The holiday season is synonymous with warmth, joy, and, of course, incredible desserts. And when it comes to a show-stopping Christmas sweet, nothing quite captures the magic and tradition like a beautifully crafted Yule Log. Forget store-bought imitations; this year, you’re going to create a truly spectacular dessert that will be the talk of your festive gathering: the magnificent Classic Chocolate Yule Log!
Why You’ll Love This Recipe
There are countless reasons why this Classic Chocolate Yule Log is about to become your new favorite holiday tradition. Here are just a few:
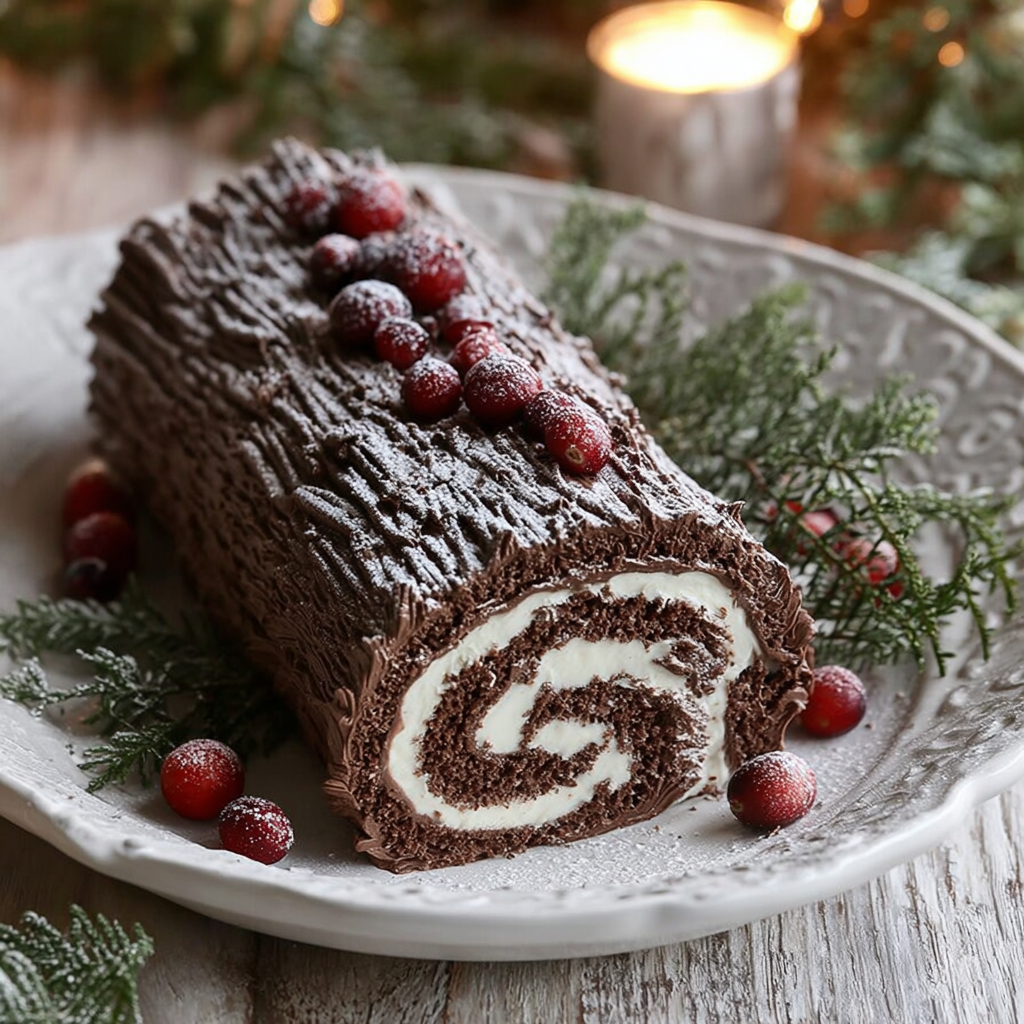
- A Festive Feast for the Eyes: This isn’t just a dessert; it’s a centerpiece! With its rustic “tree bark” frosting and enchanting garnishes, your Yule Log will evoke a cozy, wintry forest scene right on your dining table. It’s a guaranteed conversation starter.
- Incredibly Delicious & Decadent: Get ready for layers of delight! A light, airy chocolate sponge cake, generously filled with luscious whipped cream, and enrobed in a rich, velvety chocolate buttercream. Every bite of this Classic Chocolate Yule Log is pure, unadulterated bliss.
- Easier Than It Looks (Promise!): Don’t be intimidated by its fancy appearance. While it looks like it came straight from a Parisian patisserie, the steps for creating this masterpiece are straightforward and totally achievable for home bakers of all skill levels. The secret is in the gentle rolling!
- The Ultimate Holiday Baking Experience: There’s something truly special about baking a traditional holiday treat from scratch. The aroma of chocolate and vanilla filling your home, the artistic joy of decorating – making this Classic Chocolate Yule Log is a memory in the making, perfect for sharing with loved ones.
Picture this: a roaring fire, twinkling lights, and a slice of homemade chocolate heaven. That’s the magic a Classic Chocolate Yule Log brings to your holiday table. Known in France as “Bûche de Noël,” this enchanting dessert isn’t just a treat; it’s a tradition, a symbol of warmth and celebration. And this year, you’re going to master it! Get ready to impress everyone with a dessert that’s as delightful to look at as it is to eat. Our recipe guides you through creating a tender chocolate sponge, a cloud-like whipped cream filling, and a rich buttercream frosting that perfectly mimics tree bark. It’s time to roll up your sleeves and bake some holiday magic!
Ingredients with Measurements
For the Chocolate Sponge Cake:
- 🥚 4 large eggs, separated
- 🍚 1/2 cup granulated sugar, divided
- 🌾 1/3 cup all-purpose flour
- 🍫 1/4 cup cocoa powder
- 🥄 1/2 teaspoon baking powder
- 🧂 1/4 teaspoon salt
- 🍦 1 teaspoon vanilla extract
For the Whipped Cream Filling:
- 🥛 1 cup chilled heavy cream
- ✨ 2 tablespoons powdered sugar
- 🍦 1 teaspoon vanilla extract
For the Chocolate Buttercream:
- 🧈 1/2 cup unsalted butter, softened
- ✨ 1 1/2 cups powdered sugar
- 🍫 1/4 cup cocoa powder
- 🥛 1 tablespoon milk or cream
- 🍦 1 teaspoon vanilla extract
For Garnish:
- 🍒 Fresh cranberries
- 🌿 Fresh sprigs of rosemary
Detailed Step-by-Step Directions on How to Make the Recipe
Let’s get baking! Follow these steps closely to create your perfect Classic Chocolate Yule Log.
- Get Ready: First, preheat your oven to 350°F (175°C). Line a standard jelly roll pan (about 10×15 inches) with parchment paper, allowing some overhang on the sides. This step is crucial for effortlessly lifting your delicate cake.
- Whip the Egg Whites: In a meticulously clean, dry bowl (any trace of fat can prevent stiff peaks!), beat the egg whites on medium-high speed until soft peaks form. Gradually, sprinkle in 1/4 cup of the granulated sugar, continuing to beat until the peaks are stiff, glossy, and hold their shape beautifully. Gently set this cloud-like mixture aside.
- Mix the Egg Yolks: In a separate bowl, combine the egg yolks with the remaining 1/4 cup of granulated sugar. Beat them on high speed until the mixture transforms into a light, pale yellow, and thick consistency. Stir in the vanilla extract, giving it that lovely aromatic base.
- Combine Dry Ingredients: Sift together the all-purpose flour, cocoa powder, baking powder, and salt. Sifting is key here to prevent lumps and ensure a super smooth, uniform batter. Gently fold this dry mixture into your creamy egg yolk mixture until just combined – don’t overmix!
- Fold in Whites: This is where the magic happens for an airy sponge! Carefully and gently fold the beaten egg whites into your chocolate batter in two or three additions. Use a spatula to lift from the bottom and fold over, preserving as much of that precious air as possible. You want the mixture to be light and fluffy.
- Bake the Sponge: Delicately spread the aerated batter evenly into your prepared parchment-lined pan. Bake for a swift 10-12 minutes, or until the cake springs back lightly when you gently touch the center. Watch it like a hawk – overbaking will make it dry and prone to cracking.
- Roll While Warm: The moment it emerges from the oven, lay a clean kitchen towel flat on your counter and dust it generously with powdered sugar. Invert the warm cake onto the towel, carefully peel off the parchment paper (it should come off easily!). Immediately, roll the warm cake (along with the towel) from the short end into a tight spiral. Let it cool completely in this rolled shape – this “trains” the cake to roll without cracking later!
- Prepare the Cream Filling: While your cake cools its heels, grab a chilled mixing bowl and whisk. Whip the cold heavy cream with powdered sugar and vanilla extract until stiff peaks form. This will be your wonderfully fluffy and delightful filling.
- Fill the Cake: Once the cake is completely cool to the touch, gently unroll it from the towel. Evenly spread the luscious whipped cream filling across the entire surface of the cake, leaving a small border at one end.
- Re-roll and Chill: Tightly re-roll the cake from the short end, making sure it’s snug. Wrap it securely in plastic wrap and pop it into the refrigerator for at least 1 hour. This chill time is essential; it helps the cake set beautifully and makes frosting much easier.
- Make the Chocolate Buttercream: In a clean bowl, beat the softened unsalted butter until it’s wonderfully light and creamy. Gradually add the powdered sugar, cocoa powder, milk (or cream), and vanilla extract. Beat on medium-high speed until the buttercream is gloriously smooth, fluffy, and spreadable.
- Frost and Texture: Unwrap your chilled Classic Chocolate Yule Log and carefully place it on your chosen serving platter. Spread the chocolate buttercream all over the cake, covering it completely. To achieve that iconic, rustic tree bark look, use the tines of a fork or an offset spatula to create textured lines and swirls across the frosting.
- Decorate and Serve: For a magical “snow” effect, lightly dust the entire cake with powdered sugar using a sieve. Arrange fresh, bright cranberries and delicate sprigs of fragrant rosemary around and on top of your Yule Log, creating a festive woodland scene. Slice into delicious portions and proudly present your stunning homemade Classic Chocolate Yule Log! Enjoy every decadent bite!
Detailed Different Ways You Can Present the Recipe and How to Serve It
The beauty of a Classic Chocolate Yule Log is not just in its taste but also in its incredible presentation potential. Here are some ideas to make your creation truly shine:
- The Rustic Woodland Charm: Beyond the fork-textured frosting, enhance the forest floor look. Arrange edible meringue mushrooms (easy to make!), small marzipan holly leaves, or even delicate sugar snowflakes. A light dusting of cocoa powder in addition to powdered sugar can add depth.
- Elegant & Modern: For a sleek look, use an offset spatula to create smooth, clean lines on your buttercream. Instead of rustic garnishes, opt for finely shaved dark chocolate, a single elegant berry cluster, or a drizzle of white chocolate ganache for a sophisticated touch.
- Festive Sparkle: Dust your “snow” with edible glitter for a shimmering, magical effect. Add tiny edible silver or gold pearls alongside your cranberries and rosemary. This transforms your Classic Chocolate Yule Log into a glittering spectacle.
- Mini Logs for Individual Servings: Instead of one large roll, you could cut the sponge cake into smaller sections before filling and rolling them individually. Frost and decorate each mini Yule Log for a charming personalized dessert.
How to Serve Your Classic Chocolate Yule Log:
- The Perfect Companion: Serve slices alongside a steaming cup of coffee, rich hot chocolate, or a festive spiced tea.
- A Scoop of Indulgence: A small scoop of vanilla bean ice cream or a dollop of extra whipped cream makes an excellent accompaniment, adding a cool contrast to the rich chocolate.
- Dessert Buffet Star: On a holiday dessert table, place your Yule Log on a raised cake stand to make it truly stand out among other treats. Surround it with small plates of complementary cookies or truffles.
How You Can Store It and How Long Does It Last
Once you’ve created your stunning Classic Chocolate Yule Log, you’ll want to ensure it stays fresh and delicious for as long as possible. Here’s how to store it:
- Refrigeration is Key: Due to the fresh whipped cream filling and buttercream frosting, your Yule Log must be stored in the refrigerator.
- Airtight Protection: The best way to store it is in an airtight container. If you don’t have one large enough, you can cover the entire cake (or individual slices) snugly with plastic wrap, and then add a layer of aluminum foil for extra protection against odors and dryness.
- Shelf Life: When properly stored in the refrigerator, your Classic Chocolate Yule Log will stay fresh and delicious for 3 to 4 days. The sponge might slightly firm up over time, but the flavors will meld beautifully.
- Can You Freeze It? Yes, you can! This is great news if you want to bake ahead.
- Unfrosted Cake: After the cake has cooled and been rolled in the towel, you can wrap it tightly in plastic wrap and then foil. Freeze for up to 1 month. Thaw in the refrigerator before unrolling, filling, and frosting.
- Frosted Cake: If you want to freeze the entire frosted Yule Log, first place it uncovered in the freezer for about an hour to harden the buttercream. Then, wrap it tightly in several layers of plastic wrap and then foil. It can be frozen for up to 1 month. Thaw the cake slowly in the refrigerator overnight before serving.
Enjoying your magnificent Classic Chocolate Yule Log means planning for both immediate delight and future treats!
FAQs Sections
- What is a Yule Log (Bûche de Noël)?
A Yule Log, or Bûche de Noël, is a traditional French dessert served during the Christmas holidays. It’s a sponge cake, often chocolate, rolled with a filling (like whipped cream or buttercream) and decorated to resemble a miniature log from a Yule fire, symbolizing good fortune for the coming year. - Why did my cake crack when I unrolled it?
The most common reason for cracking is not rolling the cake while it’s still warm, or not letting it cool completely in its rolled shape. The warmth makes the cake pliable. If it cools flat, it loses its elasticity and will crack when forced into a roll. - Can I make the cake ahead of time?
Absolutely! You can bake the sponge cake a day or two in advance, roll it in the towel, let it cool, and then wrap it tightly in plastic wrap before refrigerating. You can also freeze the unfrosted, rolled cake for up to a month. - What if I don’t have a jelly roll pan?
A jelly roll pan is typically 10×15 inches. You can use any similarly sized rimmed baking sheet. Just ensure it has at least a 1-inch lip to contain the batter. You might need to adjust baking time slightly if your pan is a different size. - Can I use a different filling for my Yule Log?
Yes, feel free to get creative! While whipped cream is classic, you could use chocolate ganache, a raspberry or cherry jam, cream cheese frosting, or even a different flavored buttercream. - How do I get the perfect “tree bark” texture for my Classic Chocolate Yule Log?
After spreading the buttercream evenly, take a fork and gently drag the tines across the frosting in wavy, parallel lines, following the curve of the log. You can also use an offset spatula to create swirled or ridged patterns. - Can I make this recipe gluten-free?
Yes, you can often substitute the all-purpose flour with a 1:1 gluten-free baking flour blend that contains xanthan gum. Ensure all other ingredients are also certified gluten-free. - Is it possible to make a less sweet version?
You can slightly reduce the sugar in the sponge cake (by 1-2 tablespoons) and in the whipped cream filling without significantly altering the texture. For the buttercream, reducing sugar might affect consistency, so proceed with caution or opt for a less sweet ganache frosting instead. - What are some other garnish ideas for a festive Yule Log?
Beyond cranberries and rosemary, consider chocolate curls, candied nuts, edible glitter, mini candy canes, marzipan figures (like mushrooms or elves), or even fresh mint leaves for a touch of green. - How long does the Classic Chocolate Yule Log need to chill after filling and re-rolling?
A minimum of 1 hour in the refrigerator is recommended for the cake to set properly and make frosting easier. However, chilling for 2-3 hours or even overnight will yield an even firmer and easier-to-handle cake.
Classic Chocolate Yule Log 🎄
Equipment
- Jelly Roll Pan (10×15 inches)
- Parchment Paper
- Mixing Bowls
- Electric Mixer
- Spatula
- Clean Kitchen Towel
- Plastic Wrap
Ingredients
For the Cake Sponge
- 4 large eggs separated
- 0.5 cup granulated sugar divided
- 0.33 cup all-purpose flour
- 0.25 cup cocoa powder
- 0.5 tsp baking powder
- 0.25 tsp salt
- 1 tsp vanilla extract
For the Cream Filling
- 1 cup chilled heavy cream
- 2 tbsp powdered sugar
- 1 tsp vanilla extract
For the Chocolate Buttercream
- 0.5 cup unsalted butter softened
- 1.5 cups powdered sugar
- 0.25 cup cocoa powder
- 1 tbsp milk or cream
- 1 tsp vanilla extract
For Garnish
- fresh cranberries for garnish
- fresh sprigs of rosemary for garnish
Instructions
- 1. Get Ready: First, preheat your oven to 350°F (175°C). Line a standard jelly roll pan (about 10×15 inches) with parchment paper. This step makes lifting the cake super easy!
- 2. Whip the Egg Whites: In a clean, dry bowl, beat the egg whites until soft peaks form. Gradually add 1/4 cup of the granulated sugar, continuing to beat until the peaks are stiff and glossy. Set this aside gently.
- 3. Mix the Egg Yolks: In a separate bowl, beat the egg yolks with the remaining 1/4 cup of sugar until the mixture is light, pale, and thick. Stir in the vanilla extract for that lovely aroma.
- 4. Combine Dry Ingredients: Sift together the all-purpose flour, cocoa powder, baking powder, and salt. This ensures a smooth, lump-free batter. Gently fold this dry mixture into your egg yolk mixture until just combined.
- 5. Fold in Whites: Carefully fold the beaten egg whites into your batter. Be gentle! You want to keep all that beautiful air in the mixture for a light sponge.
- 6. Bake the Sponge: Spread the batter evenly into your prepared pan. Bake for 10-12 minutes, or until the cake springs back when you lightly touch it. Don’t let it overbake!
- 7. Roll While Warm: As soon as the cake is out of the oven, lay a clean kitchen towel flat and dust it lightly with powdered sugar. Invert the warm cake onto the towel, peel off the parchment paper, and then immediately roll the cake (along with the towel) from the short end. Let it cool completely in this rolled shape – this prevents cracks later!
- 8. Prepare the Cream Filling: While your cake cools, grab a chilled mixing bowl. Whip the cold heavy cream with powdered sugar and vanilla extract until stiff peaks form. This will be your fluffy, delightful filling.
- 9. Fill the Cake: Once the cake is completely cool, gently unroll it. Evenly spread the whipped cream filling across the entire surface of the cake.
- 10. Re-roll and Chill: Tightly re-roll the cake from the short end. Wrap it snugly in plastic wrap and pop it into the refrigerator for at least 1 hour. This chill time helps the cake set beautifully.
- 11. Make the Chocolate Buttercream: In a bowl, beat the softened unsalted butter until it’s light and creamy. Gradually add the powdered sugar, cocoa powder, milk (or cream), and vanilla extract. Beat until the buttercream is wonderfully smooth and fluffy.
- 12. Frost and Texture: Unwrap your chilled cake roll and place it on your serving platter. Spread the chocolate buttercream all over the cake, covering it completely. To get that classic tree bark look, use a fork or a spatula to create textured lines.
- 13. Decorate and Serve: For a final festive touch, lightly dust the entire cake with powdered sugar to mimic fresh snow. Arrange fresh, bright cranberries and sprigs of fragrant rosemary around it. Slice into delicious portions and enjoy your homemade Yule Log!