Why You’ll Love This Festive No-Bake Cookie Lush
Get ready to fall head over heels for your new favorite holiday dessert! Our Festive No-Bake Cookie Lush isn’t just a treat; it’s a holiday miracle. Here’s why you’ll be adding this recipe to your annual rotation:
-
No Oven Required!
Yes, you read that right! Keep your oven free for savory roasts and casseroles. This delightful dessert comes together without a single minute of baking, making your holiday prep stress-free and cool.
-
Pure Holiday Magic (and Sprinkles!)
With vibrant layers, festive sprinkles, and that irresistible sweet aroma, this lush screams “holidays!” It’s a feast for the eyes as much as it is for the taste buds, guaranteed to bring cheer to any gathering.
-
Seriously Easy to Make
Whether you’re a kitchen novice or a seasoned chef, you’ll whip up this dessert with ease. Simple steps and readily available ingredients mean more time celebrating and less time slaving over a hot stove.
-
A Crowd-Pleasing Sensation
Who can resist the dreamy combination of crunchy cookie crust, creamy cheesecake, luscious pudding, and fluffy whipped topping? This no-bake wonder is a guaranteed hit with guests of all ages, perfect for potlucks, parties, or a cozy family night.
Unwrap the Sweetest Holiday Secret: Your Festive No-Bake Cookie Lush Awaits!
Picture this: The twinkling lights are up, carols are playing, and your kitchen is filled with the hustle and bustle of holiday cheer. But wait, where’s the dessert? Instead of frantically preheating an oven or wrestling with complicated recipes, imagine pulling out a dazzling, layered masterpiece that looks like it took hours, but only took minutes to assemble! Say hello to the Festive No-Bake Cookie Lush – your new holiday hero!
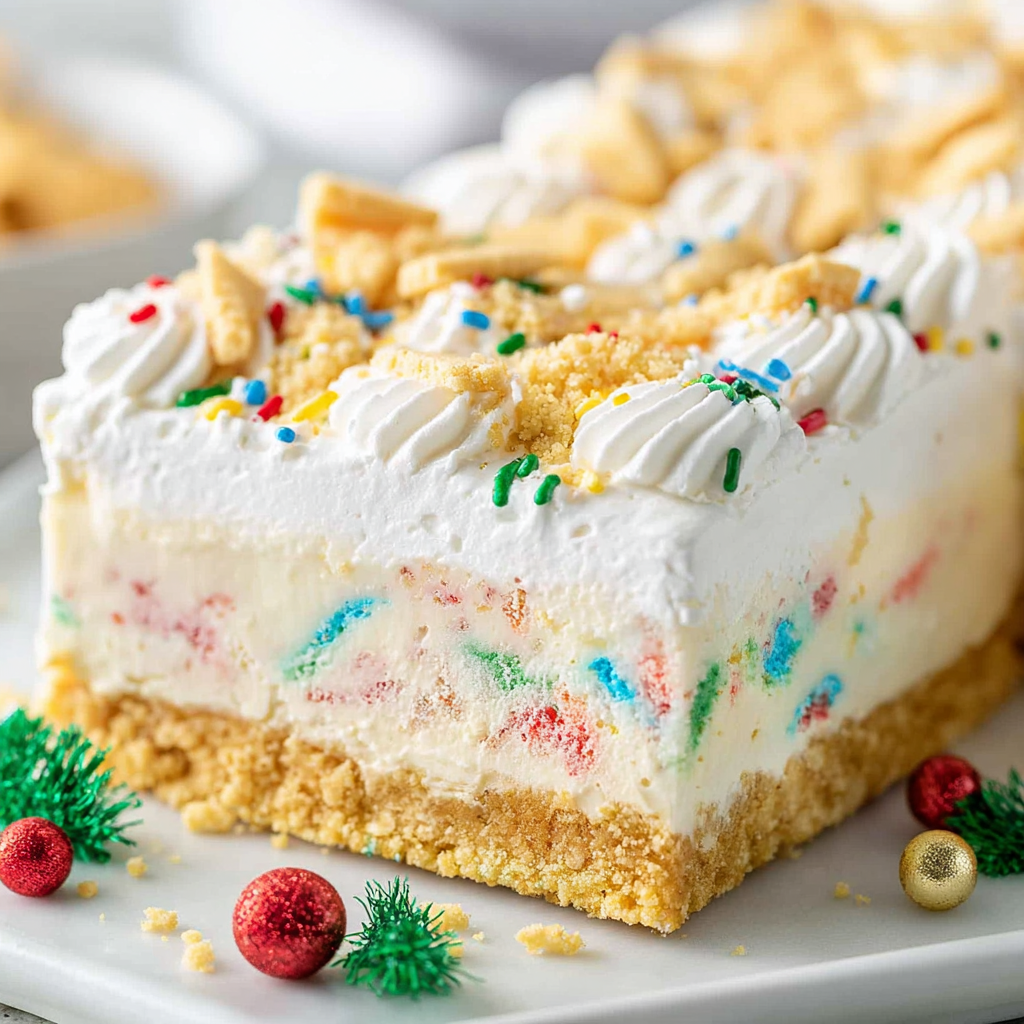
This isn’t just a dessert; it’s an experience. Each bite transports you to a winter wonderland of flavors and textures, from the delightful crunch of vanilla cookies to the silky smooth cream cheese and the dreamy cheesecake pudding. Adorned with a playful shower of holiday sprinkles, this lush is a true showstopper that promises to be the easiest, most delicious treat on your festive table. Get ready to impress, delight, and most importantly, enjoy every single scoop of this incredible no-bake wonder!
Gather Your Holiday Goodies: Ingredients for Your Festive No-Bake Cookie Lush
Ready to create some edible holiday magic? Here’s everything you’ll need to assemble your spectacular Festive No-Bake Cookie Lush. Remember, fresh ingredients make for the most delicious results!
- Cookies: 36 vanilla sandwich cookies (like Oreos), crushed into fine crumbs, plus 12 more for topping
- Butter: 6 tablespoons unsalted butter, melted
- Cream Cheese: 8 ounces light cream cheese, softened
- Sweetener: 1 cup powdered sugar
- Sprinkles: 2 tablespoons festive holiday sprinkles, divided
- Whipped Topping: 16 ounces light whipped topping (two 8-ounce tubs), divided
- Pudding Mix: 3.4 ounces instant cheesecake pudding mix (consider sugar-free for a healthier twist)
- Milk: 2 cups cold skim or low-fat milk
Your Holiday How-To Guide: Crafting the Festive No-Bake Cookie Lush
Let’s get layering! Follow these simple steps to bring your delightful Festive No-Bake Cookie Lush to life. It’s so easy, you’ll wonder why you ever baked a dessert for the holidays!
- Prepare your dish: For easy serving and clean slices, line a 9×13-inch baking dish with parchment paper, making sure to leave an overhang on the sides. This will act as a sling later!
- Make the crust: Take those 36 vanilla cookies and get crushing! A food processor makes quick work of it, or pop them in a zip-top bag and unleash your inner stress-reliever with a rolling pin until they’re fine crumbs.
- Mix the crust: In a bowl, combine your crushed cookie crumbs with the melted butter and ½ tablespoon of those cheerful holiday sprinkles. Mix until everything is beautifully combined.
- Form the base: Press this delicious, buttery mixture firmly and evenly into the bottom of your prepared baking dish. This is your sturdy foundation for all the yummy layers to come.
- Prepare the cream cheese layer: In a separate large bowl, beat the softened light cream cheese and powdered sugar together until the mixture is wonderfully smooth and creamy. A little pro tip: ensure your cream cheese is at room temperature for that perfect, lump-free texture.
- Lighten it up: Gently fold in one 8-ounce tub of light whipped topping into your cream cheese mixture. Keep folding until it’s light, airy, and beautifully blended.
- Add festive color: Now, for another pop of holiday joy! Fold in another ½ tablespoon of holiday sprinkles into the cream cheese mixture.
- Layer it on: Carefully and evenly spread this creamy, dreamy mixture over your pressed cookie crust. Take your time to get a nice, smooth layer.
- Whip up the pudding: In a medium bowl, whisk together the instant cheesecake pudding mix and cold skim milk. Whisk for about 2-3 minutes until it thickens up. Let it sit for just a few moments to firm up slightly – patience is a virtue here!
- Pudding sprinkles: Stir in the final ½ tablespoon of holiday sprinkles into the pudding. This ensures delightful little bursts of color throughout.
- Pudding layer: Gently spread the pudding mixture evenly over the cream cheese layer. Treat it delicately to keep the layers distinct.
- Final topping: Spread the remaining 8-ounce tub of light whipped topping over the pudding layer, creating a smooth, cloud-like top.
- Cookie crunch: Crush those last 12 vanilla cookies and sprinkle them generously over the top of your dessert. This adds a lovely texture and flavor contrast.
- Finishing touch: Scatter any remaining holiday sprinkles over the top for that extra sparkle and a truly beautiful festive finish.
- Chill and set: Place the entire baking dish in the refrigerator and chill for at least 4 hours. This allows all the delicious layers to set perfectly, making for clean, firm slices. For extra firm slices, you can even freeze it briefly!
- Serve with joy: Once thoroughly chilled, use the parchment paper overhang to gently lift the dessert out of the dish. Slice into squares, and watch everyone’s eyes light up as they enjoy your delightful, easy, and incredibly festive Christmas treat!
Presentation Perfection: Serving Your Festive No-Bake Cookie Lush
Your Festive No-Bake Cookie Lush is not just a dessert; it’s a holiday centerpiece! Here are some fun and elegant ways to present and serve your masterpiece:
-
Classic Squares, Elevated
The simplest and most popular way! Once chilled, use the parchment paper to lift the entire lush onto a cutting board. Use a sharp knife (wiped clean between cuts) to create neat squares. Arrange them on a festive platter, perhaps with a sprig of mint or a dusting of cocoa powder on the side of the plate for extra flair.
-
Mini Holiday Delights
For a more gourmet touch, cut smaller squares or even use holiday-themed cookie cutters (stars, trees, gingerbread men) to create individual portions. You might get a few scraps, but they’re delicious for the chef to “test”! Serve these mini portions in cupcake liners or on small dessert plates.
-
Parfait-Style Servings
Feeling fancy? Scoop portions of the lush into clear glass parfaits or small Mason jars. This allows guests to admire all those beautiful layers. You can even add an extra dollop of whipped cream and a few more sprinkles on top of each glass.
-
Garnish Galore
Elevate the visual appeal with simple garnishes. A few fresh cranberries and a sprig of rosemary mimic holly. A drizzle of white chocolate or a scattering of tiny chocolate shavings adds elegance. You could even stick a mini candy cane into each slice for an extra festive touch!
-
Pairing Perfection
Serve this lush alongside a steaming mug of hot cocoa, a freshly brewed coffee, or a glass of chilled milk for the little ones. It’s also the perfect light and refreshing end to a hearty holiday meal.
Keeping the Cheer Alive: Storing Your Festive No-Bake Cookie Lush
So delicious, it’s hard to imagine leftovers, but just in case, here’s how to keep your Festive No-Bake Cookie Lush fresh and fabulous for days to come!
-
Refrigeration is Key
Because of its creamy layers, this dessert absolutely needs to be stored in the refrigerator. Cover the baking dish tightly with plastic wrap or transfer individual slices to an airtight container. This will prevent it from absorbing other odors in your fridge and keep it moist.
-
How Long Does It Last?
When properly covered and refrigerated, your no-bake cookie lush will stay fresh and delicious for 3 to 4 days. In fact, many people find that the flavors meld and deepen even further on the second day, making it an excellent make-ahead dessert for holiday gatherings!
-
Freezing for Future Feasts
Yes, you can freeze this delightful treat! For best results, cut the lush into individual squares. Place them in an airtight freezer-safe container, separating layers with parchment paper to prevent sticking. It can be frozen for up to 1 to 2 months. To enjoy, simply transfer slices from the freezer to the refrigerator and let them thaw overnight, or for a few hours at room temperature, until soft enough to eat.
-
Tips for Perfect Storage
Always ensure your container is truly airtight to prevent freezer burn or drying out. If you’re stacking slices, parchment paper is your best friend to keep them from freezing together. Don’t leave it out at room temperature for more than an hour or two, especially if your home is warm, as the dairy ingredients will soften quickly.
Your Festive No-Bake Cookie Lush: FAQs Answered!
1. Can I use different cookies for the crust?
Absolutely! While vanilla sandwich cookies offer a classic taste, feel free to experiment. Chocolate sandwich cookies, gingerbread cookies, or even Graham crackers would make a delicious crust for this Festive No-Bake Cookie Lush.
2. Can I make this dessert ahead of time?
Yes, and we highly recommend it! This dessert benefits from chilling for at least 4 hours, but it’s even better when made the day before. The flavors have more time to meld, and the layers become perfectly set for easy slicing.
3. Can I use full-fat ingredients instead of light?
Certainly! Using full-fat cream cheese, whipped topping, and milk will result in an even richer, creamier dessert. Just be aware that the nutritional information provided will no longer be accurate.
4. What if I don’t have a food processor for the cookies?
No problem at all! Place the cookies in a large zip-top bag, seal it, and use a rolling pin, a heavy mug, or even your hands to crush them into fine crumbs. It’s a great way to relieve some holiday stress!
5. Can I make this recipe gluten-free?
You bet! Simply use gluten-free vanilla sandwich cookies for the crust and topping, and double-check that your instant cheesecake pudding mix is certified gluten-free. Most instant pudding mixes are, but always confirm.
6. Can I swap out the pudding flavor?
Yes, let your imagination run wild! While cheesecake pudding is delightful, vanilla, white chocolate, or even butterscotch instant pudding mixes would also be delicious and complement the vanilla cookie base beautifully.
7. Do I have to use parchment paper to line the dish?
While not strictly mandatory, lining your dish with parchment paper is highly recommended! It acts as a sling, making it incredibly easy to lift the entire dessert out of the dish for clean, perfect slices. If you don’t use it, you might need to scoop servings directly from the dish.
8. What kind of holiday sprinkles should I use?
Any festive sprinkles will do! Jimmies, nonpareils, edible glitter, or shaped sprinkles (stars, trees, snowflakes) in red, green, and white will add a cheerful touch to your Festive No-Bake Cookie Lush.
9. Can I make this in a different size baking dish?
You can, but be mindful of the layer thickness. A smaller dish will result in thicker layers, while a larger dish will yield thinner layers. A 9×13-inch dish is ideal for the proportions given, creating a balanced bite.
10. Why isn’t my cream cheese layer perfectly smooth?
The most common culprit is not allowing your light cream cheese to soften sufficiently to room temperature. Cold cream cheese will result in lumps no matter how much you beat it. For the smoothest results, take it out of the fridge at least 30 minutes to an hour before you start mixing.
Festive No-Bake Cookie Lush 🎄
Equipment
- 9×13 inch Baking Dish
- Parchment Paper
- Food processor (optional)
- Zip-top bag
- Rolling Pin
- Large Bowl
- Medium Bowl
- Whisk
Ingredients
- 36 vanilla sandwich cookies crushed into fine crumbs, plus 12 more for topping
- 6 tablespoons unsalted butter melted
- 8 ounces light cream cheese softened
- 1 cup powdered sugar
- 2 tablespoons festive holiday sprinkles divided
- 16 ounces light whipped topping two 8-ounce tubs, divided
- 3.4 ounces instant cheesecake pudding mix consider sugar-free for a healthier twist
- 2 cups cold skim or low-fat milk
Instructions
- For easy serving, line a 9×13-inch baking dish with parchment paper, leaving an overhang on the sides.
- Easily crush 36 vanilla cookies into fine crumbs using a food processor or by placing them in a zip-top bag and crushing with a rolling pin.
- In a bowl, combine the cookie crumbs with the melted butter and ½ tablespoon of holiday sprinkles until well mixed.
- Press this mixture firmly and evenly into the bottom of your prepared baking dish to create a solid crust.
- In a separate large bowl, beat the softened light cream cheese and powdered sugar until smooth and creamy. Ensure the cream cheese is at room temperature for the best, lump-free results.
- Gently fold in one 8-ounce tub of light whipped topping until the mixture is well blended and airy.
- Fold in another ½ tablespoon of holiday sprinkles into the cream cheese mixture.
- Carefully spread this creamy mixture evenly over the cookie crust.
- In a medium bowl, whisk together the instant cheesecake pudding mix and cold skim milk until it thickens, about 2-3 minutes. Let it sit for a few moments to firm up slightly.
- Stir in the final ½ tablespoon of holiday sprinkles into the pudding for an extra pop of color.
- Gently spread the pudding mixture evenly over the cream cheese layer.
- Spread the remaining 8-ounce tub of light whipped topping over the pudding layer, creating a smooth top.
- Crush the remaining 12 vanilla cookies and sprinkle them generously over the top of the dessert.
- Scatter any remaining holiday sprinkles over the top for a beautiful festive finish.
- Place the baking dish in the refrigerator and chill for at least 4 hours to allow all the delicious layers to set perfectly. For extra firm slices, you can freeze it briefly.
- Once chilled, lift the dessert out using the parchment paper, slice into squares, and enjoy your delightful, easy, and festive Christmas treat!
Notes
Calories: 240 kcal
Total Carbs: 35g
Net Carbs: 33g
Fats: 12g
Protein: 4g