Why You’ll Love This Divine Chocolate Cheesecake Delight
Get ready to fall head over heels for a dessert that’s as delightful to make as it is to devour! This Divine Chocolate Cheesecake Delight isn’t just a recipe; it’s an experience waiting to happen. Here are four irresistible reasons why you’ll adore bringing this masterpiece to life:
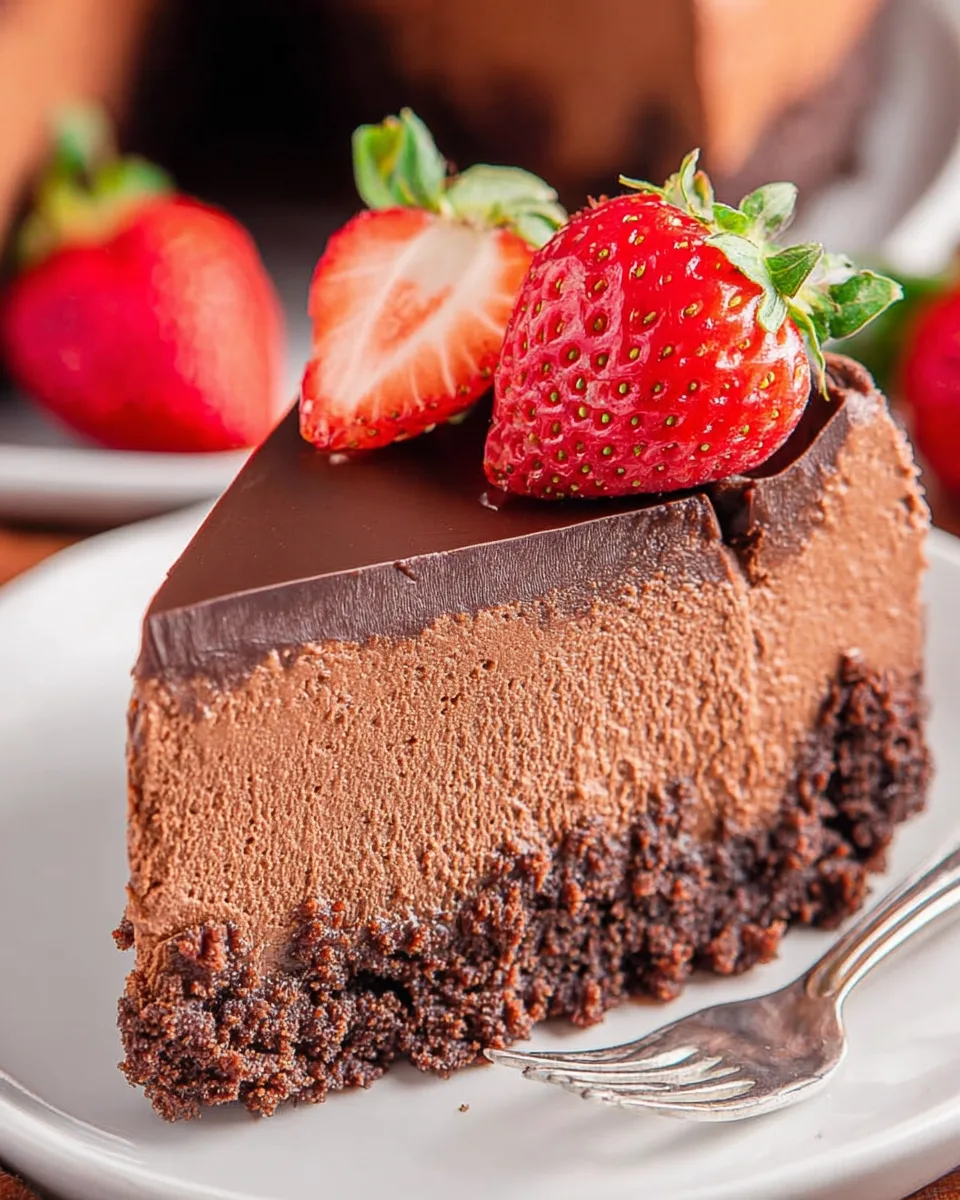
- Unforgettable Flavor Fusion: Imagine the perfect harmony of a crisp, buttery Oreo crust, a luscious, rich chocolate cheesecake filling, and a velvety, glossy ganache topping. Each bite is a symphony of textures and intensely satisfying chocolatey goodness that will leave you craving more.
- Surprisingly Simple Elegance: Don’t let its gourmet appearance fool you! This recipe breaks down the process into easy-to-follow steps, making it accessible even for novice bakers. You’ll impress everyone with minimal stress, creating a dessert that looks like it came straight from a high-end patisserie.
- The Ultimate Crowd-Pleaser: Planning a dinner party, a family gathering, or just looking for an excuse to celebrate? This Divine Chocolate Cheesecake Delight is a guaranteed showstopper. Its universal appeal ensures that everyone, from chocolate connoisseurs to casual dessert lovers, will be reaching for a slice (or two!).
- A Versatile Indulgence: While it’s utterly luxurious on its own, this cheesecake is also a fantastic canvas for your creative flair. A sprinkle of fresh berries not only adds a vibrant splash of color but also a burst of refreshing contrast to the rich chocolate. It’s perfect for any season or occasion, making every moment feel special.
Unleash Your Inner Chocolatier with this Divine Chocolate Cheesecake Delight!
Are you ready to embark on a sweet adventure that promises pure bliss? Close your eyes and imagine: a creamy, dreamy, chocolate-infused masterpiece that melts in your mouth, perched atop a crunchy, irresistible Oreo crust. Then, picture it draped in a luxurious, silky ganache, begging for a garnish of ruby-red berries. Stop dreaming and start baking, because the Divine Chocolate Cheesecake Delight is here to turn your dessert fantasies into a delicious reality!
This isn’t just any cheesecake; it’s an ode to chocolate lovers, a celebration of texture, and a testament to the joy of homemade indulgence. Forget complicated techniques and endless hours in the kitchen. We’ve crafted this recipe to be straightforward, fun, and utterly rewarding. Whether you’re a seasoned baker or just dipping your toes into the world of decadent desserts, you’ll find every step a breeze, leading you closer to a slice of chocolate heaven. So, tie on your apron, crank up your favorite tunes, and prepare to create a show-stopping treat that will earn you legendary status among your friends and family. Let’s make some magic!
Gather Your Ingredients for This Divine Chocolate Cheesecake Delight
To create this irresistible Divine Chocolate Cheesecake Delight, you’ll need a selection of high-quality ingredients, thoughtfully chosen to ensure every layer is perfect. Here’s your shopping list:
For the Easy Oreo Crust:
- 🍪 18 whole Oreo cookies (about 1 ½ cups crushed), finely crushed
- 🧈 4 tablespoons (½ stick) salted butter, melted
For the Creamy Chocolate Cheesecake:
- 🍫 8 ounces semi-sweet chocolate, melted and slightly cooled
- 🧀 32 ounces (four 8-ounce blocks) cream cheese, softened to room temperature
- 🍚 1 cup granulated sugar
- 🥛 ¼ cup sour cream
- 🌾 2 tablespoons all-purpose flour
- 💧 1 teaspoon vanilla extract
- 🥚 4 large eggs, at room temperature
For the Silky Ganache Topping:
- 🍫 8 ounces bittersweet chocolate, finely chopped
- 🥛 1 cup heavy whipping cream
Optional Garnish:
- 🍓 Fresh strawberries or raspberries, for a pop of freshness
Crafting Your Divine Chocolate Cheesecake Delight: Step-by-Step Directions
Get ready to bring your Divine Chocolate Cheesecake Delight to life with these easy-to-follow, detailed steps:
- Gear Up & Prep Your Pan: First things first, preheat your oven to a cozy 325°F. Next, give your 9-inch springform pan some love by gently wrapping its outside with two layers of heavy-duty aluminum foil (this is your superhero shield against water baths!). A light spray of nonstick cooking spray on the inside will ensure a smooth release.
- Whip Up the Oreo Crust: Grab your food processor and let those Oreo cookies dance until they’re fine crumbs. Pour in the melted butter and pulse until everything is beautifully combined. Press this magical mixture firmly into the bottom of your prepared pan, extending about 1 inch up the sides to create a perfect edge.
- Bake the Crust to Perfection: Pop your crust into the preheated oven for a quick 10 minutes. Once golden and fragrant, remove it and let it chill out while you move on to the creamy filling.
- Melt the Chocolate Magic: In a microwave-safe bowl, gently melt the semi-sweet chocolate. Heat it at 50% power in 30-second bursts, stirring patiently until it’s silky smooth. Set it aside to cool slightly, but not solidify!
- Build Your Cheesecake Batter Base: In a large bowl or your trusty stand mixer, combine the softened cream cheese and granulated sugar. Beat them on low speed until you achieve a wonderfully smooth, lump-free, and creamy consistency. This is the heart of your cheesecake!
- Layer on the Flavor & Eggs: Gently stir in the sour cream, all-purpose flour, and vanilla extract on low speed until they’re just combined. Now, fold in your slightly cooled melted chocolate. Finally, add the eggs one at a time, mixing only until each is just blended. Remember the golden rule: don’t overmix, or your cheesecake might lose its magic!
- Fill ‘Er Up & Prepare for Baking: Pour the luscious cheesecake batter over your cooled Oreo crust. Give the pan a few gentle taps on your counter – this helps release any sneaky air bubbles, ensuring a smooth finish.
- Bake with Love (and a Water Bath!): If using, place a folded towel at the bottom of a large roasting pan (this helps with even heat distribution). Carefully place your foil-wrapped cheesecake pan on the towel. Now, if using a water bath, carefully pour hot water into the larger pan (away from the cheesecake) until it comes about halfway up the side of the springform pan (about 1-2 inches deep). Bake for 60 to 70 minutes, or until the edges are set but the center still has a slight, graceful wobble.
- The Art of Cooling: This is crucial for a crack-free cheesecake! Turn off the oven and prop the door open slightly. Let the cheesecake cool inside the oven for 1 hour. Then, remove it and let it cool completely at room temperature on a wire rack for another hour. Once it’s fully cooled, wrap it snugly with plastic wrap and chill it in the refrigerator for at least 4 hours, or even better, overnight. Patience is a virtue here!
- Whip Up the Silky Ganache: Place the finely chopped bittersweet chocolate in a heat-proof bowl. In a small saucepan or microwave, heat the heavy whipping cream until it just begins to simmer. Pour the hot cream over the chocolate and let it sit undisturbed for 5 minutes. Then, stir gently until you have a wonderfully smooth, glossy ganache. Let it cool for about 20 minutes before it’s ready for its grand debut.
- Assemble & Serve Your Masterpiece: Once your cheesecake is thoroughly chilled and firm, remove it from the fridge and gently unlatch the springform pan rim. Pour the slightly cooled ganache over the cheesecake, spreading it evenly to cover the top. Chill for another 20-30 minutes until the ganache is perfectly set. For that extra “wow” factor and a refreshing counterpoint, garnish with fresh strawberries or raspberries before slicing and serving. Get ready for applause – you’ve just created a Divine Chocolate Cheesecake Delight!
Presenting and Serving Your Divine Chocolate Cheesecake Delight
The moment has arrived to showcase your magnificent Divine Chocolate Cheesecake Delight! While it’s stunning on its own, a thoughtful presentation can elevate this dessert from delicious to truly unforgettable. Here are some detailed ways to present and serve your masterpiece:
- The Classic Berry Crown: As suggested, a generous scattering of fresh strawberries or raspberries is a timeless choice. The vibrant red not only creates a striking visual contrast against the dark chocolate but also adds a refreshing tartness that perfectly cuts through the richness. Arrange them artfully around the edge or pile them in the center for a dramatic effect.
- Elegant Chocolate Shavings: Before the ganache fully sets, sprinkle some delicate chocolate shavings or curls over the top. Use a vegetable peeler or a sharp knife on a block of chocolate for homemade curls. This adds an extra layer of chocolatey texture and a sophisticated touch.
- Whipped Cream Dollops: For an airy, creamy counterpoint, pipe or dollop fresh, lightly sweetened whipped cream around the perimeter of the cheesecake or alongside each slice. You can even add a tiny berry or a chocolate curl on top of each dollop.
- Cocoa Dusted Perfection: For a minimalist yet elegant look, dust the entire top of the ganache with a fine layer of unsweetened cocoa powder using a sieve. This adds depth and a slightly bitter edge that complements the sweet cheesecake.
- Citrus Zest Sparkle: A little grated orange zest sprinkled over the ganache adds a bright, fragrant note that pairs wonderfully with chocolate. Think of it as a subtle burst of sunshine!
- Nutty Crunch: For those who love a bit of crunch, finely chopped toasted nuts like pecans, walnuts, or hazelnuts can be sprinkled around the base of the cheesecake or on top of the ganache.
How to Serve: This Divine Chocolate Cheesecake Delight is best served thoroughly chilled. Use a sharp, thin knife, dipping it in hot water and wiping it clean between each slice for the cleanest cuts. Serve individual slices on elegant dessert plates. Pair it with a strong cup of coffee, a shot of espresso, a glass of dessert wine, or even a scoop of vanilla bean ice cream for an extra indulgent experience. Each bite is a celebration of flavor and texture, so encourage your guests to savor every moment!
Storing Your Divine Chocolate Cheesecake Delight for Lasting Indulgence
Once you’ve tasted the sheer luxury of this Divine Chocolate Cheesecake Delight, you’ll want to make sure every last crumb is savored! Proper storage is key to maintaining its exquisite taste and texture. Here’s how to keep your cheesecake fresh and delicious:
In the Refrigerator:
- How to Store: After the ganache has set, cover the cheesecake tightly with plastic wrap or place it in an airtight container. If you have leftover slices, wrap each slice individually in plastic wrap to prevent drying out and absorb odors from other foods in the fridge.
- How Long it Lasts: When stored correctly in the refrigerator, your Divine Chocolate Cheesecake Delight will remain fresh and delicious for 5 to 7 days. The flavors often deepen and meld even more after a day or two!
In the Freezer:
- How to Store: Cheesecake freezes beautifully! For best results, it’s often better to freeze the entire cheesecake (without the ganache, if possible, and add it after thawing) or individual slices. To freeze the whole cheesecake, ensure it’s completely chilled and unwrapped from the springform pan. Place it on a freezer-safe plate or cardboard round, then wrap it tightly with several layers of plastic wrap, followed by a layer of heavy-duty aluminum foil. For individual slices, wrap each slice first in plastic wrap, then in foil. This double-layer protection prevents freezer burn.
- How Long it Lasts: Properly wrapped and frozen, your cheesecake can last for up to 1 to 2 months. Beyond that, the quality might start to decline.
- How to Thaw: To enjoy a frozen slice, simply unwrap it and let it thaw in the refrigerator for a few hours, or at room temperature for about 30-60 minutes. For a whole frozen cheesecake, transfer it to the refrigerator and let it thaw overnight (8-12 hours) before serving. Once thawed, you can add fresh ganache if it wasn’t applied before freezing.
Always remember to keep your cheesecake covered to prevent it from absorbing refrigerator odors or drying out. This ensures every bite of your Divine Chocolate Cheesecake Delight is as perfect as the first!
FAQs About Your Divine Chocolate Cheesecake Delight
Got questions about perfecting your Divine Chocolate Cheesecake Delight? We’ve got answers!
- Can I use other cookies for the crust? Absolutely! While Oreos provide a classic chocolatey base, feel free to experiment with graham crackers, chocolate wafers, or even digestive biscuits for a different flavor profile. Just make sure the quantity of crumbs and butter remains consistent.
- What if I don’t have a food processor for the crust? No problem! Place the Oreos in a sturdy zip-top bag, seal it, and crush them with a rolling pin or the bottom of a heavy pan until they form fine crumbs.
- Why wrap the springform pan in foil? Wrapping the pan in aluminum foil creates a barrier, preventing water from the water bath (if used) from seeping into the crust and making it soggy. It’s a crucial step for a crisp crust!
- Do I really need a water bath for baking? While optional, a water bath (bain-marie) is highly recommended for cheesecakes. It provides a moist, even heat environment, which helps the cheesecake bake gently, preventing cracks and ensuring a super creamy, smooth texture.
- How do I know when the cheesecake is done? The edges should appear set and slightly puffed, but the very center (about a 2-3 inch circle) should still have a slight, gentle wobble when you lightly jiggle the pan. It will continue to set as it cools.
- Can I make this cheesecake ahead of time? Yes, and it’s highly recommended! Cheesecake benefits from a long chilling period, allowing the flavors to meld and the texture to firm up beautifully. Making it a day or even two in advance is perfect.
- What kind of chocolate should I use for the filling and ganache? For the filling, good quality semi-sweet chocolate chips or baking bars work great. For the ganache, bittersweet chocolate (around 60-72% cocoa solids) is ideal as it provides a rich, intense chocolate flavor that balances the sweetness of the cheesecake.
- Can I skip the ganache topping? You can, but we don’t recommend it! The ganache adds an incredible layer of richness, shine, and a distinct chocolate flavor that truly elevates this to a “Divine Chocolate Cheesecake Delight.” If you must skip it, a simple dusting of cocoa powder or a dollop of whipped cream would be an alternative.
- How can I prevent cracks in my cheesecake? Several factors help: don’t overmix the batter (especially after adding eggs), use a water bath, don’t open the oven door during baking, and allow the cheesecake to cool slowly in the oven with the door propped open, then at room temperature, before chilling.
- Can I halve the recipe for a smaller cheesecake? Yes, you can halve all the ingredients and bake it in a 7-inch springform pan. Adjust the baking time accordingly; it will likely be shorter, so keep a close eye on it after about 45 minutes.
Divine Chocolate Cheesecake Delight 🍓
Equipment
- 9-inch Springform Pan
- Food Processor
- Roasting Pan
Ingredients
For the Easy Oreo Crust
- 18 whole Oreo cookies (about 1 ½ cups crushed), finely crushed
- 4 tablespoons salted butter (½ stick), melted
For the Creamy Chocolate Cheesecake
- 8 ounces semi-sweet chocolate melted and slightly cooled
- 32 ounces cream cheese (four 8-ounce blocks), softened to room temperature
- 1 cup granulated sugar
- 1/4 cup sour cream
- 2 tablespoons all-purpose flour
- 1 teaspoon vanilla extract
- 4 large eggs at room temperature
For the Silky Ganache Topping
- 8 ounces bittersweet chocolate finely chopped
- 1 cup heavy whipping cream
Optional Garnish
- Fresh strawberries or raspberries for a pop of freshness
Instructions
- Get Ready: Preheat your oven to 325°F (160°C). Gently wrap the outside of a 9-inch springform pan with two layers of heavy-duty aluminum foil. Lightly spray the inside with nonstick cooking spray.
- Make the Simple Oreo Crust: In a food processor, pulse the Oreo cookies until they become fine crumbs. Pour in the melted butter and pulse again until well combined. Press this mixture firmly into the bottom of your prepared springform pan, extending about 1 inch (2.5 cm) up the sides.
- Bake the Crust: Pop the crust into the preheated oven for 10 minutes. Once baked, remove it and let it cool while you prepare the cheesecake filling.
- Prepare the Chocolate Filling: In a microwave-safe bowl, gently melt the semi-sweet chocolate. Heat it at 50% power in 30-second bursts, stirring until smooth. Set aside to cool slightly.
- Mix the Cheesecake Batter: In a large bowl or stand mixer, combine the softened cream cheese and granulated sugar. Beat on low speed until the mixture is super smooth and creamy.
- Add Flavor & Texture: Stir in the sour cream, all-purpose flour, and vanilla extract on low speed until just combined. Next, gently mix in the slightly cooled melted chocolate. Finally, add the eggs one at a time, mixing only until each is just blended. Remember, don't overmix to keep it creamy!
- Fill & Prepare for Baking: Pour the cheesecake batter over your cooled Oreo crust. Gently tap the pan a few times on your counter to release any trapped air bubbles.
- Bake with Care: Place a folded towel at the bottom of a large roasting pan (optional, but recommended for even baking). Carefully place your cheesecake pan on the towel in the roasting pan. If using a water bath, carefully pour hot water into the larger pan, away from the cheesecake, until it comes about halfway up the side of the springform pan (1-2 inches deep). Bake for 60 to 70 minutes, or until the edges are set but the center still has a slight gentle wobble.
- Cooling is Key: Turn off the oven and prop the door open slightly. Let the cheesecake cool inside the oven for 1 hour. Then, remove it and let it cool completely at room temperature on a wire rack for another hour. Once cooled, wrap it well with plastic wrap and chill in the refrigerator for at least 4 hours, or even better, overnight.
- Whip up the Ganache Topping: Place the finely chopped bittersweet chocolate in a heat-proof bowl. In a small saucepan or microwave, heat the heavy whipping cream until it just begins to simmer. Pour the hot cream over the chocolate and let it sit undisturbed for 5 minutes. Then, stir gently until you have a wonderfully smooth, glossy ganache. Let it cool for about 20 minutes before using.
- Assemble & Serve: Once the cheesecake is thoroughly chilled, remove it from the fridge and gently take off the springform pan rim. Pour the slightly cooled ganache over the cheesecake, spreading it evenly. Chill for another 20-30 minutes until the ganache is set. For a healthy and vibrant touch, garnish with fresh strawberries or raspberries before slicing and serving. Enjoy your homemade, decadent treat!