The air is crisp, the carols are playing, and there’s a magical buzz that only the holiday season can bring! What better way to embrace the festive spirit than with the delightful aroma of freshly baked cookies filling your home? Get ready to embark on a sweet adventure that will bring smiles, joy, and a burst of vibrant color to your holiday table with our incredible Festive Holiday Circle Cookies! These aren’t just any cookies; they’re edible canvases waiting for your creative touch, guaranteed to be a hit with family and friends alike. Easy to make, incredibly delicious, and endlessly fun to decorate, let’s dive into making some unforgettable holiday memories, one cookie at a time!
Why You’ll Love These Festive Holiday Circle Cookies!
- Effortlessly Festive & Fun: These cookies are designed for joy! With a straightforward recipe, they’re perfect for bakers of all skill levels, making holiday baking less stressful and more enjoyable. Gather the family – decorating these circle cookies is a fantastic activity for everyone.
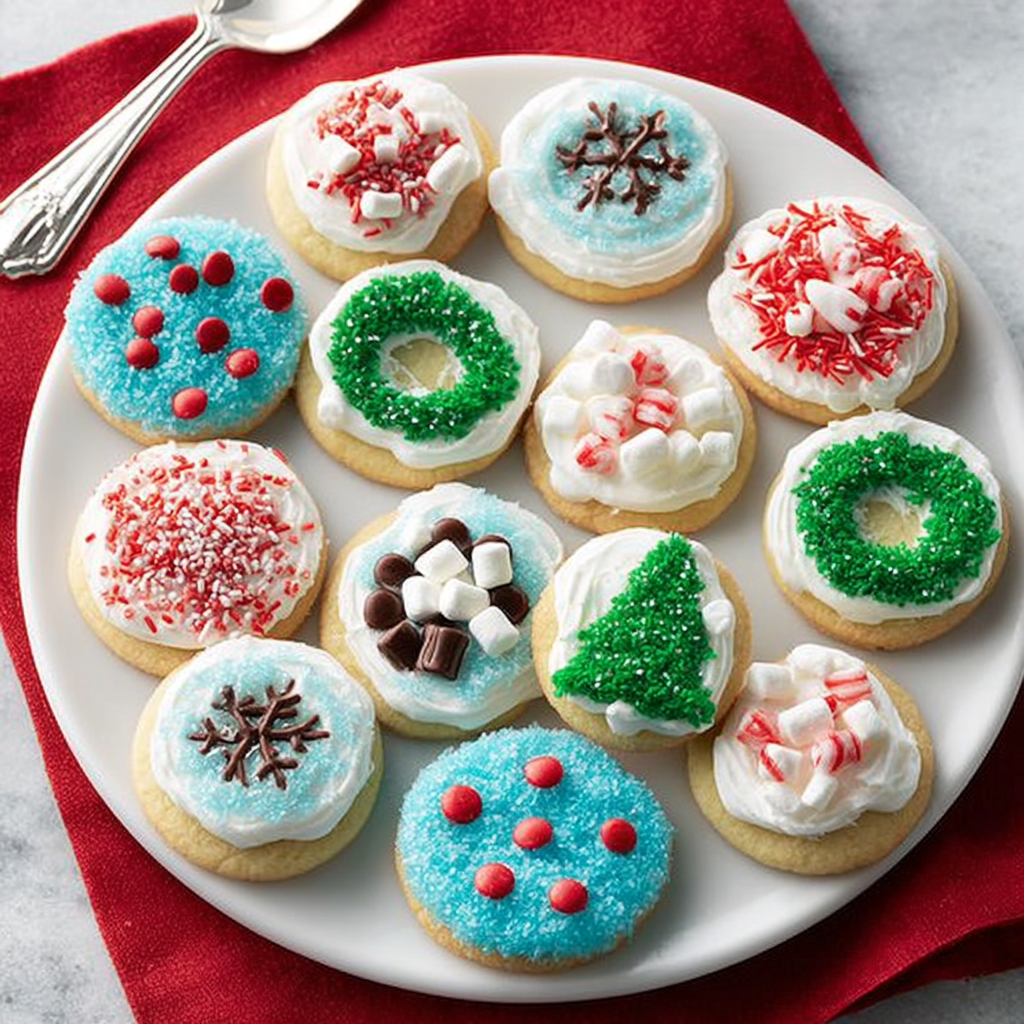
- A Canvas for Creativity: Forget boring! Our Festive Holiday Circle Cookies! are your blank canvas. The simple round shape is ideal for every festive design imaginable, from classic Christmas trees to abstract holiday swirls. Let your imagination run wild with colors, sprinkles, and candies!
- Perfect for Gifting & Sharing: There’s nothing quite like a homemade treat to show you care. These beautiful, delicious cookies make incredible holiday gifts, party favors, or additions to any dessert platter. Spread the cheer by sharing these delightful circles of joy!
- Irresistibly Delicious Flavor: Beyond their charming looks, these cookies boast a classic, buttery flavor with a hint of almond that perfectly complements the sweet, creamy frosting. They’re soft, tender, and melt-in-your-mouth delicious – a truly traditional taste of the holidays.
Ingredients with Measurements
🍪 Cookie Dough:
- 🧈 1 cup unsalted butter, softened
- 🍚 1 cup granulated sugar
- 🥚 1 large egg
- 🥛 2 tablespoons milk (any kind)
- 🌰 1 ½ teaspoons almond extract
- 🌾 2 ½ cups all-purpose flour
- ⬆️ 1 teaspoon baking powder
🍬 Sweet Frosting:
- Powdered sugar: 6 cups
- 🧈 Butter: ⅔ cup, softened
- ✨ Vanilla extract: 1 tablespoon
- 🥛 Heavy whipping cream: 4 to 6 tablespoons (for desired consistency)
🌈 Fun Decorations (Optional):
- 🎨 Food coloring (red, green, blue)
- 🍫 Mini chocolate candies
- 🥥 Sweetened flaked coconut
- ☁️ Miniature marshmallows
- ✨ Decorator sugars
Detailed Step-by-Step Directions to Make Festive Holiday Circle Cookies!
- Start the Dough: In a big mixing bowl, beat the softened butter and sugar together until they look wonderfully light and fluffy. Now, stir in the egg, milk, and almond extract until everything is smoothly combined.
- Add Dry Ingredients: Gently add the flour and baking powder to your wet mixture. Beat on a low speed, just until the ingredients are mixed – be careful not to overmix!
- Chill Out: Divide your cookie dough into two equal halves. Shape each into a flat ball, wrap it snugly in plastic wrap, and pop them into the refrigerator for at least 2-3 hours until they’re firm and easy to handle.
- Get Ready to Bake: Preheat your oven to 400°F (200°C).
- Roll and Cut: Take one half of your chilled dough (keep the other half in the fridge). On a lightly floured surface, roll it out evenly to about ⅛ to ¼ inch thick. Use a 3-inch round cookie cutter to create your festive shapes. Place them about 1 inch apart on an ungreased cookie sheet.
- Bake to Golden: Bake your cookies for 6-8 minutes, or until their edges are just lightly golden brown. Let them cool on the cookie sheets for just one minute, then carefully move them to a wire rack to cool completely.
- Whip Up the Frosting: In another bowl, combine the powdered sugar, softened butter, vanilla, and enough heavy whipping cream to make a smooth, spreadable frosting. Beat on medium speed until it’s light and creamy.
- Decorate Your Masterpieces: Set aside some white frosting if you like. Divide the rest and tint with your favorite food colors. Now, the best part – spread or pipe your frosting onto the cooled cookies as desired, and then sprinkle with your chosen decorations!
Different Ways to Present and Serve Your Festive Holiday Circle Cookies!
Once your delightful Festive Holiday Circle Cookies! are baked and beautifully decorated, the fun doesn’t stop there! How you present and serve them can add an extra layer of holiday magic. Here are some enchanting ideas:
Charming Presentations:
- The Grand Cookie Platter: Arrange your vibrantly decorated cookies on a large, festive platter. Mix and match colors and decorations for a visually stunning display. Add a few sprigs of real greenery (like rosemary or small pine branches) for an extra touch of nature.
- Stacked & Tied: For a simple yet elegant look, stack 3-4 cookies of the same design, wrap them in a clear cellophane bag, and tie with a festive ribbon. This makes for perfect individual party favors or small gifts.
- “Cookie Tree” Display: Create a stunning centerpiece by stacking cookies in a cone shape on a cake stand, securing them with a dab of frosting between layers. Decorate the “tree” with edible glitter or mini candy lights.
- Cookie Ornaments: Before baking, use a small straw to poke a hole at the top of some cookies. Once cooled and decorated, thread a ribbon through the hole to hang them on your Christmas tree (just make sure they don’t get too close to pets!).
Delightful Serving Suggestions:
- With Hot Beverages: Pair your cookies with a steaming mug of hot cocoa, a frothy latte, or a comforting cup of tea. The sweetness of the cookie perfectly complements the warmth of the drink.
- Holiday Dessert Bar: Feature your Festive Holiday Circle Cookies! as a star attraction on a holiday dessert bar alongside other festive treats like gingerbread men, yule log slices, and fruit tarts.
- Santa’s Special Treat: Leave a plate of these homemade delights by the fireplace with a glass of milk on Christmas Eve. Santa is sure to appreciate the thoughtful gesture!
- School or Office Parties: Bring a batch to holiday potlucks or school events. They’re easy to transport and always a crowd-pleaser, guaranteeing smiles all around.
How to Store Your Festive Holiday Circle Cookies! and How Long They Last
To keep your delicious Festive Holiday Circle Cookies! fresh and delightful for as long as possible, proper storage is key. Here’s what you need to know:
Storage Guidelines:
- At Room Temperature (Frosted): Once fully decorated and the frosting has set, store your cookies in an airtight container at room temperature for up to 3-5 days. To prevent sticking and smudging, you can place a piece of parchment paper between layers of cookies.
- At Room Temperature (Unfrosted): Unfrosted cookies can be stored in an airtight container at room temperature for up to one week. This is a great option if you want to bake ahead and decorate closer to your event.
- In the Refrigerator: While generally not necessary for short-term storage (unless your frosting contains highly perishable ingredients or your kitchen is very warm), frosted cookies can be refrigerated in an airtight container for up to a week. Be aware that refrigeration can sometimes alter the texture of the cookie slightly.
- Freezing (Unfrosted Dough): The raw cookie dough can be frozen! Wrap tightly in plastic wrap and then in aluminum foil, or place in a freezer-safe bag. It will last for up to 3 months. Thaw in the refrigerator overnight before rolling and baking.
- Freezing (Unfrosted Baked Cookies): Baked but unfrosted cookies freeze beautifully. Once completely cooled, place them in a single layer on a baking sheet to freeze solid, then transfer to a freezer-safe airtight container or bag. They can be stored for up to 2 months. Thaw at room temperature before frosting.
- Freezing (Frosted Cookies): You can even freeze frosted cookies! Ensure the frosting is completely set. Flash freeze them on a baking sheet until solid, then carefully transfer to an airtight container, separating layers with parchment paper. They will last for about 1 month. Thaw in the refrigerator or at room temperature.
Always ensure cookies are completely cool before storing, especially if frosting them, to prevent condensation and sogginess. With these tips, your Festive Holiday Circle Cookies! will stay fresh and delicious for days, ready to be enjoyed whenever a holiday craving strikes!
FAQs About Festive Holiday Circle Cookies!
- Q1: Can I make the cookie dough ahead of time?
- A1: Absolutely! The dough needs to chill for at least 2-3 hours, but you can definitely make it up to 2-3 days in advance. Just keep it tightly wrapped in plastic wrap in the refrigerator until you’re ready to roll and cut.
- Q2: What if I don’t have almond extract? Can I substitute it?
- A2: Yes, you can! While almond extract adds a lovely unique flavor, you can substitute it with an equal amount of pure vanilla extract for a more classic flavor, or even a different holiday extract like peppermint for a festive twist.
- Q3: My cookies are spreading too much in the oven. What went wrong?
- A3: There are a few common reasons: 1) The dough wasn’t chilled long enough (ensure it’s firm). 2) The butter was too soft or melted. 3) You used too much flour or not enough. Make sure to accurately measure your ingredients and don’t overmix the dough. Also, an overly warm kitchen can contribute to spreading, so try to work quickly with the dough.
- Q4: How do I get my frosting colors vibrant and rich?
- A4: For best results with vibrant colors, use gel food coloring instead of liquid food coloring. Gel colors are highly concentrated, so you need less to achieve rich hues without thinning your frosting too much.
- Q5: Can kids help make these Festive Holiday Circle Cookies!?
- A5: Absolutely! This recipe is perfect for involving little helpers. Kids can assist with beating the butter and sugar (with supervision), gently adding dry ingredients, rolling out the dough, cutting shapes, and, of course, the most fun part – decorating!
- Q6: How do I ensure my frosting is the right consistency?
- A6: Start with the minimum amount of heavy whipping cream (4 tablespoons) and add more, one teaspoon at a time, until you reach your desired consistency. If it’s too thick, add more cream; if it’s too thin, add a little more powdered sugar.
- Q7: Can I use different cookie cutter shapes for these cookies?
- A7: Of course! While the recipe focuses on “circle cookies,” the dough is versatile enough for any sturdy cookie cutter shape. Stars, trees, bells, or gingerbread men would all work wonderfully and keep the festive theme!
- Q8: Is it better to roll out the dough on a floured surface or between parchment paper?
- A8: Rolling between two sheets of parchment paper is often easier and less messy, as it prevents the dough from sticking without adding too much extra flour, which can make cookies tough. However, a lightly floured surface works perfectly fine too.
- Q9: How long do I need to let the frosting set before stacking or packaging the cookies?
- A9: It’s best to let the frosting set for at least 2-4 hours at room temperature, or even overnight, especially if you’ve applied a thick layer or used many decorations. This prevents smudging and sticking when stacking or packaging.
- Q10: Are these cookies suitable for mailing as gifts?
- A10: Yes, they are! Once the frosting is fully set, these cookies hold up well. Wrap them individually in cellophane bags or tissue paper, then pack them snugly in an airtight container with cushioning to prevent breakage during shipping.
Festive Holiday Circle Cookies! 🎄
Equipment
- Large mixing bowl
- Cookie cutter (3-inch round)
- Cookie Sheet
- Wire Rack
Ingredients
Cookie Dough
- 1 cup unsalted butter softened
- 1 cup granulated sugar
- 1 large egg
- 2 tablespoons milk any kind
- 1.5 teaspoons almond extract
- 2.5 cups all-purpose flour
- 1 teaspoon baking powder
Sweet Frosting
- 6 cups powdered sugar
- 0.66 cup butter softened
- 1 tablespoon vanilla extract
- 4 to 6 tablespoons heavy whipping cream for desired consistency
Fun Decorations (Optional)
- food coloring (red, green, blue)
- mini chocolate candies
- sweetened flaked coconut
- miniature marshmallows
- decorator sugars
Instructions
- Start the Dough: In a big mixing bowl, beat the softened butter and sugar together until they look wonderfully light and fluffy. Now, stir in the egg, milk, and almond extract until everything is smoothly combined.
- Add Dry Ingredients: Gently add the flour and baking powder to your wet mixture. Beat on a low speed, just until the ingredients are mixed – be careful not to overmix!
- Chill Out: Divide your cookie dough into two equal halves. Shape each into a flat ball, wrap it snugly in plastic wrap, and pop them into the refrigerator for at least 2-3 hours until they're firm and easy to handle.
- Get Ready to Bake: Preheat your oven to 400°F (200°C).
- Roll and Cut: Take one half of your chilled dough (keep the other half in the fridge). On a lightly floured surface, roll it out evenly to about ⅛ to ¼ inch thick. Use a 3-inch round cookie cutter to create your festive shapes. Place them about 1 inch apart on an ungreased cookie sheet.
- Bake to Golden: Bake your cookies for 6-8 minutes, or until their edges are just lightly golden brown. Let them cool on the cookie sheets for just one minute, then carefully move them to a wire rack to cool completely.
- Whip Up the Frosting: In another bowl, combine the powdered sugar, softened butter, vanilla, and enough heavy whipping cream to make a smooth, spreadable frosting. Beat on medium speed until it's light and creamy.
- Decorate Your Masterpieces: Set aside some white frosting if you like. Divide the rest and tint with your favorite food colors. Now, the best part – spread or pipe your frosting onto the cooled cookies as desired, and then sprinkle with your chosen decorations!