Why You’ll Love This Recipe
Get ready to fall head over heels for these **Easy Festive Oreo Truffles**! Here are four irresistible reasons why this recipe is about to become your new holiday go-to:
- Ridiculously Easy & No-Bake: Forget turning on the oven! This recipe is a breeze, requiring no baking whatsoever. Just a few simple steps, and you’ll have professional-looking truffles ready to impress. Perfect for busy holiday schedules!
- Festive & Fun: With vibrant Christmas sprinkles and a delightful mix of dark and white chocolate, these truffles scream holiday cheer. They’re not just a treat; they’re a miniature celebration in every bite, adding a pop of color and joy to any festive spread.
- A Guaranteed Crowd-Pleaser: Who doesn’t love Oreos and chocolate? This classic combination is universally adored, making these truffles an instant hit at any gathering. Kids and adults alike will be reaching for seconds (and maybe even thirds!).
- Perfect for Gifting & Sharing: Homemade treats are the best kind of gift. These adorable truffles are ideal for cookie exchanges, hostess gifts, or simply sharing the holiday spirit with friends and family. They look fancy but are wonderfully simple to make!
Unwrap the Magic: Your Guide to Easy Festive Oreo Truffles!
The holiday season is here, and with it comes the delightful chaos of gift-wrapping, carol-singing, and, of course, baking! But what if we told you there’s a way to create an absolutely show-stopping, utterly delicious, and magically festive treat without even touching your oven? Prepare to have your mind (and your taste buds) blown by the sheer simplicity and charm of these **Easy Festive Oreo Truffles**!
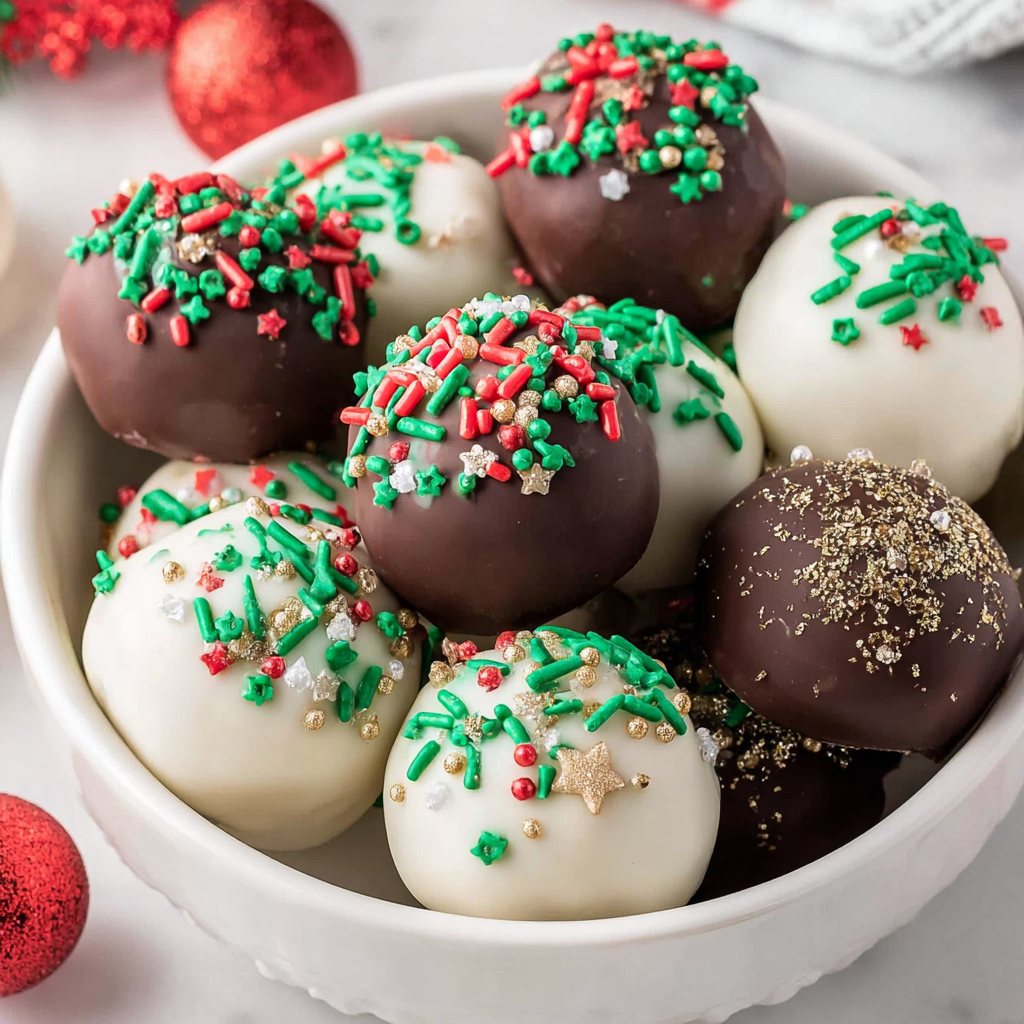
Imagine perfectly rich, creamy Oreo cookie centers, enrobed in smooth, luscious chocolate, and adorned with a sprinkle of holiday sparkle. These no-bake wonders are not just a dessert; they’re a tiny sphere of pure joy designed to bring smiles. Whether you’re a seasoned baker or a complete kitchen novice, these truffles are so straightforward, you’ll feel like a culinary wizard. Get ready to sprinkle some magic into your holiday season – one delightful truffle at a time!
Gather Your Goodies: The Ingredients You’ll Need
Creating these delightful **Easy Festive Oreo Truffles** starts with assembling a handful of simple, readily available ingredients. You’ll be surprised how much deliciousness comes from so few components!
- Oreo Cookies: 36 cookies (that’s roughly one standard family-size package). The star of our show, providing that iconic chocolatey crunch.
- Cream Cheese: 8 ounces, softened (one standard block). This is the secret to our truffles’ incredibly smooth, rich, and firm texture. Make sure it’s softened to room temperature for easy mixing!
- Dark Chocolate Melting Wafers: 10 ounces. These are fantastic because they melt smoothly and set beautifully, giving your truffles a professional-looking finish.
- White Vanilla Melting Wafers: 10 ounces. For that festive contrast and an extra layer of sweet vanilla flavor, perfect for holiday appeal.
- Festive Christmas Sprinkles: As much or as little as your heart desires! Choose a mix of reds, greens, whites, and golds to really bring out the holiday spirit.
That’s it! Just five simple ingredients stand between you and a batch of the most irresistible holiday treats.
Your Step-by-Step Guide to Truffle Perfection
Let’s turn those simple ingredients into spectacular **Easy Festive Oreo Truffles**! Follow these detailed steps for a smooth and successful truffle-making adventure.
- Step 1: The Oreo Crumble Party! Get your 36 Oreo cookies and place them into a food processor. Pulse away until they transform into super fine crumbs. It’s okay if there are a few larger bits, but the finer, the better! No food processor? No worries! Grab a sturdy zip-top bag, fill it with your Oreos, seal it tightly, and unleash your inner chef with a rolling pin until they’re perfectly smushed into crumbs.
- Step 2: Mix Your Magic Base. Now, add your softened 8 ounces of cream cheese directly to the Oreo crumbs in the food processor. Pulse again, or if mixing by hand, use a robust rubber spatula to combine. Keep going until the mixture is uniform, moist, and starts to cling together, forming a dough-like consistency. You want it smooth and fully integrated.
- Step 3: Roll into Dreamy Balls. Transfer your truffle mixture into a clean bowl and give it one last stir with a spatula to ensure perfect blending. Line a baking sheet with parchment paper. Using a 1.5-tablespoon cookie scoop (or your clean hands), portion out the mixture and gently roll it into smooth, uniform balls. Aim for consistency for a beautiful final presentation.
- Step 4: The Chill Factor. This is a crucial step! Place all your formed Oreo balls onto the parchment-lined baking sheet. Pop them into the refrigerator or freezer for a minimum of 30 minutes. This firming-up period is vital; it ensures your truffles hold their shape perfectly when you dip them into the warm chocolate.
- Step 5: Dark Chocolate Elegance. While your truffles chill, melt 10 ounces of dark chocolate melting wafers. You can do this in a microwave-safe bowl (in 30-second intervals, stirring between each) or using a double boiler until it’s perfectly smooth and fluid. Dip half of your chilled Oreo balls into the rich dark chocolate, letting any excess drip off briefly. Immediately after dipping, sprinkle generously with your festive Christmas sprinkles before the chocolate has a chance to set. Place them back on the parchment-lined sheet.
- Step 6: White Chocolate Whimsy. Repeat the melting process with the 10 ounces of white vanilla melting wafers. Once smooth, dip the remaining chilled Oreo balls into the white chocolate, allowing any excess to drip away. Again, don’t wait! Decorate these immediately with more vibrant Christmas sprinkles.
- Step 7: Final Chill & Enjoy! Once all your truffles are dipped and decorated, return the baking sheet to the refrigerator. Chill them until both chocolate coatings are completely firm and set. Now, behold your stunning, delicious, and incredibly **Easy Festive Oreo Truffles**! They are officially ready to be devoured!
Presenting & Serving Your Festive Masterpieces
Your **Easy Festive Oreo Truffles** are not just delicious; they’re also incredibly beautiful! Here’s how you can present and serve them to maximize their holiday cheer:
Creative Presentation Ideas:
- Mini Cupcake Liners: Place each truffle into a small, festive paper cupcake liner or candy cup. This makes them easy to pick up, looks elegant, and prevents sticking.
- Tiered Platter Display: Arrange your truffles on a multi-tiered dessert stand, alternating between the dark and white chocolate varieties for a visually appealing display.
- Decorative Boxes: For gifting, nestle a few truffles into small, clear, or festive-patterned boxes, perhaps tied with a ribbon and a handmade tag.
- Edible Decorations: Beyond sprinkles, consider adding a tiny drizzle of contrasting melted chocolate, a few crushed candy canes, or finely chopped nuts right after dipping for extra texture and flair.
Serving Suggestions:
- Holiday Dessert Tables: A must-have for any Christmas party or holiday potluck. They’re bite-sized perfection!
- Cookie Exchanges: Stand out from the traditional cookies with these unique and eye-catching truffles.
- Coffee & Hot Cocoa Companions: Serve alongside warm beverages for a cozy winter treat.
- Thoughtful Hostess Gifts: Boxed truffles make an excellent thank-you for holiday party hosts.
- After-Dinner Indulgence: A small, sweet treat to cap off any festive meal.
No matter how you present them, these truffles are sure to be a highlight of your holiday celebrations!
Storing Your Sweet Success: How Long Do They Last?
So, you’ve whipped up a batch of glorious **Easy Festive Oreo Truffles**, and if by some miracle there are any left after the initial flurry of enjoyment, you’ll want to know how to keep them fresh and delicious for as long as possible!
Refrigerator Storage:
These truffles absolutely need to be stored in the refrigerator due to the cream cheese in their base. Place them in an airtight container to prevent them from drying out or absorbing any fridge odors. When stored correctly, your truffles will stay wonderfully fresh and firm for up to 1 to 2 weeks. The chocolate coating also helps to seal in their freshness.
Freezer Storage:
Want to get a head start on your holiday baking or save some for later? These truffles freeze beautifully! Once the chocolate coating is completely set, arrange them in a single layer on a parchment-lined baking sheet and freeze for about an hour until solid. Then, transfer them to a freezer-safe, airtight container. You can layer them with parchment paper in between to prevent sticking. They’ll keep well in the freezer for up to 1 month. When you’re ready to enjoy, simply transfer them to the refrigerator to thaw for a few hours, or let them sit at room temperature for about 15-20 minutes for a softer texture.
Always store them away from direct sunlight and heat to prevent the chocolate from melting.
Frequently Asked Questions About Easy Festive Oreo Truffles
- Q1: Can I use different flavors of Oreo cookies?
A: Absolutely! Feel free to experiment with any Oreo flavor you love – mint, red velvet, golden, or even seasonal varieties can make these truffles uniquely yours! - Q2: What if I don’t have a food processor?
A: No problem! Place the Oreos in a sturdy zip-top bag, remove the air, and crush them with a rolling pin, a meat mallet, or the bottom of a heavy glass until they are fine crumbs. For mixing the cream cheese, use a sturdy rubber spatula or your hands. - Q3: Why is chilling the truffle balls important before dipping?
A: Chilling is crucial because it helps the truffle balls firm up. This prevents them from falling apart or losing their shape when dipped into the warm melted chocolate, ensuring a smooth, even coating. - Q4: Can I use regular chocolate chips instead of melting wafers?
A: While you can, regular chocolate chips may require tempering or adding a bit of coconut oil or shortening to achieve a smooth, dippable consistency that sets well without blooming (white streaks). Melting wafers are specifically designed for easy melting and a perfect finish. - Q5: How do I prevent the chocolate from seizing (getting thick and clumpy)?
A: Ensure your bowls and utensils are completely dry, as even a tiny drop of water can cause chocolate to seize. Also, avoid overheating the chocolate; melt it gently in short intervals, stirring frequently. - Q6: Can I make these Easy Festive Oreo Truffles ahead of time?
A: Yes, these are fantastic for making ahead! They need to chill anyway, so you can make them a day or two in advance and store them in the refrigerator until you’re ready to serve. - Q7: Are these truffles gluten-free?
A: The standard recipe is not gluten-free. However, many brands (including Oreo) now offer gluten-free versions of their cookies. If you use gluten-free Oreos, the rest of the ingredients are typically GF, making it an easy adaptation. - Q8: What other toppings can I use besides Christmas sprinkles?
A: Get creative! Try crushed candy canes, finely chopped nuts (pecans, walnuts), a contrasting chocolate drizzle, shredded coconut, or even a dusting of cocoa powder. - Q9: My chocolate isn’t melting smoothly. What should I do?
A: If using melting wafers, ensure you’re not overheating. If using regular chocolate chips, try adding 1 teaspoon of coconut oil or shortening per cup of chocolate to help it thin out and melt more smoothly. - Q10: How many truffles does this recipe yield?
A: This recipe is designed to yield approximately 20 delicious truffles, making it perfect for sharing or enjoying over time.
Easy Festive Oreo Truffles
Equipment
- Food Processor
- Zip-top bag (alternative)
- Rolling Pin (alternative)
- Rubber Spatula
- Baking Sheet
- Parchment Paper
- Cookie Scoop (optional)
- Microwave-safe Bowl
- Double Boiler (alternative)
Ingredients
- 36 cookies Oreo cookies about 1 package
- 8 ounces cream cheese softened (one standard block)
- 10 ounces dark chocolate melting wafers for easy coating
- 10 ounces white vanilla melting wafers for a festive touch
- Festive Christmas sprinkles
Instructions
- Step 1: Crush the Cookies. Place all 36 Oreo cookies into a food processor and pulse until fine crumbs form. No food processor? No problem! Put them in a sturdy zip-top bag and crush with a rolling pin until they are as smushed as possible.
- Step 2: Mix Your Base. Add the softened 8 ounces of cream cheese to the Oreo crumbs in the food processor. Pulse until well combined and the mixture starts to come together. If mixing by hand, use a rubber spatula to thoroughly combine the ingredients until smooth.
- Step 3: Roll into Balls. Transfer the mixture to a bowl and use a spatula to ensure everything is perfectly blended. Line a baking sheet with parchment paper. Use a 1.5-tablespoon cookie scoop (or your hands) to form small, uniform balls. Roll them gently to create smooth truffles.
- Step 4: Chill to Perfection. Place the formed Oreo balls on the lined baking sheet and chill them in the refrigerator or freezer for at least 30 minutes. This crucial step helps them firm up and hold their shape before dipping.
- Step 5: Dark Chocolate Dip. In a microwave-safe bowl or using a double boiler, gently melt 10 ounces of dark chocolate melting wafers until smooth and fluid. Dip half of your chilled Oreo balls into the melted dark chocolate, letting any excess drip off. Immediately sprinkle with festive Christmas sprinkles before the chocolate sets. Place them back on the parchment-lined sheet.
- Step 6: White Chocolate Finish. Now, melt the 10 ounces of white vanilla melting wafers until smooth, using the same method. Dip the remaining Oreo balls into the white chocolate, again allowing excess to drip. Decorate immediately with more vibrant Christmas sprinkles.
- Step 7: Final Chill. Return all the decorated Oreo truffles to the refrigerator and chill until the chocolate coatings are completely firm and set. These delicious no-bake treats are now ready to be enjoyed!
Notes
Calories: 202 kcal
Total Carbs: 24g
Net Carbs: 23g
Fats: 11g
Protein: 2g