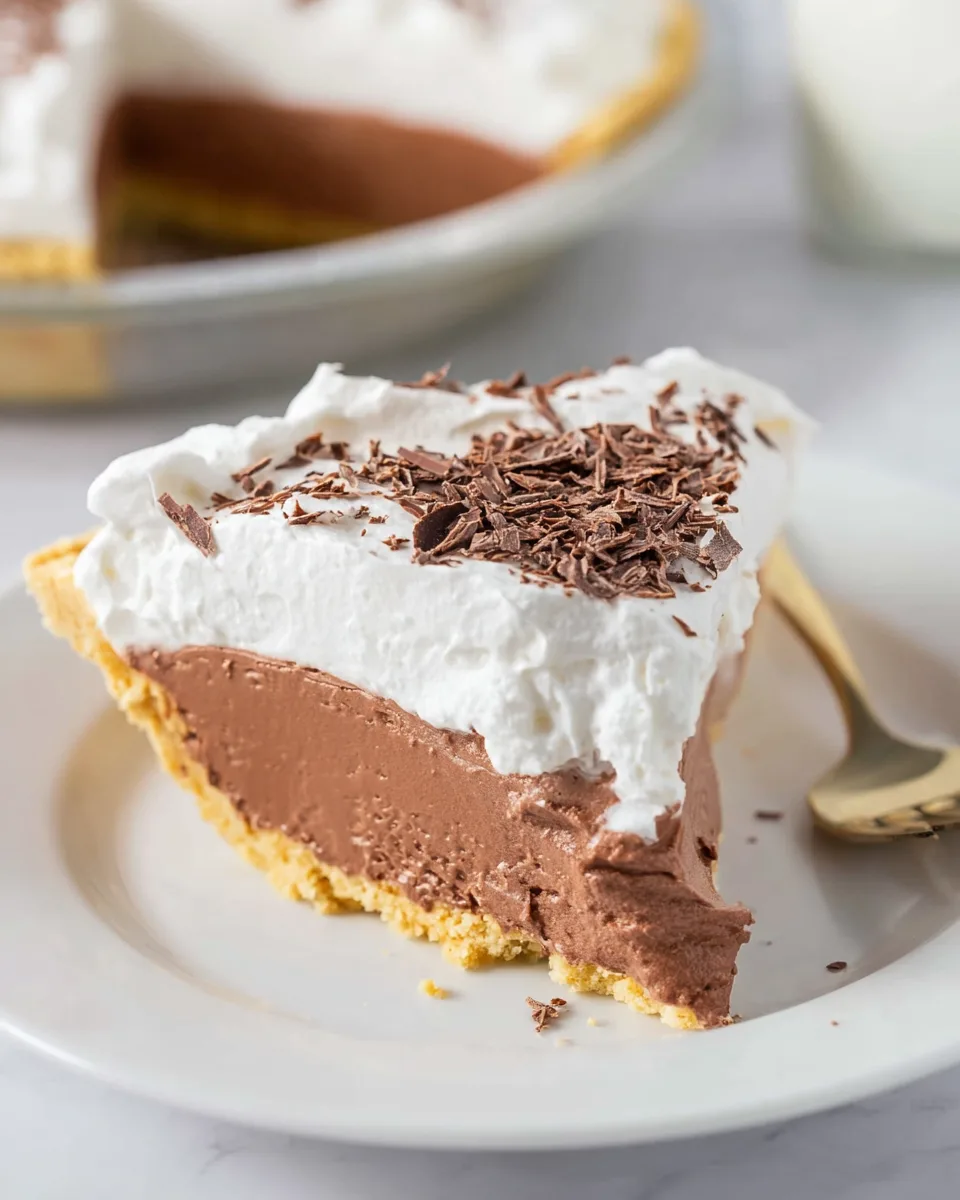
Are you ready to dive into a world of chocolatey bliss without ever turning on your oven? Imagine a dessert so rich, so creamy, and so utterly decadent, yet shockingly simple to create. Get ready to meet your new favorite indulgence: the **Easy No-Bake Chocolate Dream Pie**! This isn’t just a dessert; it’s a stress-free ticket to chocolate paradise, proving that you don’t need a culinary degree to whip up something spectacular.
Why You’ll Love This Recipe
There are countless reasons to fall head over heels for this magnificent **Easy No-Bake Chocolate Dream Pie**, but let’s narrow it down to the top four that will make you want to sprint to your kitchen!
-
Effortless Elegance: No Baking Required! Forget preheating, monitoring, and worrying about soggy bottoms or burnt edges. This pie is truly a “no-bake” wonder, meaning minimal fuss and maximum flavor. You get all the elegance of a gourmet dessert with none of the baking headaches, making it perfect for novice bakers and seasoned pros alike who appreciate a shortcut to deliciousness.
-
Decadent Flavor, Lighter Feel: Don’t let the “no-bake” fool you; this pie is packed with intensely rich chocolate flavor. However, thanks to the addition of Dream Whip and cream cheese, the filling transforms into a luscious, airy mousse. It feels wonderfully light on the palate, offering a satisfying richness without being overly heavy. It’s that delightful “healthy-ish” balance we all crave!
-
Quick Prep, Patient Chill: With only about 10 minutes of active prep time, this pie is an absolute dream for busy schedules. Most of the work involves simply mixing and chilling, giving you back precious time. It’s a fantastic make-ahead option for parties, potlucks, or simply ensuring you have a divine dessert waiting for you after a long day.
-
A Crowd-Pleaser Guaranteed: Who doesn’t love chocolate? This **Easy No-Bake Chocolate Dream Pie** is a universal crowd-pleaser that will have everyone asking for the recipe. Its smooth texture, rich taste, and appealing presentation make it an instant hit at any gathering, from casual family dinners to more formal celebrations. Prepare for rave reviews!
Ingredients with Measurements
Gather your simple ingredients, and let’s get ready to create some magic with this **Easy No-Bake Chocolate Dream Pie**!
- ☁️ 1 packet (approx. 0.75 ounces) Dream Whip mix
- 🥛 2 cups milk, divided
- 🍮 1 box (3.5 ounces) instant chocolate pudding mix
- 🧀 8 ounces cream cheese, softened
- 🥄 1/2 teaspoon vanilla extract
- 🥧 1 pre-made 9-inch graham cracker crust
- ✨ 1 to 1 1/2 cups whipped topping (like Cool Whip or similar)
- 🍫 1 tablespoon chocolate shavings (optional, for garnish)
Detailed Step-by-Step Directions on How to Make the Recipe
Get ready to whisk, fold, and chill your way to the most incredible **Easy No-Bake Chocolate Dream Pie**! Follow these simple steps, and you’ll be a no-bake pro in no time.
-
Start the Fluff: Grab a small mixing bowl and your electric mixer. Empty one packet of Dream Whip mix into the bowl, then pour in 1/2 cup of milk. Beat this glorious duo with your electric mixer on high speed until it transforms into a light, airy, and fluffy concoction with beautiful stiff peaks. This usually takes a few minutes, so be patient – it’s worth it! Once fluffy, set this aside; it’s the secret to your pie’s dreamy texture.
-
Mix the Chocolate Base: In a separate, larger mixing bowl, combine the remaining 1 1/2 cups of milk with the instant chocolate pudding mix. Grab your whisk and get to work! Whisk continuously for about 2-3 minutes. You’ll notice the pudding powder dissolving completely, and the mixture will start to thicken beautifully, signaling that your chocolate base is coming to life.
-
Creamy Smoothness: Now for the magic touch! Add your softened cream cheese and the aromatic vanilla extract to your thickening chocolate pudding mixture. Switch back to your electric mixer and beat everything together until the mixture is wonderfully smooth and completely creamy. Make sure there are no lumps of cream cheese—we’re aiming for velvety perfection for our **Easy No-Bake Chocolate Dream Pie**!
-
Fold in the Dream: It’s time to unite the fluffy Dream Whip with the rich chocolate cream cheese blend. Gently fold the prepared Dream Whip mixture into the chocolate base. Use a spatula and a light hand, stirring carefully until everything is perfectly combined and uniform. You’re looking for a light, mousse-like filling without any visible streaks. This step is key to that signature “dreamy” texture!
-
Chill Out: Carefully spoon this magnificent chocolate filling evenly into your pre-made graham cracker crust. Smooth the top with your spatula. Now for the most challenging part: the waiting game! Pop your pie into the refrigerator for at least 4-6 hours. For the absolute best, perfectly firm results, letting it chill overnight is highly recommended. This allows the pie to set up beautifully.
-
Garnish & Serve: Once your pie is perfectly set and you’re ready to indulge, retrieve it from the fridge. Spread the whipped topping evenly over the chilled chocolate filling. For an extra touch of elegance and visual appeal, sprinkle a little magic with chocolate shavings on top. Slice into generous portions, serve, and bask in the glory of your homemade, easy, and healthy-ish **Easy No-Bake Chocolate Dream Pie**!
Different Ways You Can Present the Recipe and How to Serve It
One of the joys of the **Easy No-Bake Chocolate Dream Pie** is its versatility in presentation and serving! While a classic slice is always a winner, here are some creative ways to impress your guests and elevate your dessert experience:
-
The Classic Grandeur: Serve generous slices directly from the 9-inch pie plate onto individual dessert plates. This showcases the beautiful layers and allows for easy portioning. A dollop of extra whipped topping on the side or a small cluster of fresh berries can add a pop of color and freshness.
-
Mini Pie Magic: For individual servings, press graham cracker crumbs (mixed with a little melted butter) into the bottom of muffin tins or small ramekins to create mini crusts. Spoon the chocolate filling into these, chill, and then top with whipped topping and garnish. They’re adorable, perfectly portioned, and great for parties!
-
Layered Parfait Delight: Create an elegant dessert in clear glasses or mason jars. Start with a layer of crushed graham crackers, then alternate layers of the chocolate filling and whipped topping. Repeat, finishing with a dollop of whipped topping and your chosen garnish. This offers a beautiful visual appeal and is fantastic for on-the-go enjoyment.
-
Garnish Galore: Beyond chocolate shavings, consider these additions:
- Fresh Berries: Raspberries, strawberries, or blueberries add a lovely tart contrast.
- Cocoa Dusting: A light sift of cocoa powder for a sophisticated touch.
- Mini Chocolate Chips: A playful crunch scattered over the top.
- Chopped Nuts: Toasted pecans or walnuts for texture and a nutty flavor.
- Caramel Drizzle: A decadent swirl of caramel sauce for an extra layer of sweetness.
-
Serving Suggestions: This pie pairs beautifully with a cup of hot coffee, a glass of cold milk, or even a dry red wine. It’s perfect as the grand finale to a dinner party, a celebratory treat, or simply a comforting indulgence on a quiet evening.
How You Can Store It and How Long Does It Last
Proper storage is key to keeping your delicious **Easy No-Bake Chocolate Dream Pie** fresh and ready for whenever a craving strikes! Here’s how to ensure it lasts as long as possible:
-
Refrigeration is Key: After its initial chill, your pie should always be stored in the refrigerator. To keep it fresh and prevent it from absorbing any unwanted odors from other foods, make sure it’s covered properly. An airtight pie carrier or simply wrapping the pie dish tightly with plastic wrap or aluminum foil will do the trick.
-
How Long Does It Last? When stored correctly in the refrigerator, this **Easy No-Bake Chocolate Dream Pie** will typically remain fresh and delicious for about 3 to 4 days. The texture and flavor are at their absolute best within the first two days, but it’s still perfectly enjoyable for a few days beyond that.
-
Freezing for Later: Yes, you can freeze this pie! If you plan to freeze it, it’s best to do so before adding the final layer of whipped topping and chocolate shavings. Once the chocolate filling is completely set, wrap the pie (in its crust) tightly with several layers of plastic wrap, followed by a layer of aluminum foil. This helps prevent freezer burn. It can be stored in the freezer for up to 1 month.
-
Thawing a Frozen Pie: When you’re ready to enjoy a frozen pie, transfer it from the freezer to the refrigerator and let it thaw overnight (6-8 hours). Once thawed, add your fresh whipped topping and any desired garnishes, then serve as usual. The texture might be slightly softer than a freshly made and chilled pie, but it will still be incredibly delicious!
FAQs Section
Got questions about your **Easy No-Bake Chocolate Dream Pie**? We’ve got answers!
-
Can I use a different type of crust for this pie?
Absolutely! While a graham cracker crust provides a classic complementary flavor, you can certainly use an Oreo crumb crust for an extra chocolatey punch, a shortbread crust, or even a pretzel crust for a salty-sweet twist. Just ensure it’s a pre-made or no-bake crust. -
Can I make this pie ahead of time for an event?
Yes, this pie is an excellent make-ahead dessert! In fact, it’s encouraged to chill it overnight for the best firm set. You can prepare the entire pie (minus the final whipped topping and chocolate shavings) up to 2 days in advance and keep it refrigerated. Add the final toppings right before serving. -
What if I can’t find Dream Whip mix?
Dream Whip is a powdered whipped topping mix that provides stability. While this recipe is built around it, you could potentially substitute with an equal amount of homemade stabilized whipped cream (heavy cream whipped with powdered sugar and a touch of gelatin or cream of tartar) or use a similar powdered non-dairy whipped topping mix if available. However, results may vary slightly in texture. -
Can I use sugar-free instant chocolate pudding mix?
Yes, you can! Using sugar-free instant chocolate pudding mix is a great way to reduce the sugar content, making this an even “healthier-ish” option. The texture and setting should remain consistent. -
How do I quickly soften cream cheese if I forgot to take it out?
To quickly soften cream cheese, you can remove it from its foil wrapper and place it on a microwave-safe plate. Microwave on high for 10-15 seconds. Be careful not to overheat it, as it will melt and become too liquidy. -
Can I make this dairy-free?
Making this specific recipe completely dairy-free would require several substitutions. You’d need dairy-free milk, dairy-free cream cheese, a dairy-free instant pudding mix (check ingredients carefully), and a plant-based whipped topping. Dream Whip contains dairy, so a different vegan powdered whip would be needed. While possible, it moves away from the original recipe’s components. -
Why isn’t my pie setting properly?
Common reasons for a pie not setting include not whisking the pudding long enough, not using instant pudding (cook and serve won’t work), or not chilling it for a sufficient amount of time. Ensure your cream cheese was properly softened and blended, as lumps can affect the texture. Patience with the chilling step is crucial! -
Can I add other flavors to the chocolate filling?
Absolutely! Get creative! A teaspoon of espresso powder can intensify the chocolate flavor, a hint of orange zest can add a bright note, or a splash of peppermint extract (1/4 to 1/2 teaspoon) can transform it into a mint chocolate dream pie. Just be mindful not to add too much liquid. -
Is this pie suitable for a crowd or large gathering?
This **Easy No-Bake Chocolate Dream Pie** is perfect for crowds! The recipe makes 8 generous servings, and because it’s so quick to prepare, you can easily double or triple the recipe to make multiple pies for larger gatherings. Its make-ahead nature also reduces stress on the day of the event. -
What’s the textural difference between using Dream Whip and just regular whipped cream?
Dream Whip, as a powdered mix, is designed to create a very stable, light, and almost marshmallow-like fluff that holds its shape incredibly well, even when folded into other mixtures. This stability contributes to the “dreamy”, mousse-like texture of the pie filling. Regular whipped cream (made from heavy cream) can be more delicate and may not hold up as firmly in the pie’s structure over time, though it would still be delicious.
Easy No-Bake Chocolate Dream Pie
Equipment
- Small Mixing Bowl
- Large mixing bowl
- Electric Mixer
- Whisk
- Refrigerator
- 9-inch Pie Plate (implied by crust)
Ingredients
- 1 packet Dream Whip mix approx. 0.75 ounces
- 2 cups milk divided
- 1 box instant chocolate pudding mix 3.5 ounces
- 8 ounces cream cheese softened
- 0.5 tsp vanilla extract
- 1 pre-made 9-inch graham cracker crust
- 1.25 cups whipped topping like Cool Whip or similar (1 to 1 1/2 cups)
- 1 tbsp chocolate shavings optional, for garnish
Instructions
- In a small mixing bowl, combine one packet of Dream Whip mix with 1/2 cup of milk. Using an electric mixer, beat until it becomes light and fluffy with stiff peaks, similar to fresh whipped cream (this will take a few minutes). Set this aside for later.
- In a separate, larger mixing bowl, whisk together the remaining 1 1/2 cups of milk and the instant chocolate pudding mix. Keep whisking for about 2-3 minutes until the pudding powder is fully dissolved and the mixture starts to thicken beautifully.
- Now, add your softened cream cheese and vanilla extract to the thickening chocolate pudding mixture. Use your electric mixer again to beat everything together until it's wonderfully smooth and completely creamy.
- Gently fold the prepared Dream Whip mixture into the chocolate pudding and cream cheese blend. Stir carefully until everything is perfectly combined and uniform, creating a light, mousse-like filling without any streaks.
- Spoon this amazing chocolate filling evenly into your graham cracker crust. Now, the hardest part: patience! Pop it into the refrigerator for at least 4-6 hours, or even better, overnight, to let it set up perfectly firm.
- Right before you're ready to enjoy this dreamy pie, spread the whipped topping evenly over the chilled chocolate filling. If you like, sprinkle a little magic with chocolate shavings on top. Slice into generous portions and serve up this easy, healthy-ish dessert!
Notes
Calories: 332 kcal
Total Carbs: 33 g
Net Carbs: 32 g
Fats: 20 g
Protein: 6 g