Ever found yourself staring at a bakery display, utterly mesmerized by the deep, rich crimson of a Red Velvet treat? Well, get ready to bring that magic right into your own kitchen with our incredible recipe for Easy Red Velvet Cookies! Forget complicated steps and lengthy chilling times; we’re talking about pure, unadulterated baking joy that delivers show-stopping results with minimal fuss. These aren’t just any cookies; they’re a vibrant burst of flavor, a symphony of texture, and a testament to how simple homemade indulgence can be. Prepare to transform humble ingredients into a batch of utterly irresistible, perfectly chewy, and brilliantly red cookies that will make you feel like a baking superstar!
Why You’ll Love These Easy Red Velvet Cookies
There are countless reasons to fall head over heels for this particular recipe, but we’ve narrowed it down to the top four that truly make these Easy Red Velvet Cookies a must-try:
- Effortless Elegance: Don’t let their dazzling appearance fool you; these cookies are incredibly simple to make. Our secret melted butter trick simplifies the process, cutting down on time without compromising on that perfect chewy texture.
- Irresistible Taste & Texture: Imagine a cookie that’s wonderfully soft in the center, perfectly chewy at the edges, and boasts that distinct, subtly chocolatey Red Velvet flavor. That’s exactly what you get here! The touch of cocoa powder adds depth, while the sugars ensure a delightful chew.
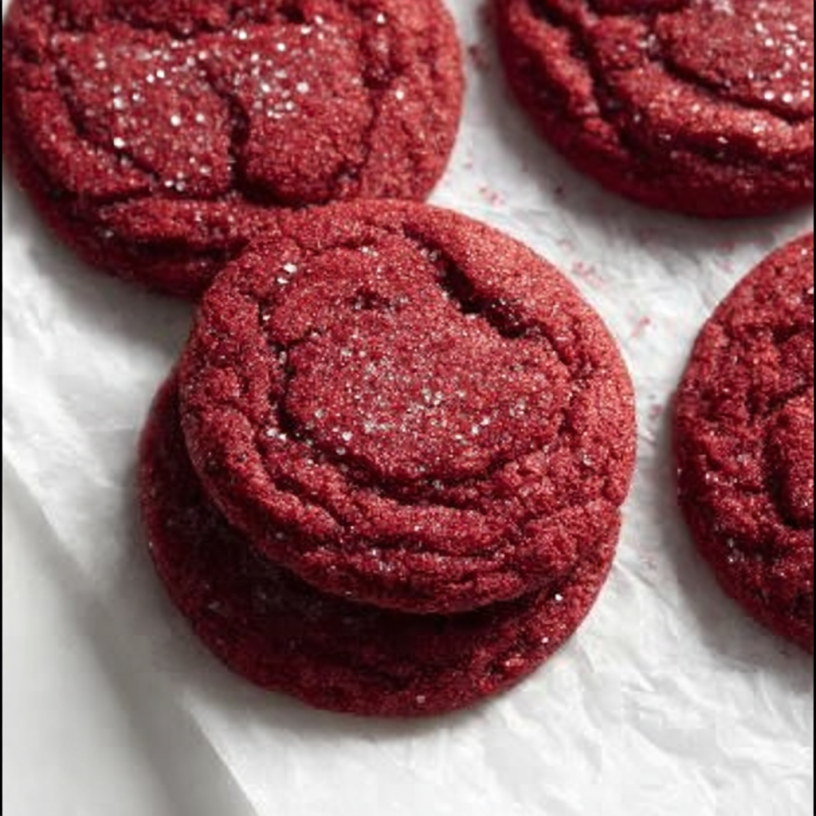
- Vibrant & Visually Stunning: The striking red hue, especially when coated in sparkling sanding sugar, makes these cookies an absolute showstopper. They’re perfect for holidays, parties, or simply brightening a gloomy day.
- Quick & Rewarding: With a total time of just 25 minutes from start to finish (including baking!), you can whip up a batch of these delightful treats on a whim. The immediate gratification of sinking your teeth into a warm, homemade cookie is truly unparalleled.
Ingredients for Your Easy Red Velvet Cookies
Gather your pantry staples and get ready to create some baking magic. Here’s everything you’ll need for these spectacular Easy Red Velvet Cookies:
- 🧈 1/2 cup unsalted butter, melted
- 🤎 1/2 cup plus 1 tablespoon light brown sugar
- 🍚 1/4 cup granulated sugar
- 🥚 1 large egg, at room temperature
- 🌸 1 1/2 teaspoons vanilla extract
- 🌈 1 1/2 teaspoons red gel food coloring
- 🌾 1 1/4 cups all-purpose flour
- 🍫 2 tablespoons unsweetened cocoa powder, sifted
- ✨ 1/2 teaspoon baking soda
- 💫 1/2 teaspoon baking powder
- 🧂 1/2 teaspoon salt
- 🔴 1/2 cup red sanding sugar (optional, or regular granulated sugar)
Detailed Directions: How to Make These Easy Red Velvet Cookies
Get ready to bake! Follow these simple, step-by-step instructions to create your own batch of delicious Easy Red Velvet Cookies:
- Melt and Chill Butter: Begin by gently melting your unsalted butter. You can do this in a small saucepan over low heat or in the microwave in short bursts. Once fully melted, pour it into a shallow dish (like a pie plate) and place it in the freezer for about 5 to 8 minutes. The goal is for it to be cold but still liquid, not completely solid. This brief chill is key for a chewy texture!
- Combine Wet Ingredients: Transfer the chilled, melted butter to a medium-sized mixing bowl. Add the light brown sugar, granulated sugar, your room-temperature egg, and the vanilla extract. Whisk these ingredients together vigorously until the mixture is beautifully smooth and thoroughly combined.
- Add Color: Now for the fun part! Stir in the red gel food coloring. Mix it diligently until your batter transforms into that iconic, vibrant red hue. Feel free to adjust the amount of coloring slightly to achieve your desired intensity.
- Whisk Dry Ingredients: In a separate, clean bowl, whisk together the all-purpose flour, the sifted unsweetened cocoa powder (sifting prevents lumps!), baking soda, baking powder, and salt. Ensure these dry ingredients are well combined with no visible lumps.
- Gentle Mix: Gradually add the whisked dry ingredient mixture to your wet, vibrant red ingredients. Using a large spatula, gently fold everything together until the ingredients are just combined. It’s crucial not to overmix the dough, as this can lead to tough cookies. A light hand keeps your cookies wonderfully tender and soft.
- Prepare for Baking: Allow your cookie dough to rest at room temperature while your oven preheats to 350°F (175°C). Line two large baking sheets with parchment paper; this prevents sticking and makes cleanup a breeze.
- Scoop and Roll: Using a medium cookie scoop (which typically yields about 2-ounce portions), divide the dough. Roll each portion into a smooth, even ball between your palms. If you’re using red sanding sugar (or plain granulated sugar), roll each cookie dough ball in it until it’s fully coated. This adds a lovely sparkle and a slight crunch!
- Bake to Perfection: Place approximately 6 cookie dough balls on each prepared baking sheet, ensuring you leave about 2 to 3 inches between them as they will spread. Bake one sheet at a time in the center of your preheated oven for 9 to 10 minutes. Look for cookies with edges that are just set and centers that are slightly puffed but still soft. Overbaking can dry them out, so pull them out when they still look a touch underdone in the middle for that ultimate fudgy texture.
- Cool and Enjoy: Once baked, carefully remove the cookies from the oven and let them cool directly on the baking sheet for 5 to 10 minutes. They will gently deflate and firm up as they cool. If you desire, sprinkle a little extra colored sugar on top before serving these delightful Easy Red Velvet Cookies!
Presentation and Serving Suggestions
These Easy Red Velvet Cookies are stunning on their own, but a little creative flair can elevate them even further. Here are some delightful ways to present and serve your homemade treats:
- Classic with a Twist: Serve them warm with a tall glass of cold milk, or for a more decadent treat, pair them with a scoop of vanilla bean ice cream.
- Powdered Sugar Dusting: For an elegant touch that contrasts beautifully with the red, lightly dust the cooled cookies with powdered sugar.
- White Chocolate Drizzle: Melt some white chocolate (or even cream cheese frosting!) and drizzle it artfully over the cooled cookies. The white against the red is truly iconic for red velvet.
- Cookie Sandwiches: Create mini ice cream sandwiches by placing a scoop of cream cheese ice cream or vanilla ice cream between two cookies.
- Gift Giving: Arrange a stack of these vibrant cookies in a clear cellophane bag tied with a pretty ribbon. They make a fantastic homemade gift for friends, family, or teachers.
- Dessert Platter Star: Include them on a festive dessert platter alongside other treats like brownies, blondies, or chocolate chip cookies for a variety of colors and flavors.
Storage and Shelf Life
Once you’ve mastered making these Easy Red Velvet Cookies, you’ll want to ensure they stay fresh for as long as possible. Here’s how to store them:
- At Room Temperature: Store cooled cookies in an airtight container at room temperature for up to 3-4 days. To keep them extra soft, you can place a slice of bread in the container with them; the cookies will absorb moisture from the bread.
- In the Refrigerator: While not strictly necessary for short-term storage, you can keep them in an airtight container in the refrigerator for up to a week. Just bring them to room temperature or warm them slightly before serving for the best texture.
- Freezing Dough: To enjoy fresh-baked cookies anytime, you can freeze the unbaked cookie dough balls. Place the rolled dough balls on a baking sheet and freeze until solid (about 1-2 hours). Transfer the frozen dough balls to a freezer-safe bag or container and store for up to 3 months. When ready to bake, place them directly on a parchment-lined baking sheet and bake as directed, adding a minute or two to the baking time.
- Freezing Baked Cookies: Fully baked and cooled cookies can also be frozen! Wrap individual cookies tightly in plastic wrap, then place them in a freezer-safe bag or container. They will last for up to 2-3 months. Thaw at room temperature or warm gently in the microwave or oven.
FAQs About Easy Red Velvet Cookies
- 1. What makes these cookies “easy”?
- They’re easy because we use melted butter, which eliminates the need for creaming butter and sugar, simplifying the mixing process significantly. Plus, the minimal chill time for the butter means you can get them in the oven faster!
- 2. Can I use liquid red food coloring instead of gel?
- While you can, gel food coloring is highly recommended. It provides a much more vibrant color without adding excess liquid to the dough, which could alter the texture. If using liquid, you might need to use more, and your color might not be as intense.
- 3. Why chill the butter after melting it?
- Chilling the melted butter slightly helps it re-solidify just enough to contribute to a chewier cookie texture, preventing the cookies from spreading too much and becoming too thin.
- 4. Can I make the cookie dough ahead of time?
- Absolutely! You can prepare the dough and store it in an airtight container in the refrigerator for up to 2-3 days. When ready to bake, let it sit at room temperature for about 15-20 minutes to soften slightly before scooping and rolling.
- 5. What if I don’t have red sanding sugar?
- No problem! You can use regular granulated sugar, or simply skip the sugar coating altogether. The cookies will still be delicious and have a lovely red color.
- 6. How do I know when the cookies are done baking?
- Look for cookies where the edges are set and lightly golden, but the centers still look slightly soft and puffed. They will firm up as they cool. Overbaking leads to dry cookies, so err on the side of slightly underdone for maximum fudginess!
- 7. Can I add chocolate chips to these cookies?
- Yes, you can! White chocolate chips or chunks would be a fantastic addition, complementing the red velvet flavor beautifully. Fold in about 1/2 cup with the dry ingredients.
- 8. Are these cookies suitable for gifting?
- Definitely! Their vibrant color and delicious taste make them a perfect homemade gift for any occasion. Package them in a nice box or bag.
- 9. Why do I need to sift the cocoa powder?
- Cocoa powder tends to clump easily. Sifting ensures that it’s evenly distributed throughout the dough, preventing pockets of dry powder and contributing to a smooth, uniform texture.
- 10. Can I halve or double this recipe?
- Yes, this recipe is quite flexible! You can easily halve it if you want a smaller batch, or double it if you’re baking for a crowd. Just ensure you adjust all ingredient measurements proportionally.
Easy Red Velvet Cookies 🍪
Equipment
- Mixing Bowls
- Baking Sheets
- Parchment Paper
- Spatula
- Cookie Scoop
Ingredients
- 1/2 cup unsalted butter melted
- 9 tbsp light brown sugar
- 1/4 cup granulated sugar
- 1 large egg at room temperature
- 1 1/2 tsp vanilla extract
- 1 1/2 tsp red gel food coloring
- 1 1/4 cups all-purpose flour
- 2 tbsp unsweetened cocoa powder sifted
- 1/2 tsp baking soda
- 1/2 tsp baking powder
- 1/2 tsp salt
- 1/2 cup red sanding sugar (optional, or regular granulated sugar)
Instructions
- Melt and Chill Butter: Begin by gently melting your unsalted butter in a small saucepan or microwave. Once melted, pour it into a shallow dish and pop it into the freezer for about 5 to 8 minutes. You want it cold but not completely solid—this little trick helps create perfectly chewy cookies!
- Combine Wet Ingredients: Transfer the chilled butter to a medium mixing bowl. Add the light brown sugar, granulated sugar, room-temperature egg, and vanilla extract. Whisk everything together until the mixture is smooth and well combined.
- Add Color: Now, stir in the red gel food coloring. Mix it thoroughly until your batter transforms into that signature vibrant red hue. Feel free to adjust the amount of coloring to achieve your desired shade.
- Whisk Dry Ingredients: In a separate bowl, whisk together the all-purpose flour, sifted cocoa powder, baking soda, baking powder, and salt. Make sure there are no lumps for an even texture.
- Gentle Mix: Gradually add the dry ingredient mixture to your wet ingredients. Use a large spatula to gently fold everything together until just combined. Be careful not to overmix the dough; a light hand keeps your cookies tender and soft.
- Prepare for Baking: Let your cookie dough rest at room temperature while you preheat your oven to 350°F (175°C). Line two large baking sheets with parchment paper for easy cleanup.
- Scoop and Roll: Using a medium cookie scoop (roughly 2-ounce portions), divide the dough. Roll each portion into a smooth ball between your palms. If using, roll each cookie dough ball in red sanding sugar until fully coated, or use plain granulated sugar.
- Bake to Perfection: Place about 6 cookies on each prepared baking sheet, leaving 2 to 3 inches between them as they will spread. Bake one sheet at a time in the center of your oven for 9 to 10 minutes. Look for edges that are set and centers that are slightly puffed but still soft. Avoid overbaking to keep them wonderfully fudgy.
- Cool and Enjoy: Once baked, remove the cookies from the oven and let them cool directly on the baking sheet for 5 to 10 minutes. They will gently deflate as they cool. If you like, sprinkle a little more colored sugar on top before serving these delightful treats!
Notes
Calories: 180
Total Carbs: 28g
Net Carbs: 27g
Fats: 10g
Protein: 3g