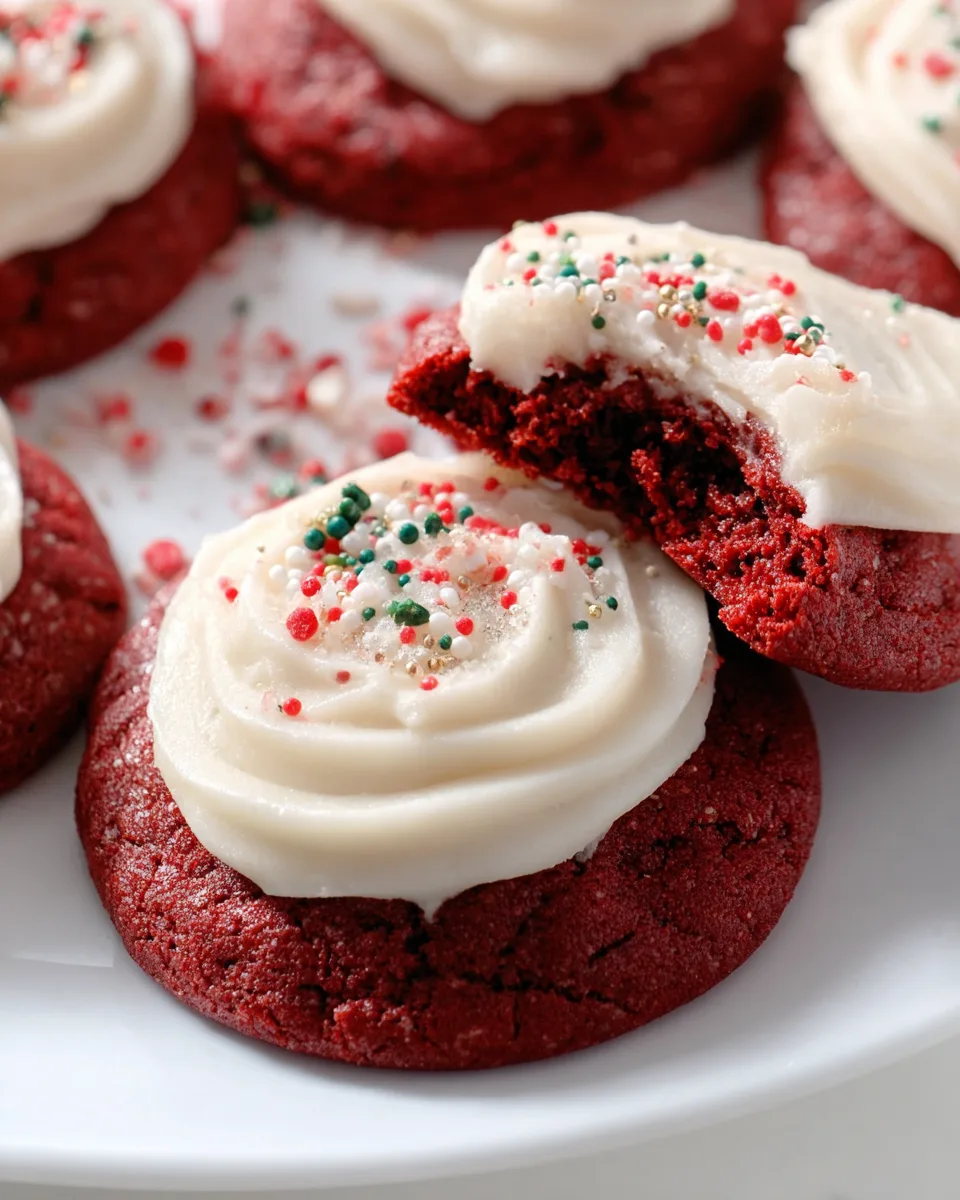
Get ready to dive into the world of truly irresistible treats! Imagine sinking your teeth into a cookie that’s not just soft and chewy, but also boasts that iconic, subtle cocoa flavor, kissed with a hint of vanilla and a vibrant red hue. And then, topping it all off with a swirl of rich, tangy, and utterly dreamy cream cheese frosting. Sound like a baking dream? Well, it’s about to become your delicious reality! Forget complicated steps and endless ingredient lists; we’re making Easy & Dreamy Red Velvet Cookies with Cream Cheese Frosting that are perfect for bakers of all levels. Whether you’re whipping them up for a special occasion, a holiday gathering, or just because you deserve a little indulgence, these cookies are guaranteed to be a showstopper and a crowd-pleaser. Let’s bake some magic!
Why You’ll Love This Recipe
- Effortlessly Delicious: Don’t let the elegant appearance fool you; these Easy & Dreamy Red Velvet Cookies with Cream Cheese Frosting come together with straightforward steps, making them perfect for even novice bakers. You’ll achieve bakery-quality results without the fuss!
- Irresistible Flavor Combination: The classic red velvet cookie, with its unique blend of cocoa and vanilla, gets a delightful boost from optional peppermint for a festive twist, perfectly complemented by a rich, spiced cream cheese frosting that melts in your mouth.
- Perfect for Any Occasion: While they shine brightly during the holidays, these vibrant cookies are a fantastic addition to any gathering, potluck, or simply as a special treat for your family. They’re beautiful, delicious, and always a hit.
- Dreamy Texture: Prepare for cookies that are wonderfully soft and chewy in the center with slightly set edges, providing that perfect comforting bite. The frosting adds an extra layer of creamy decadence that elevates the entire experience.
Ingredients with Measurements
🍪 For the Cookies:
- 1 ¾ cups all-purpose flour (lightly fluffed, spooned into measuring cup, then leveled)
- ¼ cup unsweetened cocoa powder
- ½ teaspoon baking soda
- ¼ teaspoon salt
- 8 tablespoons (½ cup) unsalted butter, softened to room temperature
- 1 cup granulated sugar
- 1 large egg, at room temperature
- 1 tablespoon eggnog or milk
- 1 tablespoon red food coloring (liquid) OR ¾ teaspoon red gel food coloring (or for a natural option, 2 teaspoons beet powder)
- 1 ½ teaspoons vanilla extract
- 1 teaspoon peppermint extract (optional, for a festive holiday twist)
- ¼ cup sour cream, at room temperature
- Optional sprinkles for decorating
🥣 For the Cream Cheese Frosting:
- 4 ounces cream cheese, softened to room temperature
- 2 tablespoons unsalted butter, softened to room temperature
- 2 tablespoons eggnog or milk
- 1 teaspoon vanilla extract
- 2 cups powdered sugar
- ½ teaspoon ground cinnamon
- A pinch of ground nutmeg and a pinch of salt
Detailed Step-by-Step Directions How to Make These Easy & Dreamy Red Velvet Cookies
Let’s whip up these delightful Red Velvet Cookies! It’s simpler than you think to create these soft, flavorful treats.
- Get Ready: First, preheat your oven to 350°F (175°C). Line two baking sheets with parchment paper or silicone mats. To ensure the best texture, make sure your butter, egg, sour cream, and cream cheese are all softened to room temperature.
- Mix Dry Goodies: In a medium bowl, gently whisk together the flour, cocoa powder, baking soda, and salt until well combined. Set this mixture aside for a moment.
- Cream Butter & Sugar: In a large mixing bowl, using an electric mixer with a paddle attachment, beat the softened butter and granulated sugar on medium-high speed. Continue for about 2 minutes until the mixture looks light and fluffy.
- Add Wet Wonders: Now, beat in the room temperature egg until fully incorporated. Then, add the 1 tablespoon of eggnog (or milk), your chosen red food coloring, vanilla extract, and the optional peppermint extract. Mix briefly until everything is just combined, about 30 seconds.
- Combine All Together: Reduce your mixer speed to low. Gradually add about half of your dry flour mixture, followed by the sour cream, and then the remaining half of the flour mixture. Mix just until combined – be careful not to overmix the dough to keep your cookies tender!
- Roll & Bake: Using greased hands or a cookie scoop (about 2 tablespoons per cookie), roll the dough into smooth balls. Place them on your prepared baking sheets, leaving approximately 2 ½ inches between each cookie. Bake for 9-11 minutes, or until the edges are lightly set and the centers look barely cooked. They might seem soft, but they’ll firm up beautifully! Let the cookies cool on the baking sheet for 5 minutes before carefully transferring them to a wire rack to cool completely.
- Whip Up the Frosting: While the cookies are cooling, prepare the dreamy frosting! In a clean mixing bowl, beat the softened cream cheese, softened butter, 2 tablespoons of eggnog (or milk), and vanilla extract until the mixture is wonderfully smooth and creamy.
- Sweeten the Deal: Add the cinnamon and nutmeg to the frosting, then gradually beat in the powdered sugar until the frosting is light and fluffy. If your frosting seems too thick, you can add a tiny bit more eggnog; if it’s too thin, a little more powdered sugar will do the trick!
- Frost & Enjoy! Once your cookies are completely cool, spread a generous dollop of cream cheese frosting on top of each. Feel free to add sprinkles or crushed candy canes for a fun, festive touch!
Detailed Different Ways You Can Present the Recipe and How to Serve It
These Easy & Dreamy Red Velvet Cookies with Cream Cheese Frosting are already showstoppers, but with a little extra flair, you can elevate their presentation to truly impress! Here are some delightful ways to serve and showcase your beautiful creations:
- Elegant Platter: Arrange the cookies artfully on a large white or silver platter. For a touch of sophistication, dust lightly with extra cocoa powder, a sprinkle of edible glitter, or finely chopped pistachios for a contrasting green.
- Festive Holiday Display: If you’ve used the optional peppermint extract, crush candy canes and sprinkle them over the frosting for a truly festive look. You can also add red and green holiday sprinkles, or small edible sugar pearls for a frosty appearance.
- Individual Dessert Plates: For a more intimate setting, serve one or two cookies on individual dessert plates. A small dollop of raspberry coulis or a fresh raspberry alongside can add a gourmet touch and a pop of color.
- Gift Boxes: These cookies make fantastic edible gifts! Pack them carefully in decorative cookie tins or clear cello bags tied with festive ribbons. Place a small piece of parchment paper between layers of cookies to prevent the frosting from smudging.
- Cookie Bar: Hosting a party? Create a “Red Velvet Cookie Bar” where guests can customize their own. Offer a variety of toppings like different colored sprinkles, chocolate shavings, mini chocolate chips, or even a drizzle of white chocolate.
- Coffee or Tea Companion: Simply serve them alongside a warm cup of coffee, hot chocolate, or a delicate tea. The rich flavors of the cookies and frosting pair wonderfully with a comforting beverage.
How You Can Store It and How Long Does It Last
Proper storage is key to keeping your Easy & Dreamy Red Velvet Cookies with Cream Cheese Frosting fresh and delicious. Since they feature a cream cheese frosting, they require a bit more care than unfrosted cookies:
- Frosted Cookies (Refrigerated): Due to the cream cheese in the frosting, these cookies must be stored in an airtight container in the refrigerator. They will stay fresh and delicious for up to 3-4 days. Allow them to come closer to room temperature for about 15-20 minutes before serving for the best texture and flavor of the frosting.
- Unfrosted Cookies (Room Temperature): If you want to bake the cookies ahead of time and frost them later, the unfrosted cookies can be stored in an airtight container at room temperature for up to 2-3 days. Make sure they are completely cool before storing.
- Freezing Frosted Cookies: For longer storage, place frosted cookies on a baking sheet and freeze until the frosting is firm (about 1-2 hours). Once firm, transfer them to an airtight freezer-safe container, separating layers with parchment paper. They can be frozen for up to 1 month. Thaw in the refrigerator overnight or at room temperature for a few hours before serving.
- Freezing Unfrosted Cookie Dough: You can also prepare the cookie dough ahead of time. Roll the dough into balls, then arrange them on a baking sheet and freeze until solid. Transfer the frozen dough balls to a freezer-safe bag or container and store for up to 3 months. When ready to bake, place frozen dough balls on a prepared baking sheet and add an extra 1-2 minutes to the baking time.
FAQs Sections
- Why is it important for ingredients to be at room temperature?
Room temperature butter, eggs, and dairy products emulsify better, creating a smoother, more uniform dough and frosting. This results in a lighter, fluffier texture in your Easy & Dreamy Red Velvet Cookies with Cream Cheese Frosting. - Can I use natural food coloring instead of artificial?
Absolutely! The recipe suggests 2 teaspoons of beet powder as a natural alternative. Keep in mind that natural colorings might yield a slightly less vibrant red hue, leaning more towards a maroon or brownish-red. - What if my frosting is too thick or too thin?
If the frosting is too thick, add a tiny bit more eggnog or milk (½ teaspoon at a time) until it reaches your desired consistency. If it’s too thin, gradually beat in more powdered sugar (1 tablespoon at a time) until it thickens up. - Can I make the cookie dough ahead of time?
Yes, you can! Prepare the dough as instructed, then cover the bowl tightly with plastic wrap and refrigerate for up to 24-48 hours. When ready to bake, let it sit at room temperature for about 15-20 minutes to soften slightly before rolling and baking. - Is the peppermint extract essential?
No, the peppermint extract is entirely optional. It adds a lovely festive touch, especially for holiday baking. If you prefer a classic red velvet flavor, simply omit it. - What kind of cocoa powder should I use?
Unsweetened natural cocoa powder works best for the classic red velvet flavor profile. Dutch-processed cocoa can be used, but it might alter the color and slightly reduce the tanginess. - My cookies spread too much; what went wrong?
This can happen if your butter was too soft (almost melted), your oven temperature was too low, or you didn’t chill the dough (though not strictly required in this recipe, it can help). Ensure your butter is just softened, not melted. - How many cookies does this recipe yield?
This recipe is designed to make approximately 24 delightful cookies, perfect for sharing or enjoying over a few days. - Can I substitute sour cream?
Full-fat plain Greek yogurt can be used as a substitute for sour cream. It will provide a similar moisture and tanginess that helps tenderize the cookies. - Do these cookies need to be chilled before baking?
While not explicitly stated as a required step in the instructions, chilling the dough for 30 minutes can help prevent spreading and yield thicker cookies. If your kitchen is warm or your dough feels very soft, a quick chill is a good idea.
Easy & Dreamy Red Velvet Cookies with Cream Cheese Frosting
Equipment
- Baking Sheets
- Parchment Paper or Silicone Mats
- Electric Mixer
- Large mixing bowl
- Medium Bowl
- Wire Rack
- Cookie Scoop
Ingredients
For the Cookies
- 1.75 cups all-purpose flour (lightly fluffed, spooned into measuring cup, then leveled)
- 0.25 cup unsweetened cocoa powder
- 0.5 teaspoon baking soda
- 0.25 teaspoon salt
- 8 tablespoons unsalted butter (½ cup), softened to room temperature
- 1 cup granulated sugar
- 1 large egg at room temperature
- 1 tablespoon eggnog or milk
- 1 tablespoon red food coloring (liquid) OR ¾ teaspoon red gel food coloring (or for a natural option, 2 teaspoons beet powder)
- 1.5 teaspoons vanilla extract
- 1 teaspoon peppermint extract (optional, for a festive holiday twist)
- 0.25 cup sour cream at room temperature
- sprinkles Optional, for decorating
For the Cream Cheese Frosting
- 4 ounces cream cheese softened to room temperature
- 2 tablespoons unsalted butter softened to room temperature
- 2 tablespoons eggnog or milk
- 1 teaspoon vanilla extract
- 2 cups powdered sugar
- 0.5 teaspoon ground cinnamon
- ground nutmeg A pinch of
- salt A pinch of
Instructions
- First, preheat your oven to 350°F (175°C). Line two baking sheets with parchment paper or silicone mats. To ensure the best texture, make sure your butter, egg, sour cream, and cream cheese are all softened to room temperature.
- In a medium bowl, gently whisk together the flour, cocoa powder, baking soda, and salt until well combined. Set this mixture aside for a moment.
- In a large mixing bowl, using an electric mixer with a paddle attachment, beat the softened butter and granulated sugar on medium-high speed. Continue for about 2 minutes until the mixture looks light and fluffy.
- Now, beat in the room temperature egg until fully incorporated. Then, add the 1 tablespoon of eggnog (or milk), your chosen red food coloring, vanilla extract, and the optional peppermint extract. Mix briefly until everything is just combined, about 30 seconds.
- Reduce your mixer speed to low. Gradually add about half of your dry flour mixture, followed by the sour cream, and then the remaining half of the flour mixture. Mix just until combined – be careful not to overmix the dough to keep your cookies tender!
- Using greased hands or a cookie scoop (about 2 tablespoons per cookie), roll the dough into smooth balls. Place them on your prepared baking sheets, leaving approximately 2 ½ inches between each cookie. Bake for 9-11 minutes, or until the edges are lightly set and the centers look barely cooked. They might seem soft, but they'll firm up beautifully! Let the cookies cool on the baking sheet for 5 minutes before carefully transferring them to a wire rack to cool completely.
- While the cookies are cooling, prepare the dreamy frosting! In a clean mixing bowl, beat the softened cream cheese, softened butter, 2 tablespoons of eggnog (or milk), and vanilla extract until the mixture is wonderfully smooth and creamy.
- Add the cinnamon and nutmeg to the frosting, then gradually beat in the powdered sugar until the frosting is light and fluffy. If your frosting seems too thick, you can add a tiny bit more eggnog; if it's too thin, a little more powdered sugar will do the trick!
- Once your cookies are completely cool, spread a generous dollop of cream cheese frosting on top of each. Feel free to add sprinkles or crushed candy canes for a fun, festive touch!
Notes
Nutrition Information (per cookie, estimated):
- Calories: ~190
- Total Carbohydrates: ~28g
- Net Carbohydrates: ~26g
- Fats: ~10g
- Protein: ~2g