Why You’ll Love These Festive Caramel Dream Cookies!
Prepare to fall head over heels for the ultimate holiday treat! These Festive Caramel Dream Cookies! aren’t just cookies; they’re miniature masterpieces of flavor and joy. Here are four irresistible reasons why they’ll become your new baking obsession:
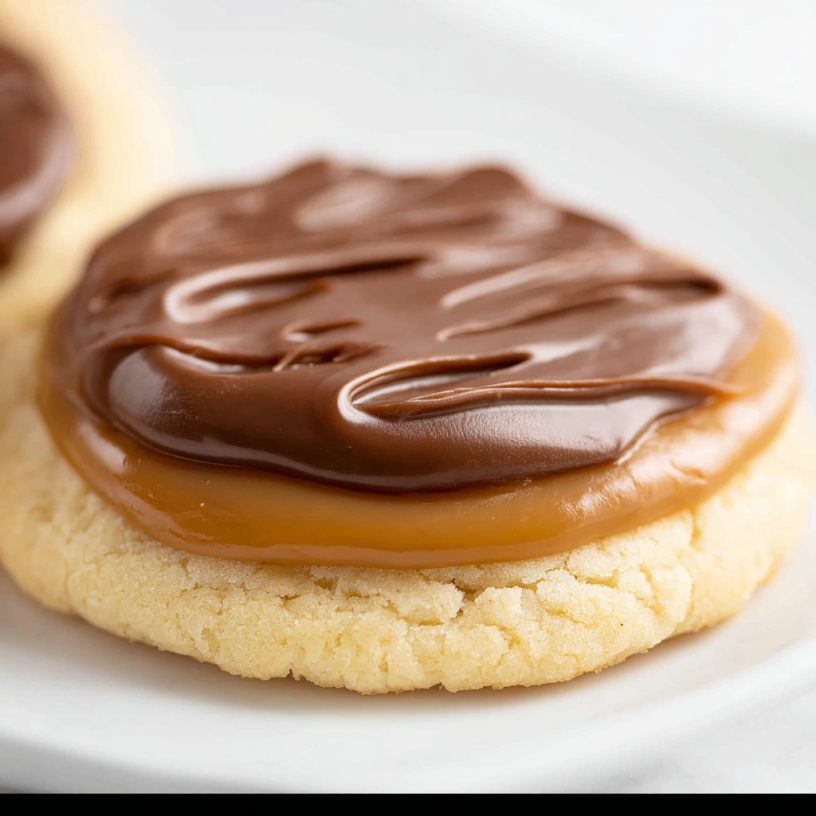
- Unforgettable Flavor Fusion: Imagine a soft, tender cookie base embracing a rich, gooey caramel layer, all crowned with decadent milk chocolate. Each bite is a symphony of sweet, salty, and utterly dreamy textures that will have everyone reaching for more!
- Holiday Magic, Made Easy: Designed with festive cheer in mind, this recipe simplifies gourmet baking. With clear, easy-to-follow steps, you’ll whip up these impressive treats without any holiday stress, leaving more time for merry-making.
- Perfectly Portable & Shareable: Whether you’re gifting them to neighbors, bringing them to a potluck, or setting them out for Santa, these cookies are robust enough for transport and beautiful enough to impress. They’re the quintessential sharing cookie!
- Homemade Goodness, Healthier Twist: While undeniably indulgent, making these treats at home means you control the ingredients. Plus, the joy of baking from scratch adds an extra sprinkle of love that no store-bought cookie can match.
Unwrap a Sweet Surprise: Introducing Festive Caramel Dream Cookies!
The scent of cinnamon and pine needles may signal the holidays, but for true connoisseurs of festive deliciousness, nothing quite announces the season like the aroma of freshly baked cookies! Get ready to sprinkle some serious magic into your kitchen with our incredible recipe for Festive Caramel Dream Cookies!. These aren’t just any cookies; they’re a blissful journey for your taste buds, transforming simple ingredients into a dazzling display of chewy, gooey, chocolatey perfection. Picture this: a buttery, soft cookie base, generously slathered with luscious, homemade salted caramel, and then drizzled with a rich cascade of milk chocolate. It’s the kind of cookie that evokes cozy evenings, twinkling lights, and the pure joy of sharing something truly special. So, tie on your apron, crank up the holiday tunes, and let’s bake some dreams together – because every celebration deserves a touch of caramel and chocolate enchantment!
Gather Your Sweet Arsenal: Ingredients for Festive Caramel Dream Cookies!
Ready to create some edible masterpieces? Here’s everything you’ll need to bring these delightful Festive Caramel Dream Cookies! to life. Make sure your butter and eggs are at room temperature for the best results – it makes all the difference in achieving that perfectly smooth dough!
For the Delightful Cookie Base:
- 🧈 ½ cup (1 stick) unsalted butter, softened
- 🧈 ½ cup shortening
- 🍚 1 cup granulated sugar
- 🥚 2 large eggs, room temperature
- 🍂 1 teaspoon vanilla extract
- 🌾 3 cups all-purpose flour
- 🌽 2 tablespoons cornstarch
- 🧂 1 teaspoon kosher salt
- ⬆️ ½ teaspoon baking powder
For the Luscious Caramel & Chocolate Topping:
- 🍬 11 ounces caramel bits or unwrapped caramel candies
- 🥛 2 tablespoons heavy cream
- 🤏 ¼ teaspoon kosher salt (for caramel)
- 🍫 1 cup milk chocolate chips
Your Journey to Cookie Bliss: Crafting Festive Caramel Dream Cookies!
Get ready to transform simple ingredients into edible art! Follow these detailed, step-by-step instructions to create your own batch of irresistible Festive Caramel Dream Cookies!. Take your time, enjoy the process, and get ready to be amazed!
For the Delightful Cookie Base:
- Preheat & Prepare: Kick things off by preheating your oven to a welcoming 325°F (160°C). Line a baking sheet with parchment paper – your future self will thank you for the super easy cleanup! Set it aside.
- Creamy Blend: Grab a spacious bowl and your trusty handheld mixer. Combine the softened butter, shortening, granulated sugar, room-temperature eggs, and that lovely fragrant vanilla extract. Beat until the mixture is beautifully smooth and wonderfully creamy. This is the foundation of your cookie dreams!
- Dry Mix Magic: Now, it’s time to gently introduce the dry team! Carefully fold in the all-purpose flour, cornstarch (our secret weapon for keeping these cookies perfectly soft and sturdy!), a pinch of kosher salt, and the baking powder. Mix with a light hand until all the dry ingredients are just incorporated. Remember, no overmixing allowed!
- Shape & Bake: It’s shaping time! Scoop out about ¼ cup of dough for each cookie (or use two 2-tablespoon scoops and combine them). Place these dough balls about 2 inches apart on your lined baking sheet. Next, lightly flatten each ball to about ¼ to ½-inch thickness using the bottom of a glass. This little trick ensures even baking and that classic, delightful shape.
- Golden Perfection: Pop your cookies into the preheated oven. Bake for a sweet 12 minutes if you adore a wonderfully softer cookie, or extend it to 14 minutes if you prefer a slightly firmer, chewier texture.
- Cool Down: Once they emerge, golden and fragrant, carefully remove the cookies from the oven and transfer them to a wire rack. Let them cool completely. Patience, young baker, is key before we add our luscious toppings!
For the Luscious Caramel & Chocolate Topping:
- Melt the Caramel: In a medium microwave-safe bowl, combine the caramel bits (or your unwrapped candies), the heavy cream, and that tiny ¼ teaspoon of kosher salt. Microwave in short 30-second bursts, stirring diligently after each interval, until the caramel transforms into a wonderfully smooth and pourable river of goodness.
- Caramel Drizzle: Once your cookies are cool, spoon about 1-2 tablespoons of the warm, melted caramel onto the center of each, spreading it gently towards the edges. If your caramel decides to firm up (it happens!), just pop it back into the microwave for a few seconds to regain its silky texture.
- Chocolate Finish: In another medium microwave-safe bowl, melt your milk chocolate chips. Use those same 30-second intervals, stirring after each, until the chocolate is glossy, smooth, and ready for its grand entrance.
- The Grand Finale: Allow the caramel to set slightly on the cookies. You can even pop them into the fridge for a brief chill to speed this up. Once the caramel is a bit firm, drizzle or spread about a tablespoon of the melted chocolate over each caramel-topped cookie. Create beautiful patterns or cover them completely – it’s your artistic moment!
- Enjoy: Let the chocolate set completely. Then, it’s time to indulge in these easy-to-make, healthier-at-home treats! They’re absolutely perfect for sharing the holiday joy or savoring as a special New Year’s delight. Happy baking!
Presenting Your Festive Caramel Dream Cookies! with Pizzazz!
You’ve baked up a batch of these glorious Festive Caramel Dream Cookies!, and now it’s time to show them off! Presentation is key to enhancing the enjoyment, whether you’re serving them at a gathering or gifting them. Here are some delightful ways to present and serve your edible masterpieces:
Creative Presentation Ideas:
- A Sprinkle of Sparkle: Before the chocolate fully sets, sprinkle a tiny pinch of flaky sea salt (for an extra gourmet touch!) or some festive edible glitter for holiday sparkle. Holiday-themed sprinkles in red, green, and gold also work wonders!
- Tiered Tray Temptation: Arrange your cookies artfully on a multi-tiered dessert stand. This elevates their visual appeal and makes them a stunning centerpiece for any party.
- Elegant Gift Boxes: Line small bakery boxes or clear cellophane bags with parchment paper. Stack 2-3 cookies, tie with a festive ribbon, and add a handmade tag. Perfect for gifting to friends, family, or teachers!
- Drizzle Diversity: For extra flair, try a contrasting chocolate drizzle! Melt a small amount of white chocolate or dark chocolate and drizzle it in thin lines over the milk chocolate layer once it’s set.
- Nutty Crunch: For those who love a bit of texture, lightly sprinkle finely chopped pecans or walnuts over the wet chocolate layer. This adds an elegant touch and a delightful crunch.
Delightful Serving Suggestions:
- Classic Comfort: Serve alongside a steaming mug of coffee, hot chocolate, or a glass of cold milk. It’s a timeless pairing that highlights the cookies’ comforting flavors.
- Dessert Platter Star: Include them on a holiday dessert platter with other treats like mini brownies, fruit tarts, and truffles for a varied and inviting spread.
- Ice Cream Extravaganza: Warm a cookie slightly and serve it with a scoop of vanilla bean ice cream. The warm cookie and cold ice cream create a heavenly contrast.
- After-Dinner Indulgence: Offer them as a sophisticated end to a festive meal, perhaps with a small glass of dessert wine or a cordial.
- Party Favors: Individually wrap them as sweet takeaways for guests at your holiday party – a delicious reminder of a joyful time.
Keeping the Dream Alive: Storing Your Festive Caramel Dream Cookies!
Once you’ve experienced the magic of these Festive Caramel Dream Cookies!, you’ll want to savor every last crumb (and maybe hide a few for yourself!). Proper storage ensures they remain fresh and delicious for as long as possible. Here’s how to keep them at their best:
How to Store:
- Airtight is Key: Always store your cookies in an airtight container. This is crucial for preventing them from drying out and keeping the caramel and chocolate fresh.
- Room Temperature (Short Term): For up to 3-5 days, cookies can be stored at cool room temperature, away from direct sunlight. Place a piece of parchment paper between layers if stacking to prevent the caramel and chocolate from sticking.
- Refrigeration (Longer Term): If you want to extend their freshness, especially in warmer climates or if your home is warm, store them in an airtight container in the refrigerator for up to a week. The caramel and chocolate will firm up nicely. Bring them to room temperature for about 15-20 minutes before serving for the best texture.
- Freezing Dough: You can prepare the cookie dough balls ahead of time and freeze them for up to 2 months. Place them on a baking sheet to freeze until solid, then transfer to a freezer-safe bag or container. Bake from frozen, adding a couple of minutes to the baking time.
- Freezing Baked Cookies: For longer storage of baked cookies, allow them to cool completely, then freeze them on a baking sheet until solid. Transfer the frozen cookies to a freezer-safe airtight container or bag, separating layers with parchment paper. They will last for 1-2 months. Thaw at room temperature or gently warm for a few seconds in the microwave.
How Long Do They Last?
- At Room Temperature: 3-5 days
- In the Refrigerator: Up to 7 days
- In the Freezer (Baked): 1-2 months
- In the Freezer (Dough): Up to 2 months
No matter how you store them, these Festive Caramel Dream Cookies! are sure to bring joy whenever you decide to enjoy them!
Your Burning Questions Answered: Festive Caramel Dream Cookies! FAQs
Got questions about these delightful Festive Caramel Dream Cookies!? We’ve got answers! Check out our frequently asked questions to ensure your baking experience is as smooth and sweet as the caramel itself.
- 1. Can I make the cookie dough ahead of time?
- Absolutely! You can prepare the cookie dough and store it wrapped tightly in plastic wrap in the refrigerator for up to 2-3 days. When ready to bake, let it sit at room temperature for about 15-20 minutes to soften slightly before scooping and shaping.
- 2. What if my caramel hardens while I’m trying to drizzle it?
- This is a common occurrence! Caramel can firm up quickly as it cools. Simply pop the bowl back into the microwave for another 10-15 seconds and stir until it reaches a pourable consistency again. Don’t overheat it!
- 3. Can I use a different type of chocolate for the topping?
- Yes, feel free to customize! Dark chocolate chips would offer a richer, less sweet contrast, while white chocolate chips could create a lovely visual and a different flavor profile. Experiment to find your favorite!
- 4. How do I know when the cookies are done baking?
- The edges should be lightly golden, and the centers should still look slightly soft. They will continue to set as they cool on the wire rack. For a softer cookie, stick closer to 12 minutes; for firmer, go for 14 minutes.
- 5. Why is cornstarch used in this recipe?
- Cornstarch is our secret ingredient for super soft and tender cookies! It helps to prevent gluten development, resulting in a wonderfully chewy texture while also adding a bit of structure to these larger cookies.
- 6. Can I freeze these baked Festive Caramel Dream Cookies!?
- Yes, they freeze beautifully! Once the caramel and chocolate toppings are fully set, place the cookies in a single layer on a baking sheet and freeze until solid. Then transfer them to an airtight freezer-safe container or bag, with parchment paper between layers, for up to 1-2 months. Thaw at room temperature before enjoying.
- 7. What’s the best way to unwrap caramel candies if I don’t have bits?
- If using individually wrapped caramels, unwrap them while they are cold. This makes them less sticky and easier to handle. You can even put them in the freezer for 10-15 minutes beforehand.
- 8. Can I skip the shortening in the cookie base?
- While shortening helps create a wonderfully soft and tender crumb and prevents spreading, you could substitute it with an equal amount of butter. However, the texture of the cookie might be slightly different – potentially less tender and a bit more prone to spreading. For the intended “dream” texture, we recommend using shortening!
- 9. Are there any nut-free alternatives for toppings if I want to add crunch?
- Absolutely! Instead of nuts, consider sprinkling mini M&Ms, toffee bits, crushed pretzel pieces (for a sweet and salty kick!), or even more festive sprinkles on the wet chocolate layer. Always check labels to ensure ingredients are certified nut-free if allergies are a concern.
- 10. How do I achieve a perfect chocolate drizzle?
- For a controlled drizzle, transfer the melted chocolate to a small piping bag or a Ziploc bag, snip a tiny corner off, and drizzle back and forth over the caramel. Alternatively, use a fork or a small spoon for a more rustic, artistic look.
“`
Festive Caramel Dream Cookies! ✨
Equipment
- Baking Sheet
- Parchment Paper
- Handheld Mixer
- Microwave-safe bowls
- Wire Rack
Ingredients
For the Delightful Cookie Base
- 0.5 cup unsalted butter softened
- 0.5 cup shortening
- 1 cup granulated sugar
- 2 large eggs room temperature
- 1 tsp vanilla extract
- 3 cups all-purpose flour
- 2 tbsp cornstarch
- 1 tsp kosher salt
- 0.5 tsp baking powder
For the Luscious Caramel & Chocolate Topping
- 11 ounces caramel bits or unwrapped caramel candies
- 2 tbsp heavy cream
- 0.25 tsp kosher salt for caramel
- 1 cup milk chocolate chips
Instructions
- Preheat & Prepare: Begin by preheating your oven to a gentle 325°F (160°C). Line a baking sheet with parchment paper for effortless cleanup and set it aside.
- Creamy Blend: In a spacious bowl, use a handheld mixer to combine the softened butter, shortening, granulated sugar, room-temperature eggs, and fragrant vanilla extract until the mixture is beautifully smooth and creamy. This forms the perfect foundation for your cookies!
- Dry Mix Magic: Gently fold in the all-purpose flour, cornstarch (our secret for keeping these large cookies wonderfully soft yet sturdy), a pinch of kosher salt, and baking powder. Mix carefully until all the dry ingredients are just incorporated – be sure not to overmix!
- Shape & Bake: Scoop out about ¼ cup of dough for each cookie (or use two 2-tablespoon scoops, combining them into one). Place these dough balls about 2 inches apart on your lined baking sheet. Lightly flatten each ball to about ¼ to ½-inch thickness using the bottom of a glass. This ensures even baking and that classic shape.
- Golden Perfection: Bake for 12 minutes for a delightfully softer cookie, or extend to 14 minutes if you prefer a slightly firmer texture.
- Cool Down: Once baked, carefully remove the cookies from the oven and transfer them to a wire rack to cool completely. Patience is key before we add our luscious toppings!
- Melt the Caramel: In a medium microwave-safe bowl, combine the caramel bits (or unwrapped candies), heavy cream, and the ¼ teaspoon kosher salt. Microwave in short 30-second increments, stirring thoroughly after each, until the caramel is wonderfully smooth and pourable.
- Caramel Drizzle: Spoon about 1-2 tablespoons of the warm, melted caramel onto each cooled cookie, spreading it gently. If your caramel starts to firm up, simply pop it back into the microwave for a few seconds to soften it again.
- Chocolate Finish: In another medium microwave-safe bowl, melt the milk chocolate chips in similar 30-second intervals, stirring until the chocolate is glossy and smooth.
- The Grand Finale: Once the caramel has had a chance to set slightly (you can chill the cookies briefly to speed this up), drizzle or spread about a tablespoon of the melted chocolate over each caramel-topped cookie.
- Enjoy: Allow the chocolate to set, then indulge in these easy-to-make, healthier-at-home treats! They're perfect for sharing the holiday joy or savoring as a special New Year's delight.
Notes
Calories: 436 kcal
Total Carbs: 60g
Net Carbs: 55g
Fats: 30g
Protein: 6g