The holidays are here, and with them comes the joy of delicious treats! But let’s be honest, who wants to spend hours slaving over a hot oven when there’s so much festive fun to be had? Enter your new best friend: the Festive & Easy No-Bake Oreo Dream Cheesecake! This show-stopping dessert is not only a breeze to make but also packed with irresistible Oreo goodness. Get ready to delight your taste buds and impress your guests with minimal effort.
Why You’ll Love This Recipe
- No Oven, No Stress! Seriously, put away your oven mitts! This cheesecake requires zero baking, making it perfect for busy holiday schedules or when your oven is already occupied with other festive dishes. It’s the ultimate stress-free dessert solution.
- Oreo Overload Perfection: If you’re an Oreo lover, prepare for pure bliss. From the crumbly crust to the creamy filling studded with cookie pieces, and even a secret ingredient from the Oreo cream itself, this recipe is a tribute to everyone’s favorite sandwich cookie.
- Dreamy, Velvety Texture: Imagine a silky-smooth cream cheese filling that practically melts in your mouth, contrasted with the satisfying crunch of an Oreo crust. It’s a symphony of textures that will have everyone asking for a second slice.
- Festive & Fully Customizable: While it’s already a showstopper, this cheesecake is a fantastic canvas for your creativity. Dress it up with seasonal garnishes to match any holiday theme, making it truly a “dream” come true for any celebration.
Ingredients
- 🍪 24 Oreo cookies (filling gently removed and set aside)
- 🧈 6 tablespoons (85g) melted butter
- 🧀 16 ounces (454g) cream cheese (softened to room temperature)
- 🍚 ½ cup (100g) granulated sugar
- 💧 1 teaspoon pure vanilla extract
- 🥛 2 ½ cups (595g) cold heavy whipping cream
- 🌬️ 1 ½ cups (188g) confectioners’ sugar (powdered sugar)
- ⚫ 15 additional Oreo cookies, crushed (about 1 cup, divided for filling and garnish)
- 🍫 Hot fudge (optional, for a festive drizzle)
Detailed Step-by-Step Directions
Making the Dreamy Oreo Crust:
- Prep the Cookies: Gently separate the creamy filling from 24 Oreo cookies. Set the cream aside in a small bowl for later – it’s our secret ingredient! Place the chocolate cookie wafers into a food processor and pulse until they become fine crumbs, like sandy soil. This should give you about 1 ½ cups of crumbs.
- Combine & Press: Transfer your beautiful cookie crumbs to a mixing bowl. Pour in the melted butter and stir it all together until every crumb is perfectly coated. This helps our crust become wonderfully firm and hold its shape.
- Form the Base: Press this buttery crumb mixture firmly into the bottom of a 9-inch springform pan. Use the bottom of a drinking glass to get a nice, even layer. Pop it into the fridge to chill while you craft the exquisite filling.
Crafting the Velvety Filling:
- Creamy Base: In a large bowl, beat the softened cream cheese with a hand mixer until it’s wonderfully smooth and fluffy. Add the granulated sugar, vanilla extract, and that reserved Oreo cream filling. Beat until everything is well combined and lump-free.
- Whip It Up: In a separate, clean bowl, pour in the cold heavy whipping cream. Using your hand mixer, beat it until it begins to thicken. Gradually add the confectioners’ sugar and continue beating until lovely stiff peaks form – this means your cream will hold its shape beautifully, ready for blending.
- Fold in the Magic: Gently fold about 2 cups of your freshly whipped cream and the majority of the additional crushed Oreos (remember to save a little for a dazzling garnish!) into the cream cheese mixture. Be gentle to keep that airy, light texture!
- Assemble & Chill: Pour this delightful filling over your chilled Oreo crust in the springform pan. Smooth the top with a spatula for an elegant finish.
- The Patience Game: Now comes the easiest part: chilling! Place your cheesecake in the refrigerator for at least 3-4 hours, but for the ultimate slice-and-serve perfection, let it chill overnight. This is key for a firm, delicious cheesecake that’s easy to cut.
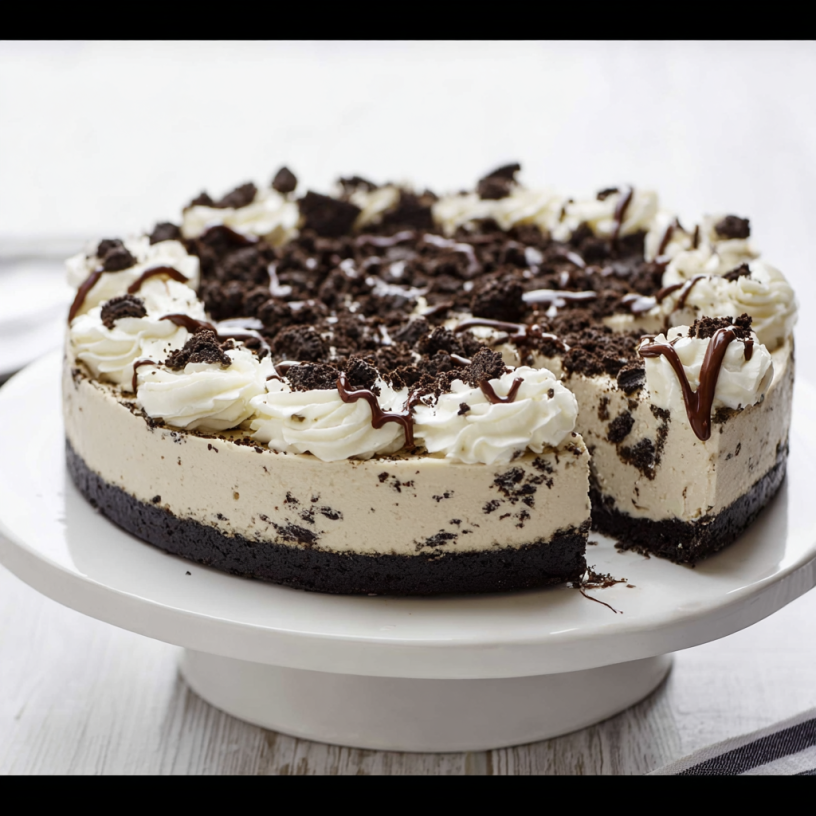
- Festive Finish: Before serving, carefully remove the cheesecake from the pan. Garnish with the remaining whipped cream, a sprinkle of the reserved crushed Oreos, and a delightful drizzle of hot fudge if you wish. Slice and share this joyful, easy treat!
Presentation & Serving Ideas for Your Dream Cheesecake
Once you’ve crafted your incredible Festive & Easy No-Bake Oreo Dream Cheesecake, the fun continues with presentation! Here are some fantastic ways to serve and garnish your masterpiece, ensuring it truly stands out on your holiday table:
- Classic & Elegant: Adorn the top with swirls of the remaining whipped cream, a generous sprinkle of crushed Oreos, and a decadent drizzle of hot fudge. Simple, yet undeniably impressive!
- Holiday Sparkle: For an extra festive touch, add fresh cranberries or pomegranate seeds around the base, a few sprigs of fresh mint, or even a light dusting of edible glitter. Crushed mini candy canes can also add a delightful seasonal crunch.
- Individual Delights: Instead of a large cheesecake, press the crust into the bottom of small dessert jars or clear glasses. Layer the filling on top, chill, and then garnish each individual serving. Perfect for parties and easy portion control!
- Sauce Sensations: Offer a variety of dessert sauces on the side. Beyond hot fudge, consider a rich caramel sauce, a tangy raspberry coulis, or a vibrant strawberry sauce to complement the Oreo flavor.
- Pairing Perfection: Serve slices alongside a steaming cup of coffee, rich hot chocolate, or a cold glass of milk for the ultimate comforting dessert experience.
How to Store Your Dream Cheesecake
Keeping your Festive & Easy No-Bake Oreo Dream Cheesecake fresh is, well, a dream! After all the effort (minimal as it was!), you want to enjoy every last bite. Here’s how to store it:
- In the Refrigerator: This cheesecake must be stored in the refrigerator due to its dairy-rich ingredients. Cover the springform pan tightly with plastic wrap or transfer leftover slices to an airtight container. It will stay fresh and delicious for up to 3-5 days.
- Freezing for Later: Yes, you can freeze this delightful creation! For best results, allow the cheesecake to chill completely in the refrigerator first. Then, remove it from the springform pan and place it on a freezer-safe plate or cardboard round. Freeze until solid (about 2-3 hours), then wrap it tightly in several layers of plastic wrap, followed by aluminum foil. It can be frozen for up to 1 month.
- Thawing Frozen Cheesecake: When you’re ready to enjoy, simply transfer the frozen cheesecake to the refrigerator and let it thaw overnight. Unwrap it only after it has fully thawed to prevent condensation from affecting the crust.
FAQs
Got questions about whipping up your perfect Festive & Easy No-Bake Oreo Dream Cheesecake? We’ve got answers!
- Can I use store-bought whipped cream instead of making my own?
While fresh whipped cream provides the best texture and flavor, you can substitute about 3 ½ to 4 cups of thawed frozen whipped topping (like Cool Whip) for the heavy whipping cream and confectioners’ sugar. Just fold it in as directed. - How do I prevent a soggy crust?
Ensuring your crust is firmly pressed and adequately chilled is key. The melted butter helps bind the crumbs, and chilling solidifies it, creating a barrier against the moisture from the filling. - Can I make this cheesecake ahead of time?
Absolutely! This is an ideal make-ahead dessert. It needs a minimum of 3-4 hours to chill, but chilling it overnight (8+ hours) yields the best texture and makes it much easier to slice neatly. - What if I don’t have a food processor for the crumbs?
No problem! Place the Oreo cookies in a large Ziploc bag, seal it, and crush them with a rolling pin or the bottom of a heavy pan until fine crumbs are formed. - Can I use different types of cookies for the crust?
Yes, you can! While Oreos are classic, feel free to experiment with other crunchy cookies like graham crackers, chocolate chip cookies, or even shortbread. Adjust the butter if needed to achieve a “wet sand” consistency. - Is this recipe gluten-free?
As written, no, it is not gluten-free due to the Oreos. However, you can make it gluten-free by using gluten-free Oreo-style sandwich cookies. - What’s the best way to remove the cheesecake from the springform pan?
After chilling, carefully release the latch on the springform pan. If the sides seem stuck, you can run a thin, warm knife around the edge before releasing the latch. - Why is my cream cheese mixture lumpy?
This usually happens if your cream cheese isn’t fully softened to room temperature. Ensure it’s very soft before beating to achieve a smooth, lump-free base. - Can I add other mix-ins to the filling?
Definitely! Chocolate chips, mini marshmallows, chopped candy bars, or even a swirl of caramel or peanut butter can be gently folded into the filling along with the crushed Oreos. - How many Oreos are in a standard package?
A standard family-size package of Oreos typically contains about 35-39 cookies, so you’ll have plenty for this recipe and maybe a few for snacking!
Festive & Easy No-Bake Oreo Dream Cheesecake!
Equipment
- 9-inch Springform Pan
- Food Processor
- Hand Mixer
- Mixing Bowls
- Spatula
- Drinking glass (for crust)
Ingredients
Dreamy Oreo Crust
- 24 Oreo cookies (filling gently removed and set aside)
- 6 tablespoons melted butter (85g)
Velvety Filling
- 16 ounces cream cheese (454g, softened to room temperature)
- 1/2 cup granulated sugar (100g)
- 1 teaspoon pure vanilla extract
- 2 1/2 cups cold heavy whipping cream (595g)
- 1 1/2 cups confectioners' sugar (188g, powdered sugar)
- 15 additional Oreo cookies crushed (about 1 cup, divided for filling and garnish)
- Hot fudge (optional, for a festive drizzle)
Instructions
Making the Dreamy Oreo Crust:
- Prep the Cookies: Gently separate the creamy filling from 24 Oreo cookies. Set the cream aside in a small bowl for later – it's our secret ingredient! Place the chocolate cookie wafers into a food processor and pulse until they become fine crumbs, like sandy soil. This should give you about 1 ½ cups of crumbs.
- Combine & Press: Transfer your beautiful cookie crumbs to a mixing bowl. Pour in the melted butter and stir it all together until every crumb is perfectly coated. This helps our crust become wonderfully firm and hold its shape.
- Form the Base: Press this buttery crumb mixture firmly into the bottom of a 9-inch springform pan. Use the bottom of a drinking glass to get a nice, even layer. Pop it into the fridge to chill while you craft the exquisite filling.
Crafting the Velvety Filling:
- Creamy Base: In a large bowl, beat the softened cream cheese with a hand mixer until it's wonderfully smooth and fluffy. Add the granulated sugar, vanilla extract, and that reserved Oreo cream filling. Beat until everything is well combined and lump-free.
- Whip It Up: In a separate, clean bowl, pour in the cold heavy whipping cream. Using your hand mixer, beat it until it begins to thicken. Gradually add the confectioners' sugar and continue beating until lovely stiff peaks form – this means your cream will hold its shape beautifully, ready for blending.
- Fold in the Magic: Gently fold about 2 cups of your freshly whipped cream and the majority of the additional crushed Oreos (remember to save a little for a dazzling garnish!) into the cream cheese mixture. Be gentle to keep that airy, light texture!
- Assemble & Chill: Pour this delightful filling over your chilled Oreo crust in the springform pan. Smooth the top with a spatula for an elegant finish.
- The Patience Game: Now comes the easiest part: chilling! Place your cheesecake in the refrigerator for at least 3-4 hours, but for the ultimate slice-and-serve perfection, let it chill overnight. This is key for a firm, delicious cheesecake that's easy to cut.
- Festive Finish: Before serving, carefully remove the cheesecake from the pan. Garnish with the remaining whipped cream, a sprinkle of the reserved crushed Oreos, and a delightful drizzle of hot fudge if you wish. Slice and share this joyful, easy treat!