Tired of the same old holiday cookie rotation? Ready to add a sprinkle of unexpected joy and a dash of delightful chaos to your festive baking? Get ready to dive into the wonderful world of our Festive Fun Kitchen Sink Cookies! These aren’t just cookies; they’re a celebration in every bite, packed with everything delicious you could imagine. Forget stress, embrace the fun, and let your taste buds embark on a holiday adventure that’s sure to become a new tradition.
Why You’ll Love These Festive Fun Kitchen Sink Cookies!
There are countless reasons to fall head over heels for these holiday masterpieces, but here are four compelling ones that make them an absolute must-bake this season:
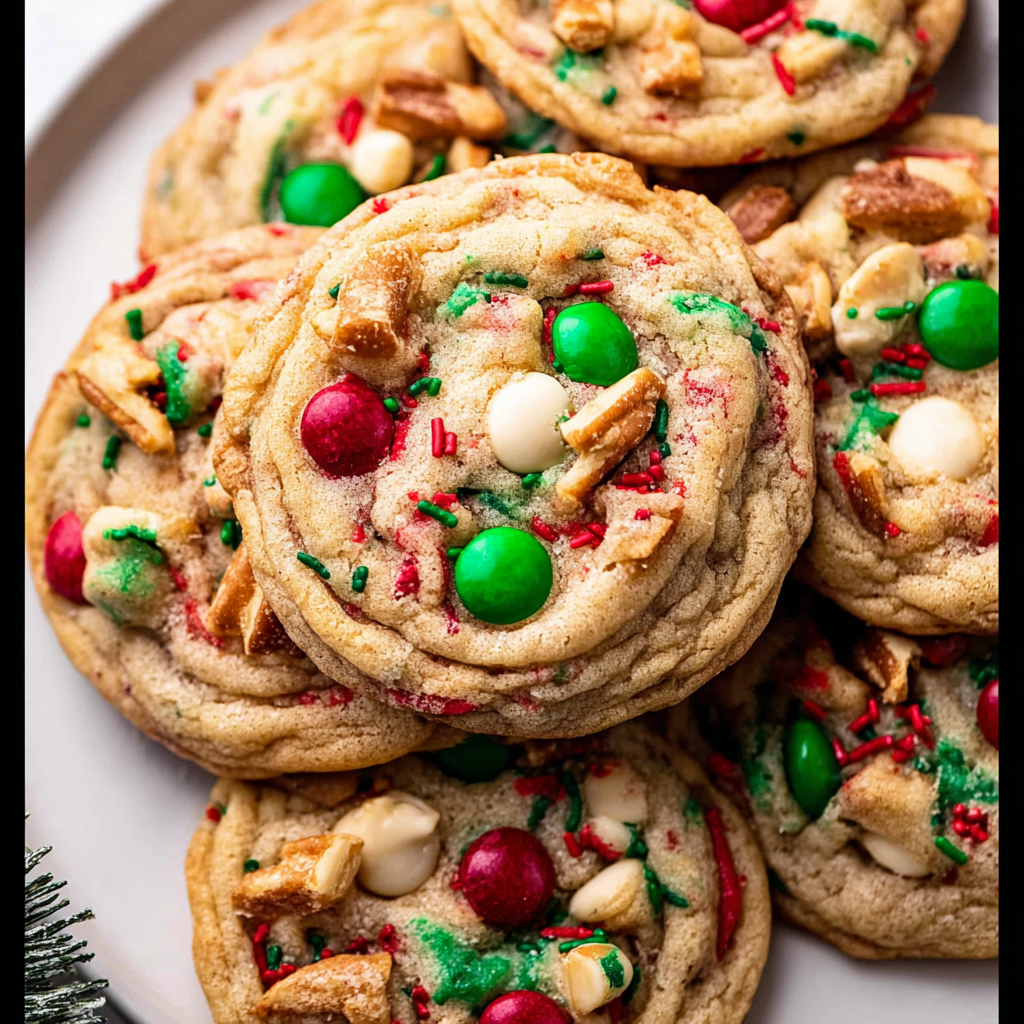
- Effortlessly Festive & Fun: Who says holiday baking has to be complicated? These Festive Fun Kitchen Sink Cookies! are a breeze to whip up, allowing you more time to enjoy the season and less time stressing in the kitchen. Plus, the vibrant red and green M&M’s and sprinkles practically scream “holiday cheer!”
- A Symphony of Flavors & Textures: Prepare your palate for an exciting journey! With the perfect balance of sweet chocolate, salty pretzels and potato chips, and rich cookie dough, every bite offers a delightful crunch, a chewy center, and a burst of flavor that will keep you coming back for more. It’s the ultimate sweet-and-salty treat!
- Customizable Creativity: While our recipe is a winner, the “kitchen sink” nature means you can easily adapt it! Have extra holiday candies? Want to swap in different chocolate? Go for it! These cookies are a playground for your culinary imagination, making each batch uniquely yours.
- Unforgettable Crowd-Pleasers: Planning a holiday party, a cookie exchange, or just a cozy night in? These cookies are guaranteed to be a massive hit. Their unique appearance and incredible taste make them a standout dessert that will have everyone asking for the recipe. Get ready for compliments galore!
INGREDIENTS
- 3/4 cup salted butter, softened
- 3/4 cup light brown sugar, packed
- 1/4 cup granulated white sugar
- 2 large egg yolks, at room temperature
- 2 teaspoons vanilla bean paste or extract
- 1 1/2 cups all-purpose flour, spooned and leveled
- 1/2 teaspoon baking powder
- 1/2 teaspoon baking soda
- 1/2 teaspoon salt
- 1/2 cup red and green M&M’s
- 1/3 cup white chocolate chips
- 1/3 cup crushed pretzel pieces
- 1/3 cup crushed potato chip pieces
- 2 tablespoons red and green jimmies (sprinkles)
INSTRUCTIONS
Making these delightful Festive Fun Kitchen Sink Cookies! is truly a breeze! Just follow these simple steps for a truly festive treat that’s easy to whip up and sure to impress.
- Get Ready: First things first, preheat your oven to 350°F (175°C). While it’s heating up, line two baking sheets with parchment paper. This little trick makes cleanup super easy, so you can focus on enjoying your delicious cookies!
- Cream It Up: In a large mixing bowl, lovingly combine the softened butter, light brown sugar, and granulated sugar. Grab your electric mixer and beat them together for about 2 minutes until the mixture transforms into a beautifully light and fluffy cloud.
- Add Wet Ingredients: Now, stir in the two happy egg yolks and the fragrant vanilla extract or paste. Keep that mixer going on medium speed for another 2 minutes until the mixture looks wonderfully pale and even fluffier. This step is key for achieving that perfect, melt-in-your-mouth texture!
- Mix Dry Ingredients: Gently add the all-purpose flour, baking powder, baking soda, and salt to the bowl. Mix until they are just combined, being super careful not to overmix the dough. Overmixing is the enemy of tender cookies!
- Fold in the Fun: Here comes the most exciting part! Add the vibrant M&M’s, creamy white chocolate chips, crunchy crushed pretzel pieces, savory potato chip pieces, and those cheerful sprinkles. With a spatula, gently fold them into the dough until everything is evenly distributed throughout. Every bite should be a surprise!
- Shape & Bake: Scoop the dough into 20 equal-sized balls. Arrange them about 2 inches apart on your prepared baking sheets, giving them space to spread their holiday cheer. For an extra pretty touch, feel free to press a few extra mix-ins onto the top of each cookie before they hit the heat! Bake for 10-12 minutes. Aim for 10 minutes if you prefer chewier centers, or 12 minutes for crispier edges.
- Cool Down: Once baked to golden perfection, let the cookies cool on the baking sheets for 5 minutes. This helps them set up. Then, carefully transfer them to a wire rack to cool completely for another 10 minutes. Now, enjoy your perfectly crafted holiday treats – you’ve earned it!
- Store: Keep any leftover Festive Fun Kitchen Sink Cookies! fresh and delicious in an airtight container for up to 3 days. But honestly, good luck having any last that long!
Presentation & Serving Ideas for Your Festive Fun Kitchen Sink Cookies!
These Festive Fun Kitchen Sink Cookies! are already a visual delight, but with a few extra touches, you can elevate their presentation and make serving them an experience in itself. Here are some fun ways to showcase and enjoy your delicious creations:
- The Grand Cookie Platter: Arrange these vibrant cookies on a festive holiday platter alongside other classic Christmas treats. Their unique mix-ins and colorful appearance will make them a standout centerpiece. Add a few sprigs of fresh rosemary or cranberries for a pop of extra holiday cheer!
- Warm & Wonderful: Serve your cookies slightly warm straight from the oven (after their initial cooling period, of course!). Pair them with a scoop of creamy vanilla bean ice cream for an indulgent dessert that contrasts beautifully with their sweet and salty notes. A drizzle of caramel or chocolate sauce wouldn’t hurt either!
- Holiday Beverage Companions: What goes better with a holiday cookie than a festive drink? Enjoy these cookies with a tall glass of cold milk, a steaming mug of homemade hot chocolate, or a rich, spiced eggnog. They’re the perfect partner for cozy evenings.
- Gift-Ready Goodness: These make incredible homemade gifts! Stack a few Festive Fun Kitchen Sink Cookies! in clear cellophane bags, tie them with a pretty ribbon, and attach a small gift tag. They’re perfect for neighbors, teachers, or as hostess gifts during holiday gatherings.
- Dust of Magic: For an extra touch of elegance (and more holiday sparkle!), lightly dust the cooled cookies with a sprinkle of powdered sugar just before serving. It gives them a delicate, snow-kissed look that is simply enchanting.
Storing Your Festive Fun Kitchen Sink Cookies!
While these Festive Fun Kitchen Sink Cookies! are so delicious they rarely last long, it’s always good to know the best way to store them to maintain their freshness!
- Airtight at Room Temperature: Once completely cooled, store your baked cookies in an airtight container at room temperature. They will stay wonderfully fresh and delicious for up to 3 days. Placing a slice of plain bread in the container can help keep them soft, as the cookies will absorb moisture from the bread.
- Freezing Baked Cookies: Want to enjoy these festive treats even longer? Baked cookies freeze beautifully! Place cooled cookies in a single layer on a baking sheet to flash freeze for about an hour. Once solid, transfer them to a freezer-safe airtight container or a heavy-duty freezer bag, separating layers with parchment paper. They will keep well for up to 3 months. Thaw them at room temperature for a few hours, or pop them in the microwave for a few seconds for a warm, chewy treat.
- Freezing Cookie Dough: You can also prepare the dough ahead of time and freeze it! Roll the dough into balls as instructed, then place them on a parchment-lined baking sheet and flash freeze until firm. Transfer the frozen dough balls to a freezer-safe bag or container. They can be stored for up to 3 months. When you’re ready to bake, place the frozen dough balls on a prepared baking sheet and bake as usual, adding an extra 1-3 minutes to the baking time.
FAQs About Festive Fun Kitchen Sink Cookies!
-
Q: What makes them “Kitchen Sink” cookies?
A: The name comes from the idea of throwing “everything but the kitchen sink” into the dough! It’s a delightful mix of sweet, salty, and crunchy ingredients that creates a unique flavor profile. -
Q: Can I customize the mix-ins in my Festive Fun Kitchen Sink Cookies?
A: Absolutely! That’s the beauty of “kitchen sink” cookies. Feel free to swap M&M’s for other candies, add different nuts, dried fruit, or even other kinds of chocolate chips. Just keep the total volume of mix-ins similar. -
Q: Why does this recipe use only egg yolks instead of whole eggs?
A: Using only egg yolks contributes to a richer, chewier cookie. The fat from the yolk adds moisture and tenderness, while omitting the whites helps prevent a cake-like texture. -
Q: Can I make the dough for these Festive Fun Kitchen Sink Cookies ahead of time?
A: Yes! You can prepare the dough and refrigerate it, tightly covered, for up to 2-3 days. Bring it closer to room temperature before scooping and baking for best results, or refer to our storage section for freezing instructions. -
Q: How do I prevent my cookies from spreading too much?
A: Ensure your butter isn’t too soft (just softened, not melted). Spooning and leveling your flour is crucial, and chilling the dough for 30 minutes before baking can also help. Make sure your oven is accurately preheated. -
Q: What if I don’t have vanilla bean paste?
A: No problem at all! Vanilla extract works perfectly fine as a direct substitute. Vanilla bean paste offers tiny specks of vanilla bean for visual appeal and a slightly more intense flavor, but extract is a great alternative. -
Q: How can I make these cookies even more festive?
A: For extra holiday cheer, press a few additional red and green M&M’s and sprinkles onto the top of each cookie ball just before baking. This ensures a vibrant, colorful display once they come out of the oven. -
Q: Are these Festive Fun Kitchen Sink Cookies gluten-free?
A: As written, no, as they contain all-purpose flour, pretzels, and potato chips that typically contain gluten. However, you could experiment with a 1:1 gluten-free flour blend and gluten-free pretzels and chips. -
Q: Can I reduce the amount of sugar in the recipe?
A: While you can try to slightly reduce the sugar, it plays a critical role in the cookie’s texture, moistness, and spread. Significant reductions might alter the final product, making them less chewy or more crumbly. -
Q: What’s the best way to crush the pretzels and potato chips?
A: Place them in a large Ziploc bag, seal it, and then use a rolling pin or the bottom of a heavy pan to crush them into small pieces. You want a mix of fine crumbs and slightly larger bits for texture.
Festive Fun Kitchen Sink Cookies! ✨
Equipment
- Electric Mixer
- Baking Sheets
- Parchment Paper
- Spatula
- Wire Rack
Ingredients
Wet Ingredients
- 3/4 cup salted butter softened
- 3/4 cup light brown sugar packed
- 1/4 cup granulated white sugar
- 2 large egg yolks at room temperature
- 2 teaspoons vanilla bean paste or extract
Dry Ingredients
- 1 1/2 cups all-purpose flour spooned and leveled
- 1/2 teaspoon baking powder
- 1/2 teaspoon baking soda
- 1/2 teaspoon salt
Mix-ins
- 1/2 cup red and green M&M’s
- 1/3 cup white chocolate chips
- 1/3 cup crushed pretzel pieces
- 1/3 cup crushed potato chip pieces
- 2 tablespoons red and green jimmies (sprinkles)
Instructions
- Preheat your oven to 350°F (175°C). Line two baking sheets with parchment paper – this makes cleanup super easy!
- In a large mixing bowl, combine the softened butter, light brown sugar, and granulated sugar. Using an electric mixer, beat them together for about 2 minutes until the mixture is beautifully light and fluffy.
- Stir in the egg yolks and vanilla extract or paste. Continue mixing on medium speed for another 2 minutes until the mixture looks pale and even fluffier. This step is key for a great texture!
- Gently add the flour, baking powder, baking soda, and salt to the bowl. Mix until just combined, being careful not to overmix the dough.
- Now for the exciting part! Add the M&M’s, white chocolate chips, crushed pretzel pieces, potato chip pieces, and sprinkles. Gently fold them into the dough with a spatula until everything is evenly distributed.
- Scoop the dough into 20 equal-sized balls. Arrange them about 2 inches apart on your prepared baking sheets. For an extra pretty touch, feel free to press a few extra mix-ins onto the top of each cookie before baking! Bake for 10-12 minutes (10 minutes for chewier centers, or 12 minutes for crispier edges).
- Once baked, let the cookies cool on the baking sheets for 5 minutes. Then, carefully transfer them to a wire rack to cool completely for another 10 minutes. Enjoy your perfectly crafted holiday treats!
Notes
Calories: 230
Total Carbs: 32g
Net Carbs: 31g
Fats: 13g
Protein: 2.5g