Why You’ll Love This Recipe
Get ready to fall head over heels for this Festive Peppermint Dream Cake! Here are four dazzling reasons why it’ll become your new holiday favorite:
- Effortlessly Easy: Thanks to a clever box mix hack, this cake comes together in a flash, leaving you more time for festive fun and less time stressing in the kitchen.
- Unforgettable Flavor: Each bite is a cool, creamy blast of peppermint perfection, balanced with a moist, tender cake that screams “holidays!”
- Customizable & “Healthy-ish”: With options to reduce sugar and fat, you can tailor this delicious treat to fit your lifestyle without sacrificing flavor.
- Crowd-Pleasing Magnificence: Serving a generous 18, this show-stopping cake is perfect for your biggest holiday gatherings, guaranteeing smiles all around.
Unwrap the Magic of the Festive Peppermint Dream Cake!
Picture this: Twinkling lights, cozy sweaters, and the sweet aroma of holiday baking filling your home. What’s missing? A show-stopping dessert that’s as delightful to make as it is to devour! Say hello to the Festive Peppermint Dream Cake – your new secret weapon for holiday cheer. This isn’t just any cake; it’s a winter wonderland of flavor, bursting with cool peppermint and wrapped in a cloud of fluffy frosting. Forget complicated recipes and endless clean-up. We’re talking easy-peasy, incredibly delicious, and utterly irresistible. Whether you’re a baking pro or a kitchen newbie, this recipe promises a perfect, festive treat every time. So grab your apron, crank up the carols, and let’s bake some holiday magic!
Gather Your Sparkly Ingredients
Get ready to transform simple ingredients into a holiday masterpiece!
For the Moist Peppermint Cake:
- 🎂 1 (15.25 ounce) box white cake mix (consider a natural or reduced-sugar option for a healthier touch!)
- 💧 ½ cup water
- 🥚 3 large eggs
- 🫒 ¼ cup vegetable oil (or unsweetened applesauce for a lighter alternative)
- 🌿 ½ cup peppermint flavored syrup (sugar-free variant can reduce calories)
For the Dreamy Peppermint Buttercream:
- 🧈 ½ cup unsalted butter, softened (1 stick)
- 🍚 3 ¾ cups powdered sugar (feel free to slightly reduce for less sweetness, or use a sugar alternative)
- 🥛 3-4 tablespoons milk or water (start with less, add more as needed)
- 🍃 2 teaspoons pure peppermint extract
For the Festive Garnish:
- 🍭 Crushed peppermint candy canes (for garnish, optional)
Bake Your Way to a Peppermint Wonderland!
Follow these simple steps to create your spectacular Festive Peppermint Dream Cake:
- Preheat & Prep: Kick things off by preheating your oven to a warm 350°F (175°C). Lightly grease and flour two 9-inch round cake pans. This little step ensures your beautiful cakes will pop right out, no fuss!
- Mix the Magic Batter: In a large mixing bowl, lovingly combine the dry cake mix, water, large eggs, your chosen oil (or applesauce for a lighter touch!), and the star of the show – the peppermint syrup. Mix gently until everything is just combined and beautifully smooth. Remember, resist the urge to overmix; a light touch leads to a tender cake.
- Fill & Bake: Evenly divide and pour your vibrant peppermint batter into your two prepared cake pans. Pop them into the preheated oven and bake for 20-25 minutes, or until a thin toothpick inserted into the very center of the cake comes out perfectly clean. This is your cue that they’re done!
- Cool Down: Once baked, let your cakes cool completely on a wire rack. Patience is a virtue here! Don’t rush this step, as trying to frost warm cakes can lead to a melty mess.
- Whip Up the Frosting: While the cakes cool, create your delightful frosting! In a large bowl, combine the softened butter, powdered sugar, an initial 3 tablespoons of milk (or water), and the pure peppermint extract. Using an electric mixer, beat on medium speed until the frosting transforms into a light, fluffy, and perfectly blended cloud of deliciousness. If you desire a thinner consistency for easier spreading, gradually add that additional tablespoon of milk.
- Assemble Your Dream: Once your cakes are completely cool, it’s time for the grand finale! Generously spread the creamy peppermint frosting over and between the layers. Don’t be shy; more frosting means more joy!
- Garnish & Serve: For that ultimate festive finishing touch, gently press the crushed peppermint candy cane pieces onto the sides and top of the cake. Slice into generous portions and serve this easy, holiday-ready treat! Get ready for the oohs and aahs!
Presenting Your Peppermint Masterpiece: Serving Suggestions
Your Festive Peppermint Dream Cake is a showstopper on its own, but with a few creative touches, you can elevate its presentation and create an unforgettable dessert experience! Here are different ways to present and serve your holiday treat:
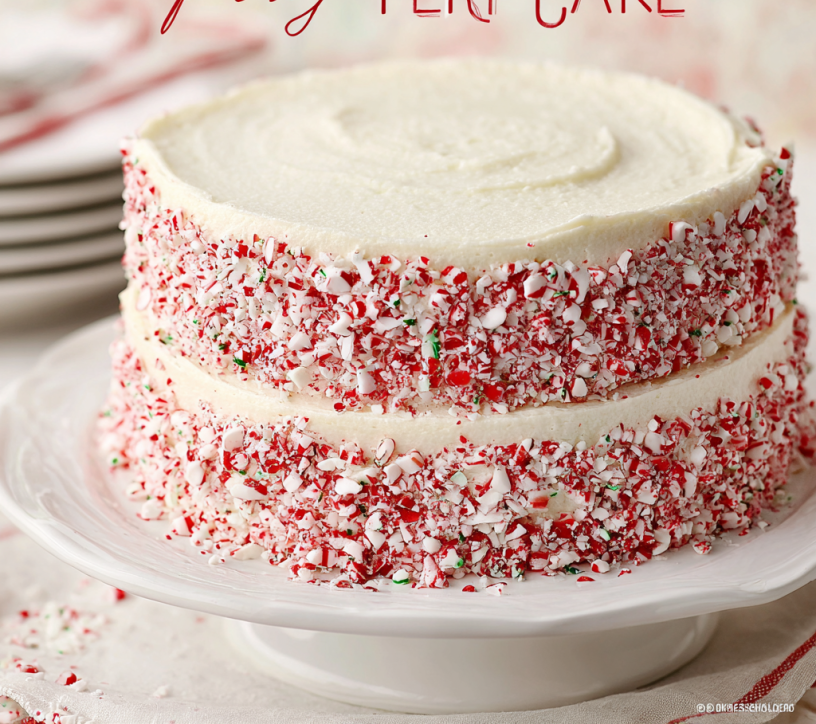
- The Classic Candy Cane Sparkle: The recipe’s suggestion of crushed candy canes is a timeless winner. For extra flair, consider using both red and white striped canes for a vibrant pop against the white frosting. Arrange them artfully on top or gently press them into the sides for a full festive coating.
- Elegant Winter Wonderland: For a more sophisticated look, skip the candy canes or use them sparingly. Instead, dust the top with a fine layer of edible silver or gold glitter, or finely grated white chocolate. A few fresh mint leaves strategically placed can also add a touch of green elegance.
- Chocolate Lover’s Dream: Peppermint and chocolate are a match made in heaven! Drizzle melted dark or white chocolate over the top of the frosted cake in an artistic pattern. You can also sprinkle mini chocolate chips or chocolate shavings alongside the crushed candy canes.
- Individual Delights (Cupcakes!): Instead of a layered cake, pour the batter into cupcake liners. Adjust baking time to about 18-22 minutes. Frost them individually and top with a mini candy cane or a sprinkle of crushed peppermint for charming, easy-to-serve portions.
- Serving with Style: Serve slices on elegant dessert plates. A dollop of whipped cream, a scoop of vanilla bean ice cream, or a small cup of hot cocoa alongside each slice can turn this simple dessert into a luxurious experience. Consider a festive cake stand to truly showcase your creation.
- Kids’ Carnival: For a kid-friendly presentation, go wild with extra sprinkles in red, green, and white! You could even add small edible glitter stars or make fun patterns with melted white chocolate and food coloring.
However you choose to present and serve it, your Festive Peppermint Dream Cake is sure to be a star at any gathering!
Storing Your Peppermint Perfection
Want to enjoy your delicious Festive Peppermint Dream Cake for longer? Here’s how to keep it fresh and fabulous:
- At Room Temperature: If your cake is fully frosted, it can typically be stored at room temperature for 2-3 days. Make sure it’s kept in an airtight cake dome or container to prevent it from drying out and absorbing any ambient odors. Keep it away from direct sunlight or heat sources.
- In the Refrigerator: For extended freshness, especially if your kitchen is warm or if you’ve used a butter-based frosting that might soften, refrigerate your cake. Place it in an airtight container or cover it loosely with plastic wrap. It will stay fresh for up to 5-7 days. Allow slices to come to room temperature for about 15-20 minutes before serving for the best texture and flavor.
- Freezing for Later: This cake freezes beautifully! For best results, freeze individual slices or whole layers (if unfrosted) tightly wrapped in plastic wrap, then again in aluminum foil, or placed in a freezer-safe airtight container. It can last for 1-2 months in the freezer. Thaw frozen cake in the refrigerator overnight, then bring to room temperature before serving.
Remember that the crushed candy cane garnish might start to dissolve or become sticky after a day or two, especially in humid conditions or when refrigerated. For the freshest look, it’s best to add the candy cane garnish right before serving or just before storing if you plan to eat it within a day.
Festive Peppermint Dream Cake FAQs
1. Can I make this Festive Peppermint Dream Cake from scratch instead of using a box mix?
While this recipe is designed for the convenience of a box mix, you can certainly adapt it! You would need to use your favorite white cake recipe from scratch and then incorporate the ½ cup of peppermint flavored syrup into your wet ingredients, potentially adjusting other liquids slightly. The rest of the instructions for baking and frosting would remain similar.
2. How can I make my cake look even more vibrant and festive?
To enhance the festive look, you can add a few drops of red or green food coloring to a small portion of the frosting to create contrasting swirls or borders. You could also tint the cake batter itself with a light green or pink food coloring for an unexpected pop of color when sliced.
3. What are some ways to make this cake “healthier”?
The recipe already suggests great options: using a natural or reduced-sugar cake mix, substituting vegetable oil with unsweetened applesauce, and opting for a sugar-free peppermint flavored syrup and sugar alternative for the frosting. Reducing the amount of powdered sugar slightly in the frosting can also help.
4. Can I convert this recipe into Festive Peppermint Dream Cupcakes?
Absolutely! Simply line a cupcake tin with festive paper liners. Fill each liner about two-thirds full with the batter. Bake for a shorter time, usually around 18-22 minutes, or until a toothpick inserted into the center of a cupcake comes out clean. The frosting recipe will be perfect for a batch of cupcakes.
5. What kind of peppermint flavored syrup should I use?
Any good quality peppermint flavored syrup will work! Popular brands found in coffee shops or grocery stores are great. If you’re looking for the “healthier-ish” option, seek out sugar-free variants like those used for coffee flavorings.
6. Can I use a substitute for butter in the frosting?
Butter is key for the classic rich, creamy texture and flavor of buttercream. While some shortening-based frostings exist, substituting butter directly with a vegan butter alternative or shortening might alter the taste and texture significantly. For best results, stick with butter or explore specific vegan peppermint frosting recipes.
7. How do I prevent my cake from sticking to the pans?
The recipe calls for greasing and flouring, which is a classic method. For extra assurance, you can also line the bottom of your greased pans with a circle of parchment paper, then grease and flour the paper and sides. This makes for super easy release every time!
8. Can I prepare the peppermint frosting ahead of time?
Yes, you can! Prepare the frosting as directed and store it in an airtight container in the refrigerator for up to 3-5 days. When you’re ready to use it, let it come to room temperature for about an hour, then re-whip it with an electric mixer for a few minutes until it’s light and fluffy again. You might need to add a tiny splash more milk if it’s too stiff.
9. What if I don’t have pure peppermint extract for the frosting?
Pure peppermint extract gives the most authentic and intense peppermint flavor. If you can’t find it, you could try using a little more of the peppermint flavored syrup (though this will add more sweetness and liquid), or a tiny amount of peppermint oil (use sparingly as it’s much stronger). However, for the best results, extract is recommended.
10. Is this Festive Peppermint Dream Cake suitable for gifting during the holidays?
Absolutely! This Festive Peppermint Dream Cake makes a wonderful homemade holiday gift. Bake it in a decorative disposable pan, or carefully package individual slices in festive boxes. It’s a thoughtful, delicious, and beautiful present that anyone would be thrilled to receive!
Festive Peppermint Dream Cake 🌟
Equipment
- 9-inch round cake pans
- Large mixing bowl
- Wire Rack
- Electric Mixer
Ingredients
Cake
- 1 box white cake mix (15.25 ounce, consider a natural or reduced-sugar option for a healthier touch!)
- 0.5 cup water
- 3 large eggs
- 0.25 cup vegetable oil (or unsweetened applesauce for a lighter alternative)
- 0.5 cup peppermint flavored syrup (sugar-free variant can reduce calories)
Frosting
- 0.5 cup unsalted butter softened (1 stick)
- 3.75 cups powdered sugar (feel free to slightly reduce for less sweetness, or use a sugar alternative)
- 3-4 tablespoons milk or water (start with less, add more as needed)
- 2 teaspoons pure peppermint extract
Garnish
- Crushed peppermint candy canes (for garnish, optional)
Instructions
- Preheat your oven to a warm 350°F (175°C). Lightly grease and flour two 9-inch round cake pans, ensuring an easy release.
- In a large mixing bowl, combine the dry cake mix, water, large eggs, your chosen oil (or applesauce), and the peppermint syrup. Mix gently until just combined and smooth; avoid overmixing for a tender cake.
- Evenly pour the vibrant batter into your prepared cake pans.
- Bake for 20-25 minutes, or until a thin toothpick inserted into the cake’s center comes out perfectly clean. Let the cakes cool completely on a wire rack before moving on.
- For the delightful frosting, combine the softened butter, powdered sugar, an initial 3 tablespoons of milk (or water), and pure peppermint extract in a large bowl. Using an electric mixer, beat on medium speed until the frosting is light, fluffy, and perfectly blended. Only add the additional tablespoon of milk if you need a thinner consistency.
- Once your cakes are cool, generously spread the creamy peppermint frosting over and between the layers.
- For that festive finishing touch, gently press the crushed peppermint candy cane pieces onto the sides and top of the cake. Slice and serve this easy, holiday-ready treat!
Notes
- Calories: 316 kcal
- Total Carbs: 55 g
- Net Carbs: 55 g
- Fats: 10 g
- Protein: 2 g