Why You’ll Love These Fudgy Valentine’s Heart Brownies
Get ready to fall head over heels for a dessert that’s as sweet as your Valentine! Our Fudgy Valentine’s Heart Brownies aren’t just a pretty face; they’re a truly decadent experience. Here are four irresistible reasons why this recipe will become your new favorite:
- Unbelievably Fudgy Perfection: We’re talking melt-in-your-mouth, dense, and rich brownies that hit all the right notes for a true chocolate lover. Thanks to the perfect blend of butter and oil, they stay extra moist and incredibly decadent.
- Picture-Perfect Heart Shapes: What’s more charming than a brownie shaped like a heart, especially for Valentine’s Day? Using a simple cookie cutter transforms these delicious squares into adorable tokens of affection, ready to impress.
- Effortlessly Impressive: Don’t let their elegant appearance fool you – these Fudgy Valentine’s Heart Brownies are surprisingly easy to make! With clear steps and common ingredients, even beginner bakers can achieve bakery-quality results.
- The Ultimate Valentine’s Treat: Whether you’re baking for your sweetheart, friends, family, or simply treating yourself, these heart-shaped brownies are the quintessential expression of love. They’re perfect for gifting, sharing, or indulging in a cozy night in.
Forget store-bought sweets! This Valentine’s Day, whisk up some magic in your kitchen with our incredible Fudgy Valentine’s Heart Brownies. Imagine sinking your teeth into a rich, dense, chocolatey dream, perfectly crafted into an adorable heart. This isn’t just a brownie; it’s a declaration of love, baked to perfection. From the first whiff of warm chocolate filling your home to the last fudgy bite, this recipe promises pure joy and a truly unforgettable treat. So grab your apron, preheat your oven, and let’s make some sweet memories!
Ingredients for Fudgy Valentine’s Heart Brownies
- 🧈 1/2 cup (1 stick) unsalted butter, melted
- 🥥 1/4 cup neutral oil (like coconut or vegetable oil)
- 🍚 1 cup granulated sugar
- 🍯 1/2 cup packed light brown sugar
- 🥚 3 large eggs, at room temperature
- 🌰 2 teaspoons pure vanilla extract
- ☕ 1/2 teaspoon espresso powder, optional
- 🌾 3/4 cup all-purpose flour (or a 1:1 gluten-free baking blend)
- 🍫 1/2 cup cocoa powder (Dutch-process for deeper color)
- 🧂 3/4 teaspoon kosher salt (or 1/2 teaspoon fine sea salt)
- 💖 1 cup semisweet chocolate chips or chopped chocolate
- ✨ Optional: Powdered sugar, chocolate drizzle, or festive sprinkles for finishing
Detailed Step-by-Step Directions
- Get Ready to Bake! Preheat your oven to 350°F (175°C). Line a 9-inch square metal baking pan with parchment paper, making sure to leave a 2-inch overhang on two sides; this will make lifting easy!
- Melt & Mix Wet Ingredients: In a large mixing bowl, gently melt the butter. Whisk in the granulated sugar, brown sugar, and oil until the mixture looks glossy and smooth, which takes about 30 to 60 seconds.
- Add Eggs & Flavor: Beat in the large eggs, one at a time, whisking well after each addition until they are fully combined. Stir in the pure vanilla extract and espresso powder (if you’re using it) until the mixture looks wonderfully thick and shiny.
- Combine Dry Ingredients: In a separate, medium-sized bowl, quickly whisk together the flour, cocoa powder, and salt.
- Gently Combine: Sprinkle the dry ingredient mixture over your wet ingredients. Using a rubber spatula, gently fold everything together until just combined and you no longer see any dry streaks of flour. Be careful not to overmix!
- Fold in Chocolate & Bake: Fold in your chocolate chips. Spread the batter evenly into your prepared pan and smooth the top. Bake for 24 to 28 minutes, or until a toothpick inserted into the center comes out with mostly damp crumbs (no wet batter).
- Cool & Chill for Perfect Cuts: Let the brownies cool completely in the pan for 20 to 30 minutes. Then, use the parchment paper overhang to carefully lift the entire brownie slab out onto a cutting board. For the neatest heart shapes, pop the slab into the fridge for an extra 15 to 20 minutes to chill.
- Cut Your Hearts! Grab your favorite heart-shaped cookie cutter (1.5 to 2.5 inches) and press it straight down, then lift straight up, to create your beautiful brownie hearts. You can wipe and lightly dust the cutter with a little cocoa powder as needed to prevent sticking.
- Serve & Enjoy! Dust your delightful brownie hearts with powdered sugar, drizzle with a little melted chocolate, or add some colorful sprinkles for that extra festive touch. Enjoy your homemade, fudgy Valentine’s treat!
Presenting and Serving Your Fudgy Valentine’s Heart Brownies
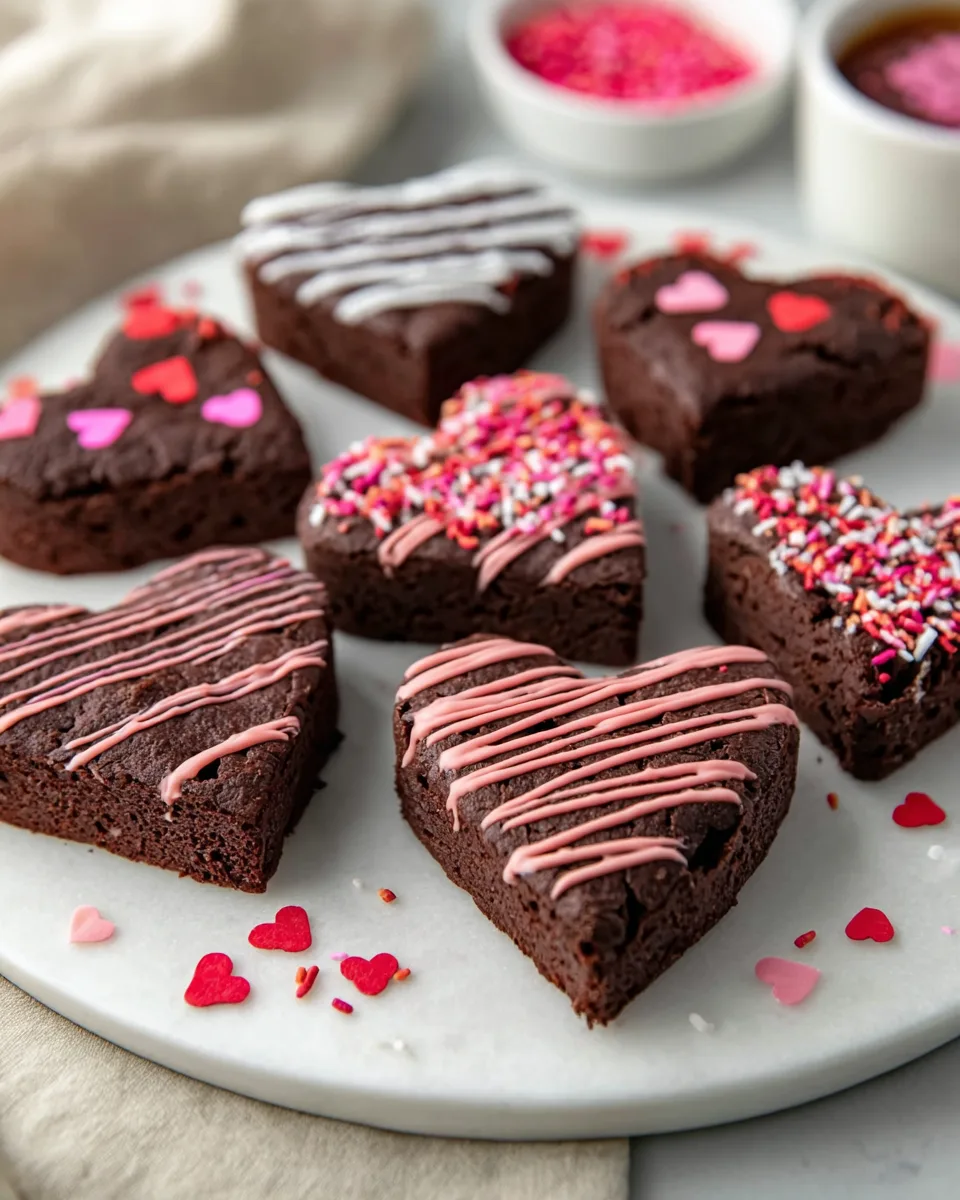
Once you’ve baked and cut your exquisite Fudgy Valentine’s Heart Brownies, it’s time to unleash your creativity for presentation! These sweet little hearts are already adorable, but a few extra touches can make them truly showstopping. For a classic, elegant look, a simple dusting of powdered sugar creates a beautiful contrast against the dark brownie. Feeling a bit more decadent? Melt some extra chocolate (white chocolate adds a lovely visual pop!) and drizzle it artfully over your hearts, perhaps in a zigzag pattern or a delicate swirl. For a burst of festive fun, scatter some red, pink, or white sprinkles, or even tiny heart-shaped candies, over the top.
When it comes to serving, these Fudgy Valentine’s Heart Brownies are incredibly versatile. Arrange them on a pretty platter for a party, or individually plate them for a more intimate dessert. They pair wonderfully with a scoop of vanilla bean ice cream, a dollop of fresh whipped cream, or a side of fresh berries for a lighter touch. Don’t forget a warm cup of coffee, a glass of milk, or even a sparkling rosé for a truly romantic pairing. And if you’re planning to gift them, pack a few into a small, decorative box tied with a ribbon – it’s a homemade present that speaks volumes of love!
Storing Your Fudgy Valentine’s Heart Brownies
To keep your delicious Fudgy Valentine’s Heart Brownies tasting their best, proper storage is key! Once completely cooled, place them in an airtight container. At room temperature, in a cool, dry place, these brownies will stay wonderfully fudgy and fresh for up to 3-4 days. If you want to extend their freshness, especially in warmer climates, you can store them in an airtight container in the refrigerator for up to a week. Just be sure to let them come to room temperature for about 15-20 minutes before serving for that optimal fudgy texture.
For longer storage, these brownies freeze beautifully! Wrap individual heart brownies tightly in plastic wrap, then place them in a freezer-safe bag or container. They can be frozen for up to 2-3 months. When you’re ready to enjoy, simply thaw them at room temperature. You can even warm them slightly in the microwave for a few seconds for that freshly-baked feel. Whether you’re enjoying them now or saving some love for later, these Fudgy Valentine’s Heart Brownies are a treat that keeps on giving!
Fudgy Valentine’s Heart Brownies: FAQs
- Q1: What makes these brownies extra fudgy?
- A1: The combination of melted butter and neutral oil, along with the specific ratio of sugar to flour and the use of cocoa powder, contributes to their incredibly dense, moist, and fudgy texture. Minimal flour and no leavening agents also help achieve this.
- Q2: Can I make these Fudgy Valentine’s Heart Brownies gluten-free?
- A2: Absolutely! The recipe states you can use a 1:1 gluten-free baking blend in place of all-purpose flour. Ensure your cocoa powder and chocolate chips are also certified gluten-free if strict dietary requirements are needed.
- Q3: Is the espresso powder really necessary?
- A3: No, it’s optional, but highly recommended! Espresso powder doesn’t make the brownies taste like coffee; instead, it enhances and deepens the chocolate flavor, making it richer and more intense without being noticeable on its own.
- Q4: What size heart cookie cutter should I use?
- A4: A heart-shaped cookie cutter between 1.5 to 2.5 inches works best. This size allows you to get a good number of brownies from the pan while still being a satisfying individual treat.
- Q5: My brownies are sticking to the cookie cutter. Any tips?
- A5: Yes! Lightly dust your cookie cutter with a little cocoa powder between cuts. Also, ensuring the brownies are thoroughly chilled (as suggested in the recipe) makes them much firmer and less prone to sticking, resulting in cleaner cuts.
- Q6: Can I use different types of chocolate in the batter?
- A6: Definitely! While semisweet chocolate chips are classic, feel free to experiment with dark chocolate chips for an even richer brownie, milk chocolate chips for a sweeter profile, or even white chocolate chips for a delightful contrast.
- Q7: Why do I need to chill the brownies before cutting them into hearts?
- A7: Chilling the brownie slab firms it up considerably. This makes it much easier to cut neat, clean heart shapes without the brownies crumbling or losing their form, giving you those perfect, presentable treats.
- Q8: Can I bake these brownies in a different pan size?
- A8: You can, but you may need to adjust the baking time. A larger pan (like a 9×13 inch) will result in thinner brownies and a shorter baking time, while a smaller pan will yield thicker brownies requiring more time. Keep a close eye on the toothpick test!
- Q9: How can I tell when the Fudgy Valentine’s Heart Brownies are done baking?
- A9: Insert a toothpick into the center of the brownies. It should come out with moist crumbs attached, but no wet batter. If it comes out completely clean, your brownies might be overbaked and less fudgy; if it’s still wet batter, they need more time.
- Q10: Can I prepare the brownie batter ahead of time?
- A10: For the best fudgy results, it’s recommended to bake the batter shortly after mixing. However, you can prepare the wet ingredients (butter, sugars, oil, eggs, vanilla) a few hours ahead and store them in the fridge. Let them come to room temperature, then whisk well before folding in the dry ingredients and chocolate chips.
Fudgy Valentine's Heart Brownies
Equipment
- 9-inch square metal baking pan
- Parchment Paper
- Large mixing bowl
- Whisk
- Rubber Spatula
- Medium-sized bowl
- Heart-shaped cookie cutter (1.5 to 2.5 inches)
Ingredients
Wet Ingredients
- 0.5 cup unsalted butter melted (1 stick, for a rich flavor)
- 0.25 cup neutral oil (like coconut or vegetable oil, helps keep centers extra moist)
- 1 cup granulated sugar
- 0.5 cup packed light brown sugar
- 3 large eggs at room temperature
- 2 tsp pure vanilla extract (for a delightful aroma)
- 0.5 tsp espresso powder optional (enhances chocolate flavor without tasting like coffee)
Dry Ingredients
- 0.75 cup all-purpose flour (or a 1:1 gluten-free baking blend for a GF option)
- 0.5 cup cocoa powder (Dutch-process for a deeper color, natural cocoa works too)
- 0.75 tsp kosher salt (or 1/2 teaspoon fine sea salt)
Other
- 1 cup semisweet chocolate chips or chopped chocolate (choose high-quality for better melt)
Optional Finishing
- Powdered sugar for finishing (optional)
- chocolate drizzle for finishing (optional)
- festive sprinkles for finishing (optional)
Instructions
- Preheat your oven to 350°F (175°C). Line a 9-inch square metal baking pan with parchment paper, making sure to leave a 2-inch overhang on two sides; this will make lifting easy!
- In a large mixing bowl, gently melt the butter. Whisk in the granulated sugar, brown sugar, and oil until the mixture looks glossy and smooth, which takes about 30 to 60 seconds.
- Beat in the large eggs, one at a time, whisking well after each addition until they are fully combined. Stir in the pure vanilla extract and espresso powder (if you're using it) until the mixture looks wonderfully thick and shiny.
- In a separate, medium-sized bowl, quickly whisk together the flour, cocoa powder, and salt.
- Sprinkle the dry ingredient mixture over your wet ingredients. Using a rubber spatula, gently fold everything together until just combined and you no longer see any dry streaks of flour. Be careful not to overmix!
- Fold in your chocolate chips. Spread the batter evenly into your prepared pan and smooth the top. Bake for 24 to 28 minutes, or until a toothpick inserted into the center comes out with mostly damp crumbs (no wet batter).
- Let the brownies cool completely in the pan for 20 to 30 minutes. Then, use the parchment paper overhang to carefully lift the entire brownie slab out onto a cutting board. For the neatest heart shapes, pop the slab into the fridge for an extra 15 to 20 minutes to chill.
- Grab your favorite heart-shaped cookie cutter (1.5 to 2.5 inches) and press it straight down, then lift straight up, to create your beautiful brownie hearts. You can wipe and lightly dust the cutter with a little cocoa powder as needed to prevent sticking.
- Dust your delightful brownie hearts with powdered sugar, drizzle with a little melted chocolate, or add some colorful sprinkles for that extra festive touch. Enjoy your homemade, fudgy Valentine's treat!
Notes
Calories: 300 kcal
Total Carbs: 42g
Net Carbs: 40g
Fats: 16g
Protein: 4g
Fiber: 2g (calculated from Total Carbs - Net Carbs)