Remember that unmistakable joy of twisting open a classic Oreo, licking the creamy filling, then dunking the chocolatey wafer? Pure bliss! But if you’re living the low-carb life, steering clear of gluten, or simply looking for a healthier alternative without sacrificing an ounce of flavor, those store-bought treats have likely become a distant memory. Well, get ready to reignite that childhood delight because we’re about to show you how to create the most incredible, guilt-free version of your favorite cookie sandwich. Forget compromises; prepare for an explosion of rich chocolate and velvety cream, all wrapped up in a package that fits your healthy lifestyle. These aren’t just cookies; they’re a dream come true for anyone craving the authentic Oreo experience, made right in your own kitchen!
Why You’ll Love These Healthy Homemade Oreos
Get ready to fall head over heels for these delectable treats! Our recipe for Healthy Homemade Oreos isn’t just another dessert; it’s a game-changer for your sweet cravings. Here are four irresistible reasons why you’ll be baking these on repeat:
-
Guilt-Free Indulgence: Say goodbye to sugar crashes and hello to wholesome deliciousness! These Healthy Homemade Oreos use natural, low-carb sweeteners, meaning you can enjoy that iconic chocolate and cream flavor without any of the guilt typically associated with sugary treats. It’s indulgence, redefined.
-
Keto & Gluten-Free Friendly: Designed with your dietary needs in mind, this recipe is a perfect fit for keto lifestyles and those avoiding gluten. With almond flour and monk fruit allulose blend, you get all the taste and texture without compromising your health goals. Finally, an Oreo that loves you back!
-
Surprisingly Easy to Make: Don’t let the gourmet taste fool you – making these Healthy Homemade Oreos is a breeze! With straightforward steps and common kitchen tools, you’ll be whipping up a batch of these beauties in no time. No advanced baking skills required, just a love for deliciousness.
-
Authentic Oreo Taste (Seriously!): This isn’t just a “healthy cookie” – it’s a true homage to the original. The rich Dutch processed cocoa combined with the sweet, creamy filling perfectly mimics the classic flavor you adore. Prepare to be amazed by how closely these Healthy Homemade Oreos replicate the real deal!
Ingredients with Measurements
Gather your magic ingredients, and let’s get ready to transform them into glorious Healthy Homemade Oreos!
For the Cookies:
- 8 tablespoons unsalted butter, softened
- 1/2 cup Besti Monk Fruit Allulose Blend (or your preferred healthy granular sweetener)
- 1 large egg
- 1 teaspoon vanilla extract
- 2 1/2 cups Wholesome Yum Superfine Blanched Almond Flour
- 1/2 cup Dutch processed cocoa powder
- 1/2 teaspoon sea salt
For the Creamy Filling:
- 2 tablespoons coconut oil, softened (or unsalted butter)
- 1 1/2 cups Besti Powdered Monk Fruit Allulose Blend (or your preferred healthy powdered sweetener, add more as needed for desired consistency)
- 1/4 teaspoon vanilla extract
- 2 teaspoons heavy cream (add 1 additional teaspoon if needed)
Detailed Step-by-Step Directions How to Make The Recipe
Ready to bake some magic? Follow these detailed steps to create your perfect batch of Healthy Homemade Oreos!
Making the Delicious Chocolate Cookies:
- In a medium bowl, use a hand mixer to beat the softened butter and your chosen healthy granular sweetener until the mixture is wonderfully light and fluffy. Next, mix in the egg and vanilla extract until well combined.
- In a separate bowl, whisk together the almond flour, cocoa powder, and sea salt until everything is evenly distributed.
- Add the dry ingredients into the wet mixture. Beat with the hand mixer until a uniform, smooth dough forms.
- Shape the dough into a flat rectangle, wrap it tightly in plastic wrap, and chill it in the refrigerator for at least 1 hour. This step is key to making the dough firm and easy to work with.
- Once chilled, remove the plastic wrap and roll out the dough thinly (about 1/4-inch thick) between two sheets of parchment paper. Use a small round cookie cutter (like a mason jar rim) to cut out circular cookies. Place these cutouts about 1-2 inches apart on a baking sheet lined with parchment paper. Re-roll any dough scraps and repeat until all the dough is used.
- Preheat your oven to 400 degrees F (204 degrees C). Bake the healthy Oreos for 10-12 minutes, or until their edges feel firm to the touch. Let them cool completely on the baking sheet before moving on – they need to be fully cool for the filling!
Whipping Up the Creamy Filling:
- In a medium bowl, beat together the softened coconut oil (or butter), powdered healthy sweetener, and vanilla extract until the mixture takes on a crumbly, pebble-like texture.
- Slowly add the heavy cream, one teaspoon at a time, continuing to beat until you achieve a thick, stiff, and beautifully creamy frosting that’s perfect for spreading.
Assembling Your Healthy Oreo Sandwiches:
- Once the chocolate cookies are entirely cool, spread or pipe 1-2 teaspoons of the prepared creamy filling onto the flat side of half the cookies.
- Gently place another plain chocolate cookie on top of the filling to create delightful sandwich cookies. Repeat this process with all remaining cookies.
- Now, your homemade healthy Oreos are ready to enjoy!
Detailed Different Ways You Can Present the Recipe and How to Serve It
Making Healthy Homemade Oreos is fun, and presenting them can be just as creative! Here are some delightful ways to showcase and serve your delicious creations:
Presentation Perfect:
-
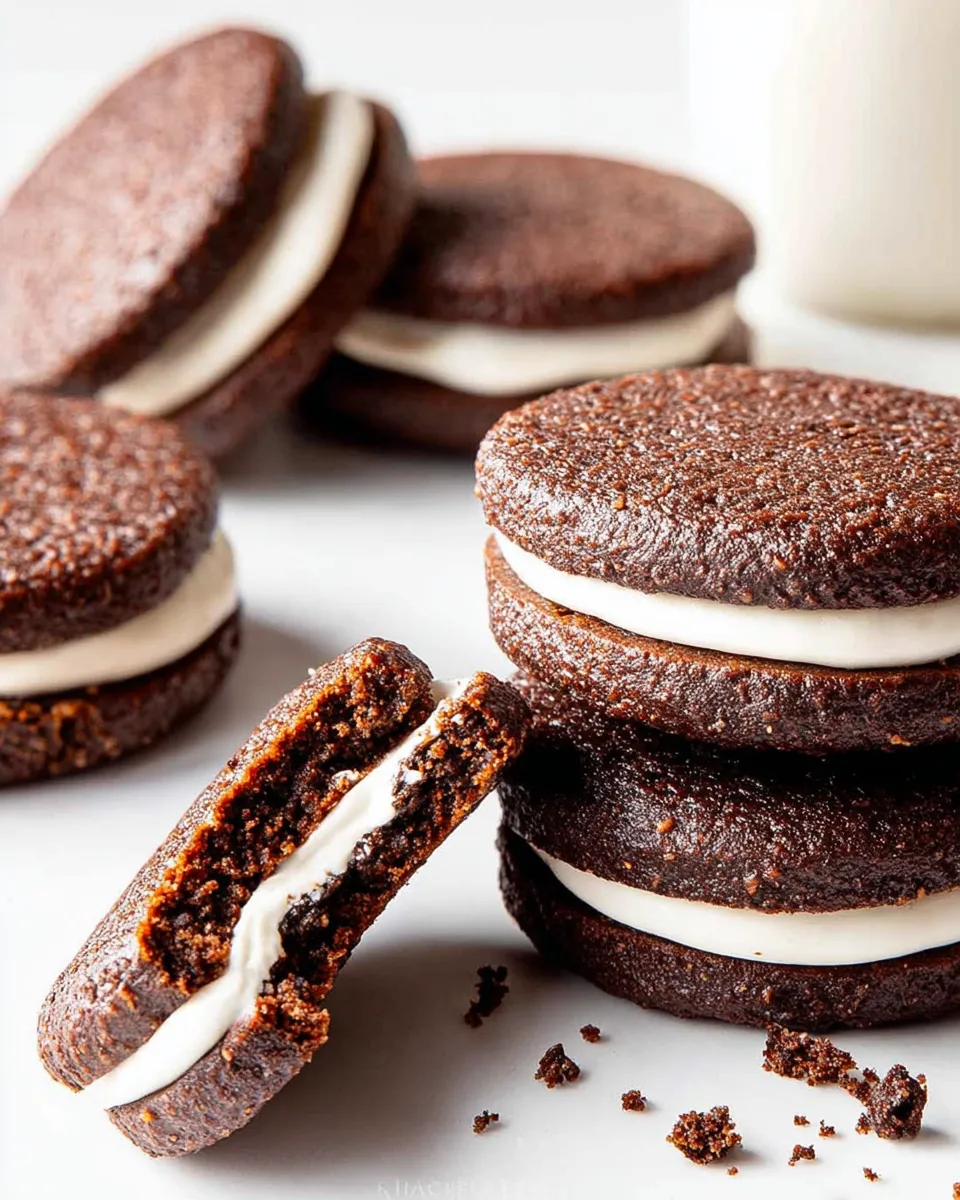
The Classic Stack: Arrange your finished Healthy Homemade Oreos neatly on a pretty plate or in a clear glass jar. The alternating dark cookie and white filling are visually appealing.
-
Dusting of Delight: For an elegant touch, lightly dust the tops of your assembled cookies with a tiny bit more cocoa powder or powdered sweetener using a fine-mesh sieve.
-
Miniature Marvels: If you have smaller cookie cutters, make mini versions! They’re adorable for parties or just for portion control.
-
Piped Perfection: For a professional look, use a piping bag with a star tip to apply the cream filling. It creates a beautiful, ruffled edge to the filling that’s extra fancy.
Serving Suggestions:
-
The Ultimate Dunk: Just like the originals, these Healthy Homemade Oreos are heavenly when dunked! Serve them alongside a glass of unsweetened almond milk, coconut milk, or even a keto-friendly coffee for an elevated snack time.
-
Dessert Topping: Crumble a few cookies over a scoop of keto vanilla ice cream, sugar-free yogurt, or a low-carb mousse for an instant upgrade. The crunch and chocolatey flavor are fantastic!
-
Afternoon Tea Treat: Pair them with your favorite herbal tea or a hot cup of black coffee for a refined, yet satisfying, pick-me-up.
-
Party Platter Star: Arrange them on a dessert platter with other low-carb treats for your next gathering. They’re sure to be a conversation starter!
How You Can Store It and How Long Does It Last
So, you’ve baked a batch of irresistible Healthy Homemade Oreos, and somehow, there are leftovers! Good news: they store beautifully, allowing you to savor them over several days. Here’s how to keep them fresh:
-
At Room Temperature: Store your assembled Healthy Homemade Oreos in an airtight container at room temperature for up to 3-4 days. Ensure they are completely cool before storing to prevent condensation, which can make them soggy. Place a piece of parchment paper between layers if stacking to prevent sticking.
-
In the Refrigerator: For a slightly longer shelf life, or if your kitchen is particularly warm, you can store them in an airtight container in the refrigerator for up to 1 week. The filling will firm up a bit, offering a chewier texture. Allow them to come to room temperature for 10-15 minutes before serving if you prefer a softer cookie.
-
Freezing for Future Cravings: Yes, you can freeze them! Place the assembled cookies in a single layer on a baking sheet and freeze until solid (about 1-2 hours). Once frozen, transfer them to a freezer-safe airtight container or a heavy-duty freezer bag, separating layers with parchment paper. They will last for up to 2-3 months. To enjoy, simply thaw them at room temperature for a few hours, or overnight in the refrigerator.
-
Freezing Cookie Dough: If you want to get a head start, you can also freeze the raw cookie dough. Wrap it tightly in plastic wrap and then in aluminum foil, and store it in the freezer for up to 3 months. Thaw in the refrigerator overnight before rolling and baking.
Always ensure your storage container is sealed tightly to maintain freshness and prevent your Healthy Homemade Oreos from absorbing other odors.
FAQs
Got questions about whipping up these fantastic Healthy Homemade Oreos? We’ve got answers!
-
Can I use a different healthy granular sweetener for the cookies?
Yes, you can! While Besti Monk Fruit Allulose Blend is recommended for its zero aftertaste and excellent baking properties, other granular keto-friendly sweeteners like erythritol, xylitol (be careful with pets!), or a stevia blend can work. Adjust quantities according to the sweetness equivalent listed on your chosen sweetener’s packaging. -
Is almond flour necessary? Can I use coconut flour instead?
Almond flour is key to the texture of these cookies. Coconut flour is far more absorbent and cannot be substituted 1:1. If you must use coconut flour, you’d need significantly less (around 1/4 to 1/3 of the amount) and likely more liquid, which would completely alter the recipe’s balance. For best results, stick with superfine blanched almond flour. -
Why Dutch processed cocoa powder? Can I use natural cocoa?
Dutch processed cocoa powder gives these cookies their signature dark color and less bitter, smoother chocolate flavor, similar to store-bought Oreos. It’s also less acidic, which affects how it reacts with baking soda (not used here, but good to know for other recipes). While natural cocoa can be used, the color will be lighter, and the flavor might be slightly sharper. -
Can I make these dairy-free?
Yes! The recipe already offers coconut oil as an alternative for the filling. For the cookies, ensure you use a dairy-free butter substitute (like a vegan butter stick) in place of unsalted butter. For the heavy cream in the filling, you can use full-fat canned coconut milk (the thick cream part), or a dairy-free heavy cream alternative, adjusting as needed for consistency. -
How do I know when the cookies are done baking?
The cookies are done when their edges feel firm to the touch. Since they are dark, it can be hard to tell by color. They might still feel slightly soft in the center when warm, but they will firm up considerably as they cool. Do not overbake, as they can become dry and crumbly. -
Can I make the cookie dough ahead of time?
Absolutely! The dough can be prepared and chilled in the refrigerator for up to 2-3 days before rolling and baking. This makes it perfect for meal prepping or splitting the baking process over two days. -
What if my creamy filling is too thin or too thick?
If your filling is too thin, add more powdered healthy sweetener, a tablespoon at a time, beating well until it reaches the desired thick consistency. If it’s too thick or crumbly, add a tiny bit more heavy cream (or your dairy-free alternative), about 1/2 teaspoon at a time, until smooth and spreadable. -
Can I freeze the assembled Healthy Homemade Oreos?
Yes, you can! Freeze the assembled cookies in a single layer until solid, then transfer them to an airtight freezer-safe container or bag, separating layers with parchment paper. They will last for 2-3 months. Thaw at room temperature or in the refrigerator before enjoying. -
Are these suitable for diabetics?
Since these cookies use a monk fruit allulose blend, which has a minimal impact on blood sugar, and almond flour, they are generally considered suitable for individuals managing blood sugar levels. However, it’s always best for diabetics to consult with their healthcare provider regarding specific dietary choices. -
What’s the best way to get perfectly round cookies?
Using a small, round cookie cutter (like the rim of a mason jar, as suggested) is ideal. Make sure to re-roll dough scraps gently and efficiently to avoid overworking the dough, which can make cookies tough. Chilling the dough thoroughly before rolling also helps maintain shape.
Healthy Homemade Oreos
Equipment
- Hand Mixer
- Plastic Wrap
- Parchment Paper
- Small Round Cookie Cutter
- Baking Sheet
Ingredients
For the Cookies
- 8 tablespoons unsalted butter softened
- 1/2 cup Besti Monk Fruit Allulose Blend (or your preferred healthy granular sweetener)
- 1 large egg
- 1 teaspoon vanilla extract
- 2 1/2 cups Wholesome Yum Superfine Blanched Almond Flour
- 1/2 cup Dutch processed cocoa powder
- 1/2 teaspoon sea salt
For the Creamy Filling
- 2 tablespoons coconut oil softened (or unsalted butter)
- 1 1/2 cups Besti Powdered Monk Fruit Allulose Blend (or your preferred healthy powdered sweetener, add more as needed for desired consistency)
- 1/4 teaspoon vanilla extract
- 2 teaspoons heavy cream (add 1 additional teaspoon if needed)
Instructions
- In a medium bowl, use a hand mixer to beat the softened butter and your chosen healthy granular sweetener until the mixture is wonderfully light and fluffy. Next, mix in the egg and vanilla extract until well combined.
- In a separate bowl, whisk together the almond flour, cocoa powder, and sea salt until everything is evenly distributed.
- Add the dry ingredients into the wet mixture. Beat with the hand mixer until a uniform, smooth dough forms.
- Shape the dough into a flat rectangle, wrap it tightly in plastic wrap, and chill it in the refrigerator for at least 1 hour. This step is key to making the dough firm and easy to work with.
- Once chilled, remove the plastic wrap and roll out the dough thinly (about 1/4-inch thick) between two sheets of parchment paper. Use a small round cookie cutter (like a mason jar rim) to cut out circular cookies. Place these cutouts about 1-2 inches apart on a baking sheet lined with parchment paper. Re-roll any dough scraps and repeat until all the dough is used.
- Preheat your oven to 400 degrees F (204 degrees C). Bake the healthy Oreos for 10-12 minutes, or until their edges feel firm to the touch. Let them cool completely on the baking sheet before moving on – they need to be fully cool for the filling!
- In a medium bowl, beat together the softened coconut oil (or butter), powdered healthy sweetener, and vanilla extract until the mixture takes on a crumbly, pebble-like texture.
- Slowly add the heavy cream, one teaspoon at a time, continuing to beat until you achieve a thick, stiff, and beautifully creamy frosting that's perfect for spreading.
- Once the chocolate cookies are entirely cool, spread or pipe 1-2 teaspoons of the prepared creamy filling onto the flat side of half the cookies.
- Gently place another plain chocolate cookie on top of the filling to create delightful sandwich cookies. Repeat this process with all remaining cookies.
- Now, your homemade healthy Oreos are ready to enjoy!
Notes
Calories: 239
Total Carbs: 7.2g
Net Carbs: 3.5g
Fats: 22.9g
Protein: 6.3g