Why You’ll Love This Holiday Mint Swirl Fudge! Recipe
- Effortlessly Festive: Ditch the complicated baking! This Holiday Mint Swirl Fudge! comes together in mere minutes on the stovetop, making it the perfect stress-free addition to your holiday spread.
- Irresistibly Delicious & Unique: The vibrant mint paired with sweet white chocolate and crunchy cookies creates a flavor and texture explosion that’s truly unforgettable. It’s a fresh take on classic fudge that will have everyone asking for the recipe.
- Perfectly Customizable & “Lighter” Option: Whether you opt for sugar-free white chocolate chips for a lighter version or add extra festive sprinkles, this Holiday Mint Swirl Fudge! is a dream for customization. Make it exactly how you and your loved ones enjoy it!
- Gift-Ready Goodness: Looking for a thoughtful, homemade gift? These beautiful mint green squares are ideal for sharing. Package them in a cute tin or box, and you’ve got a delightful present that spreads holiday cheer.
Unwrap the Magic of Holiday Mint Swirl Fudge!
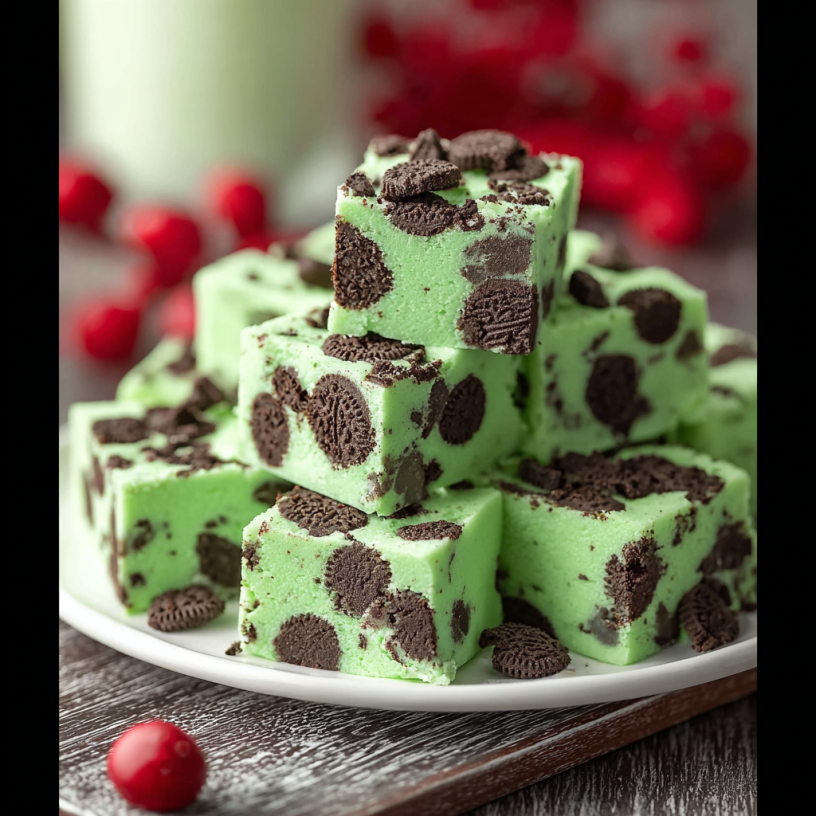
The air is crisp, the lights are twinkling, and the joyous spirit of the holidays is all around us. What better way to embrace the season than with a treat that captures its very essence? Say hello to the show-stopping, melt-in-your-mouth Holiday Mint Swirl Fudge! – your new go-to recipe for festive deliciousness! Forget fussy baking and endless cleanup; this recipe is all about quick prep, minimal cook time, and maximum holiday cheer. Imagine a smooth, creamy fudge infused with invigorating peppermint, a hint of vibrant green, and delightful crumbles of chocolatey sandwich cookies in every single bite. It’s a sensory celebration that tastes like Christmas morning! Whether you’re whipping up a batch for a holiday party, a cozy night in, or a thoughtful homemade gift, this Holiday Mint Swirl Fudge! is guaranteed to be a hit. Get ready to create some holiday magic with ease!
Ingredients for Your Holiday Mint Swirl Fudge!
Gather your festive ingredients!
- 🍫 16 ounces (about 2 ½ cups) white chocolate chips (opt for sugar-free for a lighter version)
- 🥛 1 can (14 ounces) light sweetened condensed milk
- 🧈 2 tablespoons unsalted butter, softened
- 🍃 1 teaspoon pure peppermint extract
- 🟢 A few drops green gel food coloring (optional, for a festive touch)
- 🍪 18-20 regular or gluten-free sandwich cookies (like Oreos), roughly chopped
- 🧂 Pinch of fine sea salt
Detailed Directions: Crafting Your Holiday Mint Swirl Fudge!
Let’s get cooking! Or rather, *not* cooking, because this is a no-bake wonder!
- Prepare Pan: First things first, grab an 8×8-inch baking pan. Line it generously with parchment paper, making sure to leave some overhang on the sides. This thoughtful step will be your best friend later, making it incredibly simple to lift your beautiful Holiday Mint Swirl Fudge! out once it’s set.
- Gentle Melt: In a medium saucepan, combine your trusty white chocolate chips, the creamy light sweetened condensed milk, and the softened butter. Place this mixture over a low heat. Now, here’s where patience truly pays off: stir constantly! This gentle, continuous stirring ensures everything melts beautifully into a smooth, luscious mixture without any scorching. This usually takes about 4-5 minutes, transforming your ingredients into a wonderfully melted base for your Holiday Mint Swirl Fudge!.
- Flavor & Color: Once your mixture is perfectly smooth and melted, take the saucepan off the heat. It’s time to infuse that delightful holiday spirit! Stir in the pure peppermint extract for that signature refreshing taste, and then add a few drops of green gel food coloring. Start with just a drop or two and add more until you achieve your desired “jolly” pastel green shade. Don’t forget that tiny pinch of sea salt – it wonderfully balances all the sweetness! Mix everything until it’s brilliantly combined and your fudge is a lovely, uniform green.
- Fold in Crunch: Now for the texture! Gently fold about half of your roughly chopped sandwich cookies into the warm fudge mixture. This ensures that every bite of your Holiday Mint Swirl Fudge! will have delightful, crunchy bits speckled throughout.
- Pour & Press: Carefully pour the glorious green fudge mixture into your prepared pan. Use a spatula or the back of a spoon to spread it out evenly, creating a smooth top. Then, sprinkle the remaining chopped cookies over the top of the fudge. Gently press them down just a little bit with your hand or the back of your spoon, ensuring they adhere nicely to the surface.
- Chill to Set: Pop that pan into the refrigerator! It needs at least 45 minutes to chill until the Holiday Mint Swirl Fudge! is firm to the touch. For the absolute best, firmest, and easiest-to-slice results, chilling it overnight is truly ideal.
- Slice & Serve: Once your fudge is perfectly firm, use the parchment paper overhang to effortlessly lift the entire slab out of the pan. Grab a sharp knife – a little pro tip: warming the blade under hot water briefly before each cut can help you achieve extra clean, perfect 1-inch squares. Now, marvel at your easy, festive, and slightly healthier holiday creation. Enjoy every minty bite of your homemade Holiday Mint Swirl Fudge!!
Presenting and Serving Your Holiday Mint Swirl Fudge!
Your Holiday Mint Swirl Fudge! is a work of art, and it deserves to be showcased beautifully! Here are some delightful ways to present and serve this festive treat:
- Classic Squares: The simplest and often most elegant way is to arrange the 1-inch squares neatly on a serving platter. A sprinkle of edible glitter or a few crushed candy canes can add extra sparkle.
- Mini Bites: For bite-sized indulgence, cut smaller 1/2-inch squares or use a mini cookie cutter (like a star or tree shape) after the fudge has set.
- Layered Delight: Create a stunning display by stacking the fudge squares pyramid-style on a tiered serving tray, interspersing them with other holiday treats.
- Drizzle & Decorate: Before chilling, or just after slicing, drizzle melted dark or white chocolate over the top in a zig-zag pattern. You could also sprinkle with fine peppermint dust or more crushed Oreos for added flair.
- Individual Wraps: For gifting or party favors, wrap individual pieces of Holiday Mint Swirl Fudge! in small squares of wax paper or cellophane and tie with a festive ribbon.
- Dessert Board Star: Incorporate your fudge into a holiday dessert charcuterie board alongside fresh berries, nuts, cookies, and other candies.
- With Hot Beverages: Serve alongside mugs of hot chocolate, coffee, or a peppermint latte. The mint in the fudge will perfectly complement these warm drinks.
Storing Your Holiday Mint Swirl Fudge!
Keeping your Holiday Mint Swirl Fudge! fresh is key to enjoying its deliciousness for longer.
- Room Temperature: While possible for a very short period (1-2 days), storing at room temperature is generally not recommended as the fudge can become too soft, especially in warmer environments.
- Refrigerator: This is the ideal storage method! Place the sliced or unsliced fudge in an airtight container between layers of parchment paper to prevent sticking. Stored this way, your Holiday Mint Swirl Fudge! will stay wonderfully fresh for up to 2-3 weeks.
- Freezer: Yes, you can freeze it! Wrap the fudge tightly in plastic wrap, then place it in a freezer-safe airtight container or bag. It can be frozen for up to 2-3 months. Thaw in the refrigerator overnight or at room temperature for a few hours before serving. Freezing is an excellent option if you’re making batches of Holiday Mint Swirl Fudge! in advance for gifts or future enjoyment.
Always ensure your fudge is in an airtight container to prevent it from drying out or absorbing other odors from the fridge/freezer.
FAQs About Holiday Mint Swirl Fudge!
- Can I use dark or milk chocolate chips instead of white chocolate?
Yes, you absolutely can! However, using dark or milk chocolate will change the flavor profile and the vibrant green color might not stand out as much. The white chocolate provides a neutral canvas for the mint and color. - What if my fudge doesn’t set properly?
Fudge not setting is often due to not enough chilling time or the mixture not being heated long enough to reach the right consistency. Ensure you’re stirring constantly over low heat until completely smooth and slightly thickened, then chill for the recommended time (overnight is best!). - Can I omit the green food coloring?
Certainly! The green food coloring is purely for a festive visual touch. The Holiday Mint Swirl Fudge! will taste just as amazing without it, though it will be a creamy white color. - Are there any substitutions for the sandwich cookies?
Absolutely! You can use crushed graham crackers, shortbread cookies, or even crushed pretzel for a salty-sweet crunch in your Holiday Mint Swirl Fudge!. - Is this recipe gluten-free?
If you use gluten-free sandwich cookies and ensure all other ingredients are certified gluten-free, then yes, your Holiday Mint Swirl Fudge! will be gluten-free! - How can I make the slices extra clean?
For super clean slices, make sure the fudge is thoroughly chilled. Use a very sharp knife, and for each cut, run the blade under hot water, wipe it dry, and then slice. This prevents sticking and creates crisp edges. - Can I add other flavorings?
While this is a specific Holiday Mint Swirl Fudge! recipe, you could experiment! A touch of almond extract or even orange zest could be interesting, but always start small to avoid overpowering the mint. - What kind of baking pan can I use if I don’t have an 8×8?
A 9×9-inch pan will work, but your fudge will be slightly thinner. You could also use a loaf pan (like 9×5 inches) for thicker fudge, though you might get fewer squares. - Why use light sweetened condensed milk?
Using light sweetened condensed milk helps make this a “lighter version” as stated in the recipe description, contributing to the lower calorie count provided in the nutrition info for your Holiday Mint Swirl Fudge!. - Can I double the recipe?
Yes, you can easily double this recipe! Use a larger pan (like a 9×13-inch baking pan) and increase all ingredient amounts proportionally. Ensure you still melt the ingredients slowly and stir constantly.
Holiday Mint Swirl Fudge! 🎄✨
Equipment
- 8x8 inch baking pan
- Parchment Paper
- Medium Saucepan
- Spatula
- Sharp Knife
Ingredients
- 16 ounces white chocolate chips (about 2 ½ cups, opt for sugar-free for a lighter version)
- 1 can light sweetened condensed milk (14 ounces)
- 2 tablespoons unsalted butter softened
- 1 teaspoon pure peppermint extract
- green gel food coloring A few drops (optional, for a festive touch)
- 18-20 regular or gluten-free sandwich cookies (like Oreos), roughly chopped
- Pinch fine sea salt
Instructions
- Line an 8x8-inch baking pan with parchment paper, allowing some overhang on the sides. This makes lifting the fudge out super easy later!
- In a medium saucepan, combine your white chocolate chips, light condensed milk, and softened butter. Heat this mixture over low heat, stirring constantly, until it's completely smooth and wonderfully melted (this usually takes about 4-5 minutes). Patience is key here to avoid scorching!
- Remove the saucepan from the heat. Stir in the peppermint extract, the optional green food coloring (add a drop at a time until you get your desired jolly shade!), and the pinch of sea salt. Mix until everything is beautifully combined and the fudge is a lovely pastel green.
- Gently fold about half of your roughly chopped sandwich cookies into the fudge mixture. This ensures you get delightful crunchy bits throughout your sweet treat.
- Pour the fudge mixture into your prepared pan and use a spatula or the back of a spoon to spread it evenly. Sprinkle the remaining chopped cookies over the top and gently press them down a little, just enough to adhere.
- Pop the pan into the refrigerator for at least 45 minutes, or until the fudge is firm to the touch. For the best, firmest results, chilling it overnight is ideal.
- Once firm, use the parchment paper overhang to easily lift the entire slab of fudge out of the pan. With a sharp knife (warming the blade under hot water briefly before each cut can help make them extra clean!), slice the fudge into 1-inch squares. Now, enjoy your easy, festive, and slightly healthier holiday creation!