Why You’ll Love This Keto Cheesecake Cake Recipe
Get ready to fall head over heels for this incredible Keto Cheesecake Cake! Here are four reasons why it’s about to become your new favorite:
- Unbeatable Flavor Combination: Experience the best of both worlds – rich, fudgy chocolate cake perfectly layered with a creamy, tangy cheesecake, all topped with a dreamy chocolate frosting. It’s a symphony of textures and tastes!
- Seriously Low Carb & Sugar-Free: Indulge without the guilt! This masterpiece is crafted with keto-friendly ingredients, meaning you can satisfy your sweet tooth while staying on track with your low-carb lifestyle.
- Impressive & Show-Stopping: This isn’t just a dessert; it’s a celebration in cake form. Its elegant layers make it perfect for special occasions, holidays, or simply to impress your friends and family with your baking prowess.
- Easier Than You Think: While it looks like a work of art, our step-by-step instructions break it down into manageable parts, making the process enjoyable and the outcome incredibly rewarding. Prepare for rave reviews!
Ready for a Dessert That Defies Expectations?
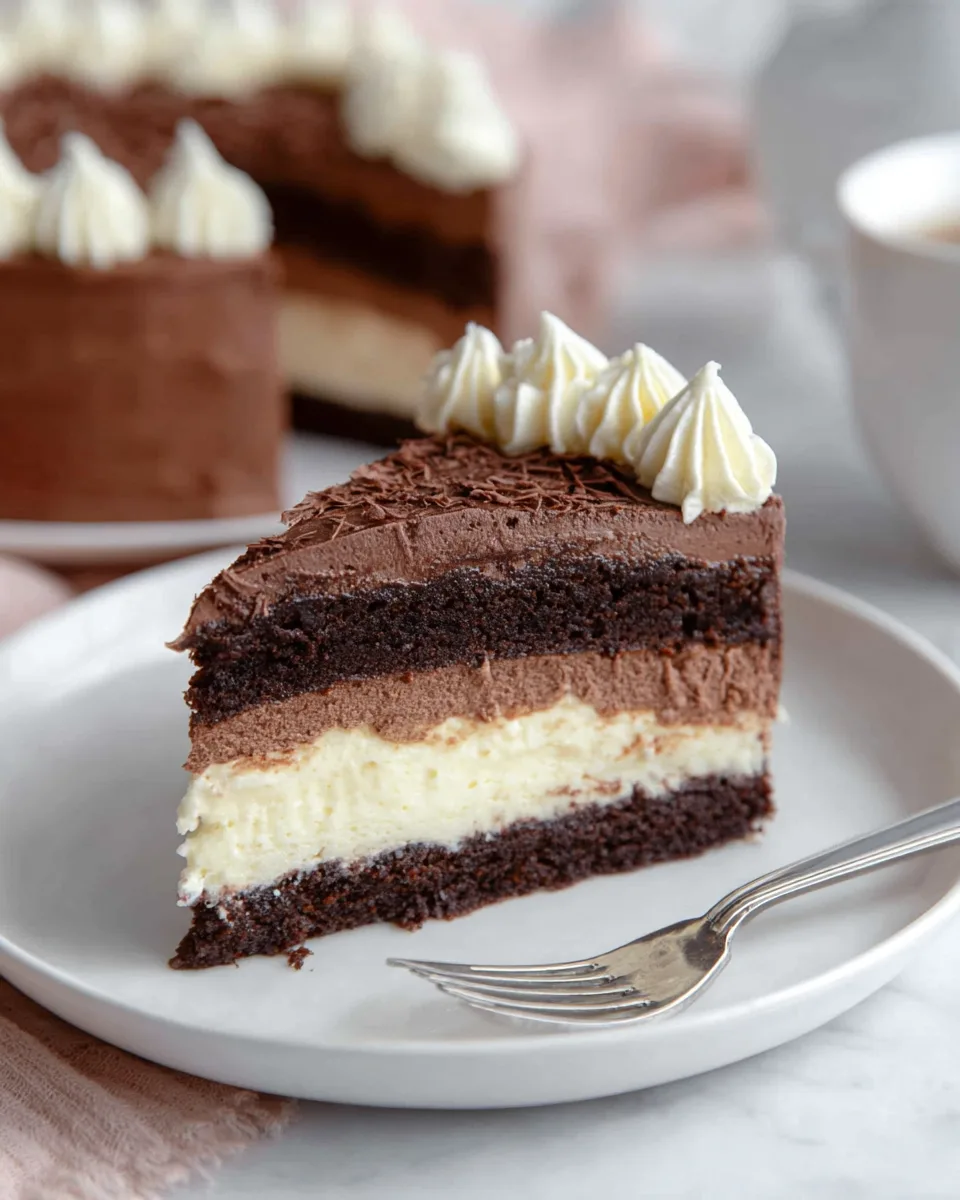
Imagine biting into a slice of pure decadence, where moist, dark chocolate cake gives way to a luscious, smooth cheesecake, all embraced by a velvety, sugar-free chocolate frosting. Sounds like a dream, right? Well, wake up and smell the cocoa, because your keto journey just got a whole lot sweeter! Introducing the ultimate showstopper: the Keto Cheesecake Cake. This isn’t just a cake; it’s an experience. It’s the perfect answer to those intense cravings, proving that going low-carb doesn’t mean sacrificing flavor or fun. Get ready to bake a masterpiece that tastes like a cheat day, but keeps you perfectly on track. Let’s dive into creating this extraordinary, guilt-free indulgence!
Ingredients You’ll Need
Gather your magic ingredients to create this spectacular Keto Cheesecake Cake:
🍰 Cheesecake Layer:
- ✨ 16 ounces cream cheese, softened
- 🥣 1/4 cup sour cream
- 🍭 1/2 cup allulose sweetener (or granular erythritol)
- 🌱 1 teaspoon vanilla extract
- 🥚 2 large eggs, at room temperature
🍫 Chocolate Cake Layers:
- 🥥 7 tablespoons coconut flour
- 🍬 1/2 cup granular sweetener (like allulose or erythritol)
- 🍫 1/4 cup cocoa powder (Dutch process for best flavor!)
- 💪 2 tablespoons whey protein powder (or plant-based, no collagen)
- 🥄 1 1/2 teaspoons baking powder
- 🧂 1/4 teaspoon salt
- 🥚 4 large eggs
- 🥑 1/3 cup avocado oil (or melted butter)
- 🌱 1/2 teaspoon vanilla extract
- ☕ 1/3 cup leftover coffee (or water, for a deeper chocolate flavor)
🍦 Chocolate Frosting:
- 🍫 3 ounces unsweetened chocolate, chopped
- ✨ 4 ounces cream cheese, softened
- 🧈 6 tablespoons butter, softened
- 🍭 1/2 cup powdered sweetener (allulose or erythritol)
- 🌱 1 teaspoon vanilla extract
- 🥛 3/4 cup heavy whipping cream, divided
Step-by-Step Directions to Your Keto Masterpiece
Follow these instructions carefully to bake your show-stopping Keto Cheesecake Cake:
- Make the Creamy Cheesecake Layer:
Get Ready: Start by preheating your oven to 300°F (150°C). Grab an 8-inch round baking pan with a removable bottom, grease it lightly, then line the bottom with parchment paper and grease the paper too.
Mix It Up: In a large bowl, beat the softened cream cheese until it’s super smooth and creamy, about 1-2 minutes. Stir in the sour cream, followed by the sweetener and vanilla extract until everything is beautifully blended.
Add Eggs: Gently beat in the eggs one at a time, just until they’re incorporated. Don’t overmix! Make sure to scrape down the bowl sides.
Bake & Chill: Pour the cheesecake batter into your prepared pan, gently shake to even it out, and tap lightly on the counter to remove any air bubbles. Bake for 30-40 minutes, or until the edges are set and the center has a slight jiggle. Let it cool completely.
Freeze Solid: Once cool, run a knife around the edges, remove the pan sides, and wrap the cheesecake tightly. Pop it in the freezer until it’s completely solid – at least 3 hours, or even overnight. This is key for easy assembly!
- Bake the Delicious Chocolate Cake Layers:
Oven & Pans: Preheat your oven to 350°F (175°C). Grease two 8-inch round cake pans really well, then line the bottoms with parchment paper and grease the paper.
Dry Mix: In a big bowl, whisk together the coconut flour, sweetener, cocoa powder, protein powder, baking powder, and salt.
Wet Mix: Stir in the eggs, avocado oil (or melted butter), and vanilla extract until combined.
Add Coffee: Gradually stir in the coffee (or water) about 1/4 cup at a time, until your batter is thick but easy to scoop.
Bake Cake: Divide the batter evenly between the two prepared pans and spread it out. Bake for 15-20 minutes, or until the tops of the cakes are firm to the touch. Let them cool completely before carefully flipping them onto a wire rack.
- Prepare the Velvety Chocolate Frosting:
Melt Chocolate: In a microwave-safe bowl, melt the chopped unsweetened chocolate in 30-second bursts, stirring until smooth. Let it cool down to lukewarm.
Creamy Base: In a large bowl, beat the softened cream cheese and butter until they’re perfectly smooth. Mix in the powdered sweetener and vanilla extract.
Combine: Add the cooled melted chocolate to the cream cheese mixture and beat until smooth. Stir in two tablespoons of the heavy cream until well combined.
Whip & Fold: In a separate bowl, beat the remaining heavy cream until it forms stiff peaks. Gently fold this whipped cream into your chocolate frosting until no streaks remain, making it light and airy.
- Assemble Your Masterpiece!
First Layer: Place one chocolate cake layer on your serving platter. Spread about 1/3 cup of the chocolate frosting evenly over the top, reaching to the edges.
Add Cheesecake: Carefully remove the frozen cheesecake layer from the freezer and gently flip it onto the frosted cake. Remove any parchment paper stuck to the bottom. Spread another 1/3 cup of frosting over the cheesecake layer.
Top It Off: Place the second chocolate cake layer on top of the cheesecake. Now, generously spread the remaining frosting over the top and sides of the entire cake.
Decorate (Optional): If you like, put any leftover frosting into a piping bag with a star tip and pipe some pretty rosettes around the top edge of the cake.
Serve & Enjoy: Let the cake sit in the fridge for a bit to allow the cheesecake layer to thaw slightly, then slice and enjoy this amazing, healthy indulgence!
Presenting and Serving Your Keto Cheesecake Cake
This magnificent Keto Cheesecake Cake deserves a grand entrance! Here are some ideas to make its presentation as delightful as its taste and how to serve it for maximum enjoyment:
- Elegant Garnishes: Elevate its appearance by sprinkling some sugar-free chocolate shavings or a light dusting of cocoa powder on top. For a pop of color and freshness, arrange a few fresh raspberries or sliced strawberries around the base or on top of the cake – they pair beautifully with chocolate and cheesecake and are keto-friendly in moderation.
- Piping Perfection: If you have extra frosting and a piping bag, consider adding decorative borders or rosettes around the top edge of the cake. This adds a professional, bakery-worthy touch that will truly impress.
- The Perfect Slice: For clean slices, use a sharp, thin knife dipped in hot water and wiped dry between each cut. This will help you achieve those Instagram-worthy layers.
- Serving Suggestions: Serve your Keto Cheesecake Cake slightly chilled for the best texture, allowing the cheesecake layer to be cool and firm but not frozen solid. It pairs wonderfully with a cup of black coffee, an unsweetened tea, or even a dollop of sugar-free whipped cream on the side for an extra luxurious touch. This cake is perfect as a sophisticated dessert for dinner parties, a decadent treat for a weekend gathering, or simply a special indulgence after a long week.
Storing Your Keto Cheesecake Cake
Once you’ve assembled your glorious Keto Cheesecake Cake, you’ll want to ensure it stays fresh and delicious. Proper storage is key!
- In the Refrigerator: Your assembled cake should be stored in an airtight cake carrier or covered tightly with plastic wrap in the refrigerator. This will keep it fresh for up to 3-5 days. The flavors actually meld beautifully over time, making it potentially even more delicious the day after it’s made!
- Freezing Whole: If you’ve baked the cake for a future event or have leftovers, you can freeze the entire cake. Wrap it tightly in several layers of plastic wrap, then an additional layer of aluminum foil. It can be stored in the freezer for 1-2 months. When you’re ready to enjoy, thaw it overnight in the refrigerator.
- Freezing Slices: For individual servings, slice the cake and wrap each slice tightly in plastic wrap before placing them in an airtight container or freezer bag. This is perfect for portion control and grabbing a quick keto treat whenever a craving strikes. Thaw individual slices in the refrigerator for a few hours or at room temperature for about 30-60 minutes.
FAQs About Your Keto Cheesecake Cake
- What is the best type of sweetener for this Keto Cheesecake Cake?
For granular, allulose or erythritol are excellent choices, with allulose often providing a smoother texture and less cooling sensation. For the frosting, powdered versions of these are ideal for a silky finish. - Can I substitute coconut flour with almond flour in the cake layers?
No, coconut flour and almond flour are not interchangeable in recipes like this due to their vastly different absorption rates. Substituting would require significant adjustments to other liquid ingredients. - Why do I need to freeze the cheesecake layer?
Freezing the cheesecake layer solid makes it much easier to handle and transfer onto the cake layers without breaking or losing its shape during assembly. It’s a crucial step for a clean, professional-looking cake. - Can I make this Keto Cheesecake Cake ahead of time?
Absolutely! The cake layers can be baked a day or two in advance and stored at room temperature, and the cheesecake layer can be made and frozen well ahead of time. You can also fully assemble and store the cake in the refrigerator for up to 3 days before serving. - What if I don’t have coffee for the chocolate cake?
You can use water instead, but coffee enhances the chocolate flavor significantly without making the cake taste like coffee. It’s highly recommended for a richer chocolate experience. - How do I know when the cheesecake layer is perfectly baked?
The cheesecake is done when the edges are set and lightly golden, but the center still has a slight wobble or jiggle when you gently shake the pan. It will firm up completely as it cools. - Can I make the frosting less chocolatey?
Yes, you can reduce the amount of unsweetened chocolate to 2 ounces for a milder chocolate flavor. However, 3 ounces gives it a wonderfully rich and deep chocolate taste. - Is the whey protein powder necessary?
The whey protein powder helps with the cake’s structure and texture, especially in keto baking. While you can try to omit it, the cake might be a bit more fragile. Ensure it’s unsweetened and unflavored. - What’s the best way to slice the Keto Cheesecake Cake cleanly?
For neat slices, use a long, sharp knife. Dip the knife in hot water and wipe it clean between each slice. This prevents the frosting and layers from sticking and tearing. - How many net carbs are in a slice of this Keto Cheesecake Cake?
Each generous serving of this Keto Cheesecake Cake contains approximately 4.3g net carbs, making it a fantastic low-carb treat you can enjoy guilt-free!
Keto Cheesecake Cake
Equipment
- 8-inch round baking pan (with removable bottom)
- Parchment Paper
- Large Bowl
- Wire Rack
- Microwave-safe Bowl
- Piping bag (optional)
- Star Tip (optional)
Ingredients
Cheesecake Layer
- 16 ounces cream cheese softened
- 1/4 cup sour cream
- 1/2 cup allulose sweetener or granular erythritol
- 1 teaspoon vanilla extract
- 2 large eggs at room temperature
Chocolate Cake Layers
- 7 tablespoons coconut flour
- 1/2 cup granular sweetener like allulose or erythritol
- 1/4 cup cocoa powder Dutch process for best flavor!
- 2 tablespoons whey protein powder or plant-based, no collagen
- 1 1/2 teaspoons baking powder
- 1/4 teaspoon salt
- 4 large eggs
- 1/3 cup avocado oil or melted butter
- 1/2 teaspoon vanilla extract
- 1/3 cup leftover coffee or water, for a deeper chocolate flavor
Chocolate Frosting
- 3 ounces unsweetened chocolate chopped
- 4 ounces cream cheese softened
- 6 tablespoons butter softened
- 1/2 cup powdered sweetener allulose or erythritol
- 1 teaspoon vanilla extract
- 3/4 cup heavy whipping cream divided
Instructions
1. Make the Creamy Cheesecake Layer:
- Get Ready: Start by preheating your oven to 300°F (150°C). Grab an 8-inch round baking pan with a removable bottom, grease it lightly, then line the bottom with parchment paper and grease the paper too.
- Mix It Up: In a large bowl, beat the softened cream cheese until it's super smooth and creamy, about 1-2 minutes. Stir in the sour cream, followed by the sweetener and vanilla extract until everything is beautifully blended.
- Add Eggs: Gently beat in the eggs one at a time, just until they're incorporated. Don't overmix! Make sure to scrape down the bowl sides.
- Bake & Chill: Pour the cheesecake batter into your prepared pan, gently shake to even it out, and tap lightly on the counter to remove any air bubbles. Bake for 30-40 minutes, or until the edges are set and the center has a slight jiggle. Let it cool completely.
- Freeze Solid: Once cool, run a knife around the edges, remove the pan sides, and wrap the cheesecake tightly. Pop it in the freezer until it's completely solid – at least 3 hours, or even overnight. This is key for easy assembly!
2. Bake the Delicious Chocolate Cake Layers:
- Oven & Pans: Preheat your oven to 350°F (175°C). Grease two 8-inch round cake pans really well, then line the bottoms with parchment paper and grease the paper.
- Dry Mix: In a big bowl, whisk together the coconut flour, sweetener, cocoa powder, protein powder, baking powder, and salt.
- Wet Mix: Stir in the eggs, avocado oil (or melted butter), and vanilla extract until combined.
- Add Coffee: Gradually stir in the coffee (or water) about 1/4 cup at a time, until your batter is thick but easy to scoop.
- Bake Cake: Divide the batter evenly between the two prepared pans and spread it out. Bake for 15-20 minutes, or until the tops of the cakes are firm to the touch. Let them cool completely before carefully flipping them onto a wire rack.
3. Prepare the Velvety Chocolate Frosting:
- Melt Chocolate: In a microwave-safe bowl, melt the chopped unsweetened chocolate in 30-second bursts, stirring until smooth. Let it cool down to lukewarm.
- Creamy Base: In a large bowl, beat the softened cream cheese and butter until they're perfectly smooth. Mix in the powdered sweetener and vanilla extract.
- Combine: Add the cooled melted chocolate to the cream cheese mixture and beat until smooth. Stir in two tablespoons of the heavy cream until well combined.
- Whip & Fold: In a separate bowl, beat the remaining heavy cream until it forms stiff peaks. Gently fold this whipped cream into your chocolate frosting until no streaks remain, making it light and airy.
4. Assemble Your Masterpiece!
- First Layer: Place one chocolate cake layer on your serving platter. Spread about 1/3 cup of the chocolate frosting evenly over the top, reaching to the edges.
- Add Cheesecake: Carefully remove the frozen cheesecake layer from the freezer and gently flip it onto the frosted cake. Remove any parchment paper stuck to the bottom. Spread another 1/3 cup of frosting over the cheesecake layer.
- Top It Off: Place the second chocolate cake layer on top of the cheesecake. Now, generously spread the remaining frosting over the top and sides of the entire cake.
- Decorate (Optional): If you like, put any leftover frosting into a piping bag with a star tip and pipe some pretty rosettes around the top edge of the cake.
- Serve & Enjoy: Let the cake sit in the fridge for a bit to allow the cheesecake layer to thaw slightly, then slice and enjoy this amazing, healthy indulgence!
Notes
Calories: 334 kcal
Total Carbs: 6.8g
Net Carbs: 4.3g
Fats: 29.9g
Protein: 8.3g