Why You’ll Love This Keto Coconut Cheesecake Delight
Get ready to fall head over heels for a dessert that’s as delightful as it sounds! This Keto Coconut Cheesecake Delight isn’t just another low-carb treat; it’s a culinary experience waiting to happen. Here are four fantastic reasons why this recipe will become your new go-to:
- Guilt-Free Indulgence: Finally, a cheesecake that perfectly fits your keto lifestyle without compromising on flavor! With impressively low net carbs, you can enjoy every rich, creamy bite without the carb crash or dietary worries. It’s pure dessert joy, keto-fied.
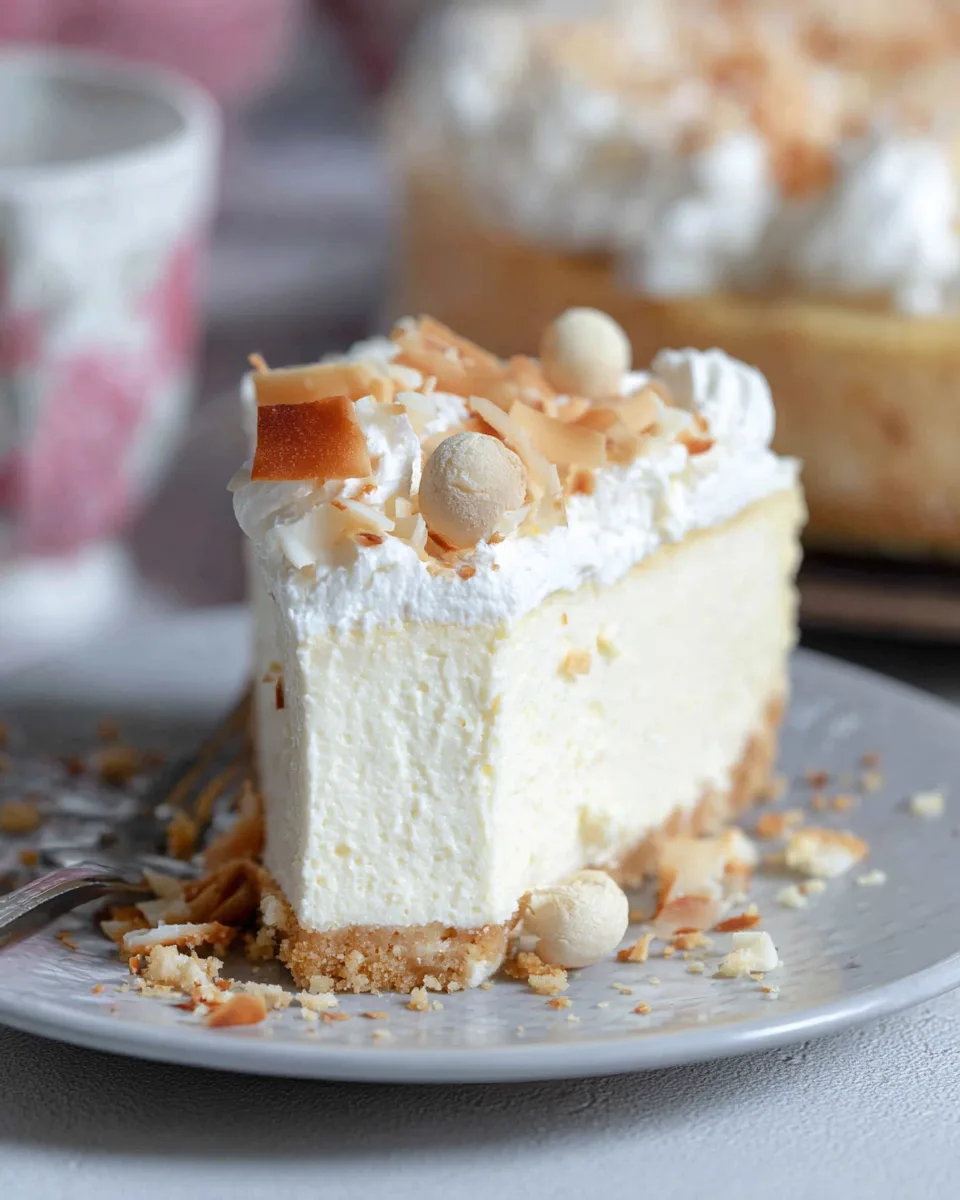
- A Tropical Escape in Every Bite: Close your eyes and imagine soft, creamy coconut filling, a crunchy macadamia-coconut crust, and a dreamy whipped topping. This cheesecake transports you straight to a sun-drenched beach with its vibrant, authentic coconut flavor.
- Surprisingly Simple to Master: Don’t let its gourmet appearance fool you! We’ve broken down the process into clear, easy-to-follow steps, making this elegant Keto Coconut Cheesecake Delight achievable for bakers of all skill levels. You’ll be amazed at the professional results you can achieve right in your own kitchen.
- The Ultimate Crowd-Pleaser: Whether you’re hosting a dinner party, bringing a dish to a potluck, or simply treating your family, this cheesecake is guaranteed to impress. Its unique flavor profile and luscious texture make it a standout dessert that even non-keto eaters will rave about!
Are you ready to embark on a flavor adventure that’s both decadently delicious and perfectly aligned with your keto goals? Imagine a dessert so creamy, so dreamy, and so bursting with tropical coconut goodness that you’d swear it couldn’t possibly be low-carb. Well, get ready to have your mind (and taste buds!) blown, because our Keto Coconut Cheesecake Delight is here to prove that you absolutely can have your cake and eat it too – without derailing your diet!
Forget bland, boring keto desserts. This isn’t just any cheesecake; it’s a symphony of textures and flavors. We’re talking about a buttery, crunchy macadamia-coconut crust, a silky-smooth, intensely coconut-flavored cream cheese filling, all crowned with a fluffy whipped topping and toasted coconut flakes. Each bite is a mini-vacation, a sweet escape that satisfies your cravings in the most spectacular way possible. So tie on your apron, crank up some island tunes, and let’s create some magic with this incredible Keto Coconut Cheesecake Delight!
Ingredients for Your Keto Coconut Cheesecake Delight
Gather your tropical treasures! Here’s everything you’ll need to whip up this irresistible Keto Coconut Cheesecake Delight:
For the Simple Crust:
- 3/4 cup raw macadamia nuts
- 3/4 cup finely shredded unsweetened coconut
- 3 tablespoons granular sweetener
- 1/4 teaspoon salt
- 2 tablespoons melted butter (or oil)
For the Creamy Filling:
- 1 1/2 pounds cream cheese, very well softened
- 2/3 cup granular sweetener
- 1/2 cup canned coconut cream, room temperature
- 1 teaspoon coconut extract
- 1/2 teaspoon vanilla extract
- 3 large eggs, room temperature
For the Heavenly Topping:
- 3/4 cup whipping cream
- 2 tablespoons powdered sweetener
- 1/2 teaspoon vanilla or coconut extract
- 1/2 cup lightly toasted large flaked coconut
Detailed Steps to Create Your Keto Coconut Cheesecake Delight
Let’s get baking! Follow these easy, detailed steps to bring your Keto Coconut Cheesecake Delight to life. Precision and a little patience are key to cheesecake perfection!
For the Simple Crust:
- First things first, preheat your oven to a cozy 325°F (160°C). Grab a 9-inch springform pan, lightly grease it, then line the bottom with parchment paper and give that a little grease too. Pop the entire pan onto a large baking sheet – this makes handling it much easier.
- Next, in your food processor, pulse those raw macadamia nuts on high until they transform into lovely coarse crumbs.
- Transfer your macadamia crumbs to a bowl, then stir in the finely shredded coconut, your granular sweetener, and the pinch of salt. Mix it all up!
- Pour in the melted butter (or oil) and mix until everything is beautifully combined and moist.
- Now, press this delightful crust mixture firmly and evenly into the bottom of your prepared springform pan.
- Bake this for 12 to 15 minutes, or until you see the edges just beginning to turn golden. Once done, remove it from the oven and let it cool completely – patience, young grasshopper!
For the Creamy Filling:
- Reduce your oven temperature to a gentle 300°F (150°C).
- In a large bowl, beat your very well softened cream cheese on medium speed for 1 to 2 minutes. You want it wonderfully smooth and gloriously creamy, with no lumps!
- Beat in the granular sweetener, the room-temperature canned coconut cream, and both extracts (coconut and vanilla) until everything is perfectly blended. This is your chance to taste and adjust the sweetness or coconut kick to your heart’s content!
- Now, gently beat in the eggs, one at a time. Mix just until each egg is incorporated, then stop. Remember to scrape down the sides of the bowl and the beaters after each addition to ensure a uniform batter.
- Pour this luscious filling over your completely cooled crust and spread it out evenly to the edges of the pan.
- Place your entire setup (springform pan on the baking sheet) on the center rack of your oven. Here’s the secret weapon: on the rack directly below, place a large baking dish filled with water. This creates a steamy environment that prevents cracks and ensures a perfectly smooth cheesecake!
- Bake for 70 to 90 minutes, or until the edges of the cheesecake are set, but the center still has a slight, delicate jiggle when you gently shake the pan. Don’t overbake!
- Remove your masterpiece from the oven and let it cool completely at room temperature.
- Once cool, run a sharp knife carefully around the edges of the pan, then gently remove the springform sides. Cover the cheesecake with plastic wrap and refrigerate for at least 2 to 3 hours (or even better, overnight!) to allow it to firm up beautifully. This chilling time is crucial for perfect slices.
For the Heavenly Topping:
- In a large bowl, beat the whipping cream, powdered sweetener, and your chosen extract (vanilla or coconut) until lovely stiff peaks form. You want it light and airy!
- Gently spread this cloud-like whipped topping over your perfectly chilled Keto Coconut Cheesecake Delight.
- Finish by sprinkling with the lightly toasted large flaked coconut for that extra touch of tropical crunch and visual appeal. Now, go ahead and enjoy your healthy, delicious, and absolutely gorgeous treat!
Presenting and Serving Your Keto Coconut Cheesecake Delight
You’ve poured your heart into creating this spectacular Keto Coconut Cheesecake Delight, so let’s make sure it looks as good as it tastes when it hits the table! Presentation can elevate any dish from great to unforgettable. Here are some fun and elegant ways to present and serve your tropical masterpiece:
- Classic Elegance: The simplest way is often the best! Serve slices directly from the springform base, showcasing the beautiful layers of crust, filling, and topping. A simple dusting of extra powdered sweetener around the plate or a single fresh mint leaf can add a touch of sophistication.
- Berry Beautiful: For a pop of color and a hint of tartness, arrange a few fresh keto-friendly berries (like raspberries, blueberries, or sliced strawberries) artfully around each slice. The vibrant hues will contrast beautifully with the creamy white cheesecake.
- Chocolate Drizzle Dream: Melt a small amount of sugar-free dark chocolate and drizzle it decoratively over each slice or across the entire top of the cheesecake before slicing. The combination of chocolate and coconut is always a winner!
- Individual Delights: For a party, consider cutting the Keto Coconut Cheesecake Delight into smaller, bite-sized squares or rectangles. Place them in mini cupcake liners for easy grabbing, or serve on small dessert plates with a tiny spoon and a delicate sprinkle of extra toasted coconut.
- Tropical Flair: Garnish with thin slices of fresh kiwi or star fruit for an exotic touch. You could also use edible flowers or a sprinkle of finely grated lime zest for a fragrant, zesty twist that complements the coconut perfectly.
Serve your cheesecake chilled, allowing its flavors and textures to truly shine. It’s perfect as a show-stopping dessert for special occasions, a delightful ending to a weeknight meal, or a much-needed treat during your keto journey.
Storing Your Keto Coconut Cheesecake Delight
So, you’ve managed to resist eating the entire Keto Coconut Cheesecake Delight in one sitting (impressive!). Now, how do you keep your delicious creation fresh for later enjoyment? Proper storage is key to maintaining its creamy texture and vibrant flavor.
- Refrigeration: Your cheesecake will last beautifully in the refrigerator for up to 5-7 days. To store, make sure it’s completely cooled. You can either leave it on the springform pan base and cover the entire cheesecake tightly with plastic wrap, or if you’ve already sliced it, place individual slices in an airtight container. This prevents it from absorbing any fridge odors and keeps it from drying out.
- Freezing: Yes, you can freeze your Keto Coconut Cheesecake Delight! This is great for meal prep or if you want to save some for a much later date.
- Whole Cheesecake: Once the cheesecake is fully chilled and firm, remove it from the springform pan base. Place it on a freezer-safe plate or cardboard round. Wrap it tightly first in plastic wrap, then again in aluminum foil. This double layer protects it from freezer burn. It can be frozen for up to 1-2 months.
- Individual Slices: For easy portion control, slice the cheesecake first. Place slices on a baking sheet lined with parchment paper and freeze for about an hour until firm. Then, wrap each slice individually in plastic wrap and store them together in an airtight freezer bag or container. This way, you can grab just one slice whenever a craving strikes!
- Thawing: To enjoy a frozen slice, simply transfer it from the freezer to the refrigerator and let it thaw for a few hours (or overnight for a whole cheesecake) until it’s soft and creamy again. Avoid thawing at room temperature for food safety and best texture.
With these storage tips, you can savor your delightful Keto Coconut Cheesecake for days or even weeks to come!
FAQs About Your Keto Coconut Cheesecake Delight
Got questions about whipping up this incredible Keto Coconut Cheesecake Delight? We’ve got answers! Here are some of the most common queries to help you master this recipe.
- Can I use a different type of nut for the crust?
Yes! While macadamia nuts offer a unique buttery flavor, you can substitute them with almond flour or a mix of almond flour and pecans for a slightly different, but still delicious, keto-friendly crust. Just ensure the total quantity remains the same. - Is coconut cream the same as coconut milk?
Not quite! Coconut cream is thicker and has a higher fat content than coconut milk. It’s the thick, opaque part that separates and rises to the top when a can of full-fat coconut milk is chilled. For best results in this Keto Coconut Cheesecake Delight, use canned coconut cream. - My cream cheese isn’t soft enough. What should I do?
Softened cream cheese is crucial for a smooth filling! If you forget to take it out ahead of time, unwrap it and place it in a microwave-safe bowl. Microwave on low power (e.g., 50%) for 15-30 second intervals, checking and flipping until just soft, not melted. - What granular sweetener should I use?
For best results, use a high-quality erythritol-based granular sweetener (like Swerve or Lakanto Monk Fruit Sweetener) that measures cup-for-cup like sugar. Allulose is another excellent option for its clean taste. - How do I know when the cheesecake is done baking?
Look for edges that are set and slightly puffed, while the very center (about 2-3 inches wide) still has a slight, delicate jiggle. It will continue to set as it cools and chills. Overbaking can lead to cracks. - Why do I need a water bath for baking this Keto Coconut Cheesecake Delight?
The water bath (steam in the oven) provides a moist, even heat, which helps prevent cracks on the surface of the cheesecake and ensures a creamy, smooth texture from edge to center. It’s a cheesecake’s best friend! - Can I skip the chilling time in the refrigerator?
Technically, you can eat it warm, but the chilling time is absolutely essential for the cheesecake to firm up, fully set, and develop its best flavor and texture. It also makes for much cleaner slices. Don’t skip this step for optimal results! - What if I don’t have coconut extract?
You can still make a delicious cheesecake! The coconut extract intensifies the flavor, but if you don’t have it, simply increase the vanilla extract to 1 teaspoon, or add a tiny pinch of extra shredded coconut to the filling. - Is this cheesecake truly keto-friendly?
Absolutely! This recipe is crafted with keto-friendly ingredients, resulting in just 3.4g net carbs per serving. It’s designed to be a delightful indulgence that fits perfectly into your low-carb lifestyle. - Can I make this cheesecake ahead of time for an event?
Yes, and in fact, it’s highly recommended! The Keto Coconut Cheesecake Delight benefits greatly from chilling overnight, allowing the flavors to meld and the texture to become perfectly firm. This makes it an ideal make-ahead dessert for parties and gatherings.
Keto Coconut Cheesecake Delight 🥥
Equipment
- 9-inch Springform Pan
- Food Processor
- Large Baking Sheet
- Large baking dish
- Large Bowl
- Electric Mixer
Ingredients
Simple Crust
- 0.75 cup raw macadamia nuts
- 0.75 cup finely shredded unsweetened coconut
- 3 tbsp granular sweetener
- 0.25 tsp salt
- 2 tbsp melted butter (or oil)
Creamy Filling
- 1.5 lbs cream cheese very well softened
- 2/3 cup granular sweetener
- 0.5 cup canned coconut cream room temperature
- 1 tsp coconut extract
- 0.5 tsp vanilla extract
- 3 large eggs room temperature
Heavenly Topping
- 0.75 cup whipping cream
- 2 tbsp powdered sweetener
- 0.5 tsp vanilla or coconut extract
- 0.5 cup lightly toasted large flaked coconut
Instructions
- For the Simple Crust:
- 1. Preheat your oven to 325°F. Lightly grease a 9-inch springform pan, line the bottom with parchment paper, and grease the parchment. Place the pan on a large baking sheet.
- 2. In a food processor, pulse the macadamia nuts on high until they form coarse crumbs.
- 3. Transfer the crumbs to a bowl, then stir in the shredded coconut, sweetener, and salt.
- 4. Add the melted butter and mix until everything is well combined.
- 5. Press this crust mixture firmly and evenly into the bottom of your prepared pan.
- 6. Bake for 12 to 15 minutes, or until the edges just start to turn golden. Remove from the oven and let it cool completely.
- For the Creamy Filling:
- 1. Reduce your oven temperature to 300°F.
- 2. In a large bowl, beat the softened cream cheese on medium speed for 1 to 2 minutes until it's wonderfully smooth and creamy.
- 3. Beat in the sweetener, room temperature coconut cream, and extracts until everything is well blended. Feel free to taste and adjust the sweetness or coconut flavor to your liking!
- 4. Gently beat in the eggs one at a time, mixing just until each egg is incorporated. Remember to scrape down the sides of the bowl and the beaters after each addition.
- 5. Pour the delicious filling over your cooled crust and spread it out evenly to the edges.
- 6. Place the entire setup (springform pan on the baking sheet) on the center rack of your oven. On the rack directly below, place a large baking dish filled with water – this creates steam for a perfect cheesecake!
- 7. Bake for 70 to 90 minutes, or until the edges are set but the center still has a slight, delicate jiggle when you gently shake the pan.
- 8. Remove from the oven and let the cheesecake cool completely at room temperature.
- 9. Once cool, run a sharp knife around the edges of the pan, then carefully remove the springform sides. Cover the cheesecake with plastic wrap and refrigerate for at least 2 to 3 hours (or even better, overnight) for it to firm up beautifully.
- For the Heavenly Topping:
- 1. In a large bowl, beat the whipping cream, powdered sweetener, and extract until lovely stiff peaks form.
- 2. Gently spread this whipped topping over your chilled cheesecake.
- 3. Finish by sprinkling with the lightly toasted large flaked coconut for that extra touch of tropical crunch. Enjoy your healthy and delicious treat!
Notes
Calories: 306kcal
Total Carbs: 4.7g
Net Carbs: 3.4g
Fats: 28g
Protein: 4.6g