Indulge in the Ultimate Luscious Caramel Dream Cake Experience!
Get ready to embark on a flavor journey that will tickle your taste buds and warm your soul! Imagine a cake so incredibly moist, infused with the deep, complex notes of burnt sugar, and crowned with a frosting that’s equally rich and dreamy. We’re not just talking about any cake here; we’re diving headfirst into the magnificent world of the Luscious Caramel Dream Cake! This isn’t just a dessert; it’s an edible masterpiece, a sweet symphony of caramel bliss designed to make every single bite an unforgettable moment. Whether you’re a seasoned baker or just looking for your next show-stopping creation, prepare to fall madly in love with this truly special treat. Let’s bake some magic!
Why You’ll Love This Luscious Caramel Dream Cake Recipe
Prepare to be utterly enchanted! Here are four irresistible reasons why the Luscious Caramel Dream Cake will become your new go-to indulgence:
- Unforgettable Burnt Sugar Flavor: This isn’t your average caramel. The homemade burnt sugar syrup infuses both the cake and the frosting with a rich, smoky, and deeply nuanced caramel flavor that’s complex and utterly addictive. It’s a game-changer!
- Incredibly Moist & Tender Crumb: Thanks to ingredients like sour cream, egg whites, and whole milk, this cake boasts an incredibly soft, tender, and moist texture that practically melts in your mouth. Every slice is pure cloud-like perfection.
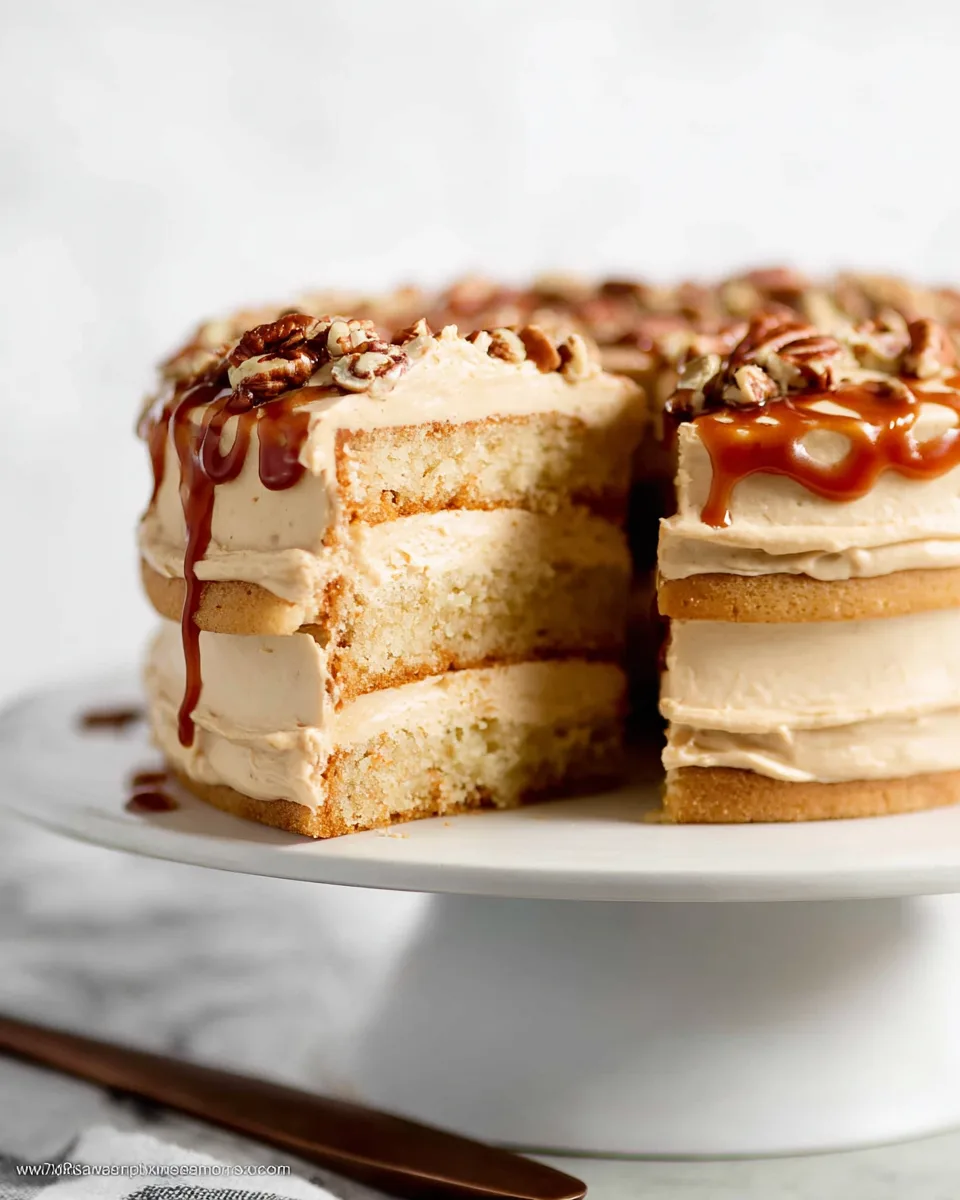
- Show-Stopping Presentation: With its beautifully golden layers, creamy frosting, and optional drizzles of salted caramel and toasted pecans, this cake isn’t just delicious – it’s a visual delight. It’s guaranteed to impress at any gathering or simply make your kitchen feel extra special.
- Homemade Love in Every Bite: There’s something truly satisfying about creating a dessert from scratch that tastes this good. From the aromatic burnt sugar syrup to the final pecan flourish, every step is a labor of love that results in a homemade treat you’ll be proud to share (or devour all by yourself!).
Ingredients for Your Luscious Caramel Dream Cake
Gather your ingredients and let’s get ready to create some magic! Precise measurements are key for this show-stopping Luscious Caramel Dream Cake.
For the Burnt Sugar Syrup:
- 🥣 1 cup (200g) granulated sugar
- 💧 3/4 cup (180ml) boiling water
For the Cake:
- 🌾 2 and 1/2 cups (285g) cake flour (spooned & leveled for a lighter crumb)
- 🥄 2 teaspoons baking powder
- 🧂 1/2 teaspoon baking soda
- ✨ 1 teaspoon salt
- 🧈 3/4 cup (12 Tbsp; 170g) unsalted butter, softened to room temperature
- 🍚 1 cup (200g) granulated sugar
- 🍯 1/2 cup (120ml) cooled burnt sugar syrup
- 🥚 4 large egg whites, at room temperature
- 🍦 1/2 cup (120g) sour cream, at room temperature (or plain Greek yogurt for a lighter option)
- 🌰 2 teaspoons pure vanilla extract
- 🥛 1/2 cup (120ml) whole milk, at room temperature
For the Burnt Sugar Frosting:
- 🧈 1 cup (16 Tbsp; 226g) unsalted butter, softened to room temperature
- ✨ 4 cups (480g) confectioners’ sugar
- 🍯 1/2 cup (120ml) cooled burnt sugar syrup
- 🌰 1 teaspoon pure vanilla extract
- 🥛 2 Tablespoons (30ml) whole milk or heavy cream
- 🧂 1/4 teaspoon salt
For Assembly:
- 🍮 Homemade Salted Caramel, cooled (use moderately for a balanced sweetness)
- 🌰 1/2 cup (50g) chopped pecans, toasted (adds a lovely crunch and healthy fats)
Detailed Step-by-Step Directions to Master Your Luscious Caramel Dream Cake
Follow these precise instructions to bring your beautiful Luscious Caramel Dream Cake to life. Each step is designed for perfection!
- Prepare the Signature Burnt Sugar Syrup (Best Made Ahead!): In a sturdy, medium saucepan, gently melt 1 cup of granulated sugar over medium heat, stirring constantly with a wooden spoon. It will transform into a beautiful amber brown caramel in about 8-10 minutes. Turn the heat to low, then very carefully and slowly drizzle in the boiling water – it will sizzle a lot! Stir after each addition. Once all the water is in, cook for just 3 more minutes on low. Remove from heat and let it cool completely, ideally overnight, until thick and ready to use. This yields about 1 cup.
- Preheat & Prep Pans: Get your oven ready by preheating to 350°F (177°C). Lightly grease two 9-inch cake pans, line the bottoms with parchment paper circles, and grease the parchment too. This makes sure your cakes release perfectly!
- Whisk Dry Ingredients: In a medium bowl, simply whisk together the cake flour, baking powder, baking soda, and salt. Set this aside.
- Cream Butter & Sugar: In a large mixing bowl (using a hand or stand mixer), beat the softened butter and granulated sugar together on high speed until they’re light, fluffy, and perfectly creamed, which takes about 2 minutes.
- Mix in Wet Goodness: With the mixer on medium speed, pour in half (1/2 cup) of your cooled burnt sugar syrup and beat until fully blended. Next, beat in the egg whites, sour cream (or yogurt), and vanilla extract until well combined.
- Combine Wet & Dry Gently: Reduce your mixer speed to low. Gradually add the dry ingredient mixture to the wet, mixing just until combined. With the mixer still on low, slowly pour in the milk until everything comes together. Remember, don’t over-mix for a super tender cake! The batter will be slightly thick.
- Bake to Golden Perfection: Divide the cake batter evenly between your two prepared pans. Bake for 23-25 minutes, or until a toothpick inserted into the center of a cake comes out clean. The syrup gives the cakes a lovely golden crust! Let them cool completely in their pans on a wire rack.
- Whip Up the Creamy Frosting: While the cakes cool, let’s make the frosting! In a large bowl (with your mixer and paddle attachment), beat the softened butter on medium speed until creamy, about 1-2 minutes. Add the confectioners’ sugar, the remaining 1/2 cup of cooled burnt sugar syrup, vanilla extract, milk/cream, and salt. Beat on low speed for 30 seconds, then crank it up to high and beat for about 2 minutes until it’s wonderfully smooth and light. Taste and adjust salt if you love that salty-sweet kick!
- Assemble Your Dream Cake: Once your cakes are fully cool, use a large serrated knife to level the tops for a flat, beautiful surface. Place one cake layer on your serving plate. Spread an even layer of frosting over it, then drizzle about 1/4 cup of your cooled salted caramel on top of the frosting. Gently place the second cake layer on top.
- Chill & Finish with Flair: Pop the cake into the refrigerator for at least 30-45 minutes; this helps the inner caramel layer set. After chilling, spread the remaining frosting evenly over the top and sides of the cake. For a final flourish, garnish with your toasted pecans and an extra drizzle of salted caramel. Slice and enjoy this truly special, homemade treat!
Creative Ways to Present and Serve Your Luscious Caramel Dream Cake
Your Luscious Caramel Dream Cake is a masterpiece, and it deserves a presentation that’s just as delightful! Here are some fun and elegant ways to serve it:
- Classic Elegance: For a sophisticated touch, dust the top lightly with a sprinkle of sea salt flakes right before serving to enhance the salted caramel notes. Arrange a few whole toasted pecans artfully around the top edge.
- A Scoop of Heaven: Serve individual slices warm (just slightly, pop it in the microwave for 10-15 seconds!) with a generous scoop of vanilla bean ice cream or a dollop of freshly whipped cream. The warm cake and cold ice cream create an incredible contrast!
- Berry Bliss: While caramel is the star, a few fresh raspberries or blackberries on the side of each slice can add a lovely tart counterpoint and a pop of color, making the Luscious Caramel Dream Cake even more visually appealing.
- Coffee Pairing: This rich cake is a dream come true with a strong cup of coffee, an espresso, or a creamy latte. Consider serving small slices alongside after-dinner drinks.
- Mini Marvels: Instead of a large cake, you can bake this batter in cupcake tins for delightful caramel cupcakes! Adjust baking time to about 18-22 minutes. Frost, drizzle with caramel, and top with a single pecan for individual treats.
- Dessert Bar Feature: If you’re hosting a party, cut the cake into smaller, bite-sized squares and arrange them on a tiered dessert stand. This makes it easy for guests to grab a sweet morsel and appreciate the beautiful layers.
Storing Your Luscious Caramel Dream Cake: Freshness & Longevity
You’ll want to savor every last crumb of your exquisite Luscious Caramel Dream Cake, so proper storage is key to maintaining its freshness and deliciousness. Here’s how to keep it at its best:
- At Room Temperature: If your home is cool (below 70°F or 21°C) and the cake will be consumed within 1-2 days, you can store it in an airtight cake dome or container on the counter. The butter in the frosting keeps it stable for a short period.
- In the Refrigerator: For longer storage, or if your kitchen is warmer, the refrigerator is your best friend. Place the cake in an airtight container or cover it loosely with plastic wrap to prevent it from drying out or absorbing fridge odors. Stored this way, your Luscious Caramel Dream Cake will stay fresh and moist for up to 5-7 days. Remember to let it come to room temperature for about 30 minutes before serving for the best flavor and texture.
- Freezing for Future Enjoyment: This cake freezes beautifully! For best results, freeze individual unfrosted cake layers wrapped tightly in plastic wrap, then aluminum foil. They’ll last for up to 2-3 months. For a fully frosted cake, flash freeze it uncovered until the frosting is firm (about 1-2 hours), then wrap it tightly in plastic wrap and then foil. Thaw in the refrigerator overnight before bringing to room temperature to serve.
FAQs About the Luscious Caramel Dream Cake
Got questions about whipping up this incredible Luscious Caramel Dream Cake? We’ve got answers!
- Can I use all-purpose flour instead of cake flour?
While cake flour is recommended for its lighter crumb, you can substitute it with all-purpose flour by removing 2 tablespoons from each cup of all-purpose flour and replacing it with 2 tablespoons of cornstarch, then sifting them together.
- What if my burnt sugar syrup crystallizes?
This can happen if sugar crystals get on the sides of the pan. To prevent it, try not to stir too much once the sugar starts to melt, or brush down the sides of the pan with a wet pastry brush. If it crystallizes, you can try adding a splash more hot water and stirring over low heat until it dissolves, but sometimes it’s best to start over.
- Can I make the burnt sugar syrup ahead of time?
Absolutely, it’s encouraged! Making it ahead, even overnight, allows it to cool and thicken perfectly, making it easier to incorporate into the batter and frosting. Store it in an airtight container at room temperature.
- Why do I need room temperature ingredients?
Room temperature butter, eggs, sour cream, and milk emulsify better, creating a smooth, cohesive batter. This leads to a finer, more tender crumb and a more consistent cake texture.
- Can I use store-bought salted caramel?
Yes, for convenience, you can definitely use your favorite good-quality store-bought salted caramel. Just ensure it’s cooled to prevent it from melting the frosting.
- Is sour cream essential, or can I omit it?
Sour cream adds incredible moisture and tenderness to the cake. Plain Greek yogurt is a great substitute if you want a lighter option. We don’t recommend omitting it entirely.
- My cake layers domed in the oven. How do I get flat layers?
Slight doming is normal. You can level them using a large serrated knife once completely cooled. For less doming, ensure your oven temperature is accurate, and avoid over-mixing the batter.
- How do I know when the cake is done baking?
A toothpick inserted into the center of the cake should come out clean, with no wet batter clinging to it. The edges will also be lightly golden and pulling away slightly from the pan.
- Can I halve this recipe?
Yes, you can halve all the ingredients to make a single 9-inch layer cake or a smaller 6-inch two-layer cake.
- What’s the best way to cut a clean slice of cake?
For clean slices, use a long, sharp serrated knife. Dip the knife in hot water and wipe it clean between each slice. This helps prevent the frosting from sticking and tearing.
Luscious Caramel Dream Cake ✨
Equipment
- Medium Saucepan
- Hand or stand mixer
- Mixing Bowls
- 9-inch Cake Pans
- Parchment Paper
- Wire Rack
- Large Serrated Knife
- Wooden Spoon
Ingredients
For the Burnt Sugar Syrup
- 1 cup granulated sugar
- 3/4 cup boiling water
For the Cake
- 2 1/2 cups cake flour (spooned & leveled for a lighter crumb)
- 2 teaspoons baking powder
- 1/2 teaspoon baking soda
- 1 teaspoon salt
- 3/4 cup unsalted butter softened to room temperature
- 1 cup granulated sugar
- 1/2 cup cooled burnt sugar syrup
- 4 large egg whites at room temperature
- 1/2 cup sour cream at room temperature (or plain Greek yogurt for a lighter option)
- 2 teaspoons pure vanilla extract
- 1/2 cup whole milk at room temperature
For the Burnt Sugar Frosting
- 1 cup unsalted butter softened to room temperature
- 4 cups confectioners' sugar
- 1/2 cup cooled burnt sugar syrup
- 1 teaspoon pure vanilla extract
- 2 Tablespoons whole milk or heavy cream
- 1/4 teaspoon salt
For Assembly
- Homemade Salted Caramel cooled (use moderately for a balanced sweetness)
- 1/2 cup chopped pecans toasted (adds a lovely crunch and healthy fats)
Instructions
- 1. Prepare the Signature Burnt Sugar Syrup (Best Made Ahead!): In a sturdy, medium saucepan, gently melt 1 cup of granulated sugar over medium heat, stirring constantly with a wooden spoon. It will transform into a beautiful amber brown caramel in about 8-10 minutes. Turn the heat to low, then very carefully and slowly drizzle in the boiling water – it will sizzle a lot! Stir after each addition. Once all the water is in, cook for just 3 more minutes on low. Remove from heat and let it cool completely, ideally overnight, until thick and ready to use. This yields about 1 cup.
- 2. Preheat & Prep Pans: Get your oven ready by preheating to 350°F (177°C). Lightly grease two 9-inch cake pans, line the bottoms with parchment paper circles, and grease the parchment too. This makes sure your cakes release perfectly!
- 3. Whisk Dry Ingredients: In a medium bowl, simply whisk together the cake flour, baking powder, baking soda, and salt. Set this aside.
- 4. Cream Butter & Sugar: In a large mixing bowl (using a hand or stand mixer), beat the softened butter and granulated sugar together on high speed until they're light, fluffy, and perfectly creamed, which takes about 2 minutes.
- 5. Mix in Wet Goodness: With the mixer on medium speed, pour in half (1/2 cup) of your cooled burnt sugar syrup and beat until fully blended. Next, beat in the egg whites, sour cream (or yogurt), and vanilla extract until well combined.
- 6. Combine Wet & Dry Gently: Reduce your mixer speed to low. Gradually add the dry ingredient mixture to the wet, mixing just until combined. With the mixer still on low, slowly pour in the milk until everything comes together. Remember, don't over-mix for a super tender cake! The batter will be slightly thick.
- 7. Bake to Golden Perfection: Divide the cake batter evenly between your two prepared pans. Bake for 23-25 minutes, or until a toothpick inserted into the center of a cake comes out clean. The syrup gives the cakes a lovely golden crust! Let them cool completely in their pans on a wire rack.
- 8. Whip Up the Creamy Frosting: While the cakes cool, let's make the frosting! In a large bowl (with your mixer and paddle attachment), beat the softened butter on medium speed until creamy, about 1-2 minutes. Add the confectioners' sugar, the remaining 1/2 cup of cooled burnt sugar syrup, vanilla extract, milk/cream, and salt. Beat on low speed for 30 seconds, then crank it up to high and beat for about 2 minutes until it's wonderfully smooth and light. Taste and adjust salt if you love that salty-sweet kick!
- 9. Assemble Your Dream Cake: Once your cakes are fully cool, use a large serrated knife to level the tops for a flat, beautiful surface. Place one cake layer on your serving plate. Spread an even layer of frosting over it, then drizzle about 1/4 cup of your cooled salted caramel on top of the frosting. Gently place the second cake layer on top.
- 10. Chill & Finish with Flair: Pop the cake into the refrigerator for at least 30-45 minutes; this helps the inner caramel layer set. After chilling, spread the remaining frosting evenly over the top and sides of the cake. For a final flourish, garnish with your toasted pecans and an extra drizzle of salted caramel. Slice and enjoy this truly special, homemade treat!
Notes
Cook Time: 24 minutes
Total Time: 4 hours, 30 minutes (includes cooling time)
Servings: 10-12 Nutrition per serving (estimated):
Calories: 450
Total Carbs: 65g
Net Carbs: 62g
Fats: 25g
Protein: 4g