Why You’ll Love This No Bake Pistachio Cheesecake
Get ready to fall head over heels for a dessert that’s as delightful to make as it is to eat! This No Bake Pistachio Cheesecake isn’t just a recipe; it’s an experience. Here are four irresistible reasons why it’s about to become your new go-to treat:
- Effortlessly Easy & Oven-Free Bliss: Say goodbye to stressful baking! This recipe truly lives up to its “no bake” title, meaning less time in the kitchen and more time enjoying. Perfect for those hot summer days or when you just don’t want to turn on the oven.
- Irresistibly Creamy & Nutty Dream: Prepare for a symphony of textures and flavors. The cheesecake filling is unbelievably smooth and rich, boasting that distinctive, subtly sweet pistachio flavor that’s utterly addictive. It’s a sophisticated taste that appeals to everyone.
- A Refreshing Dessert Sensation: Unlike heavy baked cheesecakes, this No Bake Pistachio Cheesecake is wonderfully light and refreshing. It’s the perfect palate cleanser after any meal, leaving you feeling satisfied but never overly full.
- Perfect for Any Occasion (or No Occasion!): Whether you’re hosting a fancy dinner party, bringing a dish to a potluck, or simply craving something sweet on a Tuesday night, this cheesecake fits the bill. Its vibrant color and unique flavor make it a showstopper every time.
Meet Your New Favorite Dessert: The No Bake Pistachio Cheesecake!
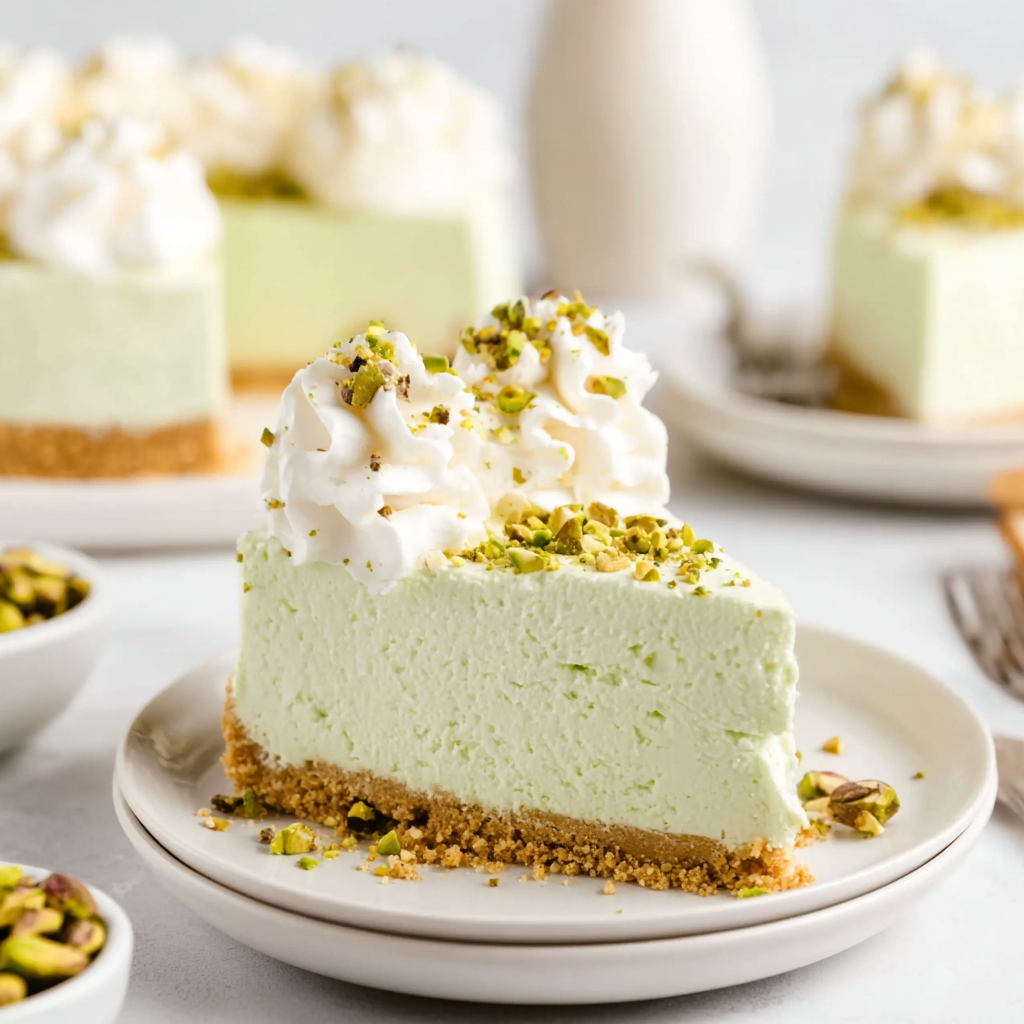
Picture this: a dessert so creamy, so nutty, so utterly refreshing, it feels like a little slice of heaven. Now, imagine whipping it up without even touching your oven! Yes, you heard that right. We’re talking about the magical, marvelous No Bake Pistachio Cheesecake – a dessert that promises pure bliss with minimal fuss.
Forget the hours of preheating, water baths, and crack-induced panic. This recipe is all about embracing the easy life. From its buttery graham cracker crust to its velvety smooth, pistachio-infused filling, every bite is a delightful escape. It’s cool, it’s vibrant, and it brings that sophisticated pistachio flavor to the forefront in the most approachable way possible. Perfect for pistachio lovers and dessert enthusiasts alike, this cheesecake is about to become the star of your dessert repertoire. Let’s get creating!
Ingredients for Your Delectable No Bake Pistachio Cheesecake
Gather your simple ingredients, and let’s get ready to transform them into something truly spectacular. Precision matters, but don’t worry, it’s all straightforward for this glorious No Bake Pistachio Cheesecake.
- 🥄 1 ½ cups graham cracker crumbs
- 🧈 5 tablespoons butter, melted
- 🧀 24 ounces cream cheese, softened (usually 3 standard blocks)
- 🧁 3.4 ounces instant pistachio pudding mix (one standard box)
- 🍚 ¾ cup powdered sugar
- 🌰 ½ teaspoon almond extract
- 🥛 2 cups heavy cream, very cold
Crafting Your Dream: Step-by-Step Directions for No Bake Pistachio Cheesecake
Get ready for a fun, straightforward journey to dessert nirvana. Follow these easy steps to create your magnificent No Bake Pistachio Cheesecake.
- Crust Creation: In a medium bowl, combine your graham cracker crumbs with the melted butter. Mix thoroughly until the crumbs are evenly moistened and resemble wet sand. Press this mixture firmly into the bottom of an 8-inch or 9-inch springform pan. Use the back of a spoon or the bottom of a glass to get a compact, even layer. Chill this crust in the refrigerator for at least 30 minutes to set. If you’re really pressed for time, you can bake it for 5 minutes at 350°F, then let it cool completely.
- Cream Cheese Base: In a large mixing bowl, add the softened cream cheese, instant pistachio pudding mix powder (don’t prepare it separately, just add the powder!), powdered sugar, and almond extract. Beat these ingredients together with an electric mixer (handheld or stand mixer) on medium speed until the mixture is completely smooth and well blended. Scrape down the sides of the bowl as needed to ensure everything is incorporated.
- Whip the Cream: In a separate, chilled large bowl, pour in the very cold heavy cream. Using clean beaters, whip the heavy cream on high speed until stiff peaks form. This usually takes about 3-4 minutes. You’ll know it’s ready when the cream holds its shape firmly when you lift the beaters. Be careful not to over-whip, or it can become grainy.
- Gentle Folding: This is a key step to keep your cheesecake airy! Gently fold about one-third of the whipped cream into the cream cheese mixture using a spatula. Once partially combined, add the remaining whipped cream and continue to fold gently until no streaks of white cream remain. The goal is to incorporate it without deflating the air you’ve whipped into the cream.
- Assemble & Chill: Pour the luscious No Bake Pistachio Cheesecake filling evenly over your chilled graham cracker crust in the springform pan. Use an offset spatula or the back of a spoon to smooth the top. Cover the pan loosely with plastic wrap.
- Patience is a Virtue (and Delicious): Refrigerate your cheesecake for at least 6 hours. For the absolute best results and a perfectly set, sliceable cheesecake, chilling it overnight is highly recommended. The longer it chills, the firmer and more stable it will be.
Serving & Presentation: Elevating Your No Bake Pistachio Cheesecake
Once your magnificent No Bake Pistachio Cheesecake is perfectly chilled and set, it’s time for the grand reveal! Presentation can make all the difference, transforming a delicious dessert into a true showstopper. Here’s how to serve and present your creation like a pro:
- The Grand Unveiling: Carefully run a thin knife around the edge of the springform pan before releasing the sides. This ensures a clean, smooth edge.
- Garnish Galore:
- Chopped Pistachios: The most classic choice! Sprinkle a generous amount of finely chopped, roasted pistachios over the top for added crunch and visual appeal.
- Whipped Cream Dollops: Pipe or spoon additional dollops of freshly whipped cream around the perimeter or in the center.
- Berry Burst: Fresh raspberries, strawberries, or even a mix of berries add a beautiful contrast in color and a lovely tartness that complements the rich cheesecake.
- Chocolate Drizzle: A drizzle of melted dark or white chocolate can add a touch of elegance and extra indulgence.
- Mint Leaves: A few fresh mint leaves can add a pop of green and a refreshing aroma.
- Individual Portions: For easy serving at a party, you can pre-slice the cheesecake while it’s still cold and arrange the slices on a platter. Or, for a fun twist, prepare individual mini cheesecakes in muffin tins lined with paper cups (adjust crust and filling quantity accordingly).
- Room Temperature vs. Chilled: While the cheesecake must be served cold, letting a slice sit at room temperature for 5-10 minutes before eating can slightly soften it, enhancing its creamy texture.
- Pairing Suggestions: Serve alongside a cup of coffee, a glass of cold milk, or a light fruit tea.
Storage Savvy: Keeping Your No Bake Pistachio Cheesecake Fresh
You’ve put in the (minimal!) effort to create this delightful No Bake Pistachio Cheesecake, so naturally, you’ll want to keep it fresh and delicious for as long as possible. Here’s how to store it and maximize its shelf life:
- Refrigeration is Key: Since this is a no-bake dessert made with dairy products, it must be stored in the refrigerator. After serving, cover any remaining cheesecake tightly with plastic wrap or aluminum foil. If it’s still in the springform pan, simply cover the top securely.
- How Long Does It Last? When properly stored in the refrigerator, your No Bake Pistachio Cheesecake will stay fresh and delicious for up to 4-5 days. Beyond that, the texture and flavor might start to diminish.
- Preventing Odor Absorption: Cream cheese-based desserts can sometimes absorb odors from other foods in your fridge. Ensure it’s covered tightly to prevent this and keep its pure pistachio flavor intact.
- Freezing for Longer Storage: Yes, you can freeze no-bake cheesecake!
- Whole Cheesecake: Once fully set, remove the cheesecake from the springform pan. Place it on a freezer-safe plate or cardboard round. Freeze uncovered for about an hour until firm. Then, wrap it tightly in several layers of plastic wrap, followed by a layer of aluminum foil.
- Individual Slices: Freeze individual slices following the same method. This is great for portion control!
- Thawing Frozen Cheesecake: To enjoy a frozen slice, transfer it to the refrigerator and let it thaw for 3-4 hours, or overnight for a whole cheesecake. Do not thaw at room temperature for extended periods.
- Freezer Shelf Life: Frozen No Bake Pistachio Cheesecake can last for up to 1-2 months in the freezer without a significant loss in quality.
FAQs About Your Delicious No Bake Pistachio Cheesecake
Got questions about whipping up the perfect No Bake Pistachio Cheesecake? We’ve got answers!
- Q1: Can I use a different type of crust?
- Absolutely! While graham cracker crumbs are classic, you can experiment with other cookie crumbs like vanilla wafers, shortbread cookies, or even chocolate cookies for a fun twist.
- Q2: Is instant pistachio pudding mix essential?
- Yes, for this specific recipe, the instant pudding mix is crucial. It not only provides the vibrant pistachio flavor and color but also acts as a stabilizer and thickener for the no-bake filling, ensuring it sets properly.
- Q3: Can I make this cheesecake ahead of time?
- This cheesecake is an ideal make-ahead dessert! In fact, it’s encouraged to make it the day before, as it needs at least 6 hours (preferably overnight) in the refrigerator to set completely and achieve its best texture.
- Q4: How do I get clean slices?
- For clean slices, ensure your cheesecake is thoroughly chilled. Use a sharp knife that has been run under hot water and wiped dry between each slice. This will help the knife glide through cleanly without sticking.
- Q5: Can I use fresh pistachios in the filling?
- While you can add finely ground fresh pistachios for extra texture and flavor, they won’t replace the instant pudding mix. The pudding mix is vital for the filling’s structure. You can fold in some finely chopped pistachios along with the whipped cream for a delightful crunch.
- Q6: What if my heavy cream isn’t whipping to stiff peaks?
- Ensure your heavy cream is very cold, and preferably, chill your mixing bowl and beaters in the freezer for 10-15 minutes before whipping. If it’s still not whipping, it might not have enough fat content (ensure it’s at least 36% milk fat).
- Q7: Can I make this cheesecake less sweet?
- You can slightly reduce the amount of powdered sugar to ¾ cup without significantly impacting the texture. However, the instant pudding mix itself contains sugar, so complete removal isn’t feasible for this recipe.
- Q8: Why is my cheesecake too soft or not setting?
- The most common reasons are not chilling long enough, not whipping the heavy cream to stiff peaks, or over-folding the whipped cream into the cream cheese mixture, which can deflate the air. Ensure all steps are followed carefully and allow for ample chill time.
- Q9: Can I use a regular pie dish instead of a springform pan?
- You can, but it will be much harder to remove and present. A springform pan allows you to release the sides, showcasing the beautiful cheesecake. If using a pie dish, you’ll likely serve slices directly from the dish.
- Q10: Can I double the recipe?
- Yes, you can double all the ingredients to make a larger cheesecake (e.g., in a 10 or 12-inch springform pan) or two smaller ones. Just ensure you have large enough bowls and give it extra chilling time, possibly overnight or longer, to fully set.
No Bake Pistachio Cheesecake
Equipment
- Springform Pan
Ingredients
Crust
- 1.5 cups graham cracker crumbs
- 5 tablespoons butter melted
Cheesecake Filling
- 24 ounces cream cheese
- 3.4 ounces instant pistachio pudding mix
- 0.75 cup powdered sugar
- 0.5 teaspoon almond extract
- 2 cups heavy cream
Instructions
- Combine graham cracker crumbs and melted butter in a bowl, then press into the bottom of an 8″ or 9″ springform pan. Chill for 30 minutes, or bake for 5 minutes at 350°F if in a hurry.
- In a large bowl, beat the cream cheese, pistachio pudding mix, powdered sugar, and almond extract until smooth and well blended.
- In a separate bowl, whip the heavy cream until stiff peaks form, about 3-4 minutes.
- Gently fold the whipped cream into the cream cheese mixture, ensuring it stays airy.
- Spread the filling evenly over the crust and refrigerate for at least 6 hours, preferably overnight, before serving.
Notes
Calories: 688
Total Carbs: 32g
Net Carbs: 31g
Fats: 60g
Protein: 8g