Get ready to ditch the oven and embrace the easiest, most irresistible fall dessert! If you’re dreaming of pumpkin spice and everything nice, but dread the baking, then prepare to meet your new best friend: the No Bake Pumpkin Pie Delight! This isn’t just a dessert; it’s a creamy, dreamy, spiced pumpkin hug for your taste buds, all without ever turning on the oven. It’s perfect for busy holidays, spontaneous cravings, or simply impressing your guests with minimal effort. Dive in and discover the magic!
Why You’ll Love This No Bake Pumpkin Pie Delight!
- Effortlessly Easy: Forget complicated techniques and endless steps! This recipe comes together in a flash, making it perfect for novice bakers and seasoned pros alike. No oven required means less stress and more time to enjoy the fall festivities.
- Healthy & Guilt-Free: With monk fruit sweetener and light whipped topping, this pie offers all the delicious flavor you crave without the extra calories. It’s a delightful treat that you can feel good about serving and savoring.
- Bursting with Autumn Flavor: From the zesty ginger snap crust to the creamy, perfectly spiced pumpkin filling, every bite screams fall. It’s the quintessential autumn dessert, delivering that cozy, comforting taste everyone adores.
- Make-Ahead Marvel: This pie loves to chill! Prepare it the day before your event, and it will be perfectly set, beautifully delicious, and ready to wow your guests, giving you a head start on entertaining.
Ingredients You’ll Need for Your No Bake Pumpkin Pie Delight!
- 🍪 35 ginger snap cookies, crushed
- 🥄 6 Tablespoons granular monk fruit sweetener (or granulated sugar)
- 🧈 3 Tablespoons butter, melted
- 🧀 1 (8 ounce) package cream cheese, softened to room temperature
- 🍯 1/2 cup granular monk fruit sweetener (or granulated sugar)
- 🎃 1 cup pumpkin puree (ensure it’s not pie filling)
- ✨ 1 Tablespoon pumpkin pie spice
- 🌿 1 teaspoon vanilla extract
- ☁️ 1 (8 ounce) carton Cool Whip, thawed (or homemade light whipped topping)
Crafting Your No Bake Pumpkin Pie Delight!: Step-by-Step Directions
- Crust Creation Magic: Grab your ginger snap cookies and let a blender or food processor do the heavy lifting, turning them into fine, fragrant crumbs. Transfer these golden crumbs into a 9-inch pie plate. Now, add your melted butter and the 6 tablespoons of monk fruit sweetener (or sugar), mixing with a fork until every crumb is perfectly moistened. Press this mixture down firmly and evenly, covering the bottom and extending up the sides of your pie plate. Pop this masterpiece into the freezer – it’s going on a quick chill mission while you whip up the filling!
- Whip Up the Creamy Filling: In a large bowl, it’s time for the magic to happen! Using a hand or stand mixer, beat the softened cream cheese and the 1/2 cup of monk fruit sweetener (or sugar) until the mixture is beautifully smooth and lump-free. Then, gently fold in the rich pumpkin puree, the aromatic pumpkin pie spice, and the fragrant vanilla extract. Keep mixing until everything is perfectly blended and wonderfully creamy.
- Fold in the Fluff: Now for the airy texture! Take your thawed Cool Whip (or your homemade light whipped topping) and gently fold it into the pumpkin mixture using a rubber scraper. Mix carefully – you want to combine everything thoroughly while keeping that lovely, airy texture intact.
- Assemble Your Delight: Spoon this irresistible, creamy filling into your perfectly chilled pie crust. Smooth the top evenly with a scraper or spatula, making it look picture-perfect.
- Chill & Set: Cover your pie with plastic wrap and slide it into the refrigerator. This is the crucial setting time! Let it chill for a minimum of 2 hours, but for the absolute best results and a truly firm, sliceable pie, leaving it overnight is the golden ticket. Prepare it the day before for special occasions – you won’t regret it!
- Serve & Savor: Before serving, if you wish, add an extra dollop of light whipped topping for that extra touch of elegance. Slice into generous portions and enjoy every healthy, easy, and utterly delightful bite!
Presenting and Serving Your No Bake Pumpkin Pie Delight!
This No Bake Pumpkin Pie Delight! is already a showstopper, but with a few extra touches, you can elevate it from delightful to absolutely dazzling!
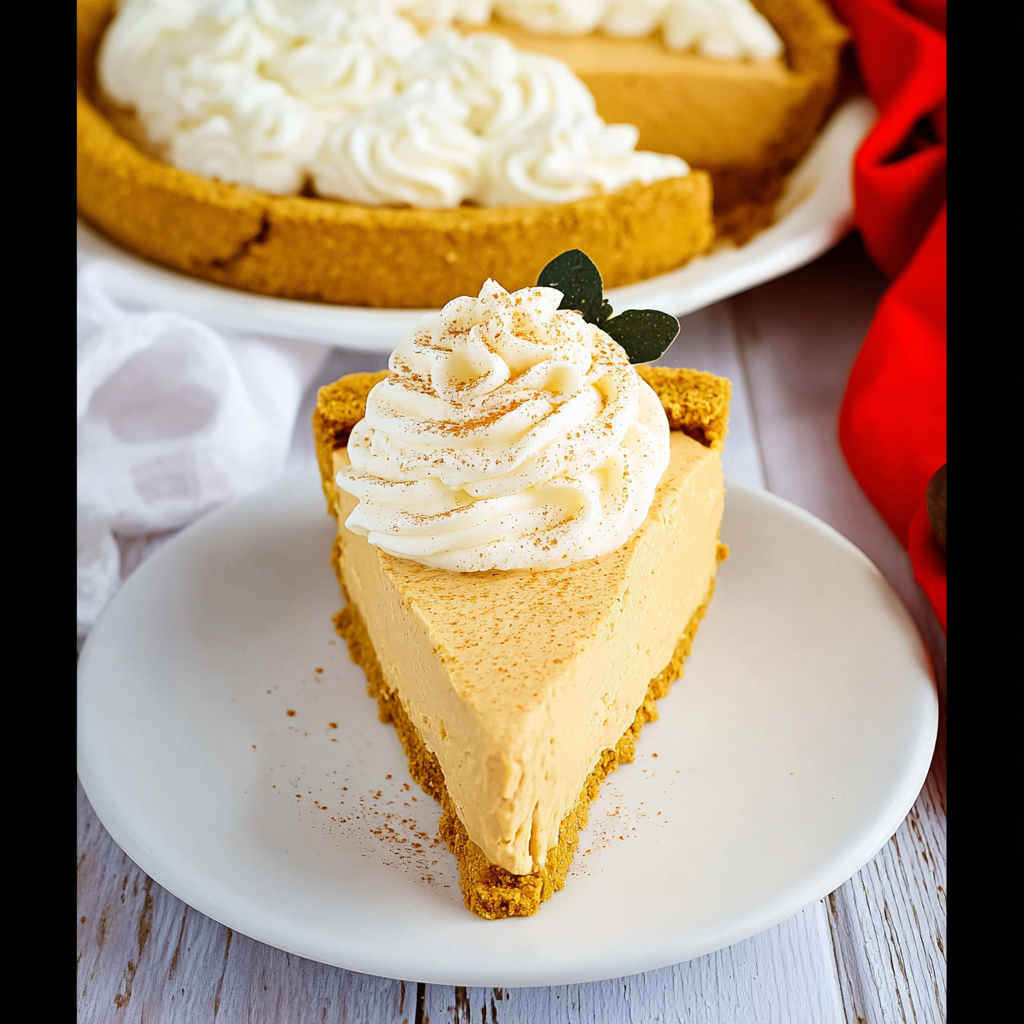
- Classic Elegance: A simple swirl of extra light whipped topping on each slice, dusted lightly with a pinch of cinnamon or nutmeg, is always a winner.
- Ginger Snap Glamour: Crush a few extra ginger snaps and sprinkle them around the edges of the pie or over individual slices for added crunch and flavor.
- Caramel Drizzle Dream: A light drizzle of sugar-free caramel sauce (or regular caramel if you’re not counting calories) adds a touch of sophistication and extra sweetness.
- Chocolate Shavings: A sprinkle of dark chocolate shavings can create a beautiful contrast and an unexpected flavor pairing.
- Mini Pies: Instead of one large pie, press the crust mixture into muffin tins lined with paper cups for individual “mini” pumpkin pies. These are perfect for parties and portion control!
- Berry Brightness: While not traditional, a few fresh cranberries or a light cranberry coulis can add a vibrant color pop and a tart counterpoint to the sweetness.
- Serving Suggestion: For the cleanest slices, use a warm, sharp knife. Dip your knife in hot water and wipe clean between each cut. This will ensure every slice of your No Bake Pumpkin Pie Delight! looks as perfect as it tastes.
Storage & Shelf Life of Your No Bake Pumpkin Pie Delight!
Good news! This No Bake Pumpkin Pie Delight! is excellent for making ahead, and it stores beautifully. Once assembled, ensure your pie is tightly covered with plastic wrap to prevent it from absorbing refrigerator odors and to maintain its freshness. Store it in the refrigerator for up to 3-4 days. While it might still be safe to eat after this, the texture and freshness are best within this timeframe. We don’t recommend freezing this particular pie, as the texture of the cream cheese and Cool Whip can change upon thawing, potentially becoming watery or gritty. Enjoy it fresh and chilled!
FAQs About Your No Bake Pumpkin Pie Delight!
- Q1: Can I use regular sugar instead of monk fruit sweetener?
- A: Absolutely! The recipe provides both options. Simply substitute the monk fruit sweetener with granulated sugar in the same measurements.
- Q2: Is it okay to use pumpkin pie filling instead of pumpkin puree?
- A: No, it’s crucial to use plain pumpkin puree. Pumpkin pie filling already contains spices and sweeteners, which would alter the flavor profile of this recipe significantly.
- Q3: Can I make this pie dairy-free?
- A: Making this completely dairy-free would require substitutions for the cream cheese and Cool Whip. You could try vegan cream cheese and coconut-based whipped topping, but the texture and flavor might vary.
- Q4: How can I ensure my crust is firm?
- A: Pressing the mixture firmly and evenly into the pie plate is key. Also, chilling it in the freezer while preparing the filling helps it set and become sturdy.
- Q5: What if I don’t like ginger snap cookies?
- A: You can certainly use other cookie crumbs! Graham crackers, shortbread, or even vanilla wafers would make a delicious alternative crust.
- Q6: Can I make this pie ahead of time for a party?
- A: Yes, in fact, it’s highly recommended! Preparing it the day before allows it to set perfectly, making it easier to slice and enhancing the flavors. Just keep it refrigerated.
- Q7: How do I get clean slices of the pie?
- A: Ensure the pie is thoroughly chilled, ideally overnight. Use a sharp knife that has been dipped in hot water and wiped clean between each slice. This prevents the filling from sticking.
- Q8: What kind of pumpkin pie spice should I use?
- A: Any store-bought pumpkin pie spice blend works great! Or, you can make your own by combining cinnamon, nutmeg, ginger, and a pinch of cloves.
- Q9: Can I add nuts to the crust?
- A: Yes, for an extra layer of flavor and texture, you could add about 1/4 cup of finely chopped pecans or walnuts to the crushed ginger snap cookies for the crust.
- Q10: Why does the recipe specify “light” whipped topping?
- A: The recipe aims for a healthier profile, so using light whipped topping helps reduce the calorie and fat content. You can certainly use regular Cool Whip or homemade whipped cream if you prefer.
Prep Time & Nutrition Snapshot:
Prep Time: 20 Minutes
Cook Time: 0 Minutes
Total Time: 140 Minutes (includes chill time)
Servings: 8
Calories: 281 kcal
Total Carbs: 49g
Net Carbs: 47g
Fats: 9g
Protein: 2g
No Bake Pumpkin Pie Delight!
Equipment
- Blender or Food Processor
- 9-inch Pie Plate
- Hand or stand mixer
- Large Bowl
- Rubber scraper
- Spatula
Ingredients
Ginger Snap Cookie Crust
- 35 ginger snap cookies crushed
- 6 Tbsp granular monk fruit sweetener (or granulated sugar)
- 3 Tbsp butter melted
Pumpkin Pie Filling
- 1 package cream cheese 8 ounce, softened to room temperature
- 0.5 cup granular monk fruit sweetener (or granulated sugar)
- 1 cup pumpkin puree (ensure it’s not pie filling)
- 1 Tbsp pumpkin pie spice
- 1 tsp vanilla extract
- 1 carton Cool Whip 8 ounce, thawed (or homemade light whipped topping)
Instructions
- First, create your delicious crust! In a blender or food processor, finely crush the ginger snap cookies into crumbs. Transfer these crumbs to a 9-inch pie plate. Mix in the melted butter and 6 tablespoons of monk fruit sweetener (or sugar) with a fork until fully moistened. Press this mixture firmly and evenly into the bottom and up the sides of the pie plate. Pop your crust into the freezer to chill while you prepare the filling.
- Next, prepare the creamy pumpkin filling. In a large bowl, using a hand or stand mixer, beat together the softened cream cheese and 1/2 cup of monk fruit sweetener (or sugar) until smooth. Stir in the pumpkin puree, pumpkin pie spice, and vanilla extract until the mixture is perfectly blended and creamy.
- Gently fold in the thawed Cool Whip (or your favorite light whipped topping) into the pumpkin mixture using a rubber scraper. Mix carefully until everything is well combined and airy.
- Spoon this delightful filling into your chilled pie crust, smoothing the top evenly with a scraper or spatula. Cover the pie with plastic wrap and refrigerate for a minimum of 2 hours, or ideally, overnight, to allow it to set beautifully. For best results, especially for special occasions, prepare this the day before! Before serving, you can add extra light whipped topping if you like. Slice into lovely portions and enjoy your healthy, easy-to-make dessert!