Peppermint Swirl Cookies: Easy Holiday Magic!
The holidays are here, and with them comes that enchanting feeling of warmth, joy, and the irresistible aroma of freshly baked treats! If you’re looking to sprinkle a little extra magic into your festive season, look no further. Imagine vibrant red and white swirls, a refreshing burst of peppermint, and a tender, buttery cookie that simply melts in your mouth. That’s the promise of our Peppermint Swirl Cookies: Easy Holiday Magic! recipe. These delightful confections aren’t just cookies; they’re edible works of art that capture the spirit of Christmas in every bite. They look like they came straight from a professional bakery, but we promise, the “magic” behind them is surprisingly simple to achieve. Get ready to impress everyone on your nice list with these show-stopping treats!
Why You’ll Love This Recipe
These stunning Peppermint Swirl Cookies are more than just a pretty face; they’re a holiday baking dream come true. Here are four irresistible reasons why this recipe will become your new festive favorite:
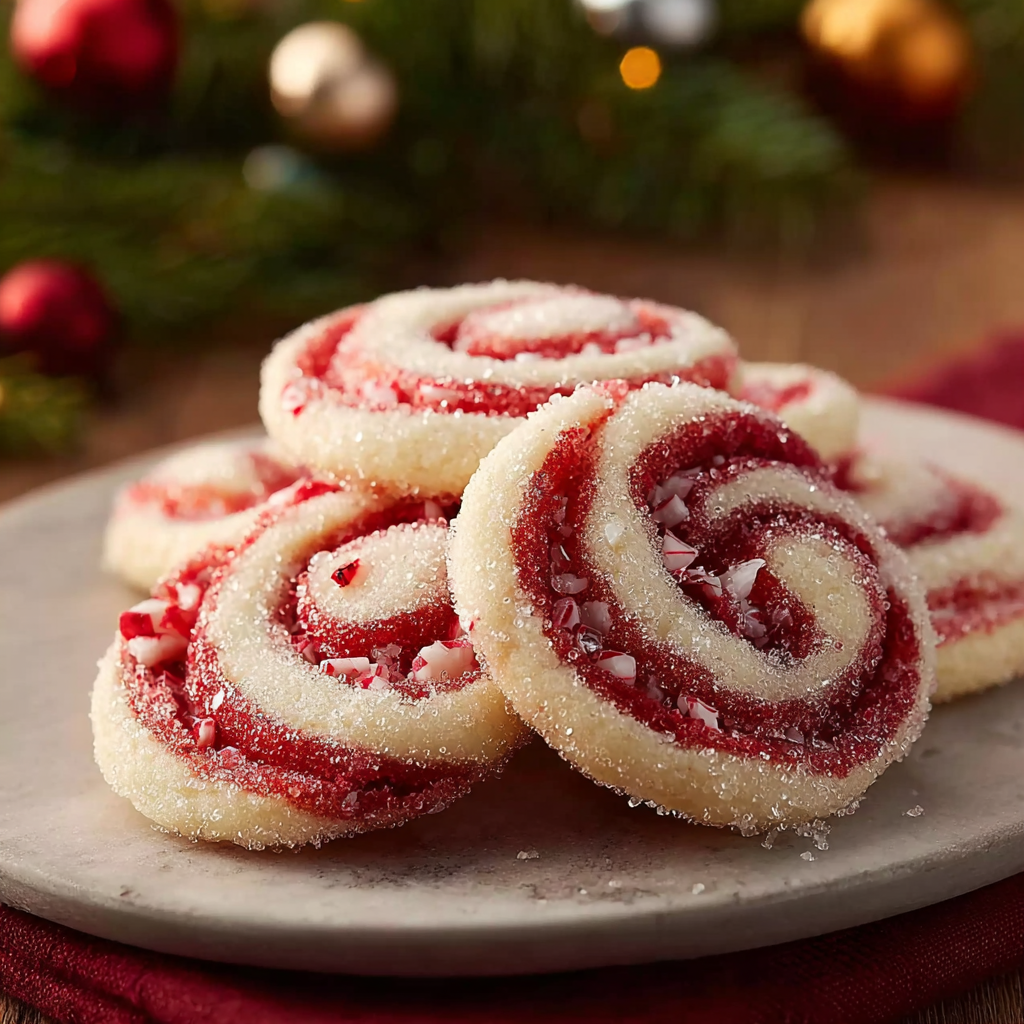
- Visually Spectacular: The vibrant red and crisp white swirls are an absolute showstopper! These cookies bring instant festive cheer to any platter, making them perfect for holiday parties, cookie exchanges, or simply a beautiful addition to your Christmas table. They truly embody “Easy Holiday Magic!” with their impressive appearance.
- Irresistible Flavor Combination: Experience the classic holiday pairing of cool, refreshing peppermint and a rich, buttery sugar cookie base. It’s a harmonious balance of sweet and minty that will delight your taste buds and leave you craving more.
- Easier Than They Look: Don’t let the intricate appearance fool you! Our step-by-step guide breaks down the process, making it approachable for bakers of all skill levels. The essential chilling steps ensure clean lines and easy handling, turning what looks complex into a manageable and enjoyable baking experience.
- Perfect for Gifting & Sharing: These cookies are not only delicious but also incredibly robust, making them ideal for gifting to friends, family, and neighbors. Pack them into decorative tins or bags, and you’ve got a homemade present that spreads holiday cheer and shows you care.
Ingredients with Measurements
Gather your festive ingredients and get ready to create some holiday magic!
- 🌾 2 ½ cups all-purpose flour
- ✨ 1 teaspoon baking powder
- 🧂 ½ teaspoon salt
- 🧈 1 cup (2 sticks) unsalted butter, softened to room temperature
- 🥄 1 cup granulated sugar
- 🥚 1 large egg
- 🌿 1 teaspoon vanilla extract
- 🍬 1 teaspoon peppermint extract
- 🔴 Red gel food coloring (for vibrant, distinct swirls)
- ✨ ¼ cup coarse sugar or crushed peppermint candies (for a festive sparkle)
Detailed Step-by-Step Directions on How to Make Peppermint Swirl Cookies
Follow these precise steps to create your own batch of Peppermint Swirl Cookies, ensuring a perfect bake every time!
- Prep Your Dry Mix: In a medium bowl, quickly whisk together the flour, baking powder, and salt until well combined. Set this aside.
- Whip Up the Wet Base: In a large bowl, using an electric mixer, cream the softened butter and granulated sugar together until the mixture is light and fluffy – this incorporates air for a tender cookie! Beat in the egg until just combined, then stir in the vanilla and peppermint extracts.
- Form the Dough: Gradually add the prepped dry ingredients to your wet mixture, mixing on low speed until a soft, cohesive dough forms. Stop mixing as soon as it comes together to keep the cookies tender.
- Divide & Color: Gently divide your fresh dough into two equal halves. Leave one half plain for your white swirl. To the second half, add a few drops of red gel food coloring and mix until you achieve a vibrant, uniform red.
- First Essential Chill (The Swirl Secret!): Wrap each ball of dough separately in plastic wrap and chill them in the refrigerator for at least 30 minutes. This key step makes the dough firm and much easier to handle without colors bleeding.
- Roll Out Perfectly: Once chilled, lightly flour your work surface. Roll the plain dough into a neat 10×12 inch rectangle, aiming for an even ¼ inch thickness. Repeat this process with the red dough, ensuring it’s the exact same size and thickness.
- Layer Up: Carefully lift the red dough rectangle and place it directly on top of the plain dough rectangle, aligning the edges. Gently press the layers together with your hands or a rolling pin to make them stick.
- Create the Log: Starting from one of the long sides, carefully and tightly roll the layered dough into a log. As you roll, gently press to remove any air pockets, ensuring a consistently tight log for perfectly defined swirls.
- Second Crucial Chill (For Clean Slices!): Wrap the formed dough log tightly in plastic wrap and return it to the refrigerator for at least 2 hours, or until it’s very firm. This longer chill is vital for slicing clean, crisp swirls that hold their shape.
- Get Ready to Bake: When ready, preheat your oven to 375°F (190°C). Line your baking sheets with parchment paper to prevent sticking and promote even baking.
- Optional Festive Coat: Remove the firm dough log from the fridge. For extra sparkle and crunch, lightly brush the log with water or a whisked egg white, then roll it evenly in coarse sugar or crushed peppermint candies.
- Slice & Arrange: Using a very sharp knife, slice the chilled dough log into uniform ¼-inch thick rounds. Place the sliced cookies about 1 inch apart on your prepared baking sheets.
- Bake to Perfection: Bake for 8 to 10 minutes, or until the edges are lightly golden. It’s important not to overbake; these cookies will continue to firm up as they cool, keeping their tender texture.
- Cool & Enjoy: Let the freshly baked cookies cool on the baking sheets for a few minutes before carefully transferring them to a wire rack to cool completely. Then, share and enjoy your beautiful, bakery-perfect peppermint swirls!
Detailed Different Ways You Can Present and Serve Peppermint Swirl Cookies
These Peppermint Swirl Cookies are not just delicious; they’re incredibly photogenic! Their vibrant colors and intricate swirls make them a star on any holiday spread. Here are some magical ways to present and serve them:
- On a Festive Platter: Arrange them artfully on a white or silver platter, perhaps interspersed with fresh cranberries or sprigs of evergreen for a pop of natural color.
- With Hot Cocoa: Serve a stack of these cookies alongside mugs of rich hot chocolate topped with whipped cream and a sprinkle of crushed peppermint. The perfect cozy combination!
- Cookie Exchange Ready: Package them in clear cellophane bags tied with festive ribbons, or arrange them neatly in decorative holiday tins. They make exquisite homemade gifts that show thoughtfulness.
- Dessert Board Centerpiece: Incorporate them into a larger holiday dessert board alongside other treats like gingerbread, truffles, and candied nuts. Their distinct look will draw the eye.
- Individual Party Favors: For a special touch, place one or two cookies in small clear boxes or bags at each place setting for guests to take home.
- Alongside Coffee or Tea: Their refreshing peppermint flavor pairs wonderfully with a warm cup of coffee or a comforting herbal tea, offering a delightful afternoon treat.
How You Can Store Peppermint Swirl Cookies and How Long Do They Last
To keep your beautiful Peppermint Swirl Cookies fresh and delicious for as long as possible, proper storage is key:
- At Room Temperature: Once completely cooled, store the cookies in an airtight container at room temperature for up to 5-7 days. Layers of parchment paper between the cookies can help prevent them from sticking together.
- In the Refrigerator: While not strictly necessary for baked cookies, you can extend their freshness slightly by storing them in an airtight container in the refrigerator for up to 10 days. Bring them to room temperature before serving for the best texture.
- Freezing Baked Cookies: For longer storage, flash freeze the completely cooled cookies on a baking sheet until firm (about 1-2 hours). Then, transfer them to a freezer-safe airtight container or heavy-duty freezer bag, again separating layers with parchment. They will last for up to 1 month. Thaw at room temperature.
- Freezing Dough Logs: This is a fantastic make-ahead option! Wrap the unbaked, chilled dough log (Step 9) very tightly in several layers of plastic wrap, then an additional layer of aluminum foil. Freeze for up to 2-3 months. When ready to bake, thaw the log in the refrigerator overnight, then slice and bake as directed, potentially adding a minute or two to the baking time.
FAQs Section
Here are answers to some common questions you might have about making these magical Peppermint Swirl Cookies:
-
Why do I need to chill the dough twice?
The first chill (after coloring) makes the dough firm and easier to roll without sticking or the colors bleeding. The second, longer chill (after forming the log) is crucial for the dough to become very firm, allowing for clean, crisp slices and preventing the swirls from spreading or losing definition during baking.
-
Can I use liquid food coloring instead of gel?
It’s highly recommended to use gel food coloring. Liquid food coloring can add too much moisture to the dough, altering its texture and making it sticky. Gel coloring provides much more vibrant color with only a few drops, maintaining the dough’s consistency.
-
What if my dough is too sticky to roll?
This usually means it hasn’t chilled long enough, or your kitchen is too warm. Return it to the fridge for another 15-30 minutes. Also, ensure your work surface and rolling pin are lightly floured, but don’t add too much flour to the dough itself.
-
Can I make these cookies without peppermint extract?
Yes, you can! For a classic sugar cookie, simply omit the peppermint extract and perhaps increase the vanilla extract to 2 teaspoons for a richer flavor. They won’t be “Peppermint Swirl Cookies,” but they’ll still be delightful!
-
How do I prevent my swirls from bleeding?
The key to preventing color bleeding is sufficient chilling, especially the second long chill. Also, avoid over-mixing the colored dough, as this can break down the dough structure and make colors more prone to running.
-
Can I prepare the dough ahead of time?
Absolutely! The dough log (Step 9) can be made up to 3 days in advance and stored tightly wrapped in the refrigerator. You can also freeze the dough log for up to 2-3 months, as detailed in the storage section.
-
What’s the best way to get uniform slices?
A very sharp knife is essential. Ensure your dough log is thoroughly chilled and firm. You can also use a ruler as a guide to mark out ¼-inch increments before slicing to help achieve consistency.
-
My cookies spread too much, what went wrong?
Common reasons for spreading include butter that was too soft or melted, not enough chilling time for the dough log, or an oven temperature that’s too low. Make sure your oven is accurately preheated.
-
Can I freeze the baked cookies?
Yes, baked Peppermint Swirl Cookies freeze very well! Once completely cooled, flash freeze them, then transfer to an airtight freezer-safe container or bag. They will keep for up to 1 month. Thaw at room temperature before serving.
-
Are there any variations I can try with these Peppermint Swirl Cookies?
Yes! You could swap red for green food coloring for a different holiday look. For flavor variations, try almond extract instead of peppermint, or add mini chocolate chips to one of the doughs before rolling for a chocolate swirl cookie!
Peppermint Swirl Cookies
Ingredients
- 2.5 cups all-purpose flour
- 1 tsp baking powder
- 0.5 tsp salt
- 1 cup unsalted butter softened to room temperature
- 1 cup granulated sugar
- 1 large egg
- 1 tsp vanilla extract
- 1 tsp peppermint extract
- red gel food coloring (for vibrant, distinct swirls)
- 0.25 cup coarse sugar or crushed peppermint candies (for a festive sparkle)
Instructions
- In a medium bowl, quickly whisk together the flour, baking powder, and salt until well combined. Set this aside.
- In a large bowl, using an electric mixer, cream the softened butter and granulated sugar together until the mixture is light and fluffy – this incorporates air for a tender cookie! Beat in the egg until just combined, then stir in the vanilla and peppermint extracts.
- Gradually add the prepped dry ingredients to your wet mixture, mixing on low speed until a soft, cohesive dough forms. Stop mixing as soon as it comes together to keep the cookies tender.
- Gently divide your fresh dough into two equal halves. Leave one half plain for your white swirl. To the second half, add a few drops of red gel food coloring and mix until you achieve a vibrant, uniform red.
- Wrap each ball of dough separately in plastic wrap and chill them in the refrigerator for at least 30 minutes. This key step makes the dough firm and much easier to handle without colors bleeding.
- Once chilled, lightly flour your work surface. Roll the plain dough into a neat 10×12 inch rectangle, aiming for an even ¼ inch thickness. Repeat this process with the red dough, ensuring it’s the exact same size and thickness.
- Carefully lift the red dough rectangle and place it directly on top of the plain dough rectangle, aligning the edges. Gently press the layers together with your hands or a rolling pin to make them stick.
- Starting from one of the long sides, carefully and tightly roll the layered dough into a log. As you roll, gently press to remove any air pockets, ensuring a consistently tight log for perfectly defined swirls.
- Wrap the formed dough log tightly in plastic wrap and return it to the refrigerator for at least 2 hours, or until it’s very firm. This longer chill is vital for slicing clean, crisp swirls that hold their shape.
- When ready, preheat your oven to 375°F (190°C). Line your baking sheets with parchment paper to prevent sticking and promote even baking.
- Remove the firm dough log from the fridge. For extra sparkle and crunch, lightly brush the log with water or a whisked egg white, then roll it evenly in coarse sugar or crushed peppermint candies.
- Using a very sharp knife, slice the chilled dough log into uniform ¼-inch thick rounds. Place the sliced cookies about 1 inch apart on your prepared baking sheets.
- Bake for 8 to 10 minutes, or until the edges are lightly golden. It’s important not to overbake; these cookies will continue to firm up as they cool, keeping their tender texture.
- Let the freshly baked cookies cool on the baking sheets for a few minutes before carefully transferring them to a wire rack to cool completely. Then, share and enjoy your beautiful, bakery-perfect peppermint swirls!
Notes
- Calories: 85 kcal
- Total Carbohydrates: 10g
- Net Carbohydrates: 9g
- Fats: 4.5g
- Protein: 1g