Why You’ll Love This Coconut Flour Pie Crust Recipe
Get ready to fall head over heels for this incredible **Coconut Flour Pie Crust**! It’s not just a recipe; it’s a game-changer for anyone craving delicious pies without the carb overload or gluten woes. Here are four irresistible reasons why this will become your new go-to:
- Keto & Low-Carb Friendly: Say goodbye to carb-heavy crusts! This recipe is perfectly crafted to fit your ketogenic or low-carb lifestyle, allowing you to enjoy your favorite pies guilt-free.
- Naturally Gluten-Free: Made with wholesome coconut flour, this crust is a dream come true for those avoiding gluten. No compromises on taste or texture, just pure, wholesome deliciousness.
- Quick & Easy to Make: Forget complicated rolling and chilling! With a food processor and minimal fuss, you can have this crust ready for the oven in just minutes. It’s perfect for busy bakers and last-minute pie cravings.
- Versatile for Any Filling: Whether you’re dreaming of a sweet fruit pie, a creamy chocolate silk, or a savory quiche, this **Coconut Flour Pie Crust** provides a sturdy, flavorful foundation that complements any filling you can imagine.
Tired of pie crusts that sabotage your healthy eating goals? Imagine sinking your teeth into a flaky, golden crust that’s not only delicious but also fits perfectly into your keto or gluten-free lifestyle. Stop dreaming, because our ultimate **Coconut Flour Pie Crust** recipe is here to make it a reality! This isn’t just another healthy alternative; it’s a star in its own right – a versatile, easy-to-make foundation for all your pie adventures. Get ready to bake smarter, not harder, and create pies that everyone will rave about. Let’s dive into the world of guilt-free indulgence!
Ingredients for Your Perfect Coconut Flour Pie Crust
Gather your ingredients and get ready to create magic! This simple list is all you need for a fantastic **Coconut Flour Pie Crust** that’s both healthy and delicious.
- 🥥 3/4 cup Wholesome Yum Coconut Flour
- 🧈 1/2 cup Unsalted butter (cold, cut into pieces)
- sweetener 1/4 cup Besti Monk Fruit Allulose Blend (or your preferred granulated sweetener; skip for savory crust)
- 🧂 1/4 teaspoon Sea salt (use 1/2 teaspoon for savory crust)
- 🥚 2 large Eggs
- 🌿 1/2 teaspoon Vanilla extract (optional, skip for savory crust)
Detailed Step-by-Step Directions: Crafting Your Coconut Flour Pie Crust
Creating this amazing **Coconut Flour Pie Crust** is surprisingly simple! Follow these detailed steps, and you’ll have a gorgeous, golden base for your next masterpiece in no time.
- Prepping for Pie Perfection: First things first, get your oven fired up to a cozy 350°F (177°C). Grab your trusty 9-inch round pie pan and either line the bottom with parchment paper for easy removal or give it a light greasing. This small step ensures your crust comes out beautifully.
- Whip Up the Base: In the bowl of your food processor, combine the dry stars: the coconut flour, the chunks of cold butter, your chosen sweetener (if you’re making a sweet pie), and the sea salt. Give it a few brief pulses until the mixture transforms into delightful coarse crumbs. It should resemble a sandy texture at this stage.
- Magical Dough Transformation: Now for the wet ingredients! Crack in your two large eggs and drizzle in the vanilla extract (if you’re going for a sweet creation). Process again. Watch as the magic unfolds – the mixture will come together to form a dense, cohesive dough. Don’t worry if it looks a little crumbly; as long as it sticks together when you press it, you’re golden!
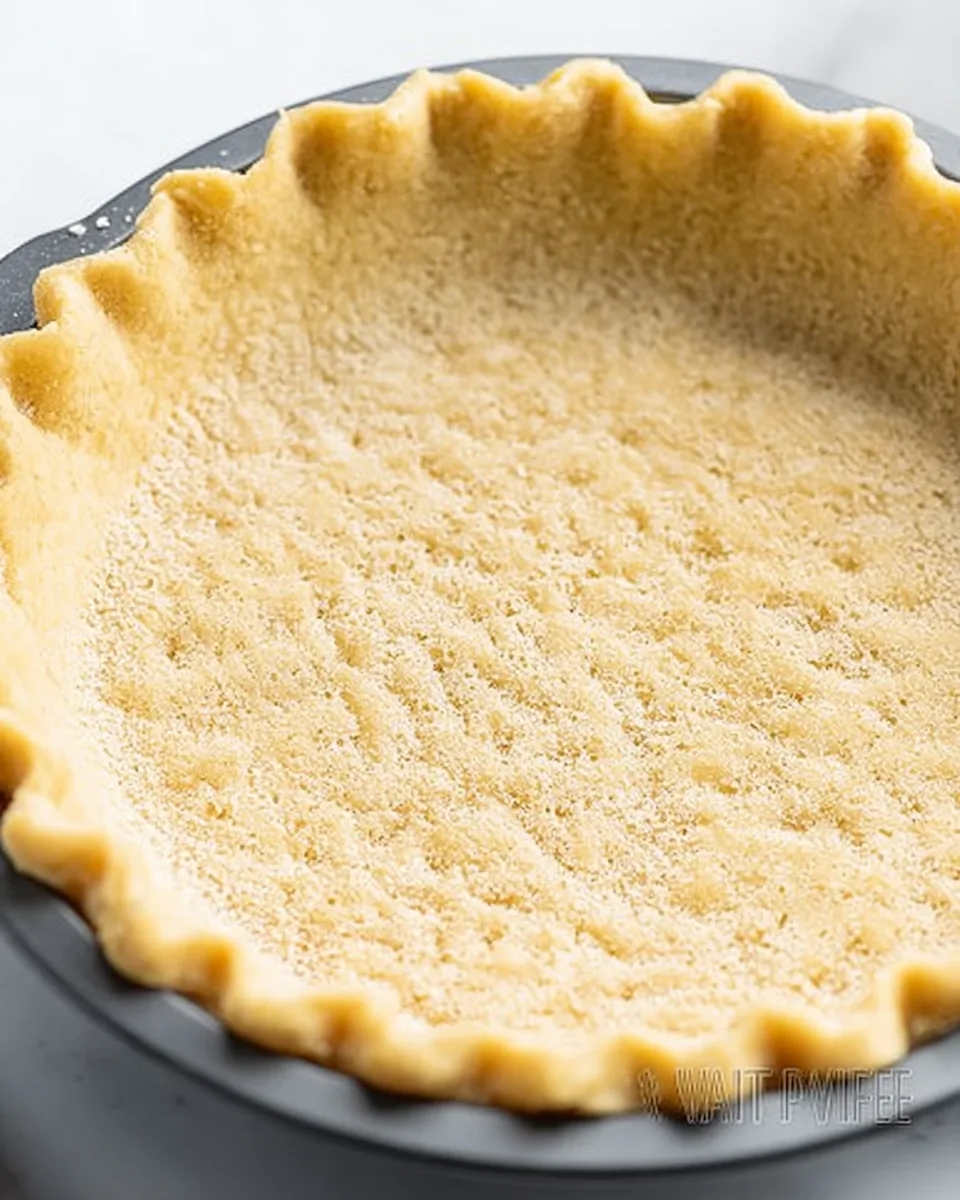
- Crust Creation & Prick-a-Dilly: Gently transfer your dough into the prepared pie pan. Using your fingers or the back of a spoon, evenly press the dough across the bottom and up the sides of the pan. Aim for an even thickness. To prevent any unwelcome bubbles during baking, grab a fork and gently poke several holes all over the bottom of the crust.
- Golden Bake & Cool Down: Slide your creation into the preheated oven and bake for 10-15 minutes. Keep an eye on it – you’re looking for a firm texture and edges that are just barely turning golden. Once done, remove it and let it cool on your counter for at least 10 minutes before adding your scrumptious filling. If your filling requires further baking, simply cover the edges of the crust with aluminum foil to prevent them from over-browning. For the absolute best texture and stability, allow the entire finished pie to cool completely before you even think about slicing into it!
Creative Ways to Present and Serve Your Coconut Flour Pie Crust
This versatile **Coconut Flour Pie Crust** is a blank canvas for your culinary imagination! Beyond the classic pie, here are some delightful ways to present and serve your creations, making every occasion special:
- The Classic Sweet Pie: Fill your golden crust with creamy no-bake cheesecakes, luscious chocolate ganache, vibrant fruit tarts, or a comforting pumpkin pie filling. Top with fresh berries, a dollop of whipped cream, or a sprinkle of toasted coconut flakes for an elegant finish.
- Savory Delights: Don’t forget the savory side! With a slight increase in salt (as per the recipe) and skipping the sweetener and vanilla, this **Coconut Flour Pie Crust** is perfect for quiches, chicken pot pies (with a top crust made from the same dough), or even a savory tomato and cheese tart. Garnish with fresh herbs like parsley or chives.
- Individual Mini Tarts: Press the dough into muffin tins or mini tart pans for adorable individual servings. These are fantastic for parties, lunchboxes, or portion control. Fill them with lemon curd, berry compote, or mini quiche fillings.
- Hand Pies or Turnovers: Roll out sections of the dough between two pieces of parchment paper, cut into circles or squares, fill with a sweet or savory mixture, fold, crimp the edges, and bake! These are portable and utterly charming.
- Crust Dippers: Bake the crust plain, break it into irregular pieces, and serve alongside sweet fruit dips, chocolate hummus, or savory spreads like guacamole or spinach dip for a unique, dippable snack.
Remember, presentation matters! A simple dusting of powdered sweetener, a sprig of mint, or a artistic swirl of sauce can elevate your **Coconut Flour Pie Crust** creation from delicious to truly unforgettable.
Storing Your Coconut Flour Pie Crust: How Long Does It Last?
Planning ahead or have leftovers? Knowing how to properly store your **Coconut Flour Pie Crust** is key to enjoying its deliciousness for longer. Here’s a detailed guide:
- Unbaked Dough: If you’ve made the dough but aren’t ready to bake, form it into a disk, wrap it tightly in plastic wrap, and store it in the refrigerator for up to 3-4 days. You can also freeze the unbaked dough for up to 1 month. Thaw in the refrigerator overnight before pressing into the pie pan.
- Baked, Unfilled Crust: Once you’ve pre-baked your **Coconut Flour Pie Crust**, let it cool completely. You can then wrap it tightly in plastic wrap or aluminum foil and store it at room temperature for 1-2 days, or in the refrigerator for up to 4 days. For longer storage, freeze the baked crust (well-wrapped) for up to 1 month. Thaw at room temperature before filling.
- Filled and Baked Pie: The storage duration for a finished pie largely depends on its filling.
- Cream or Custard Pies: These are best stored in the refrigerator and typically last 3-4 days. Make sure to cover them loosely with plastic wrap.
- Fruit Pies: Most fruit pies can be stored at room temperature for 1-2 days, then moved to the refrigerator for another 2-3 days.
- Savory Pies (Quiches, Pot Pies): Store these in the refrigerator for 3-5 days, tightly covered. They also freeze very well for up to 2-3 months.
Always ensure your pie is completely cooled before storing to prevent condensation, which can make the crust soggy. When reheating a baked and filled pie (if applicable), do so gently in the oven to avoid over-browning the crust edges, especially with this delicate **Coconut Flour Pie Crust**.
FAQs About Your Coconut Flour Pie Crust
Got questions about making the perfect **Coconut Flour Pie Crust**? We’ve got answers! Here are 10 common queries to help you master this fantastic recipe:
- Can I substitute other flours for coconut flour in this recipe?
No, coconut flour is unique! It’s incredibly absorbent and behaves very differently from almond flour or traditional wheat flour. Substituting it directly with another flour will drastically change the texture and consistency of your **Coconut Flour Pie Crust**. - Why is my Coconut Flour Pie Crust crumbly?
Coconut flour dough can appear a bit crumbly, but it should stick together when pressed. If it’s too crumbly to press into the pan, your eggs might be small, or the butter wasn’t cold enough. Try adding an extra tablespoon of cold water or melted butter, one at a time, and pulse until it just comes together. - Does this pie crust taste like coconut?
While made with coconut flour, the coconut flavor is typically very mild, especially with the addition of vanilla extract in sweet recipes. It provides a subtle, pleasant undertone that usually complements most fillings rather than overpowering them. - Is this Coconut Flour Pie Crust truly keto-friendly?
Yes! Coconut flour is naturally low in carbs, and when combined with a monk fruit allulose blend, this crust is perfectly suited for a ketogenic diet, providing a fantastic low-net-carb option. - Can I make a savory pie with this crust?
Absolutely! The recipe specifically notes to skip the sweetener and vanilla extract, and to increase the sea salt to 1/2 teaspoon. This makes it an ideal base for quiches, pot pies, and other savory fillings. - Do I have to pre-bake (blind bake) this Coconut Flour Pie Crust?
Yes, pre-baking is crucial for this crust. It helps to set its structure, prevents it from becoming soggy, and ensures a golden, firm texture before adding your filling. - Can I use a different granulated sweetener?
Yes, you can use other granulated low-carb sweeteners like erythritol or xylitol, or even regular granulated sugar if you’re not strictly keto. Adjust the amount to your taste preference, keeping in mind that different sweeteners have varying sweetness levels. - How do I prevent the edges of the crust from browning too much?
If your filling requires additional baking time after the crust is pre-baked, simply cover the edges of the **Coconut Flour Pie Crust** with aluminum foil or a pie shield to protect them from over-browning. - Can I freeze the baked Coconut Flour Pie Crust?
Yes, you can! Once baked and completely cooled, wrap the empty crust tightly in plastic wrap and then in aluminum foil. It can be frozen for up to 1 month. Thaw at room temperature before filling. - What kind of fillings work best with this crust?
Due to its sturdy yet delicate nature, this **Coconut Flour Pie Crust** is excellent with both baked and no-bake fillings. Think creamy custards, fruit tarts, cheesecakes, chocolate ganache, pumpkin pie, and savory quiches. Its versatility is one of its best features!
Coconut Flour Pie Crust 🥥
Equipment
- Food Processor
- 9-inch round pie pan
Ingredients
- 3/4 cup Wholesome Yum Coconut Flour
- 1/2 cup Unsalted butter cold, cut into pieces
- 1/4 cup Besti Monk Fruit Allulose Blend or your preferred granulated sweetener; skip for savory crust
- 1/4 teaspoon Sea salt use 1/2 teaspoon for savory crust
- 2 large Eggs
- 1/2 teaspoon Vanilla extract optional, skip for savory crust
Instructions
- Get Ready: Preheat your oven to 350°F (177°C). Prepare a 9-inch round pie pan by lining the bottom with parchment paper or greasing it lightly.
- Combine Dry Ingredients: In a food processor, add the coconut flour, cold butter (cut into pieces), sweetener (if using for a sweet pie), and sea salt. Pulse briefly until the mixture resembles coarse crumbs.
- Form the Dough: Add the eggs and vanilla extract (if using) to the food processor. Process again until a dense, cohesive dough forms. It might look a little crumbly, but it should stick together when pressed.
- Press into Pan: Evenly press the dough into the prepared pie pan, covering the bottom and sides. Use a fork to gently poke several holes across the bottom of the crust to prevent it from bubbling up during baking.
- Bake the Crust: Bake the crust for 10-15 minutes, until it's firm and the edges are just barely golden. Remove from the oven and let it cool on the counter for at least 10 minutes before adding your filling. If your filling requires further baking, you can cover the edges of the crust with aluminum foil to prevent them from browning too much. Allow the entire pie to cool completely before slicing for the best texture and stability.
Notes
- Calories: 111
- Total Carbs: 4g
- Net Carbs: 2g
- Fats: 9g
- Protein: 2g