Are you ready to sprinkle a little extra love and a whole lot of deliciousness into your day? Imagine sinking your teeth into a rich, fudgy brownie, bursting with that signature red velvet tang, all topped off with a cloud of dreamy, tangy-sweet cream cheese frosting. It’s not just a dessert; it’s a declaration of love, baked into every square. Get ready to fall head over heels for these **Sweetheart Red Velvet Brownies with Cream Cheese Frosting** – they’re the ultimate treat to share with your special someone, or simply to indulge yourself because you deserve it! Forget the complicated desserts; these brownies bring all the romance and flavor without any of the fuss. So grab your apron and let’s bake up some magic!
Why You’ll Love This Recipe
Get ready to add a new favorite to your baking repertoire! Here are four irresistible reasons why you’ll adore making these **Sweetheart Red Velvet Brownies with Cream Cheese Frosting**:
- Unforgettable Fudgy Texture: Unlike cakey brownies, these beauties are dense, moist, and wonderfully fudgy, melting in your mouth with every bite. The secret lies in the perfect balance of butter, sugar, and just the right amount of flour.
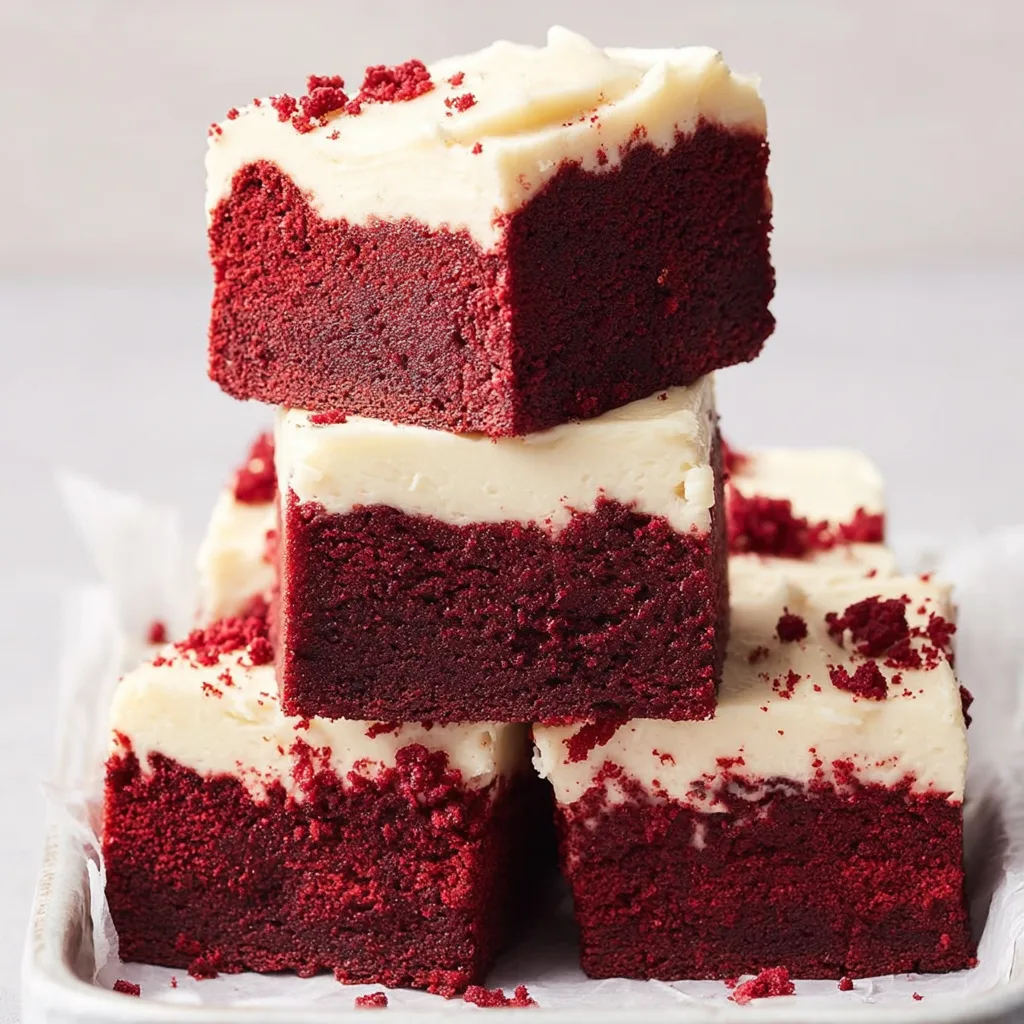
- Vibrant & Eye-Catching Color: That gorgeous, deep red hue isn’t just for show! It screams romance and special occasions, making these brownies a showstopper on any dessert table, especially when topped with the contrasting white frosting.
- Perfect Sweet & Tangy Balance: The classic red velvet flavor, with its subtle cocoa and tangy notes, is perfectly complemented by the rich, slightly zesty cream cheese frosting. It’s a flavor pairing that’s truly iconic and addictive.
- Surprisingly Simple to Make: Don’t let their elegant appearance fool you! This recipe is straightforward and uses common pantry ingredients, making it accessible for bakers of all skill levels. You’ll be whipping up these delightful treats in no time!
Ingredients You’ll Need
Gather your baking essentials to create these divine **Sweetheart Red Velvet Brownies with Cream Cheese Frosting**. Every ingredient plays a crucial role in achieving that perfect fudgy texture and irresistible flavor profile.
- 🧈 ¾ stick (6 tablespoons) Unsalted Butter
- 🍚 1 cup Granulated Sugar
- 🌰 ¼ cup Light Brown Sugar
- 🥚 3 Large Eggs
- 🥚 1 large Egg Yolk
- ✨ 1 teaspoon Vanilla Extract
- 🌻 ⅓ cup Vegetable Oil
- 🍫 ¼ cup Dutch-processed Cocoa Powder
- 🌾 ¾ cup All-purpose Flour
- 🧪 1 tablespoon White Vinegar (or White Wine Vinegar)
- 🌽 1 tablespoon Cornstarch
- 🧂 ¼ teaspoon Salt
- 🔴 ½ teaspoon Red Gel Food Coloring
- ⚪ ¾ cup White Chocolate Chips (optional)
- 🧀 4 ounces Cream Cheese, softened
- 🧈 ¾ stick (6 tablespoons) Unsalted Butter, softened
- 🧁 4 cups Powdered Sugar
Detailed Directions: Baking Your Love Story
Ready to bring these **Sweetheart Red Velvet Brownies with Cream Cheese Frosting** to life? Follow these simple, step-by-step instructions to ensure a perfect batch every time. Precision is key, but don’t forget to have fun!
- Prep Your Oven & Pan: Get your oven ready by preheating it to 350°F (180°C). Line an 8-inch square baking pan with parchment paper, letting a little hang over the sides for easy lifting later. This prevents sticking and makes cleanup a breeze!
- Melt the Butter: Melt the butter gently in the microwave in short bursts until it’s completely liquid. Be careful not to burn it!
- Combine Sugars & Butter: In a big mixing bowl, combine the melted butter with both the granulated and light brown sugars. Whisk them together until they’re nicely blended. This creates the foundation for that fudgy texture.
- Add Eggs & Vanilla: Add the eggs, extra egg yolk, and vanilla extract. Whisk just until everything is combined, but don’t overdo it – we want fudgy, not cakey! Overmixing develops gluten, which can lead to a tougher brownie.
- Mix in Oil & Cocoa: Stir in the vegetable oil and cocoa powder until the batter is smooth. The cocoa powder contributes to the signature red velvet flavor.
- The Color Magic! Scoop out about two tablespoons of your batter into a small separate bowl. Mix in the red gel food coloring until it’s completely smooth and lump-free. Then, add this vibrant red mixture back to your main bowl and mix until the whole batter is beautifully colored (it will look dark, but trust the process – it brightens when baked!).
- Fold in Dry Ingredients: Swap your whisk for a rubber spatula. Gently fold in the all-purpose flour, cornstarch, and salt until there are no dry streaks left. Again, avoid overmixing.
- Vinegar & Chips: Stir in the vinegar completely. This ingredient reacts with the cocoa powder to enhance the red color and adds a subtle tang. If you’re using white chocolate chips, now’s the time to fold them in for an extra burst of sweetness.
- Bake to Perfection: Pour your gorgeous red batter into the prepared pan. Bake for 20-25 minutes. To check if they’re done, insert a toothpick into the center – it should come out with moist crumbs, not wet batter. Be careful not to overbake, or you’ll lose that perfect fudgy texture!
- Cool Completely: Let the brownies cool in the pan for about an hour, then use the parchment paper to lift them out onto a wire rack. They need to cool completely before frosting! This step is super important for clean frosting and slicing.
Whip Up the Dreamy Cream Cheese Frosting!
- Soften & Beat: Make sure your cream cheese and butter are at room temperature – this helps them blend beautifully. In a mixing bowl, beat them together until they’re wonderfully smooth and creamy.
- Add Powdered Sugar: Gradually add the powdered sugar, starting on a low speed to avoid a sugar cloud! Once the sugar is incorporated, turn the mixer to high speed and beat for a few minutes until the frosting is light, fluffy, and absolutely irresistible.
- Finish with Vanilla: Stir in the vanilla extract for that extra touch of deliciousness.
- Frost & Serve: Once your brownies are completely cool, generously spread this luscious cream cheese frosting evenly over the top. Slice into 16 individual pieces. Now, serve up these delightful **Sweetheart Red Velvet Brownies with Cream Cheese Frosting** and enjoy every bite!
Presenting & Serving Your Sweetheart Red Velvet Brownies
You’ve baked these amazing **Sweetheart Red Velvet Brownies with Cream Cheese Frosting**, now let’s make them look as good as they taste! Presentation is everything, especially when you’re making something so lovingly crafted. For a truly romantic touch, cut them into heart shapes using a cookie cutter before or after frosting (just make sure the brownies are very cool if cutting before). Dust with a sprinkle of cocoa powder, red velvet crumbs, or some festive sprinkles. A light scattering of white chocolate shavings or fresh raspberries can add an elegant flourish. Serve them on a beautiful platter for a special occasion, perhaps with a scoop of vanilla bean ice cream or a dollop of fresh whipped cream on the side for an extra luxurious dessert experience. These brownies are perfect for Valentine’s Day, anniversaries, birthdays, or just a cozy night in, making every moment feel a little more special.
Storage & Shelf Life
To keep your **Sweetheart Red Velvet Brownies with Cream Cheese Frosting** fresh and delicious, proper storage is key due to the cream cheese frosting. Once frosted, these brownies should be stored in an airtight container in the refrigerator. They will stay fresh and delicious for up to 3-4 days. For optimal taste, let them come to room temperature for about 15-20 minutes before serving. You can also freeze unfrosted brownies wrapped tightly in plastic wrap and then foil for up to 2-3 months. Thaw them in the refrigerator overnight, then frost and serve. Frosted brownies can also be frozen for up to a month, though the frosting’s texture might be slightly altered upon thawing. Make sure to place them in a single layer in an airtight container when freezing to prevent sticking.
FAQs About Sweetheart Red Velvet Brownies with Cream Cheese Frosting
- Q1: What makes red velvet brownies red?
- The vibrant red color comes from red gel food coloring, which is essential for that signature look. Traditionally, red velvet cake’s color was a result of a reaction between natural cocoa, buttermilk, and vinegar, but modern recipes rely on food coloring for a consistent, bright hue.
- Q2: Can I use regular cocoa powder instead of Dutch-processed?
- While you can, Dutch-processed cocoa powder is preferred for red velvet as it has a milder, less acidic flavor and results in a darker base, allowing the red color to stand out more. Regular cocoa powder might give a slightly different color and flavor profile.
- Q3: Why add vinegar to red velvet brownies?
- Vinegar (along with buttermilk, if used) reacts with baking soda to help the brownies rise slightly and contribute to the classic subtle tang of red velvet. It also helps to enhance the red color by interacting with the cocoa powder.
- Q4: How do I know when the brownies are done without overbaking?
- Insert a toothpick into the center of the pan. It should come out with moist crumbs attached, but no wet batter. If it comes out completely clean, they might be overbaked and less fudgy. Keep a close eye on them during the last few minutes of baking!
- Q5: Can I make the cream cheese frosting ahead of time?
- Yes! You can prepare the frosting up to 2-3 days in advance. Store it in an airtight container in the refrigerator. Before using, let it come to room temperature and give it a good whip with an electric mixer to restore its fluffy texture.
- Q6: Can I substitute any ingredients, like vegetable oil?
- Vegetable oil contributes to the fudgy texture and moisture. While you can use other neutral oils like canola or grapeseed, avoid strong-flavored oils. Substituting with all butter will change the texture, making them less fudgy.
- Q7: My frosting is too runny/too stiff, what do I do?
- If your frosting is too runny, gradually add more powdered sugar, a tablespoon at a time, until it reaches the desired consistency. If it’s too stiff, add a tiny splash of milk or cream (about ½ teaspoon at a time) and beat until smooth and spreadable.
- Q8: Can I make these brownies without food coloring?
- Absolutely! They will still be delicious red velvet flavored brownies, but they will have a dark reddish-brown hue rather than the vibrant red. The flavor will remain the same, just the visual appeal will differ.
- Q9: What’s the best way to cut clean slices?
- Ensure the brownies are completely chilled (refrigerating for 30 minutes to an hour after they’ve cooled helps). Use a sharp knife, wiping the blade clean with a damp cloth after each cut to prevent sticking and ensure neat edges. A hot knife (run under hot water then wiped dry) can also help.
- Q10: Are these Sweetheart Red Velvet Brownies good for gifting?
- They are absolutely perfect for gifting! Their festive color, delicious flavor, and charming name make them an ideal present for loved ones, especially during holidays or special occasions. Package them in a nice box or tin for an extra thoughtful touch.
Sweetheart Red Velvet Brownies with Cream Cheese Frosting ❤️
Equipment
- 8-inch square baking pan
- Parchment Paper
- Mixing Bowl
- Whisk
- Rubber Spatula
- Wire Rack
- Electric Mixer
Ingredients
Red Velvet Brownies
- 0.75 stick Unsalted Butter (6 tablespoons)
- 1 cup Granulated Sugar
- 0.25 cup Light Brown Sugar
- 3 Large Eggs
- 1 large Egg Yolk
- 1 teaspoon Vanilla Extract
- 0.33 cup Vegetable Oil
- 0.25 cup Dutch-processed Cocoa Powder
- 0.75 cup All-purpose Flour
- 1 tablespoon White Vinegar (or White Wine Vinegar)
- 1 tablespoon Cornstarch
- 0.25 teaspoon Salt
- 0.5 teaspoon Red Gel Food Coloring
- 0.75 cup White Chocolate Chips (optional)
Cream Cheese Frosting
- 4 ounces Cream Cheese softened
- 0.75 stick Unsalted Butter softened (6 tablespoons)
- 4 cups Powdered Sugar
- 1 teaspoon Vanilla Extract
Instructions
Let's Make Those Lovely Red Velvet Brownies!
- Get your oven ready by preheating it to 350°F (180°C). Line an 8-inch square baking pan with parchment paper, letting a little hang over the sides for easy lifting later.
- Melt the butter gently in the microwave in short bursts until it's completely liquid.
- In a big mixing bowl, combine the melted butter with both the granulated and light brown sugars. Whisk them together until they're nicely blended.
- Add the eggs, extra egg yolk, and vanilla extract. Whisk just until everything is combined, but don't overdo it – we want fudgy, not cakey!
- Stir in the vegetable oil and cocoa powder until the batter is smooth.
- Here’s the color magic! Scoop out about two tablespoons of your batter into a small separate bowl. Mix in the red gel food coloring until it's completely smooth and lump-free. Then, add this vibrant red mixture back to your main bowl and mix until the whole batter is beautifully colored (it will look dark, but trust the process – it brightens when baked!).
- Swap your whisk for a rubber spatula. Gently fold in the all-purpose flour, cornstarch, and salt until there are no dry streaks left.
- Stir in the vinegar completely. If you're using white chocolate chips, now’s the time to fold them in.
- Pour your gorgeous red batter into the prepared pan. Bake for 20-25 minutes. To check if they're done, insert a toothpick into the center – it should come out with moist crumbs, not wet batter. Be careful not to overbake, or you'll lose that perfect fudgy texture!
- Let the brownies cool in the pan for about an hour, then use the parchment paper to lift them out onto a wire rack. They need to cool completely before frosting! This step is super important for clean frosting and slicing.
Whip Up the Dreamy Cream Cheese Frosting!
- Make sure your cream cheese and butter are at room temperature – this helps them blend beautifully. In a mixing bowl, beat them together until they're wonderfully smooth and creamy.
- Gradually add the powdered sugar, starting on a low speed to avoid a sugar cloud! Once the sugar is incorporated, turn the mixer to high speed and beat for a few minutes until the frosting is light, fluffy, and absolutely irresistible.
- Stir in the vanilla extract for that extra touch of deliciousness.
- Once your brownies are completely cool, generously spread this luscious cream cheese frosting evenly over the top.
- Slice into 16 individual pieces. Now, serve up these delightful Sweetheart Red Velvet Brownies and enjoy every bite!
Notes
Calories: 367 kcal
Total Carbs: 57g
Net Carbs: 56g
Fats: 15g
Protein: 3g