Bake Your Dreams Come True: The Ultimate Chocolate Strawberry Dream Cake!
Why You’ll Love This Chocolate Strawberry Dream Cake Recipe
Prepare to fall head over heels for this incredible dessert! Here are four irresistible reasons why the Chocolate Strawberry Dream Cake will become your new go-to:
- A Flavor Combination Straight from Heaven: Rich, dark chocolate perfectly complements sweet, juicy strawberries. It’s a classic pairing that never disappoints, delivering a harmonious balance of indulgence and fresh fruitiness in every single bite.
- Surprisingly Simple to Master: Don’t let its elegant appearance fool you! Our detailed, step-by-step instructions make baking this showstopper cake accessible for bakers of all skill levels. You’ll be amazed at what you can create with a little guidance.
- The Ultimate Showstopper Dessert: Whether it’s a birthday, an anniversary, or just a Tuesday night craving, this Chocolate Strawberry Dream Cake is guaranteed to impress. Its beautiful layers and vibrant colors make it the centerpiece of any dessert table.
- Bursting with Fresh, Authentic Flavor: We believe in using the best ingredients! This recipe incorporates real, fresh strawberries into both the luscious filling and the creamy buttercream, ensuring an authentic, bright, and utterly delicious strawberry taste.
Unleash Your Inner Baker: Dive into the World of Chocolate Strawberry Dream Cake!
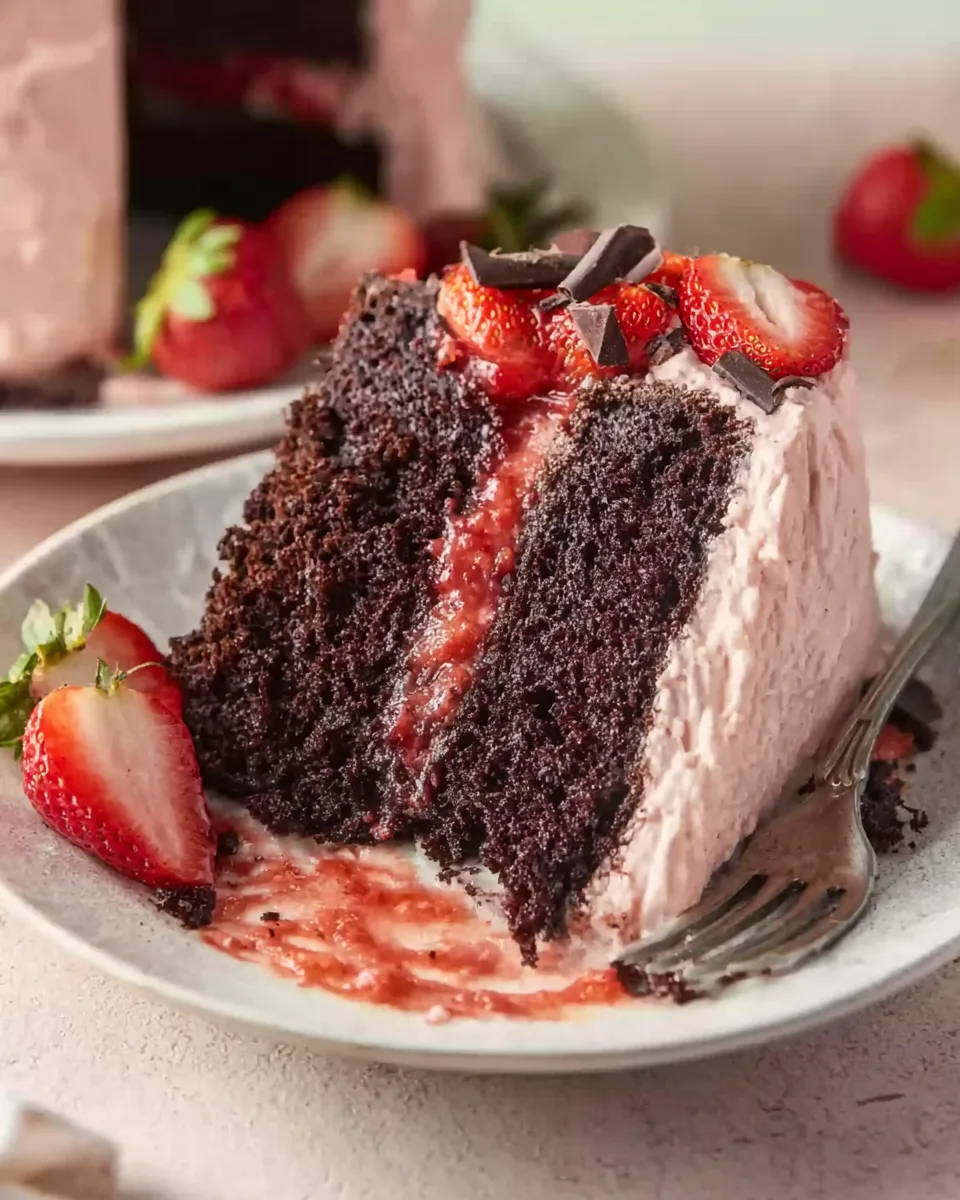
Imagine this: a cloud-like bite of moist, decadent chocolate cake, followed by a burst of sweet, tangy strawberry filling, all enveloped in a dreamy swirl of strawberry-infused buttercream. Sounds like a fantasy? Well, get ready to make it a delicious reality! This isn’t just a cake; it’s an experience, a celebration, a moment of pure bliss in every slice. Forget store-bought desserts; today, we’re crafting a masterpiece from scratch – your very own Chocolate Strawberry Dream Cake that will have everyone asking for seconds (and the recipe!). So, tie on that apron, clear your counters, and let’s embark on a sweet adventure!
Gather Your Magic: Chocolate Strawberry Dream Cake Ingredients
To create this magnificent cake, you’ll need a few essential ingredients. Fresh is best, especially for those vibrant strawberries!
🍓 Strawberry Cake Filling
- 3 cups fresh strawberries, chopped small
- ½ cup granulated sugar
- 3 Tablespoons fresh lemon juice
- 2 Tablespoons water
- 2 Tablespoons cornstarch
🍫 Chocolate Cake
- 1 ½ cups all-purpose flour
- 1 ¼ cups granulated sugar
- ½ teaspoon salt
- 1 ½ teaspoons baking soda
- ½ teaspoon baking powder
- ¾ cup Dutch-processed cocoa powder
- 2 large eggs
- 1 teaspoon vanilla extract
- 1 cup hot water
- ½ cup neutral oil (like sunflower, grapeseed, or canola)
- ½ cup milk of choice (dairy or dairy-free)
🧈 Strawberry Buttercream
- 1 ½ cups softened butter (or dairy-free butter)
- 3 to 3 ¾ cups powdered sugar
- ¼ cup of the prepared strawberry cake filling (from above)
Your Step-by-Step Journey to a Chocolate Strawberry Dream Cake
Follow these detailed instructions, and you’ll be enjoying your homemade dream cake in no time!
Get the Strawberry Filling Ready:
- First, in a small bowl, whisk together the cornstarch and water until smooth. Set it aside – this is your secret thickening weapon!
- Grab a medium pan and combine the chopped strawberries, sugar, and lemon juice. Cook over medium-low heat, stirring occasionally, until it starts to gently simmer. Reduce the heat to low and let it cook for about 8-10 minutes, or until the mixture has noticeably reduced and thickened slightly. Those strawberries are getting happy!
- Stir in the cornstarch mixture. Continue cooking for a couple more minutes until it’s nice and thick – it should cling beautifully to the back of a spoon.
- Remove the pan from the heat and let the filling cool down completely. Once cooled, pop it into an airtight container and chill it in the fridge for at least an hour. This helps it set perfectly for your cake!
Bake the Chocolate Cake Layers:
- Preheat your oven to 350°F (175°C). Lightly grease two 8-inch round cake pans and line the bottoms with parchment paper – this is a pro tip for easy, perfect cake removal!
- In a large bowl, whisk together the flour, cocoa powder, sugar, salt, baking powder, and baking soda. This creates your dry foundation.
- Now, add in the eggs, vanilla extract, oil, and milk. Pour in the hot water and mix everything until the batter is smooth. Be careful not to overmix; just until combined is perfect for a tender cake!
- Divide the delicious batter evenly between your prepared cake pans. Bake for 20-26 minutes, or until a toothpick inserted into the center comes out clean.
- Let the cakes cool in their pans for about 20 minutes before carefully transferring them to a wire rack to cool completely. Patience is key here for perfect, sturdy layers for your Chocolate Strawberry Dream Cake!
Whip Up the Strawberry Buttercream:
- While the cakes are cooling, let’s make that luscious buttercream! In a large bowl, beat the softened butter until wonderfully creamy.
- Gradually add the powdered sugar, mixing slowly at first to avoid a sugar cloud, then increasing speed until combined and fluffy.
- Stir in ¼ cup of your chilled strawberry cake filling. Mix until it’s perfectly smooth and combined, infusing that lovely strawberry flavor. If you want it a bit thicker, add a touch more powdered sugar.
- Keep the buttercream in the fridge until your cake layers are completely cool – this ensures it’s the perfect consistency for frosting.
Assemble Your Dream Cake:
- Once everything is completely cool (seriously, this is important!), it’s assembly time! Place one cake layer onto your serving plate. Pipe a thick border of strawberry buttercream around the very edge of this layer.
- Spoon the remaining strawberry filling into the center, spreading it gently within the frosting border. This creates a delicious dam to hold all that fruity goodness!
- Carefully place the second cake layer on top. Now, frost the top and sides of the cake with the rest of your dreamy strawberry buttercream, smoothing it out for a polished finish. Decorate as you wish – fresh strawberries or chocolate shavings are always a hit – and get ready to enjoy this delightful creation!
Presenting Your Masterpiece: Serving the Chocolate Strawberry Dream Cake
You’ve baked a truly magnificent Chocolate Strawberry Dream Cake, and now it’s time to showcase its beauty! Here are some delightful ways to present and serve your creation:
- Classic Elegance: Garnish the top with fresh, whole strawberries or fanned strawberry slices. A sprinkle of chocolate shavings or a dusting of cocoa powder adds a sophisticated touch that highlights the cake’s dual flavors.
- Whipped Cream & Mint: For an extra layer of indulgence, serve each slice with a dollop of freshly whipped cream and a delicate sprig of fresh mint. The mint’s freshness perfectly cuts through the richness.
- Berry Coulis Drizzle: A light drizzle of raspberry or strawberry coulis (pureed berries strained and sweetened) around the serving plate can elevate the presentation, adding a vibrant splash of color and an extra fruity kick.
- Warm Knife, Clean Slices: For perfectly clean slices, dip a sharp, thin knife into hot water, wipe it clean, and then make your cut. Repeat for each slice. This makes serving a breeze and keeps your cake looking pristine.
- Pair with Beverages: This cake pairs wonderfully with a glass of cold milk, a hot cup of coffee, or even a glass of sparkling rosé for a more celebratory feel.
- Occasion Ready: The Chocolate Strawberry Dream Cake is perfect for birthdays, anniversaries, Valentine’s Day, or as a stunning centerpiece for any gathering. It’s also a fantastic way to celebrate summer’s bounty of fresh strawberries!
Storing Your Chocolate Strawberry Dream Cake: Keep the Dream Alive!
Want to savor your delicious Chocolate Strawberry Dream Cake for as long as possible? Proper storage is key!
- At Room Temperature (Short Term): If your kitchen isn’t too warm (below 70°F/21°C) and you plan to serve the cake within 1-2 days, it can be stored loosely covered with a cake dome or plastic wrap. However, due to the fresh strawberry filling and buttercream, refrigeration is generally recommended for optimal freshness and safety.
- In the Refrigerator (Recommended): For longer storage, or if your home is warm, refrigerate the cake. Place it in an airtight cake carrier or cover it loosely with plastic wrap to prevent it from drying out or absorbing fridge odors. Your Chocolate Strawberry Dream Cake will stay fresh and delicious for 3-5 days in the refrigerator. Allow slices to come to room temperature for about 15-30 minutes before serving for the best flavor and texture.
- Freezing for Future Cravings: Yes, you can freeze this cake!
- Unfrosted Layers: Once completely cool, wrap individual cake layers tightly in plastic wrap, then in aluminum foil. They can be frozen for up to 2 months. Thaw at room temperature before frosting.
- Frosted Slices: For easy treats, freeze individual slices! Place slices on a baking sheet and freeze until firm (about 1-2 hours). Then, wrap each slice tightly in plastic wrap, then in foil. Store in the freezer for up to 1 month. Thaw in the refrigerator overnight or at room temperature for a few hours.
FAQs About Your Chocolate Strawberry Dream Cake
- Q1: Can I make this cake gluten-free?
- A: Yes! You can substitute the all-purpose flour with a 1:1 gluten-free baking flour blend that contains xanthan gum. Ensure all other ingredients are also gluten-free certified if necessary.
- Q2: Can I use frozen strawberries for the filling?
- A: Absolutely! If using frozen strawberries, there’s no need to thaw them first. Just add them to the pan and follow the recipe. They might release more water, so you might need to cook the filling for a few extra minutes until it thickens properly.
- Q3: What if my buttercream is too runny or too stiff?
- A: If your buttercream is too runny, add more powdered sugar, a tablespoon at a time, until it reaches the desired consistency. If it’s too stiff, add milk (dairy or dairy-free) in half-teaspoon increments until it’s spreadable. Ensure your butter was properly softened, not melted, to start.
- Q4: Can I make the cake layers ahead of time?
- A: Yes, you can! Bake the layers and once completely cooled, wrap them tightly in plastic wrap. They can be stored at room temperature for up to 1 day, or frozen for up to 2 months (as described in the storage section). Thaw completely before assembling.
- Q5: How can I get perfectly flat cake layers?
- A: For flatter tops, you can use “baking strips” soaked in water around your cake pans. Alternatively, after baking and cooling, you can level the cakes with a serrated knife or a cake leveler. The dense chocolate cake usually bakes fairly flat on its own.
- Q6: Is Dutch-processed cocoa powder essential for the chocolate cake?
- A: Dutch-processed cocoa powder is recommended for its darker color and milder, less acidic chocolate flavor, which works beautifully with the baking soda and baking powder combination in this recipe. Regular unsweetened cocoa powder can be used, but the cake’s color and flavor profile might be slightly different.
- Q7: Can I make this into cupcakes?
- A: Yes! This recipe yields about 24-30 standard cupcakes. Line cupcake tins with paper liners and fill about two-thirds full. Bake for 18-22 minutes, or until a toothpick comes out clean. You can core them and fill with the strawberry filling, then frost.
- Q8: Why did my cake sink in the middle?
- A: Common reasons for sinking cakes include overmixing the batter (which develops gluten too much), opening the oven door too early, or the oven temperature being too low. Ensure your oven is accurately calibrated and follow the baking times closely.
- Q9: What’s the best way to cut clean slices of Chocolate Strawberry Dream Cake?
- A: Use a long, thin, sharp knife. For the cleanest cuts, run the knife under hot water, wipe it dry, and then slice. Repeat this process for each slice. Chilling the cake for at least 30 minutes before slicing can also help firm up the buttercream and filling.
- Q10: Can I adjust the sweetness of the cake?
- A: For the cake layers, the sugar amount is balanced with the cocoa, so it’s best not to reduce it significantly. For the strawberry filling, you can slightly reduce the sugar if your strawberries are very sweet. For the buttercream, you can adjust the powdered sugar to your preference, starting with 3 cups and adding more if you desire a sweeter or firmer frosting.
Nutrition Facts (per serving)
Prep Time: 1 hour
Cook Time: 30 minutes
Total Time: 1 hour 30 minutes
Servings: 15 slices
Calories: 458 kcal
Total Carbs: 63g
Net Carbs: 60g
Fats: 23g
Protein: 3g
“`
Chocolate Strawberry Dream Cake 🍓🍰
Equipment
- Small Bowl
- Medium Pan
- 8-inch Round Cake Pans (2)
- Parchment Paper
- Large Bowl
- Whisk
- Wire Rack
Ingredients
Strawberry Cake Filling
- 3 cups fresh strawberries chopped small
- 0.5 cup granulated sugar
- 3 Tablespoons fresh lemon juice
- 2 Tablespoons water
- 2 Tablespoons cornstarch
Chocolate Cake
- 1.5 cups all-purpose flour
- 1.25 cups granulated sugar
- 0.5 teaspoon salt
- 1.5 teaspoons baking soda
- 0.5 teaspoon baking powder
- 0.75 cup Dutch-processed cocoa powder
- 2 large eggs
- 1 teaspoon vanilla extract
- 1 cup hot water
- 0.5 cup neutral oil like sunflower, grapeseed, or canola
- 0.5 cup milk of choice dairy or dairy-free
Strawberry Buttercream
- 1.5 cups softened butter or dairy-free butter
- 3 to 3.75 cups powdered sugar
- 0.25 cup of the prepared strawberry cake filling from above
Instructions
- First, in a small bowl, whisk together the cornstarch and water until smooth. Set it aside.
- Grab a medium pan and combine the chopped strawberries, sugar, and lemon juice. Cook over medium-low heat, stirring occasionally, until it starts to gently simmer. Reduce the heat to low and let it cook for about 8-10 minutes, or until the mixture has noticeably reduced and thickened slightly.
- Stir in the cornstarch mixture. Continue cooking for a couple more minutes until it's nice and thick – it should cling to the back of a spoon.
- Remove the pan from the heat and let the filling cool down completely. Once cooled, pop it into an airtight container and chill it in the fridge for at least an hour. This helps it set perfectly!
- Preheat your oven to 350°F (175°C). Lightly grease two 8-inch round cake pans and line the bottoms with parchment paper – this is a pro tip for easy cake removal!
- In a large bowl, whisk together the flour, cocoa powder, sugar, salt, baking powder, and baking soda.
- Now, add in the eggs, vanilla extract, oil, and milk. Pour in the hot water and mix everything until the batter is smooth. Be careful not to overmix!
- Divide the delicious batter evenly between your prepared cake pans. Bake for 20-26 minutes, or until a toothpick inserted into the center comes out clean.
- Let the cakes cool in their pans for about 20 minutes before carefully transferring them to a wire rack to cool completely. Patience is key here for perfect layers!
- While the cakes are cooling, let's make that luscious buttercream! In a large bowl, beat the softened butter until creamy.
- Gradually add the powdered sugar, mixing slowly at first, then increasing speed until combined and fluffy.
- Stir in ¼ cup of your chilled strawberry cake filling. Mix until it's perfectly smooth and combined. If you want it a bit thicker, add a touch more powdered sugar.
- Keep the buttercream in the fridge until your cake layers are completely cool.
- Once everything is completely cool, it's assembly time! Place one cake layer onto your serving plate. Pipe a thick border of strawberry buttercream around the edge of this layer.
- Spoon the remaining strawberry filling into the center, spreading it gently within the frosting border.
- Carefully place the second cake layer on top. Now, frost the top and sides of the cake with the rest of your dreamy strawberry buttercream. Decorate as you wish and get ready to enjoy this delightful creation!