Why You’ll Love These Valentine’s Kiss Red Velvet Rosettes!
Get ready to fall head over heels for our “Valentine’s Kiss Red Velvet Rosettes”! These aren’t just cookies; they’re edible declarations of affection, bursting with classic red velvet flavor and a tender, melt-in-your-mouth texture. Here’s why these beauties will steal your heart:
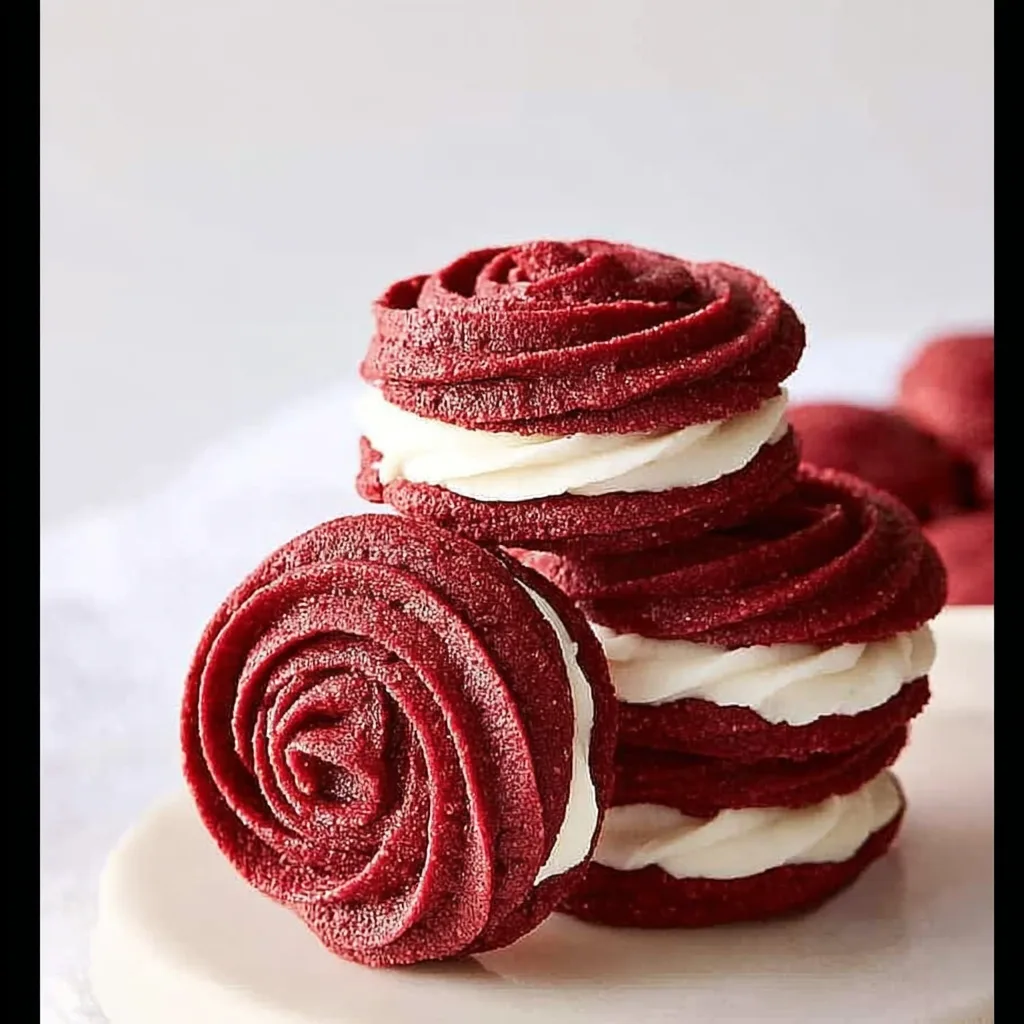
- Visually Stunning: Their deep red hue and delicate rosette shape make these “Valentine’s Kiss Red Velvet Rosettes” absolutely irresistible and perfect for gifting or a romantic dessert spread. Prepare for compliments!
- Surprisingly Simple: Despite their elegant appearance, these cookies come together with straightforward steps, making them accessible even for novice bakers. You’ll look like a pro without breaking a sweat!
- Irresistibly Delicious: That iconic red velvet flavor, complete with a hint of cocoa and a tender crumb, is simply divine. When paired with a creamy filling, it’s pure bliss. A true taste of romance!
- Versatile & Customizable: Whether you prefer a classic marshmallow buttercream or a lighter, healthier cream cheese filling, these rosettes are wonderfully adaptable to your taste and dietary preferences. Make them uniquely yours!
Unveiling Your Valentine’s Kiss Red Velvet Rosettes!
This Valentine’s Day, ditch the predictable and bake something truly enchanting! Imagine a sweet whisper, a tender embrace, a delectable treat that perfectly encapsulates the spirit of love. Get ready to sprinkle a little magic into your kitchen with our breathtaking “Valentine’s Kiss Red Velvet Rosettes”! These aren’t just cookies; they’re tiny, crimson works of art, baked with love and designed to melt hearts. With their vibrant color and delicate, floral shape, they’re the ultimate romantic gesture for your sweetheart, friends, or even a loving treat for yourself. Let’s dive into creating these delightful declarations of affection!
Gather Your Love Potion: Ingredients & Measurements
To craft your enchanting “Valentine’s Kiss Red Velvet Rosettes,” you’ll need these carefully selected ingredients, ready to transform into pure bliss:
- 🧈 2/3 cup solid vegetable shortening
- 🍚 1 ¾ cups granulated white sugar
- 🥚 2 large eggs
- 🌸 1 teaspoon pure vanilla extract
- 🥛 ¼ cup buttermilk (plus up to ¼ cup extra, if needed)
- 🔴 1 teaspoon red gel food coloring
- 🌾 2 cups all-purpose flour
- 🍫 ½ cup unsweetened cocoa powder
- 🧂 ½ teaspoon salt
Your Sweet Journey: Detailed Step-by-Step Directions
Follow these simple steps to bring your “Valentine’s Kiss Red Velvet Rosettes” to life:
- Preheat your oven to a warm 350°F (175°C) to get ready for baking.
- In your stand mixer, gently cream together the shortening and sugar until the mixture becomes light and fluffy, resembling a sweet cloud.
- Carefully add the eggs, one at a time, mixing on a medium-low speed until they are fully incorporated, ensuring each egg adds its magic.
- Reduce the mixer speed to low, then pour in the pure vanilla extract, creamy buttermilk, and the vibrant red gel food coloring, mixing until just combined and the color is beautifully uniform.
- In a separate bowl, lightly whisk together the all-purpose flour, rich cocoa powder, and a pinch of salt. This ensures all your dry ingredients are perfectly blended.
- With the mixer still on low speed, gradually add the dry flour mixture to the wet ingredients, blending just until a soft dough forms. Be careful not to overmix; we want a tender touch!
- If your dough feels a little dry, you can add a touch more buttermilk, up to an additional ¼ cup, until it reaches a smooth, pipeable consistency. It should be soft but hold its shape.
- Spoon small portions of the dough into a piping bag fitted with a 1M or 2D tip, then gently pipe beautiful, individual rosette shapes onto a parchment-lined baking sheet. Let your creativity bloom!
- Bake for just 6-8 minutes. Don’t worry if the centers still look a bit soft—that’s how these cookies get their delightful texture! Let them cool completely on the baking sheet to firm up.
- Once cool, for a delightful sandwich, spread about 1 tablespoon of your favorite marshmallow buttercream (or a lighter, healthier cream cheese filling for a fresh twist!) onto the flat side of one cookie. Gently top with another cookie and press ever so slightly to create a charming treat. Enjoy these lovely creations in moderation!
Presenting & Serving Your Valentine’s Kiss Red Velvet Rosettes
These “Valentine’s Kiss Red Velvet Rosettes” are almost too beautiful to eat! Here are some enchanting ways to present and serve them, making every bite a celebration:
- The Classic Embrace: Sandwich two rosettes together with a generous dollop of marshmallow buttercream or a tangy cream cheese filling. This traditional presentation is always a winner!
- Dainty Individuals: Serve the rosettes as single cookies, perhaps with a light dusting of powdered sugar. This is perfect for a lighter treat or as part of a larger dessert buffet.
- Romantic Dessert Platter: Arrange your “Valentine’s Kiss Red Velvet Rosettes” alongside fresh berries, chocolate-dipped strawberries, small truffles, and other mini desserts for a truly luxurious and romantic spread.
- Charming Cookie Pops: For a fun, handheld option, insert a lollipop stick into the dough before baking, or carefully into the filling of a sandwiched cookie. Drizzle with melted white chocolate and sprinkles for extra flair!
- Thoughtful Gift Boxes: Package a few beautifully sandwiched “Valentine’s Kiss Red Velvet Rosettes” in a elegant box tied with a satin ribbon. This makes for a heartfelt, homemade gift that speaks volumes.
- Mini Cake Adornments: Use an individual rosette as a stunning topper for a small cupcake, a slice of vanilla cake, or even a scoop of ice cream for an extra touch of romance and color.
Storing Your Sweet Memories: How Long Do They Last?
To keep your “Valentine’s Kiss Red Velvet Rosettes” fresh and delightful for as long as possible, follow these storage tips:
- Unfilled Cookies: Once completely cooled, store your unfilled “Valentine’s Kiss Red Velvet Rosettes” in an airtight container at room temperature for up to 3-4 days. They’ll retain their delightful softness and flavor.
- Filled Cookies: If you’ve filled your rosettes, especially with a cream cheese frosting, they *must* be stored in an airtight container in the refrigerator for up to 2-3 days due to the dairy content. Marshmallow buttercream might last a bit longer at room temperature (1-2 days) but refrigeration is still recommended for optimal freshness and safety.
- Freezing for Later: Unfilled “Valentine’s Kiss Red Velvet Rosettes” can be frozen in an airtight container or freezer bag for up to 1 month. Thaw them at room temperature before filling and serving for a fresh-baked taste anytime!
FAQs About Your Valentine’s Kiss Red Velvet Rosettes
Q: Why is shortening used instead of butter in these Valentine’s Kiss Red Velvet Rosettes?
A: Shortening helps create a very tender, soft cookie with less spread, which is ideal for maintaining the delicate rosette shape. It also contributes to a lighter texture and helps ensure those beautiful defined edges.
Q: Can I use regular liquid red food coloring instead of gel?
A: While you *can* use liquid food coloring, gel food coloring is highly concentrated and provides a much more vibrant red with less product. This prevents adding excess liquid to your dough, which could alter its consistency. For the best “Valentine’s Kiss Red Velvet Rosettes” color, gel is highly recommended.
Q: What if I don’t have buttermilk?
A: No problem! You can easily make a substitute. Add 1 teaspoon of white vinegar or lemon juice to a measuring cup, then fill with regular milk up to the ¼ cup line. Let it sit for 5-10 minutes until it slightly curdles, then use as directed in the recipe.
Q: My dough seems too sticky/too dry for piping. What should I do?
A: If your dough feels too dry, gradually add a *tiny* bit more buttermilk (as the recipe suggests, up to an additional ¼ cup) until it reaches a smooth, pipeable consistency. If it’s too sticky, try chilling the dough for 15-30 minutes, or incorporate a tiny sprinkle more flour, being careful not to overmix.
Q: What kind of piping tip is best for creating rosettes?
A: A 1M or 2D open star tip (often called a “petal” or “drop flower” tip) is absolutely perfect for creating beautiful, defined rosette shapes for your “Valentine’s Kiss Red Velvet Rosettes.”
Q: How do I know when the Valentine’s Kiss Red Velvet Rosettes are baked perfectly?
A: They will be set around the edges, but the centers should still look slightly soft. It’s crucial not to overbake, as they will firm up as they cool on the baking sheet, ensuring that delightful, soft texture.
Q: Can I make these cookies ahead of time?
A: Absolutely! You can prepare the dough and refrigerate it for up to 2-3 days before piping and baking. Unfilled, baked “Valentine’s Kiss Red Velvet Rosettes” also store wonderfully for several days, making them perfect for planning ahead.
Q: Is there a gluten-free option for these Valentine’s Kiss Red Velvet Rosettes?
A: We haven’t specifically tested a gluten-free version, but you could try substituting the all-purpose flour with a 1:1 gluten-free baking blend that contains xanthan gum. Please note that results may vary slightly in texture.
Q: What other fillings could I use besides marshmallow buttercream or cream cheese?
A: Get creative! You could try a classic vanilla buttercream, a luscious white chocolate ganache, a bright raspberry jam, a tangy lemon curd, or even a simple chocolate hazelnut spread for a different flavor profile.
Q: How many Valentine’s Kiss Red Velvet Rosettes does this recipe make?
A: The recipe indicates “8 servings,” which typically means 8 assembled sandwich cookies. This translates to 16 individual rosette cookies before filling.
Valentine's Kiss Red Velvet Rosettes 😘
Equipment
- Stand Mixer
- Piping bag
- 1M or 2D tip
- Parchment-lined baking sheet
Ingredients
Cookie Dough
- 2/3 cup solid vegetable shortening
- 1 3/4 cups granulated white sugar
- 2 large eggs
- 1 teaspoon pure vanilla extract
- 1/4 cup buttermilk (plus up to ¼ cup extra, if needed)
- 1 teaspoon red gel food coloring
- 2 cups all-purpose flour
- 1/2 cup unsweetened cocoa powder
- 1/2 teaspoon salt
For Serving
- 1 tablespoon your favorite marshmallow buttercream (or a lighter, healthier cream cheese filling for a fresh twist!)
Instructions
- Preheat your oven to a warm 350°F (175°C) to get ready for baking.
- In your stand mixer, gently cream together the shortening and sugar until the mixture becomes light and fluffy.
- Carefully add the eggs, one at a time, mixing on a medium-low speed until they are fully incorporated.
- Reduce the mixer speed to low, then pour in the pure vanilla extract, creamy buttermilk, and the vibrant red gel food coloring, mixing until just combined.
- In a separate bowl, lightly whisk together the all-purpose flour, rich cocoa powder, and a pinch of salt.
- With the mixer still on low speed, gradually add the dry flour mixture to the wet ingredients, blending just until a soft dough forms.
- If your dough feels a little dry, you can add a touch more buttermilk, up to an additional ¼ cup, until it reaches a smooth, pipeable consistency.
- Spoon small portions of the dough into a piping bag fitted with a 1M or 2D tip, then gently pipe beautiful, individual rosette shapes onto a parchment-lined baking sheet.
- Bake for just 6-8 minutes. Don't worry if the centers still look a bit soft—that's how these cookies get their delightful texture! Let them cool completely on the baking sheet to firm up.
- Once cool, for a delightful sandwich, spread about 1 tablespoon of your favorite marshmallow buttercream (or a lighter, healthier cream cheese filling for a fresh twist!) onto the flat side of one cookie. Gently top with another cookie and press ever so slightly to create a charming treat. Enjoy these lovely creations in moderation!
Notes
Calories: Not Provided
Total Carbs: Not Provided
Net Carbs: Not Provided
Fats: Not Provided
Protein: Not Provided Enjoy these lovely creations in moderation!