Why You’ll Love This Recipe
Get ready to fall head over heels for these Winter Wonderland Chocolate Chip Christmas Cookies! Here are four delightful reasons why this recipe is about to become your new holiday tradition:
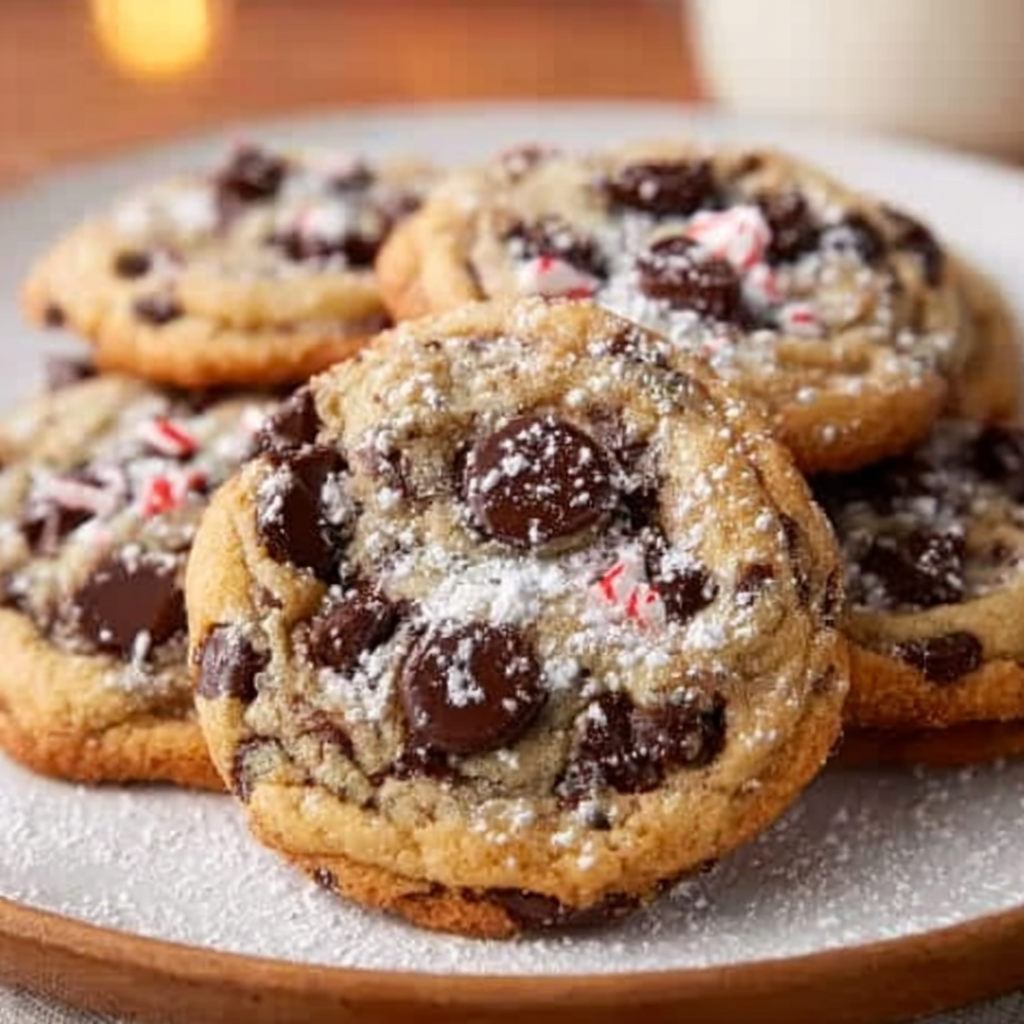
- Magical Festive Charm: With a simple dusting of powdered sugar, these aren’t just any chocolate chip cookies; they transform into enchanting “snow-kissed” treats perfect for a festive spread. Their elegant simplicity captures the magic of a winter wonderland.
- Irresistibly Delicious Classic: We’re talking about the ultimate chocolate chip cookie – perfectly chewy centers, slightly crisp edges, and abundant chocolatey goodness. This recipe takes that beloved classic and gives it a holiday glow, making it a guaranteed crowd-pleaser for all ages.
- Quick & Easy Holiday Baking: Don’t let holiday stress get to you! With just 20 minutes of prep and 12 minutes of baking, you can whip up a batch (or two!) of these delightful cookies without breaking a sweat. Perfect for spontaneous baking sessions or last-minute holiday treats.
- Perfect for Gifting & Sharing: These cookies aren’t just for eating; they’re for sharing the joy! Their beautiful presentation makes them ideal for holiday cookie exchanges, homemade gifts for friends and family, or simply sharing with loved ones around a cozy fire.
Embrace the Magic: Your New Favorite Winter Wonderland Chocolate Chip Christmas Cookies!
Imagine a chilly evening, soft twinkling lights, and the heartwarming aroma of freshly baked cookies wafting through your home. What could be more magical? As the snow (real or imagined!) begins to fall, there’s nothing quite like a treat that embodies the spirit of the season. Forget complicated confections; we’re here to talk about a true holiday hero: the Winter Wonderland Chocolate Chip Christmas Cookies. This isn’t just a recipe; it’s an invitation to create joy, one perfectly baked, snow-dusted cookie at a time. Easy to make, incredibly delicious, and utterly charming, these cookies are destined to become a beloved part of your festive celebrations. Get ready to sprinkle a little extra magic into your holiday baking!
Ingredients for Your Snowy Delight
Gather your magic-making ingredients to craft these enchanting Winter Wonderland Chocolate Chip Christmas Cookies:
- 🥣 2 1/4 cups all-purpose flour
- ✨ 1/2 teaspoon baking soda
- 🧈 1 cup softened unsalted butter (2 sticks)
- 🍚 1/2 cup granulated sugar
- 🌰 1 cup packed brown sugar
- 🧂 1 teaspoon salt
- 🌿 2 teaspoons vanilla extract
- 🥚 2 large eggs
- 🍫 2 cups chocolate chips (semi-sweet or dark for a richer flavor)
- ❄️ 1 cup powdered sugar (for a light, snowy dusting)
Detailed Directions: Bake Your Way to a Winter Wonderland
Creating these delightful Winter Wonderland Chocolate Chip Christmas Cookies is a joyous journey! Follow these easy steps:
- Preheat Your Oven: Start by setting your oven to 350°F (175°C). Getting it warm ensures your cookies bake perfectly and consistently from the moment they hit the heat.
- Combine Dry Ingredients: In a medium-sized bowl, gently whisk together the all-purpose flour and baking soda. This vital step ensures these dry ingredients are evenly distributed, contributing to light, fluffy cookies. Set this mixture aside for later.
- Cream Butter and Sugars: In a large mixing bowl, take your softened butter, granulated sugar, brown sugar, and salt. Use an electric mixer (or put some elbow grease into it!) to cream these ingredients until the mixture becomes wonderfully light and fluffy. This creates the essential, airy base for your incredible cookies.
- Incorporate Wet Ingredients: Next, beat in the fragrant vanilla extract until fully combined. Then, add the large eggs one by one, mixing thoroughly after each addition. This beautifully integrates all the wet ingredients into your creamy base.
- Gently Mix Dry and Wet: Gradually add the dry flour mixture (from step 2) to the wet ingredients in the large bowl. Mix until they are just combined. Remember, the key here is not to overmix, as overworking the dough can lead to tougher cookies instead of tender ones.
- Fold in Chocolate Chips: Finally, pour in your chosen chocolate chips. Gently fold them into the dough until they are evenly distributed throughout. Every bite should have that perfect chocolatey burst!
- Portion the Dough: Drop rounded tablespoons of your cookie dough onto ungreased baking sheets. Make sure to leave a little space between each cookie; they’ll need room to spread out and bake beautifully.
- Bake to Perfection: Place your baking sheets in the preheated oven and bake for 10 to 12 minutes. You’ll know they’re ready when the edges are a lovely golden brown and the centers look just set. For an extra chewy cookie, err on the side of slightly underbaked centers.
- Cool Down Gently: Once baked, let the cookies cool on the baking sheets for a few minutes. This crucial step allows them to firm up gently before you move them to a wire rack to finish cooling completely.
- Dust for a Winter Wonderland Finish: Once your cookies are entirely cool, give them a delicate dusting of powdered sugar. Use a fine-mesh sieve for the best “snowy” effect. Enjoy your homemade, festive Winter Wonderland Chocolate Chip Christmas Cookies!
Presentation and Serving: Sharing the Holiday Cheer
These Winter Wonderland Chocolate Chip Christmas Cookies aren’t just delicious; they’re a treat for the eyes too! Here’s how you can present them to maximize their festive appeal and serve them in style:
Dazzling Presentation Ideas:
- The Classic Snowfall: The powdered sugar dusting is your basic, beautiful “winter wonderland” touch. For an even and ethereal look, use a fine-mesh sieve to dust them once they are completely cool.
- A Sprinkle of Sparkle: After dusting with powdered sugar, add a light sprinkle of edible glitter, silver dragees, or festive red and green sprinkles for extra holiday cheer.
- White Chocolate Drizzle: Melt some white chocolate, put it in a piping bag or a ziplock bag with a corner snipped, and drizzle artistic patterns over the cooled, dusted cookies. This adds another layer of flavor and visual appeal.
- Festive Packaging for Gifts: Arrange your cookies neatly in clear cellophane bags tied with festive ribbons, or layer them in holiday-themed tins. They make thoughtful, homemade gifts for neighbors, teachers, and loved ones.
- Tiered Dessert Platter: For a holiday party, stack these beautiful cookies on a tiered serving platter alongside other festive treats. Their simple elegance will stand out.
Delightful Serving Suggestions:
- With a Glass of Milk: The ultimate classic pairing! Cold milk perfectly complements the rich chocolate and sweet cookie.
- Alongside Hot Cocoa: Serve with a mug of steaming hot chocolate, perhaps topped with whipped cream and a candy cane for an extra cozy experience.
- Coffee or Tea Companion: These cookies are wonderful with a warm cup of coffee or your favorite herbal tea, perfect for an after-dinner treat or a mid-afternoon break.
- Dessert Platter Star: Include them as a key component of your holiday dessert spread, alongside fruit, cheese, or other baked goods.
- By the Fire: Enjoy these cookies while curled up by a warm fire, perhaps listening to holiday music – truly embracing the winter wonderland vibe.
Storage & Longevity: Keeping the Magic Fresh
You’ll want to savor every moment of your delicious Winter Wonderland Chocolate Chip Christmas Cookies! Here’s how to store them to keep them fresh and delightful for as long as possible:
Storing Baked Cookies:
- Once your cookies have cooled completely, store them in an airtight container at room temperature.
- To maintain their softness and prevent them from drying out, you can place a slice of bread in the container with the cookies. The cookies will absorb moisture from the bread.
- Properly stored, these cookies will stay fresh and delicious for up to 5-7 days.
- If you’ve added the powdered sugar dusting, be aware that storing them in an airtight container for too long might cause the sugar to absorb moisture and “melt” slightly into the cookie surface. For best presentation, dust just before serving if possible, or accept a slightly less pristine look after a few days.
Freezing Baked Cookies:
- These cookies freeze beautifully! Once fully cooled, place them in a single layer on a baking sheet and freeze for about an hour until solid.
- Transfer the frozen cookies to a freezer-safe airtight container or heavy-duty freezer bag, separating layers with parchment paper to prevent sticking.
- They will last in the freezer for up to 3 months.
- To enjoy, simply thaw them at room temperature, or warm them slightly in a low oven for a “freshly baked” experience.
Freezing Cookie Dough:
- You can also prepare the dough ahead of time and freeze it! Form the dough into balls as if you were going to bake them, then arrange them on a baking sheet lined with parchment paper.
- Freeze until solid (about 1-2 hours), then transfer the frozen dough balls to a freezer-safe airtight container or bag.
- Frozen dough can be stored for up to 3 months.
- When you’re ready to bake, you can bake them directly from frozen. Just add an extra 2-4 minutes to the baking time, or until the edges are golden and centers are set.
Frequently Asked Questions About Your Winter Wonderland Cookies
Got questions about these magical Winter Wonderland Chocolate Chip Christmas Cookies? We’ve got answers!
- Q: Can I use different types of chocolate chips in this recipe?
A: Absolutely! While semi-sweet or dark chocolate chips are recommended for a richer flavor, you can certainly experiment with milk chocolate, white chocolate, or even a festive mix of different chips to suit your taste. - Q: What if I don’t have an electric mixer for creaming the butter and sugars?
A: No problem at all! You can definitely use good old arm power with a sturdy whisk or a wooden spoon. Just make sure you cream the butter and sugars really well until the mixture is light and fluffy – it might take a little extra effort but is totally achievable! - Q: How can I prevent my cookies from spreading too much on the baking sheet?
A: A few tips: ensure your butter isn’t too soft (it should be softened but not melted), don’t grease your baking sheets (unless specified by the recipe), and consider chilling the dough for 15-30 minutes before baking. Using parchment paper also helps. - Q: Can I make the cookie dough ahead of time?
A: Yes, you can! Prepare the dough as directed, cover the bowl tightly with plastic wrap, and refrigerate for up to 2-3 days. When ready to bake, let it sit at room temperature for 15-20 minutes to soften slightly before scooping, or bake from chilled, adding an extra minute or two to the bake time. - Q: Why is it important not to overmix the dough once the flour is added?
A: Overmixing develops the gluten in the flour, which can lead to tougher, less tender cookies. Mixing until just combined ensures a perfectly soft and chewy texture. - Q: What’s the best way to get that beautiful, even “snowy” powdered sugar look?
A: The trick is to use a fine-mesh sieve! Place a small amount of powdered sugar in the sieve and gently tap it over your completely cooled cookies for a light, even dusting that truly captures the “winter wonderland” effect. - Q: Can I add other festive ingredients to these cookies?
A: Definitely! Get creative with holiday additions. A pinch of cinnamon or nutmeg, a dash of peppermint extract (reduce vanilla slightly), or even some chopped dried cranberries or pecans can add extra festive flair. - Q: My cookies turned out hard. What might have gone wrong?
A: The most common reason for hard cookies is overbaking. Keep a close eye on them during the last few minutes of baking, aiming for just-set centers. Your oven temperature might also be slightly off, so using an oven thermometer can help. - Q: What kind of butter is best for these cookies?
A: Unsalted butter is generally preferred for baking because it allows you to control the exact amount of salt in your recipe. If you only have salted butter, you can use it, but consider reducing the added salt by about 1/4 teaspoon. - Q: Can these cookies be made gluten-free?
A: While this recipe uses all-purpose flour, you can try substituting with a 1:1 gluten-free all-purpose flour blend (one that includes xanthan gum) for gluten-free versions. The texture might vary slightly, but it’s often a successful swap.
Winter Wonderland Chocolate Chip Christmas Cookies 🎄
Equipment
- Electric Mixer
- Baking Sheets
- Wire Rack
Ingredients
Cookie Ingredients
- 2 1/4 cups all-purpose flour
- 1/2 teaspoon baking soda
- 1 cup unsalted butter softened, 2 sticks
- 1/2 cup granulated sugar
- 1 cup brown sugar packed
- 1 teaspoon salt
- 2 teaspoons vanilla extract
- 2 large eggs
- 2 cups chocolate chips semi-sweet or dark for a richer flavor
- 1 cup powdered sugar for a light, snowy dusting
Instructions
- Start by setting your oven to 350°F (175°C) – getting it warm ensures your cookies bake perfectly.
- In a medium bowl, gently whisk the all-purpose flour and baking soda together. This makes sure everything is evenly mixed for light, fluffy cookies. Set it aside.
- In a large mixing bowl, use an electric mixer (or good old arm power!) to cream the softened butter, granulated sugar, brown sugar, and salt until the mixture is light and fluffy. This step creates a wonderful base for your cookies.
- Beat in the vanilla extract, then add the eggs one by one, mixing well after each. This combines all the wet ingredients beautifully.
- Gradually add the dry flour mixture to the wet ingredients. Mix until just combined – be careful not to overmix to keep your cookies tender.
- Fold in the chocolate chips until they're evenly distributed throughout the dough.
- Drop rounded tablespoons of cookie dough onto ungreased baking sheets, leaving a little space between each for them to spread.
- Bake for 10 to 12 minutes, or until the edges are golden and the centers look just set. Remember, a slightly underbaked center often means a chewier cookie!
- Let the cookies cool on the baking sheets for a few minutes before moving them to a wire rack to finish cooling completely. This helps them firm up gently.
- Once cool, give them a light dusting of powdered sugar for that beautiful "winter wonderland" touch. Enjoy your homemade festive treat!
Notes
- Calories: 150
- Total Carbs: 20g
- Net Carbs: 19g
- Fats: 7g
- Protein: 2g