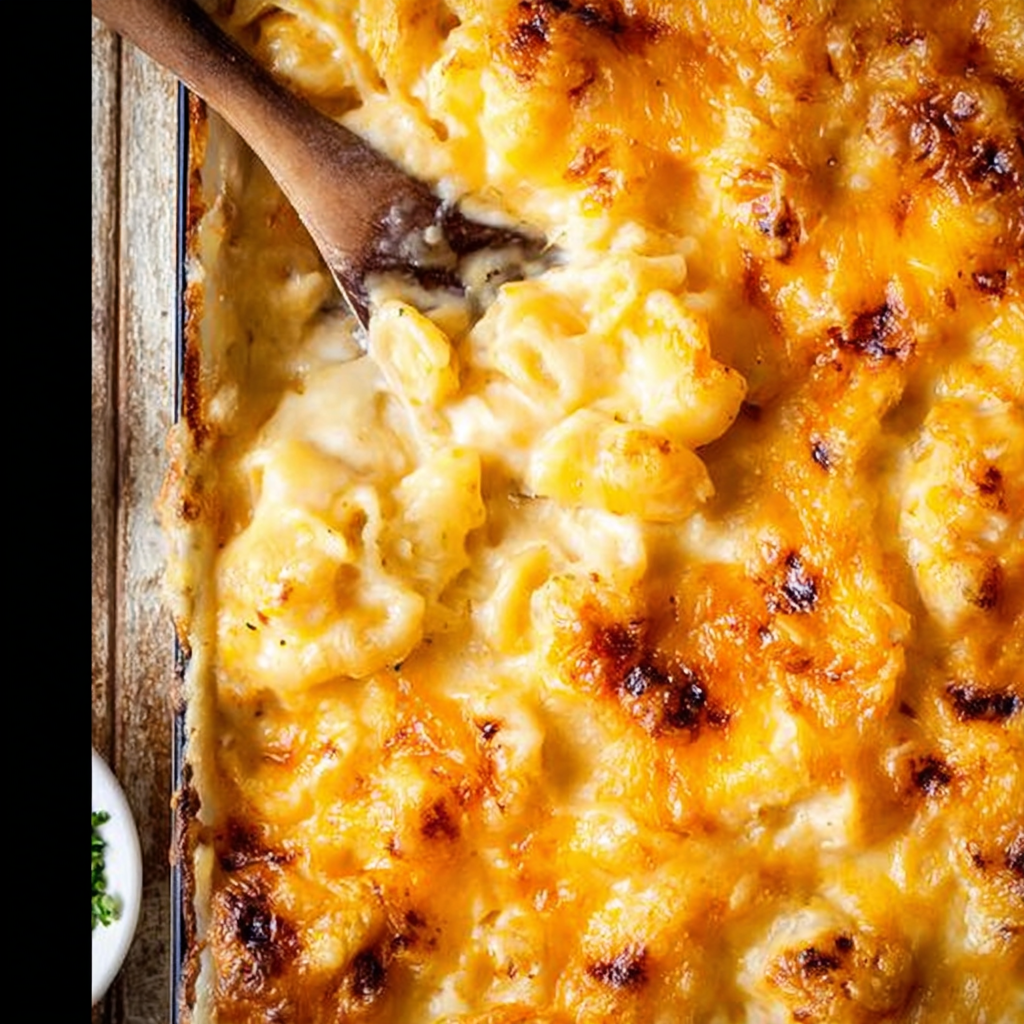
Picture this: the twinkling lights of the holiday season, the joyful hum of festive tunes, and the irresistible aroma of something utterly divine wafting from your kitchen. What could it be? None other than the star of your holiday spread, the ultimate crowd-pleaser, the dish that screams comfort and joy in every glorious bite: our **Holiday Cheesy Comfort Mac Bake**! Forget bland sides; this isn’t just mac and cheese; it’s a creamy, dreamy, two-cheese masterpiece baked to golden perfection, ready to warm hearts and tantalize taste buds. Get ready to impress with minimal fuss and maximum flavor – because holidays should be delicious, not stressful!
Why You’ll Love This Holiday Cheesy Comfort Mac Bake
- Effortlessly Impressive: Despite its gourmet taste, this recipe is incredibly straightforward, making it perfect for both seasoned chefs and holiday cooking newbies. You’ll look like a culinary wizard with minimal effort!
- The Ultimate Comfort Food: What’s better than warm, cheesy goodness during the colder months? This mac bake offers a hug in a dish, bringing that cozy, nostalgic feeling to your holiday table.
- A Crowd-Pleasing Star: From picky eaters to gourmet enthusiasts, everyone adores a well-made mac and cheese. This version, with its rich blend of cheddar and Gruyere, is guaranteed to be a universal hit at any festive gathering.
- Perfectly Festive Flavor: The hint of paprika and the rich, creamy sauce elevate this dish from everyday mac to a special holiday treat. It pairs beautifully with traditional holiday roasts and adds a touch of indulgence to your celebratory meal.
Ingredients for Your Holiday Cheesy Comfort Mac Bake
Gather your festive arsenal – here’s what you’ll need to create this cheesy masterpiece:
- Pasta: 1 pound dried elbow pasta
- Butter: 1/2 cup unsalted butter
- Flour: 1/2 cup all-purpose flour
- Milk & Cream: 1 1/2 cups whole milk, 2 1/2 cups half and half
- Cheese (the stars!): 4 cups shredded medium cheddar cheese (freshly shredded for best melt!), 2 cups shredded Gruyere cheese (freshly shredded for best melt!)
- Seasonings: 1/2 tablespoon salt, 1/2 teaspoon black pepper, 1/4 teaspoon paprika (smoked paprika for a lovely touch!)
Detailed Directions: Crafting Your Cheesy Dream
Let’s get cooking! Follow these simple steps to bring your **Holiday Cheesy Comfort Mac Bake** to life:
- Preheat & Prep: Set your oven to a cozy 325°F (160°C). Lightly grease a 3-quart (9×13 inch) baking dish – your mac’s comfy home!
- Pasta Perfection: In a large pot, bring generously salted water to a rolling boil. Add your elbow pasta and cook for just 1 minute less than the package suggests for ‘al dente’. This ensures it finishes perfectly in the oven. Drain and toss with a tiny splash of olive oil to prevent any sticky situations.
- Cheese Division: While the pasta cooks, shred all your cheeses and mix them together. Divide this glorious cheesy blend into three equal piles: one for the sauce (about 3 cups), one for the middle layer (1 1/2 cups), and the final one for the top (1 1/2 cups).
- Roux Magic: In a large saucepan over medium heat, melt the unsalted butter. Sprinkle in the flour and whisk non-stop for about a minute until you have a smooth, thick paste – that’s your roux, the base of pure creaminess!
- Building the Bechamel: Gradually pour in about 2 cups of the half and half, whisking like a pro until it’s smooth. Slowly add the remaining half and half and the whole milk, continuing to whisk until everything is perfectly combined and smooth.
- Thicken Up: Keep heating this mixture over medium heat, whisking frequently. Patience is a virtue here! It will slowly thicken to a consistency much like a slightly thinned condensed soup.
- Cheesy Meltdown: Remove the saucepan from the heat. Stir in the salt, black pepper, and paprika. Now for the fun part: add 1 1/2 cups of your mixed shredded cheese, stirring until it’s completely melted and integrated. Then, stir in another 1 1/2 cups of cheese until your sauce is incredibly smooth, shiny, and wonderfully cheesy.
- Combine & Layer: In a large mixing bowl, gently combine your perfectly cooked pasta with that luscious cheese sauce, ensuring every single noodle is gloriously coated. Pour half of this cheesy pasta mixture into your prepared baking dish. Evenly sprinkle 1 1/2 cups of your reserved shredded cheese over this layer.
- Final Flourish & Bake: Top with the remaining pasta mixture. For the grand finale, sprinkle the very last 1 1/2 cups of shredded cheese over the top. Bake for a quick 15 minutes, or until the cheese is bubbly and boasts a beautiful golden-brown crust. For an extra crispy top, a 2-3 minute broil at the very end (watch it like a hawk!) does wonders.
- Serve & Savor: Let it cool for just a few minutes, then dive into this delightful, easy-to-make dish. Enjoy every warm, cheesy, comforting bite!
Presenting & Serving Your Holiday Cheesy Comfort Mac Bake
This **Holiday Cheesy Comfort Mac Bake** is a showstopper on its own, but a little presentation can elevate it even further! For a classic look, serve it straight from the baking dish, allowing guests to scoop out generous portions. A sprinkle of fresh chopped parsley or chives just before serving adds a pop of color and freshness. For a more elegant touch, you could spoon individual servings into small oven-safe ramekins and bake them off for a personalized experience, perfect for a dinner party. This mac bake is fantastic alongside a holiday roast (think turkey, ham, or prime rib), but also pairs beautifully with lighter fare like a crisp green salad or roasted vegetables to balance the richness. Don’t forget a side of cranberry sauce or a dollop of spicy mustard for an extra festive kick!
Storage & Shelf Life
Got leftovers? Lucky you! This **Holiday Cheesy Comfort Mac Bake** stores wonderfully. Once cooled, transfer any remaining mac and cheese to an airtight container and refrigerate for up to 3-4 days. For longer storage, you can freeze it! Divide into individual portions in freezer-safe containers or bags, and it will keep well for up to 2-3 months. To reheat, thaw overnight in the refrigerator if frozen. Reheat in the oven at 300°F (150°C) until warmed through, adding a splash of milk or cream if it seems dry, or microwave individual servings. Cover with foil to prevent drying out if reheating in the oven.
FAQs About Your Holiday Cheesy Comfort Mac Bake
1. Can I use pre-shredded cheese?
While convenient, pre-shredded cheese often contains anti-caking agents that can make your sauce gritty or less smooth. For the absolute best, creamiest melt in your **Holiday Cheesy Comfort Mac Bake**, we highly recommend shredding your own cheese.
2. What if I don’t have Gruyere cheese?
Gruyere adds a fantastic nutty depth. Great substitutes include Swiss, Fontina, or even a good quality white cheddar. A mix of different melting cheeses can also work wonders!
3. Why cook the pasta ‘al dente’ and then bake it?
Cooking the pasta slightly undercooked (al dente) before baking ensures it absorbs the creamy cheese sauce and finishes cooking in the oven without becoming mushy. This results in perfect texture every time.
4. Can I make this mac and cheese ahead of time?
Absolutely! You can assemble the entire dish up to the point of baking, cover it tightly, and refrigerate for up to 24 hours. When ready to bake, let it sit at room temperature for about 30 minutes before baking, and you might need to add an extra 5-10 minutes to the bake time.
5. How can I make this spicier?
For a kick, add a pinch of cayenne pepper to the cheese sauce along with the paprika, or stir in a dash of your favorite hot sauce. A sprinkle of red pepper flakes on top before baking also works!
6. Can I make this gluten-free?
Yes! Simply swap out the regular elbow pasta for your favorite gluten-free elbow pasta and ensure your all-purpose flour is a gluten-free blend (or use cornstarch as a thickener, adjusting quantities as needed).
7. What are the best side dishes to serve with this?
This rich mac bake pairs wonderfully with lighter, contrasting sides. Think roasted green beans, a fresh garden salad with a vinaigrette, glazed carrots, or even a simple sautéed spinach. It’s also fantastic with any roasted holiday meat.
8. My sauce isn’t thickening. What should I do?
Patience is key! Ensure your heat is consistent (medium) and keep whisking. The thickening process happens gradually. If after a significant amount of time it’s still too thin, you can try mixing a teaspoon of flour or cornstarch with a tablespoon of cold milk to create a slurry, then gradually whisk it into the hot sauce and cook for a few more minutes.
9. Can I add other ingredients to the mac and cheese?
Absolutely! Feel free to customize. Cooked bacon bits, caramelized onions, roasted mushrooms, or even cooked lobster meat can be folded into the pasta mixture before baking for an extra special treat.
10. Is it possible to freeze this recipe?
Yes, it freezes beautifully! Assemble and bake the mac and cheese as directed. Once completely cooled, wrap it tightly in aluminum foil and then in plastic wrap, or transfer to freezer-safe containers. Thaw in the refrigerator overnight before reheating in the oven until bubbly and hot.
Holiday Cheesy Comfort Mac Bake 🎄
Equipment
- 3-quart (9x13 inch) baking dish
- Large Pot
- Large saucepan
- Large mixing bowl
Ingredients
- 1 pound dried elbow pasta
- 0.5 cup unsalted butter
- 0.5 cup all-purpose flour
- 1.5 cups whole milk
- 2.5 cups half and half
- 4 cups shredded medium cheddar cheese freshly shredded for best melt!
- 2 cups shredded Gruyere cheese freshly shredded for best melt!
- 0.5 tablespoon salt
- 0.5 teaspoon black pepper
- 0.25 teaspoon paprika smoked paprika is a lovely touch!
Instructions
- Get Ready: Preheat your oven to 325°F (160°C). Lightly grease a 3-quart (9x13 inch) baking dish and set it aside.
- Cook the Pasta: Bring a large pot of salted water to a rolling boil. Add your elbow pasta and cook for just about 1 minute less than the package instructions for 'al dente' – it will finish cooking in the oven. Drain the pasta and toss it with a tiny bit of olive oil to prevent sticking.
- Prep the Cheese: While the pasta cooks, shred all your cheeses. Mix them together, then divide into three equal piles: about 3 cups for the sauce, 1 1/2 cups for the middle layer, and 1 1/2 cups for the top.
- Start the Sauce Base (Roux): In a large saucepan over medium heat, melt the unsalted butter. Sprinkle in the flour and whisk continuously for about 1 minute until it forms a smooth, thick paste (a roux).
- Build the Creaminess: Gradually pour in about 2 cups of the half and half, whisking constantly until smooth. Then, slowly add the remaining half and half and the whole milk, continuing to whisk until fully combined and smooth.
- Thicken the Sauce: Keep heating the mixture over medium heat, whisking frequently, until it thickens to a consistency similar to a slightly thinned condensed soup. This takes patience but is key to a creamy sauce!
- Melt the Cheese: Remove the saucepan from the heat. Stir in the salt, black pepper, and paprika. Add 1 1/2 cups of your mixed shredded cheese, stirring until completely melted. Then, stir in another 1 1/2 cups of cheese until the sauce is wonderfully smooth and cheesy.
- Combine & Layer: In a large mixing bowl, gently combine the drained pasta with your creamy cheese sauce, ensuring every noodle is coated. Pour half of this cheesy pasta mixture into your prepared baking dish. Sprinkle evenly with 1 1/2 cups of the remaining shredded cheese.
- Final Layers & Bake: Top with the rest of the pasta mixture. Finish by sprinkling the very last 1 1/2 cups of shredded cheese over the top. Bake for just 15 minutes, or until the cheese is bubbly and beautifully golden brown on top. For an extra crispy crust, you can broil for 2-3 minutes at the very end, watching carefully!
- Enjoy! Serve warm and savor this delightful, easy-to-make dish.
Notes
Calories: 665
Total Carbs: ~46g
Net Carbs: ~44g
Fats: ~44g
Protein: ~32g