Ever found yourself craving the savory, perfectly seasoned goodness of a classic gyro, but wishing you could enjoy it right in your own kitchen? That distinct aroma, the tender slices of meat, the fresh toppings… it’s a symphony of flavors that often feels exclusive to your favorite Mediterranean spot. But what if we told you that achieving that authentic, mouth-watering experience at home is not only possible but surprisingly easy and incredibly rewarding? Get ready to transform your dinner routine with our ultimate guide to a Homemade Gyro Delight that promises all the flavor without any of the fuss. Prepare to be amazed by how simple it is to bring this street food hero to your dinner table, turning everyday meals into an exciting culinary adventure!
Why You’ll Love This Recipe
You’re about to discover why this particular Homemade Gyro Delight recipe is destined to become a new family favorite. It’s more than just a meal; it’s an experience that checks all the right boxes for convenience, flavor, and health.
- Authentic Flavor, Simplified: Forget about needing a vertical spit! This recipe masterfully replicates the deep, savory, herb-infused flavor and dense texture of traditional gyro meat using just your oven. You get all the incredible taste without any specialized equipment.
- Healthy & Diet-Friendly: Looking for a delicious meal that aligns with your low-carb or keto lifestyle? This Homemade Gyro Delight is perfectly suited! It’s packed with protein, low in carbs, and designed to be enjoyed guilt-free, especially when served with a fresh salad or cauliflower rice.
- Surprisingly Easy to Make: Don’t be intimidated by homemade gyros! With straightforward steps and common ingredients, you’ll find this recipe is incredibly accessible for home cooks of all skill levels. The hands-on mixing is the most “involved” part, and it’s surprisingly therapeutic!
- Versatile & Crowd-Pleasing: Whether you’re feeding a family, hosting friends, or prepping meals for the week, this gyro meat is a winner. It’s incredibly versatile and can be served in countless ways, ensuring everyone finds a way to enjoy this delightful creation.
Ingredients for Your Homemade Gyro Delight
Gather these simple ingredients to embark on your journey to a truly magnificent Homemade Gyro Delight. Each component plays a crucial role in building that signature flavor profile you know and love!
- 🐑 1 pound ground lamb: Essential for that authentic Mediterranean richness.
- 🐄 1 pound ground beef: (or more lamb for a richer flavor) Balances the lamb and adds a familiar robustness.
- 🧅 1/4 medium onion, grated: Adds moisture and a subtle sweetness that deepens the flavor.
- 🧄 4 cloves garlic, minced: A pungent aromatic that’s foundational to savory dishes.
- 🌿 1 tablespoon dried marjoram: A sweet, piney herb crucial for classic gyro taste.
- 🥄 1 ½ teaspoons cumin: Earthy and warm, it brings a touch of exotic spice.
- 🌿 1 teaspoon dried rosemary: Woody and fragrant, it complements the lamb beautifully.
- 🧂 2 teaspoons salt: Enhances all the flavors and seasons the meat perfectly.
- 🌶️ 1 teaspoon black pepper: Adds a gentle warmth and zest.
- 🍶 A small amount of oil for searing (optional): For that irresistible crispy exterior.
Step-by-Step Directions to Make This Homemade Gyro Delight
Follow these easy instructions to create your very own Homemade Gyro Delight. You’ll be amazed at how simple it is to achieve such incredible flavor and texture right in your kitchen!
- Get Ready: Start by preheating your oven to 325°F (160°C). Grab a rimmed baking sheet and line it with parchment paper for easy cleanup. This prevents sticking and makes transfer a breeze.
- Mix It Up: In a large bowl, combine your ground lamb and ground beef. Grate the onion directly into the bowl – this ensures fine distribution and moisture – then add the minced garlic, dried marjoram, cumin, rosemary, salt, and pepper.
- Get Hands-On: This is where the magic happens! Use your hands to thoroughly mix and squeeze the ingredients together. Work the mixture for several minutes until it becomes very dense and sticky, almost like a paste. This step is key to getting that classic dense gyro texture!
- Shape & Bake: Shape the mixture into a long, flat loaf, roughly 4 by 10 inches, and place it on your prepared baking sheet. Bake for 30 to 40 minutes, or until the center of the loaf reaches 160°F (71°C) with an instant-read thermometer. This ensures it’s perfectly cooked through.
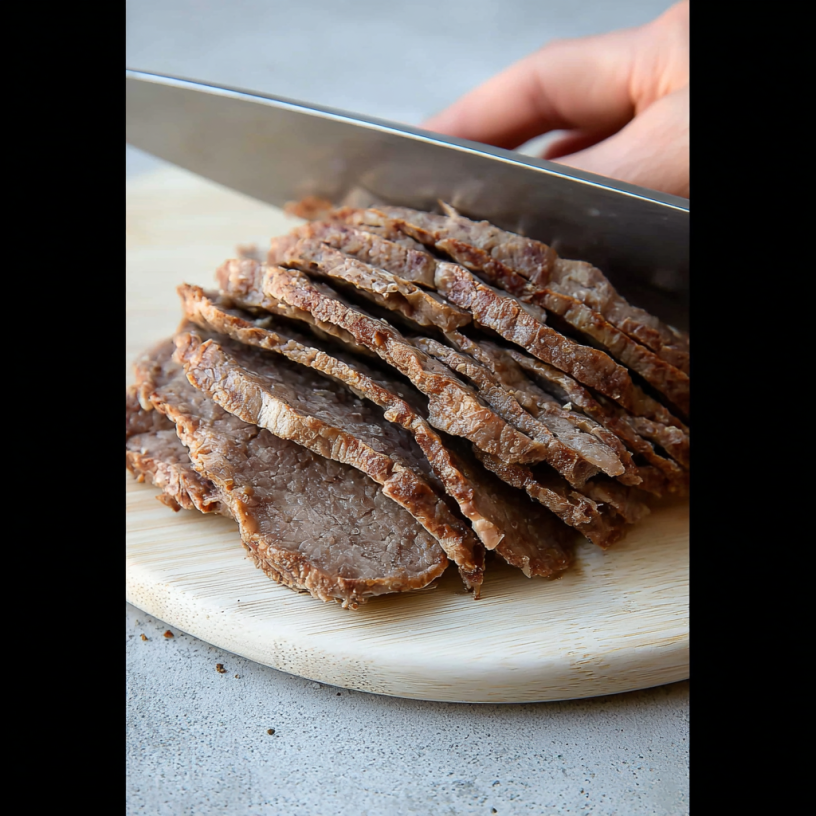
- Cool & Slice: Let the loaf cool completely. This is critically important for firm, easy-to-slice pieces! Attempting to slice it warm will result in crumbling. Once cooled, use a sharp knife to slice it into thin pieces, about 1/4 inch thick.
- Quick Sear (Optional, but recommended!): If you like, heat a small amount of oil (like olive or avocado oil) in a pan over medium-high heat. Quickly sear each gyro slice for about 1 minute per side until golden brown and slightly crispy. This step adds incredible texture and boosts the flavor!
- Serve Healthy: Enjoy your homemade gyro meat over a fresh salad or with cauliflower rice for a light, delicious, and healthy meal!
Serving Your Homemade Gyro Delight: Creative Ways to Enjoy
Now that you’ve crafted this amazing Homemade Gyro Delight, it’s time to talk about serving! While it’s fantastic on its own, here are several delicious ways to present your culinary masterpiece, catering to all tastes and dietary preferences:
- Classic Gyro Pita: The quintessential way to enjoy! Warm up some soft pita bread, slather it with homemade tzatziki sauce, pile on your seared gyro slices, and top with crisp lettuce, diced tomatoes, red onion, and a sprinkle of feta cheese.
- Healthy Gyro Salad Bowl: As suggested in the recipe, create a vibrant salad base with mixed greens, cucumbers, tomatoes, red onion, and olives. Arrange your gyro slices on top and drizzle with a light lemon-herb vinaigrette or extra tzatziki for a refreshing, low-carb option.
- Keto-Friendly Lettuce Wraps: For an ultra-low-carb approach, use large, crisp lettuce leaves (like butter or romaine) as your “wrap.” Fill with gyro meat, a dollop of tzatziki, and your favorite fresh veggies for a satisfying crunch.
- Gyro Rice Bowls: Serve your gyro meat over fluffy basmati rice, quinoa, or – for a low-carb alternative – cauliflower rice. Add a side of Greek salad components, a sprinkle of fresh dill, and a squeeze of lemon for a wholesome and complete meal.
- Mezze Platter Addition: Arrange the sliced gyro meat on a platter alongside hummus, baba ghanoush, olives, warm pita wedges, and fresh vegetable sticks for an impressive Mediterranean-inspired appetizer spread.
Storing Your Homemade Gyro Delight: Freshness and Longevity
One of the best things about making a Homemade Gyro Delight is having delicious leftovers ready to go! Proper storage ensures your effort pays off with convenient, tasty meals for days.
Refrigeration:
Once your gyro loaf has cooled completely and been sliced, store the slices in an airtight container in the refrigerator. It will stay fresh and delicious for up to 3-4 days. For best results, avoid mixing it with sauces like tzatziki until just before serving to prevent sogginess. When ready to enjoy, you can quickly sear the slices again in a hot pan for a minute per side, microwave them briefly, or warm them in a toaster oven until heated through.
Freezing:
For longer storage, the gyro meat freezes beautifully! You can freeze the entire cooled and unsliced loaf, or slice it first and then freeze the individual portions. Wrap the loaf or stack of slices tightly in plastic wrap, then place in a freezer-safe bag or container. It will maintain its quality for up to 2-3 months. Thaw overnight in the refrigerator before slicing (if frozen whole) or reheating. Reheat thawed slices as you would fresh leftovers.
FAQs About Your Homemade Gyro Delight
Got questions about making this incredible Homemade Gyro Delight? We’ve got answers to help you perfect your homemade masterpiece!
- Can I use only lamb or only beef for this recipe?
While the lamb and beef blend offers the most traditional flavor, you can certainly use all lamb for an even richer, more pronounced Mediterranean taste. Using all beef might yield a slightly different texture and flavor, but it will still be delicious! - What if I don’t have an instant-read thermometer?
While highly recommended for accuracy, if you don’t have one, bake for the full 40 minutes. The internal temperature of 160°F (71°C) ensures it’s cooked through and safe. - Why is it important to cool the loaf completely before slicing?
Cooling allows the meat to firm up and the fats to solidify. This is crucial for achieving clean, thin slices without the loaf crumbling or falling apart. Patience is key here! - What kind of pan should I use for searing the slices?
A cast-iron skillet or any heavy-bottomed non-stick pan works best for achieving that beautiful golden-brown crust and crispy texture on the seared slices. - What is a good homemade sauce to serve with this gyro meat?
Tzatziki sauce is the classic choice! It’s a refreshing mix of Greek yogurt, cucumber, garlic, dill, and lemon juice that perfectly complements the rich gyro meat. - Can I prepare the mixture ahead of time?
Yes! You can mix all the ingredients and shape the loaf, then cover it tightly and refrigerate for up to 24 hours before baking. This is great for meal prepping. - Is this recipe gluten-free?
Yes, the gyro meat itself is naturally gluten-free. Just be mindful of what you serve it with if you’re maintaining a gluten-free diet (e.g., use lettuce wraps instead of pita bread). - Can I grill the slices instead of searing them on the stove?
Absolutely! Grilling the thin slices briefly adds a wonderful smoky char and is a fantastic alternative to pan-searing, especially during warmer months. - How thin should I slice the gyro meat?
Aim for about 1/4 inch thick. This thickness is ideal for achieving the desired texture – firm enough to hold up but tender enough to bite through easily. A very sharp knife is your best friend here. - Can I add more herbs or spices to customize the flavor?
Certainly! Feel free to experiment with a pinch of oregano, a touch of smoked paprika, or even a tiny amount of cayenne pepper if you like a little heat. Remember to start small and taste!
Homemade Gyro Delight
Equipment
- Rimmed Baking Sheet
- Parchment Paper
- Large Bowl
- Instant-read thermometer
- Sharp Knife
- Pan (for searing, optional)
Ingredients
Gyro Meat
- 1 pound ground lamb
- 1 pound ground beef (or more lamb for a richer flavor)
- 1/4 medium onion grated
- 4 cloves garlic minced
- 1 tablespoon dried marjoram
- 1.5 teaspoons cumin
- 1 teaspoon dried rosemary
- 2 teaspoons salt
- 1 teaspoon black pepper
- oil a small amount for searing (optional)
Instructions
- Get Ready: Start by preheating your oven to 325°F (160°C). Grab a rimmed baking sheet and line it with parchment paper for easy cleanup.
- Mix It Up: In a large bowl, combine your ground lamb and ground beef. Grate the onion directly into the bowl, then add the minced garlic, dried marjoram, cumin, rosemary, salt, and pepper.
- Get Hands-On: Use your hands to thoroughly mix and squeeze the ingredients together. This step is key to getting that classic dense gyro texture!
- Shape & Bake: Shape the mixture into a long, flat loaf, roughly 4 by 10 inches, and place it on your prepared baking sheet. Bake for 30 to 40 minutes, or until the center of the loaf reaches 160°F (71°C) with an instant-read thermometer.
- Cool & Slice: Let the loaf cool completely. This is important for firm, easy-to-slice pieces! Once cooled, use a sharp knife to slice it into thin pieces, about 1/4 inch thick.
- Quick Sear (Optional, but recommended!): If you like, heat a small amount of oil in a pan over medium-high heat. Quickly sear each gyro slice for about 1 minute per side until golden brown.
- Serve Healthy: Enjoy your homemade gyro meat over a fresh salad or with cauliflower rice for a light, delicious, and healthy meal!