Oh, hello there, fellow comfort food enthusiast! Are you ready to dive headfirst into a world of creamy, dreamy, cheesy goodness that will make your taste buds sing and your soul feel utterly pampered? Forget everything you thought you knew about mac and cheese, because we’re about to unveil the recipe for an **Easy Cheesy Baked Mac & Cheese Delight** that’s so good, it should come with a warning label (a warning of extreme deliciousness, that is!). This isn’t just a meal; it’s a warm hug in a baking dish, a symphony of flavors, and frankly, the only mac and cheese recipe you’ll ever need again. Get ready to impress yourself and everyone lucky enough to grab a fork!
Why You’ll Love This Easy Cheesy Baked Mac & Cheese Delight
- Unbelievably Creamy, Every Time: Thanks to our secret weapon (a perfectly executed roux and a blend of whole milk and heavy cream), your sauce will be silken smooth, thick, and never gritty. Each bite is pure, unadulterated bliss.
- The Perfect Cheese Pull: With a dynamic duo of sharp cheddar and Gruyere, you’re not just getting flavor; you’re getting that glorious, Instagram-worthy cheese pull that makes every serving feel extra special.
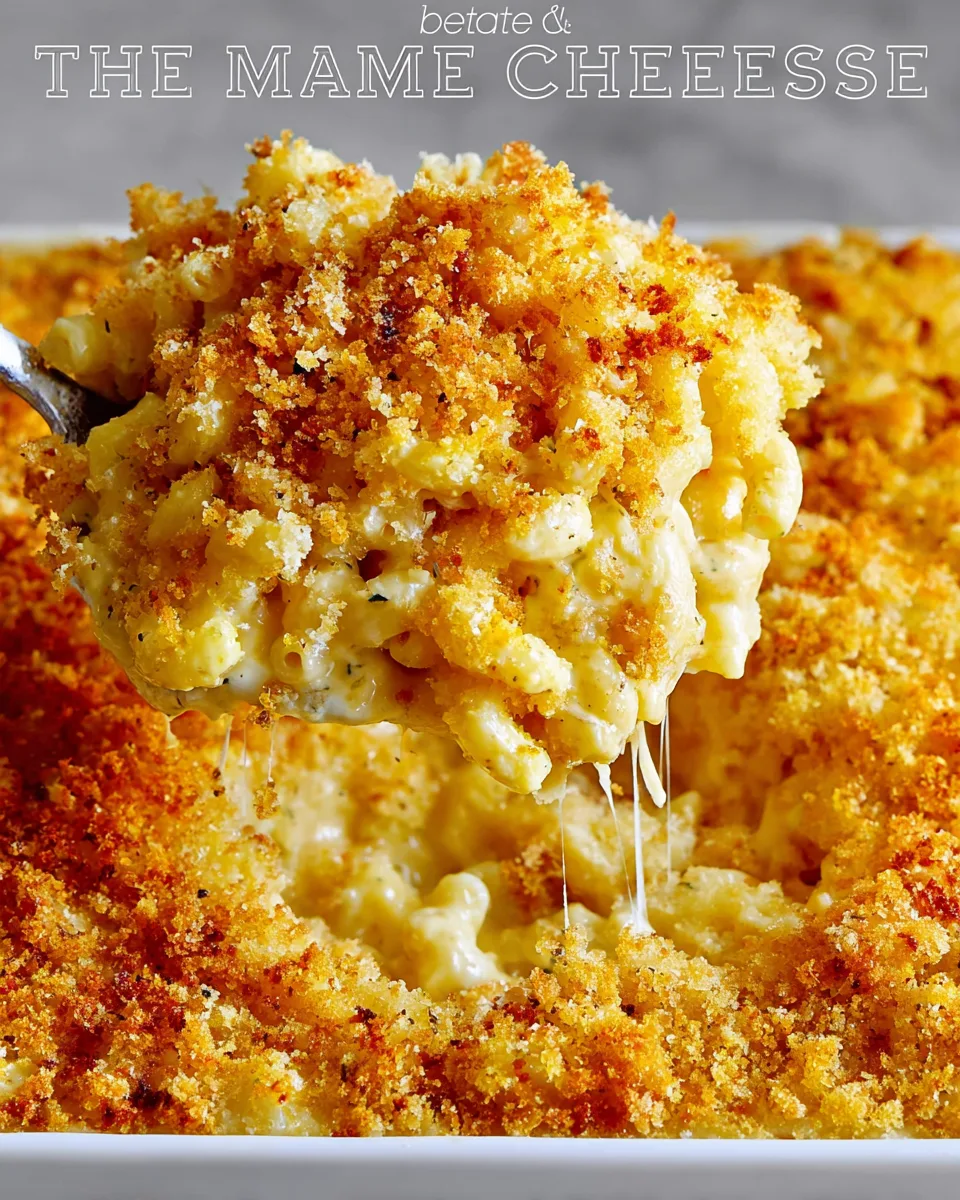
- Crunchy, Golden Topping: A buttery Panko and Parmesan breadcrumb topping adds an irresistible textural contrast to the creamy pasta below. It’s the perfect crispy crown on your cheesy masterpiece.
- Surprisingly Simple & Stress-Free: Don’t let the gourmet taste fool you! This **Easy Cheesy Baked Mac & Cheese Delight** is designed for home cooks of all levels. Our step-by-step instructions break down the process, making it a joy to prepare, not a chore.
Ingredients for Your Cheesy Masterpiece
Gather your delicious arsenal – here’s what you’ll need to create this Easy Cheesy Baked Mac & Cheese Delight:
- 🍝 16 ounces elbow macaroni (or similar tubular pasta)
- 🌿 1 tablespoon extra virgin olive oil
- 🧈 6 tablespoons unsalted butter
- 🍚 1/3 cup all-purpose flour
- 🥛 3 cups whole milk
- 🥛 1 cup heavy whipping cream
- 🧀 4 cups sharp cheddar cheese, freshly shredded
- 🧀 2 cups Gruyere cheese, freshly shredded (or Jarlsberg Swiss for a similar flavor)
- 🧂 Salt and freshly ground black pepper, to taste
- 🍞 1 1/2 cups Panko breadcrumbs
- 🧈 4 tablespoons butter, melted
- 🧀 1/2 cup Parmesan cheese, freshly shredded
- 🌶️ 1/4 teaspoon smoked paprika (or regular paprika)
Your Step-by-Step Guide to Baked Mac & Cheese Bliss
Ready to create magic? Follow these simple steps for your very own **Easy Cheesy Baked Mac & Cheese Delight**:
- Get Ready: Preheat your oven to a cozy 350°F (175°C). Lightly butter or grease a large 3 or 4-quart baking dish and set it aside. In a separate bowl, combine your freshly shredded cheddar and Gruyere cheeses and keep them handy for their cheesy debut.
- Cook the Pasta: Boil your elbow macaroni until it’s just shy of al dente (about one minute less than the package directions). This little trick helps keep the pasta firm for baking – no mushy noodles here! Drain the pasta well, drizzle it with 1 tablespoon of olive oil to prevent sticking, and let it cool slightly in a large bowl.
- Start the Roux: In a large saucepan or Dutch oven, melt the 6 tablespoons of unsalted butter over medium heat. Whisk in the flour and cook for about 1 minute, continuing to whisk until the mixture is bubbly and lightly golden. This “roux” is your secret to a thick, creamy sauce – don’t skip it!
- Make the Cheese Sauce Base: Slowly and gradually whisk in the cold whole milk and heavy cream until the mixture is beautifully smooth. Keep whisking and cooking until it starts to gently bubble, then continue for another 2 minutes, allowing it to thicken. Season generously with salt and pepper to your taste – remember, cheese can be salty, so taste before adding too much!
- Melt the Cheese: Now, for the star of the show! Add 4 cups of your shredded cheddar and Gruyere cheese mixture (you’ll use the remaining 2 cups later!). Whisk continuously until the cheese has fully melted and the sauce is wonderfully creamy and thick. Oh, that aroma!
- Combine & Layer: Gently fold the slightly cooled pasta into your luscious cheese sauce until every single noodle is perfectly coated in cheesy goodness. Pour half of this cheesy pasta mixture into your prepared baking dish. Sprinkle the remaining 2 cups of shredded cheese evenly over this layer, creating a hidden cheese treasure, then top with the rest of the mac and cheese.
- Prepare the Topping: In a small bowl, combine the Panko breadcrumbs, Parmesan cheese, 4 tablespoons of melted butter, and smoked paprika. Mix everything together until it resembles coarse, golden crumbs. Sprinkle this crunchy, golden topping evenly over the mac and cheese in the baking dish.
- Bake to Perfection: Bake for approximately 30 minutes, or until the mac and cheese is bubbly around the edges and the Panko topping is golden brown and delightfully crispy. The smell will be incredible!
- Serve Hot: Let it cool for just a few glorious minutes before serving this ultimate homemade baked mac and cheese! Those few minutes allow the sauce to set slightly, making for easier, cleaner servings.
Presenting and Serving Your Cheesy Delight
An **Easy Cheesy Baked Mac & Cheese Delight** isn’t just about taste; it’s also about presentation! While it’s utterly delicious straight from the dish, here are some fun ways to serve and present your culinary masterpiece:
- Classic Comfort: Serve generous scoops directly from the baking dish onto individual plates. A sprinkle of fresh chopped chives or parsley adds a pop of color and freshness.
- Side Dish Star: This mac and cheese pairs wonderfully as a decadent side with roasted chicken, pulled pork, or a juicy steak. Its richness balances perfectly with grilled meats.
- Main Course Marvel: Embrace its hearty nature and serve it as a main course with a simple green salad dressed with a vinaigrette. The tartness of the salad cuts through the richness beautifully.
- Individual Ramekins: For a more elegant or portion-controlled presentation, bake the mac and cheese in individual oven-safe ramekins. This looks charming and ensures everyone gets their own perfectly crisped topping.
- Garnish Galore: Beyond chives, consider a drizzle of truffle oil for an extra luxurious touch, a dash of hot sauce for a spicy kick, or even some crispy bacon bits for a savory crunch.
- Family-Style Feast: Place the entire baking dish on a heat-proof trivet in the center of your table and let everyone serve themselves. This promotes a warm, communal dining experience perfect for gatherings.
Storing and Reheating Your Mac & Cheese
Lucky enough to have leftovers of your **Easy Cheesy Baked Mac & Cheese Delight**? Here’s how to keep it fresh and delicious for future cravings:
- Refrigeration: Allow the mac and cheese to cool completely (this is important to prevent condensation and sogginess). Transfer it to an airtight container and store it in the refrigerator for up to 3-4 days.
- Freezing: Mac and cheese freezes surprisingly well! For best results, freeze individual portions in freezer-safe containers or wrap larger portions tightly in plastic wrap, then aluminum foil. It can be stored in the freezer for up to 2-3 months. Thaw overnight in the refrigerator before reheating.
- Reheating (Oven): For the best texture, especially for the topping, reheat in the oven. Preheat to 300-325°F (150-160°C). Place the mac and cheese in an oven-safe dish, cover loosely with foil (to prevent the topping from burning), and bake for 15-25 minutes, or until heated through. Remove foil for the last few minutes if you want to crisp the topping.
- Reheating (Microwave): For a quick reheat, individual portions can be microwaved. Place in a microwave-safe dish, add a splash of milk (about 1-2 tablespoons) to help rehydrate the sauce, cover, and heat on medium power, stirring occasionally, until hot. The topping won’t be as crispy, but it’ll still be delicious!
FAQs About Your Easy Cheesy Baked Mac & Cheese Delight
- Q1: Can I use different types of pasta?
- Absolutely! While elbow macaroni is classic, tubular shapes like cavatappi, penne, or even shells work wonderfully as they hold the creamy sauce perfectly.
- Q2: Why cook the pasta “slightly less than al dente”?
- This is a crucial step! Since the mac and cheese will continue to cook and absorb sauce in the oven, cooking it slightly under al dente prevents it from becoming mushy or overcooked in the final bake. It ensures a perfect texture.
- Q3: Can I make the cheese sauce ahead of time?
- You can! Prepare the cheese sauce, let it cool, and store it in an airtight container in the fridge for up to 2 days. When ready to use, gently reheat over low heat, whisking frequently, and add a splash of milk if it’s too thick before combining with the pasta and baking.
- Q4: My cheese sauce is lumpy. What did I do wrong?
- Lumpy sauces usually happen if the milk is added too quickly to the roux, or if it wasn’t whisked continuously. To fix it, you can push the sauce through a fine-mesh sieve or use an immersion blender for a super smooth finish.
- Q5: What if I don’t have Gruyere cheese?
- No problem! Jarlsberg Swiss is an excellent substitute for Gruyere, offering a similar nutty and mild flavor. Other options include Fontina, Gouda, or even more sharp cheddar if you prefer a simpler cheese profile.
- Q6: Can I make this a gluten-free dish?
- Yes! Use your favorite gluten-free elbow macaroni and substitute the all-purpose flour with a 1:1 gluten-free flour blend for the roux. Ensure your breadcrumbs are also gluten-free.
- Q7: How can I make this mac and cheese spicier?
- For a kick, add a pinch of cayenne pepper to the cheese sauce, or sprinkle some red pepper flakes into the breadcrumb topping. A dash of hot sauce mixed into the finished dish also works wonders!
- Q8: Is fresh shredded cheese really necessary?
- For the best results, yes! Pre-shredded cheeses often contain anti-caking agents that can make your sauce slightly grainy and prevent it from melting as smoothly as freshly shredded cheese. It’s worth the extra minute!
- Q9: Why is my topping not getting crispy?
- Ensure your oven is fully preheated, and don’t skimp on the melted butter in your Panko mix. If it’s still not crisping, try placing the dish under the broiler for 1-2 minutes at the very end (watch it *very* closely to prevent burning!).
- Q10: Can I add meat or vegetables to this recipe?
- Absolutely! Cooked and crumbled bacon, diced ham, sautéed mushrooms, or steamed broccoli florets are all fantastic additions. Stir them into the cheese-pasta mixture before layering and baking for a heartier meal.
Easy Cheesy Baked Mac & Cheese Delight 🧀
Equipment
- Baking Dish (3-4 quart)
- Large Saucepan or Dutch Oven
Ingredients
- 16 ounces elbow macaroni (or similar tubular pasta), cooked slightly less than al dente
- 1 tablespoon extra virgin olive oil
- 6 tablespoons unsalted butter
- 1/3 cup all-purpose flour
- 3 cups whole milk
- 1 cup heavy whipping cream
- 4 cups sharp cheddar cheese freshly shredded
- 2 cups Gruyere cheese freshly shredded (or Jarlsberg Swiss for a similar flavor)
- Salt and freshly ground black pepper to taste
- 1 1/2 cups Panko breadcrumbs
- 4 tablespoons butter melted
- 1/2 cup Parmesan cheese freshly shredded
- 1/4 teaspoon smoked paprika (or regular paprika)
Instructions
- Preheat your oven to 350°F (175°C). Lightly butter or grease a large 3 or 4-quart baking dish and set it aside. In a separate bowl, combine your freshly shredded cheddar and Gruyere cheeses and keep them handy.
- Boil your elbow macaroni until it's just shy of al dente (about one minute less than the package directions). This little trick helps keep the pasta firm for baking! Drain the pasta well, drizzle it with 1 tablespoon of olive oil to prevent sticking, and let it cool slightly in a large bowl.
- In a large saucepan or Dutch oven, melt the 6 tablespoons of unsalted butter over medium heat. Whisk in the flour and cook for about 1 minute, continuing to whisk until the mixture is bubbly and lightly golden. This "roux" is your secret to a thick, creamy sauce!
- Slowly and gradually whisk in the cold whole milk and heavy cream until the mixture is beautifully smooth. Keep whisking and cooking until it starts to gently bubble, then continue for another 2 minutes. Season generously with salt and pepper to your taste.
- Now, add 4 cups of your shredded cheddar and Gruyere cheese mixture (you'll use the remaining 2 cups later!). Whisk continuously until the cheese has fully melted and the sauce is wonderfully creamy and thick.
- Gently fold the slightly cooled pasta into your luscious cheese sauce until every single noodle is perfectly coated. Pour half of this cheesy pasta mixture into your prepared baking dish. Sprinkle the remaining 2 cups of shredded cheese evenly over this layer, then top with the rest of the mac and cheese.
- In a small bowl, combine the Panko breadcrumbs, Parmesan cheese, 4 tablespoons of melted butter, and smoked paprika. Mix everything together. Sprinkle this crunchy, golden topping evenly over the mac and cheese in the baking dish.
- Bake for approximately 30 minutes, or until the mac and cheese is bubbly around the edges and the Panko topping is golden brown and delightfully crispy.
- Let it cool for just a few minutes before serving this ultimate homemade baked mac and cheese!
Notes
Calories: 642 kcal
Total Carbs: 40g
Net Carbs: 39g
Fats: 41g
Protein: 26g