Why You’ll Love This Zesty Instant Pot Lemon Cheesecake
Get ready to fall head over heels for your new favorite dessert! This Zesty Instant Pot Lemon Cheesecake isn’t just a recipe; it’s a game-changer. Here are four fantastic reasons why it’s about to become your go-to:
- Speedy & Simple Sweetness: Forget long baking times and water baths! Your Instant Pot transforms cheesecake making into a quick, almost effortless affair, delivering a gourmet dessert without the fuss.
- Zesty Flavor Bomb: If you adore bright, tangy flavors, this is your dream come true. Bursting with fresh lemon juice and zest, every bite is a refreshing explosion of citrusy delight that cuts through the richness beautifully.
- Creamy Dream Texture: The magic of pressure cooking ensures an unbelievably smooth, melt-in-your-mouth texture that’s consistently perfect. No dry edges or rubbery centers here, just pure, creamy bliss.
- Impressive Yet Effortless: This cheesecake looks like it came from a fancy bakery, but only you’ll know how wonderfully simple it was to create. It’s the perfect showstopper for dinner parties, potlucks, or just a treat to brighten your day.
Unleash the Zest: Your Instant Pot Lemon Cheesecake Adventure Awaits!
Are you ready to banish bland desserts forever? Do you dream of sunshine on a plate, even on the gloomiest of days? Then buckle up, buttercup, because we’re about to embark on a truly exhilarating culinary journey! Forget the intimidating ovens and complicated steps of traditional cheesecake. We’re harnessing the power of your Instant Pot to whip up a Zesty Instant Pot Lemon Cheesecake that’s so vibrant, so creamy, and so ridiculously easy, you’ll wonder where it’s been all your life. Imagine a silky-smooth, tangy lemon filling nestled on a buttery graham cracker crust – all achieved with minimal effort and maximum flavor. It’s a dessert revolution in your kitchen, promising pure lemon-infused joy with every forkful. Let’s get zesty!
Gather Your Zesty Arsenal: Ingredients
Here’s everything you’ll need to create this bright and beautiful Zesty Instant Pot Lemon Cheesecake. Gather these gems, and let the magic begin!
For the Crust:
- 🍪 1 cup graham cracker crumbs
- 🌾 2 tablespoons brown sugar
- 🧈 3 tablespoons butter, melted
For the Creamy Lemon Filling:
- 🧀 2 (8-oz) blocks cream cheese, softened
- 🍚 1/2 cup granulated sugar
- 🍦 1/4 cup sour cream, at room temperature
- 🌿 1/2 teaspoon vanilla extract
- 🍋 3 tablespoons fresh lemon juice
- 🌟 2 teaspoons grated lemon zest
- 🥚 2 large eggs, at room temperature
Your Zesty Instant Pot Lemon Cheesecake Blueprint: Step-by-Step Directions
Follow these simple steps, and you’ll be enjoying a slice of lemon heaven in no time!
- Craft Your Crust Foundation: In a small mixing bowl, combine the graham cracker crumbs, brown sugar, and melted butter. Stir thoroughly until the mixture resembles wet sand. Press this fragrant mixture firmly and evenly into the bottom of a 7-inch springform cheesecake pan, extending it about an inch up the sides. For an extra crisp texture, you can pre-bake the crust at 325°F for 12-15 minutes and let it cool, but it’s optional for this quick recipe.
- Whip Up the Dreamy Filling: Grab a large mixing bowl and your electric mixer. Beat the softened cream cheese on low speed until it’s unbelievably smooth and free of any lumps. Gradually add the granulated sugar, continuing to beat until just combined. Next, stir in the sour cream, vanilla extract, fresh lemon juice, and vibrant lemon zest until the mixture is silky smooth. Finally, gently mix in the eggs, one at a time, beating just until they are fully incorporated. The key here is not to overmix, as this can introduce too much air and lead to cracks.
- Pressure Cook Your Masterpiece: Pour 1 cup of water into the bottom of your Instant Pot liner. Carefully place the cheesecake pan, now brimming with that gorgeous lemon filling, onto the trivet inside the Instant Pot. Secure the lid, ensuring the venting knob is set firmly to the “sealed” position. Cook on high pressure for 22 minutes.
- The Art of Cooling & Chilling: Once the cooking cycle sings its completion song, resist the urge to peek! Allow the pressure to release naturally. This slow release is crucial for preventing cracks in your cheesecake. Once the float valve drops, you can carefully open the lid. Gently blot any condensation from the top of your cheesecake using the edge of a paper towel. Let the cheesecake cool gracefully on the counter at room temperature for at least an hour. Then, the hardest part: transfer it to the refrigerator to chill for a minimum of 4-6 hours, or ideally, overnight. This chilling time is essential for the cheesecake to firm up and achieve its perfect, rich texture.
- Serve & Savor Your Zesty Creation: Once thoroughly chilled and ready to impress, carefully remove the cheesecake from the springform pan. Now, present your cool, creamy, and wonderfully zesty treat! Prepare for compliments!
Presenting Your Zesty Masterpiece: Serving Suggestions
Your Zesty Instant Pot Lemon Cheesecake is a showstopper on its own, but with a few simple additions, you can elevate its presentation and flavor even further! Here are some delightful ways to serve and garnish your amazing creation:
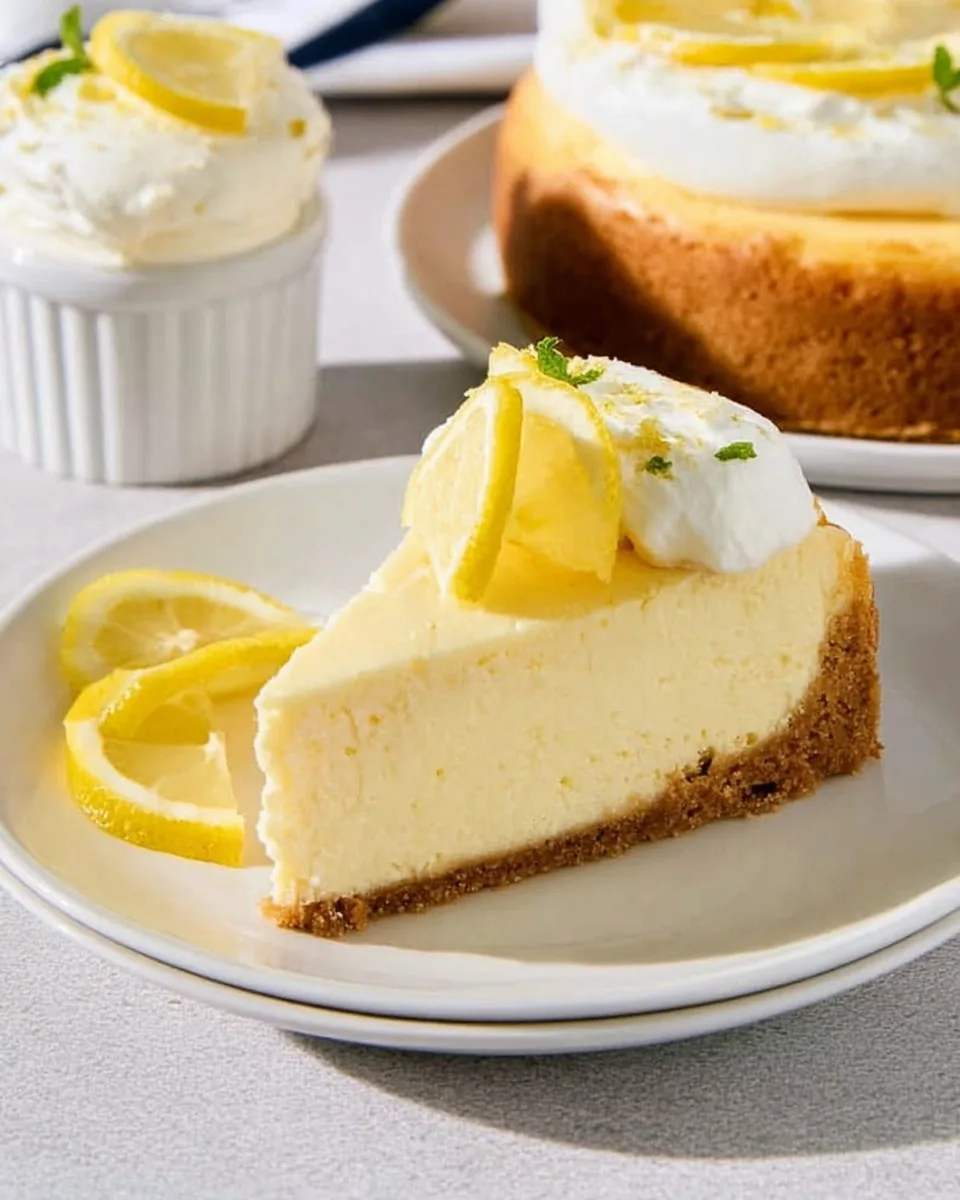
- Classic Elegance: A dollop of freshly whipped cream is always a winning combination with cheesecake. Its light sweetness perfectly complements the tart lemon.
- Berry Bliss: Garnish with a vibrant medley of fresh berries – raspberries, blueberries, or sliced strawberries add a beautiful pop of color and a delightful burst of flavor.
- Lemon Lover’s Dream: For an extra touch of lemon, add a thin slice of fresh lemon, a delicate lemon twist, or even a spoonful of homemade lemon curd on top.
- Herbal Hint: A small sprig of fresh mint or a few edible flowers can add a sophisticated touch and a hint of freshness.
- Simple Dusting: A light dusting of powdered sugar just before serving creates an elegant, snow-dusted look.
- Chocolate Kiss: Shaved white chocolate (or even dark chocolate, if you’re adventurous!) can add a touch of indulgence and visual appeal.
Serve cold, directly from the refrigerator, to ensure the best texture and zesty experience. It’s perfect as a refreshing dessert after a hearty meal, a delightful centerpiece for a summer gathering, or a luxurious treat for a special occasion.
Store It Right, Enjoy It Longer: Storage Tips
You’ve put in the effort, now make sure your delicious Zesty Instant Pot Lemon Cheesecake lasts as long as possible!
- Refrigeration: The best way to store your cheesecake is in the refrigerator. Once chilled, place any leftovers back into the springform pan or carefully transfer slices to an airtight container. Cover tightly with plastic wrap or a lid. When stored properly in the fridge, your cheesecake will stay fresh and delicious for up to 5-7 days.
- Freezing for Future Zest: Yes, you can freeze cheesecake! For best results, freeze the cheesecake whole (without any toppings) or in individual slices.
- To Freeze Whole: Ensure the cheesecake is completely chilled. Place it on a baking sheet and freeze uncovered for about an hour until firm. Then, wrap it tightly in several layers of plastic wrap, followed by a layer of aluminum foil.
- To Freeze Slices: Place individual slices on a baking sheet lined with parchment paper and freeze until firm. Then, wrap each slice individually in plastic wrap and foil.
Frozen cheesecake can last for up to 1-2 months. To thaw, simply transfer it from the freezer to the refrigerator and let it thaw overnight.
FAQs: Your Zesty Instant Pot Lemon Cheesecake Questions Answered!
Got questions? We’ve got answers to help you master your Zesty Instant Pot Lemon Cheesecake!
- Can I use a different size springform pan?
This recipe is optimized for a 7-inch springform pan. Using a larger pan might result in a thinner cheesecake that requires less cooking time, while a smaller pan might require more time. Adjusting cooking time for other sizes can be tricky.
- Do I have to use a springform pan?
A springform pan is highly recommended as it allows for easy removal of the cheesecake without disturbing its delicate structure. A regular cake pan would make serving very difficult.
- What if I don’t have sour cream?
Full-fat plain Greek yogurt can be a good substitute for sour cream, providing a similar tang and creaminess. Make sure it’s at room temperature.
- Can I make this ahead of time?
Absolutely! This cheesecake benefits greatly from chilling overnight, making it an ideal make-ahead dessert for parties or special occasions. Just cover and refrigerate.
- Why is natural pressure release important?
Natural pressure release (NPR) is crucial for cheesecakes. It allows the cheesecake to cool down slowly and gradually, preventing rapid temperature changes that can lead to cracks on the surface.
- How do I prevent cracks in my cheesecake?
Key tips: don’t overmix the eggs (mix just until incorporated), don’t open the Instant Pot lid during NPR, and ensure the cheesecake cools slowly at room temperature before chilling.
- Can I use bottled lemon juice?
While bottled lemon juice can be used, fresh lemon juice and zest will provide a far superior, brighter, and more authentic “zesty” flavor. We highly recommend fresh for the best results!
- How do I know when it’s done?
After natural pressure release, the center of the cheesecake might still have a slight jiggle, but the edges should be set. It will firm up completely as it cools and chills.
- Can I add other flavors to the cheesecake?
Yes, you can experiment! While this is a lemon cheesecake, you could try adding a hint of ginger, a touch of cardamom, or even a swirl of raspberry puree (after cooking) for a twist.
- What’s the best way to get it out of the pan?
Once thoroughly chilled, carefully release the springform pan’s clasp. Gently lift the ring. You can then slide a thin knife or offset spatula between the crust and the pan bottom to loosen it, or carefully slide it onto a serving plate.
Zesty Instant Pot Lemon Cheesecake 🍋
Equipment
- Instant Pot
- 7-inch springform cheesecake pan
- Electric Mixer
Ingredients
Crust
- 1 cup graham cracker crumbs
- 2 tablespoons brown sugar
- 3 tablespoons butter melted
Cheesecake Filling
- 2 (8-oz) blocks cream cheese softened
- 1/2 cup granulated sugar
- 1/4 cup sour cream at room temperature
- 1/2 teaspoon vanilla extract
- 3 tablespoons fresh lemon juice
- 2 teaspoons grated lemon zest
- 2 large eggs at room temperature
For Instant Pot
- 1 cup water
Instructions
- Prepare the Crust: In a small bowl, mix together the graham cracker crumbs, brown sugar, and melted butter until well combined. Press this mixture firmly into the bottom and about an inch up the sides of a 7-inch springform cheesecake pan. (For an extra crisp crust, you can optionally bake it at 325°F for 12-15 minutes, but it's not essential for this quick recipe!)
- Whip the Creamy Filling: In a large mixing bowl, use an electric mixer to beat the softened cream cheese on low speed until perfectly smooth. Gradually add the granulated sugar, beating until just combined. Stir in the sour cream, vanilla extract, fresh lemon juice, and lemon zest until everything is smooth. Finally, gently mix in the eggs one at a time, beating just until they are incorporated – be careful not to overmix!
- Pressure Cook Your Cheesecake: Pour 1 cup of water into the bottom of your Instant Pot liner. Carefully place the cheesecake pan with the filling onto the trivet inside the Instant Pot. Secure the lid and make sure the venting knob is set to the sealed position. Cook on high pressure for 22 minutes.
- Cool & Chill for Perfection: Once the cooking cycle is complete, allow the pressure to release naturally. Once the float valve drops, carefully open the lid. Use the edge of a paper towel to gently blot any condensation from the top of the cheesecake. Let the cheesecake cool on the counter at room temperature for at least an hour. Then, transfer it to the refrigerator to chill for a minimum of 4-6 hours (or ideally overnight) for the best texture.
- Serve & Enjoy: Once thoroughly chilled, remove the cheesecake from the springform pan. Serve this cool, creamy, and wonderfully zesty treat as is, or with a dollop of whipped cream and a slice of lemon for garnish!
Notes
Nutrition Facts (per serving):
- Calories: 189
- Carbohydrates: 24g
- Fats: 9g
- Protein: 3g