
Introduction: The Lunchbox Upgrade Your Kids Have Been Begging For
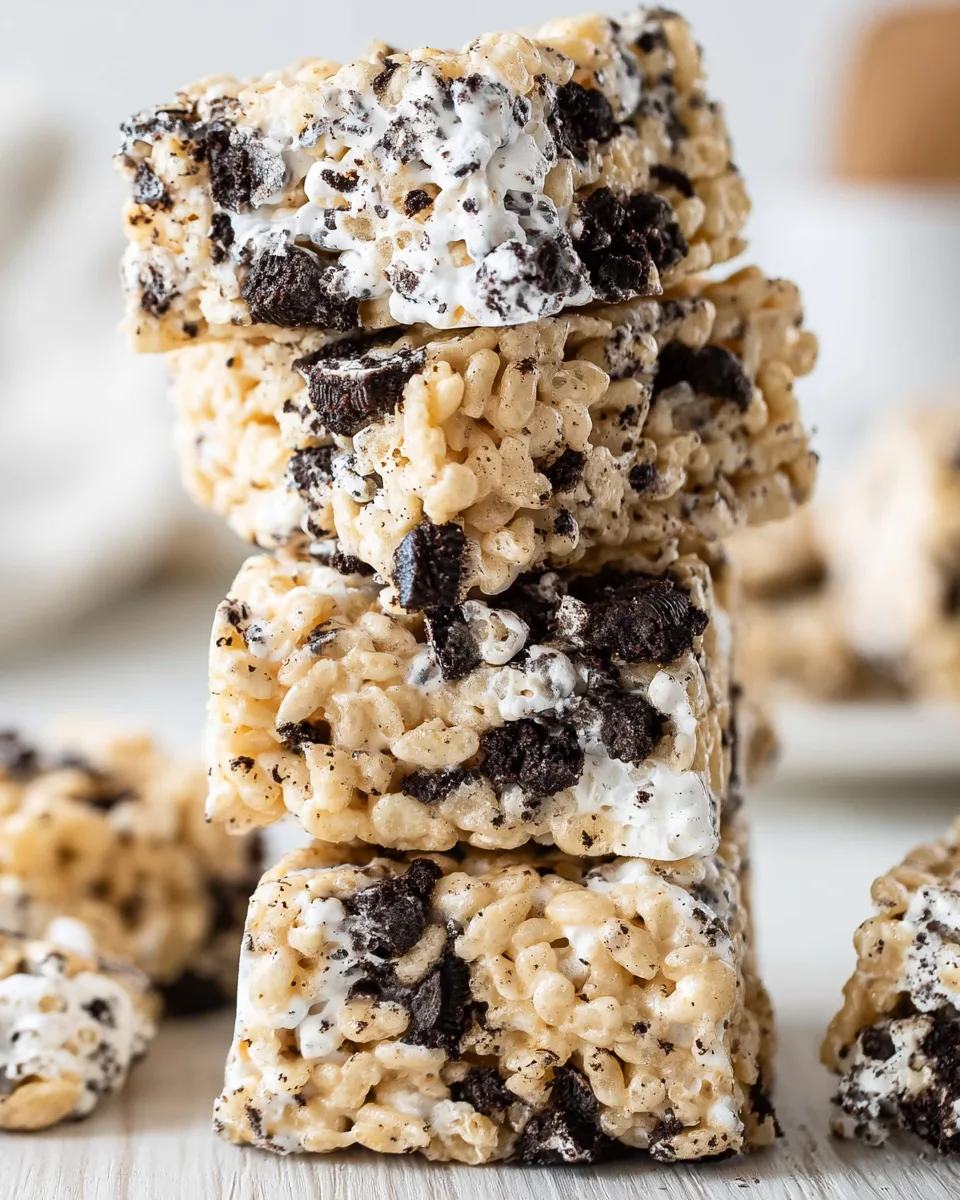
Let’s be real for a second—packing a school lunch that actually comes home empty is like finding a four-leaf clover. You want something fast, nut-free-friendly (always check your labels!), and ridiculously delicious enough to trade for a pudding cup. Let’s stop dreaming and start baking—except there’s no baking involved. These no-fuss, 15-minute Back-to-School Cookies & Cream Lunchbox Treats are about to make you the undisputed champion of the school drop-off line. With a crispy, gooey texture that bursts with chunks of Oreo in every bite, this recipe upgrades the classic crispy rice treat into something spectacular. No oven required, minimal mess, and maximum happiness. Let’s make lunchbox magic happen!
Why You’ll Love This Recipe
1. 15-Minute Wonder
From the moment you melt the butter to the moment you pour the mixture into the pan, you’re looking at just about 15 minutes of work. It’s faster than running to the store, and infinitely tastier than anything pre-packaged.
2. No Oven Needed
Back-to-school season is chaotic enough. The last thing you need is to preheat an oven and dirty a bunch of baking sheets. This stovetop method keeps your kitchen cool and cleanup incredibly easy.
3. That Cookies & Cream Flavor
We aren’t skimping on the Oreos here. By reserving some of the marshmallows to fold in at the end, you get those luscious, gooey pockets of melted sugar that perfectly complement the chocolatey crunch of the cookies.
4. Lunchbox Ready
These treats hold their shape beautifully. They aren’t overly sticky or crumbly, which means less mess in the lunchbox and more happy smiles when the bell rings. Plus, they are perfectly portioned for a sweet afternoon pick-me-up.
Ingredients with Measurements
Here is exactly what you need to whip up a batch of these incredible Back-to-School Cookies & Cream Lunchbox Treats.
- 🧈 6 tablespoons (85 g) salted butter, plus extra for greasing pan
- 🍬 15 oz (425 g) mini marshmallows, divided (7½ cups total)
- 🥄 1 teaspoon vanilla extract
- 🥣 6 cups (175 g) crisped rice cereal
- 🍪 15 Oreo cookies (regular or double stuf), crushed into pieces
Detailed Step-by-Step Directions
Step 1: Prep the Pan
Lightly grease a 9×13-inch baking pan with butter. Make sure to get the corners. This ensures your treats slide out effortlessly later.
Step 2: Crush the Oreos
Place the Oreos in a zip-top bag and crush them with a rolling pin. You want small chunks, not powder. Pro tip: If you want the prettiest treats (and to keep them from turning gray), sift out the finest crumbs through a strainer before adding them to the mix.
Step 3: Melt the Base
In a large pot over medium-low heat, melt the 6 tablespoons of butter. Add 10 oz (about 5 cups) of the mini marshmallows. Stir often until completely melted and smooth. Keep the heat low to prevent the mixture from becoming tough.
Step 4: Mix the Cereal
Remove the pot from the heat immediately. Stir in the vanilla extract. Then, add the crisped rice cereal and mix until every piece is well coated in that sticky, buttery marshmallow goodness.
Step 5: Fold in the Extras
Working quickly (before the mixture sets), fold in the remaining 5 oz of mini marshmallows and the crushed Oreos. Stir just until combined—you want distinct pockets of marshmallow and cookie chunks.
Step 6: Press Gently
Pour the mixture into your prepared pan. Use a greased spatula (or greased hands) to gently spread it evenly. Do not press down hard! Pressing too firmly will turn your perfectly soft treats into hard, dense bricks.
Step 7: Cool and Cut
Let the treats cool completely at room temperature. Once set, cut them into 20 even squares and pack them into lunchboxes with pride!
Different Ways to Present & Serve
Classic Lunchbox Squares
This is the standard go-to. Cut into 20 bars, wrap individually in plastic wrap or parchment paper, and drop them into the lunchbox. Easy, mess-free, and delightful.
Mini Bites for Little Hands
Cut the pan into 40 smaller cubes. These are perfect for younger kids who prefer smaller snacks or for adding to a bento-style lunchbox alongside fruit and cheese.
Dipped & Drizzled Treats
Feeling fancy? Once the treats are cut, melt some white chocolate or dark chocolate. Dip one end of the square into the chocolate and let it set on a wire rack. The combination of cookies & cream with a chocolate shell is absolutely divine.
Ice Cream Sundae Topping
Crumble these treats over a scoop of vanilla ice cream for an after-school sundae. The salty-sweet crunch is the perfect topping.
How to Store & How Long It Lasts
Storing these Back-to-School Cookies & Cream Lunchbox Treats is incredibly easy.
- Room Temperature: Place the treats in an airtight container, layering them with wax paper or parchment paper to prevent sticking. They will stay fresh and soft for up to 4 days.
- Freezer: These treats freeze like a dream! Wrap them tightly individually in plastic wrap, then place them in a freezer-safe bag. They can be frozen for up to 3 months. Just pull one out in the morning, and it will be thawed and perfect by lunchtime.
- Pro Tip: Do not refrigerate them! The fridge can dry out the marshmallow and make the texture hard and chewy in a bad way. Stick to room temp or frozen.
FAQs: Everything You Need to Know
1. Can I use Double Stuf Oreos?
Absolutely! Double Stuf works wonderfully and gives you an even stronger cookies & cream flavor. The extra cream filling makes the treats a bit sweeter and softer.
2. Why are my treats too hard?
This usually happens for two reasons. First, you may have pressed the mixture down too firmly in the pan. The goal is gentle spreading. Second, you might have overcooked the marshmallows. Keep the heat on medium-low and remove the pot from the burner as soon as the marshmallows are melted.
3. Can I make these gluten-free?
Yes! Simply use gluten-free Oreos (or a similar gluten-free sandwich cookie) and ensure your crisped rice cereal is certified gluten-free, as some brands contain malt flavoring.
4. Can I add chocolate chips or peanut butter?
Definitely. For a peanut butter twist, melt 2 tablespoons of peanut butter with the butter and marshmallows. You can also fold in up to 1/2 cup of mini chocolate chips along with the crushed Oreos.
5. How do I keep the colors from turning gray?
The “gray” color comes from the fine dust of the chocolate wafers coating the marshmallow. To avoid this, crush your Oreos in a bag and then sift the contents through a strainer. Use only the chunky pieces left in the strainer for the treats (you can save the dust for milkshakes!).
6. Do I have to use salted butter?
Not necessarily. Salted butter is recommended because it helps balance the intense sweetness of the marshmallows and Oreos. If you only have unsalted butter, just add a generous pinch of flaky sea salt to the pot when you add the vanilla.
7. Can I use generic sandwich cookies?
Yes, you can substitute generic sandwich cookies, but Oreos are the gold standard here. They have a specific texture that stays slightly crunchy even after being mixed into the marshmallow, giving the treat its signature crunch.
8. Can I double the recipe?
Yes, this recipe doubles perfectly. Simply use a larger pot (a 6-quart or larger) and press the mixture into a 12×17-inch half-sheet pan or a large roasting pan.
9. Why did my marshmallows seize up or get lumpy?
This happens if your heat is too high. Marshmallows are sensitive to high heat. Always melt them over medium-low heat and stir constantly. If they get too hot, the sugar can seize up and become grainy.
10. Can I skip the “remaining marshmallows” step?
We highly recommend you don’t skip it! Adding 1/3 of the marshmallows at the end ensures you get those glorious, soft, gooey pockets of marshmallow that haven’t fully melted into the cereal. It’s the secret to the perfect texture.
Back-to-School Cookies & Cream Lunchbox Treats
Equipment
- 9x13-inch baking pan
- Large Pot
- Rolling Pin
- Greased spatula
Ingredients
- 6 tablespoons salted butter plus extra for greasing
- 15 oz mini marshmallows divided (7.5 cups total)
- 1 teaspoon vanilla extract
- 6 cups crisped rice cereal
- 15 Oreo cookies crushed into pieces
Instructions
- Lightly grease a 9x13-inch baking pan with butter.
- Place Oreos in a zip-top bag and crush with a rolling pin until you have small pieces (not powder). If you want, sift out the finest crumbs through a strainer to keep the treats from turning gray.
- In a large pot over medium-low heat, melt the 6 tablespoons of butter. Add 10 oz (about 5 cups) of the mini marshmallows and stir often until completely melted.
- Remove from heat, stir in vanilla, then add the cereal and mix until well coated.
- Quickly fold in the remaining marshmallows and the crushed Oreos – just until combined.
- Pour the mixture into the prepared pan. Use a greased spatula to gently spread it evenly. Don’t press down hard or the treats will become tough.
- Let cool completely at room temperature, then cut into 20 squares and pack into lunchboxes!