Why You’ll Love This Recipe
Get ready to fall head over heels for this incredible Tiramisu recipe! It’s not just a dessert; it’s an experience, and here’s why it’s about to become your new favorite:
- Effortlessly Easy: Forget complicated techniques and endless baking. This recipe is a no-bake wonder that simplifies the art of making Tiramisu. With straightforward steps and minimal fuss, you’ll be whipping up this Italian masterpiece in no time, making it perfect for both novice bakers and seasoned dessert enthusiasts.
- Authentically Italian: We’re talking true, classic flavors that transport you straight to a bustling piazza in Italy. This recipe stays true to the traditional method, focusing on the rich combination of coffee-soaked ladyfingers and a dreamy mascarpone cream. It’s the kind of authentic taste that makes you say “Mamma Mia!” with every bite.
- No-Bake Wonder: Seriously, no oven required! This makes it an ideal dessert for any season – cool and refreshing in the summer, yet comforting and decadent year-round. Spend less time heating up your kitchen and more time enjoying the process and the spectacular results.
- Irresistibly Delicious: Prepare your taste buds for pure bliss! The creamy, rich mascarpone base perfectly balances the bitter notes of espresso and the delicate sweetness of the ladyfingers. Finished with a dusting of cocoa, it’s a symphony of textures and flavors that will leave everyone craving another slice. It’s a guaranteed crowd-pleaser that will earn you rave reviews!
Unveiling the Secret to Easy Authentic Italian Tiramisu
Ever dreamt of whisking away your family and friends to the cobblestone streets of Italy, if only for a moment? Well, get ready to do just that, right from your kitchen! Tiramisu, the beloved “pick-me-up” dessert, is famous for its elegant layers, rich coffee kick, and cloud-like creaminess. But often, the thought of making it at home seems daunting. Not anymore! We’re here to shatter that myth and introduce you to an Easy Authentic Italian Tiramisu recipe that’s so simple, you’ll wonder why you ever bought it from a store.
Forget the fancy pastry chefs; you’re about to become the Tiramisu maestro! This isn’t just a recipe; it’s your golden ticket to impressing everyone with minimal effort and maximum flavor. Picture this: delicate ladyfingers quickly dipped in aromatic espresso, layered with a velvety smooth mascarpone cream that melts in your mouth, all topped with a generous dusting of cocoa. It’s pure indulgence, a dessert that speaks volumes without saying a word. So, grab your apron, put on some Italian tunes, and let’s embark on this delicious journey to create the most delightful Easy Authentic Italian Tiramisu you’ve ever tasted!
Gather Your Italian Dessert Arsenal: Ingredients with Measurements
Creating the perfect Easy Authentic Italian Tiramisu starts with selecting quality ingredients. Each component plays a crucial role in building those iconic flavors and textures. Don’t skimp on the good stuff – especially the mascarpone!
- 3 large cold egg yolks: These form the rich, creamy base of our mascarpone mixture, giving it that classic Tiramisu lusciousness. Cold yolks are often easier to separate and whip.
- 1 cup unpacked, sifted powdered sugar: Essential for a smooth, lump-free cream. Sifting ensures it dissolves beautifully into the yolks.
- 2 ¼ cups cold full-fat mascarpone cheese: This is the star! Use a good quality, full-fat mascarpone for the best creamy texture and authentic flavor. Keep it cold until you’re ready to mix to prevent it from curdling.
- 27-36 hard Italian ladyfingers (Savoiardi): These light, airy biscuits are perfect for soaking up coffee without becoming overly mushy. The quantity depends on your dish size and how tightly you layer them.
- ½ cup cooled brewed espresso or strong coffee: The heart of Tiramisu’s flavor! Make sure it’s cooled to room temperature to avoid cooking the ladyfingers or warming the cream.
- 2 tablespoons unsweetened cocoa powder: For that final, elegant dusting and a hint of chocolatey bitterness that perfectly complements the sweet cream and coffee.
With these simple, yet powerful ingredients, you’re well on your way to a spectacular homemade Tiramisu!
Your Step-by-Step Guide to Tiramisu Perfection
Ready to make magic? Follow these easy steps to whip up your very own Easy Authentic Italian Tiramisu. It’s simpler than you think!
- Whip the Creamy Base: Grab a large mixing bowl and your trusty electric mixer. Add the cold egg yolks and powdered sugar. Beat on medium-high speed for a good 2-3 minutes. You’re looking for a transformation here: the mixture should become beautifully light, pale, and thick, almost like a fluffy cloud, with all the sugar fully dissolved. This is your luscious foundation!
- Combine with Mascarpone: Now for the star of the show! Gently add the cold, full-fat mascarpone cheese to your egg yolk mixture. Mix on medium speed for just about 1 minute. The goal is smooth, creamy perfection – avoid overmixing, as mascarpone is delicate and can turn lumpy or curdle if beaten too vigorously. Stop as soon as it’s perfectly combined.
- Prepare Ladyfingers: Pour your cooled espresso or strong coffee into a shallow dish. Take each ladyfinger and quickly dip both sides into the coffee – we’re talking 1-2 seconds, max! You want them moist and flavorful, not soaking wet and soggy. Arrange 9-12 of these dipped ladyfingers in a single, snug layer at the bottom of your 9x7x3-inch or 8x8x3-inch baking dish.
- First Layer of Cream: Spoon about one-third of your dreamy mascarpone mixture over the ladyfingers. Carefully spread it out evenly with a spatula, making sure every inch of those coffee-soaked biscuits is covered.
- Build Your Layers: Now, let’s build! Repeat steps 3 and 4 twice more. That means another layer of quickly dipped ladyfingers, followed by another third of your mascarpone cream. Then, one more layer of ladyfingers, and finally, spread the remaining cream smoothly and evenly to form the top layer. You’ll end up with three glorious layers of ladyfingers and three indulgent layers of cream.
- Chill for Perfection: This is arguably the most crucial step! Cover your dish tightly with plastic wrap. Pop it into the refrigerator for at least 8-12 hours, or even better, let it chill overnight. This essential resting time allows all those incredible flavors to meld, marry, and develop, and the Tiramisu to set into a sliceable, delightful dessert. Patience is a virtue, especially when it comes to Tiramisu!
- Serve with a Dusting: The grand finale! Just before you’re ready to serve, grab your unsweetened cocoa powder and a fine-mesh sieve. Lightly dust the entire top surface of your chilled Tiramisu. Slice into generous portions and prepare for delighted smiles. Enjoy your authentic, homemade Italian masterpiece!
Presenting Your Masterpiece: Serving Suggestions and Presentation Ideas
Crafting an Easy Authentic Italian Tiramisu is an accomplishment, and presenting it beautifully is the cherry on top! While a simple dusting of cocoa is traditional and elegant, there are many ways to elevate its visual appeal and serving experience.
Classic Dish Presentation:
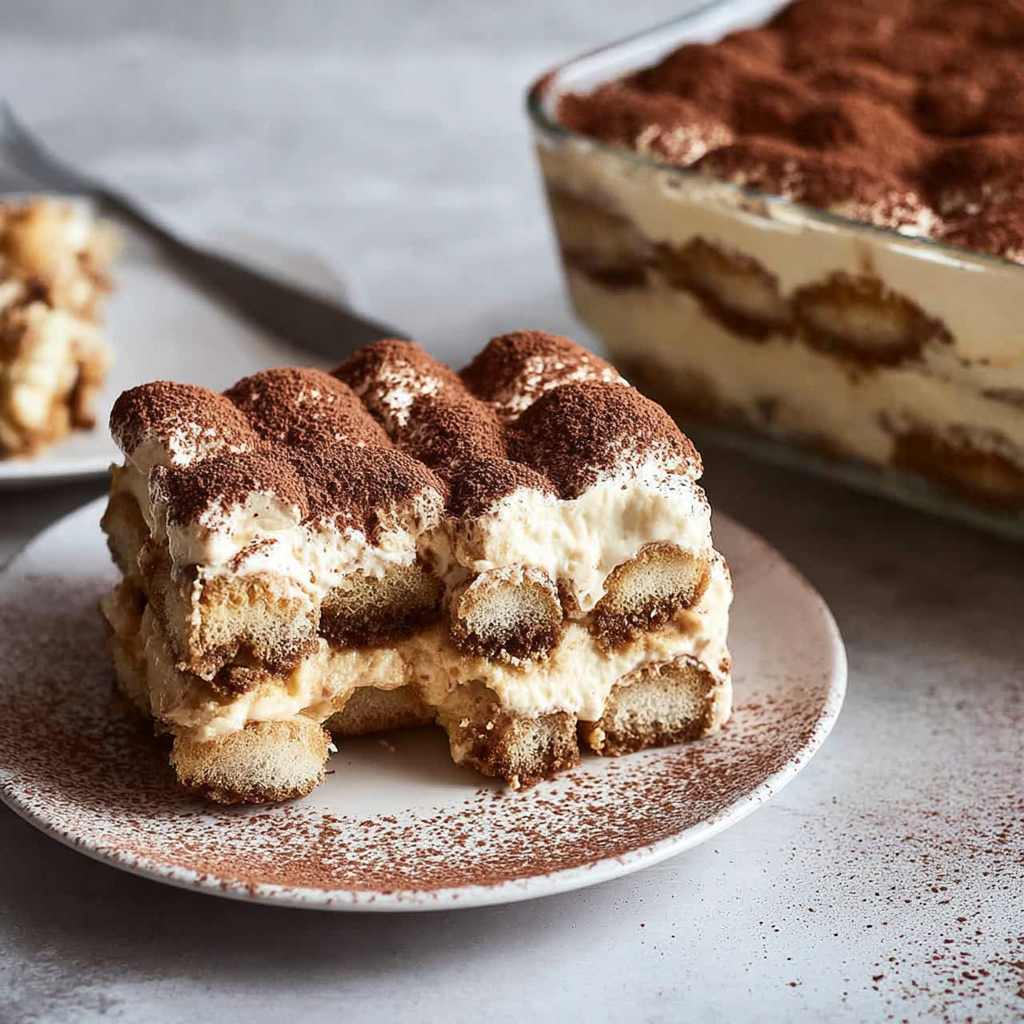
Your 9x7x3-inch or 8x8x3-inch baking dish is perfect for a family-style presentation. Once thoroughly chilled and dusted with cocoa, slice generous squares or rectangles. Use a spatula to carefully lift each piece onto individual plates. The clean layers will be visible, showcasing your effort.
Individual Servings:
For a more sophisticated touch, consider assembling or serving Tiramisu in individual portions:
- Ramekins or Small Glasses: Instead of a large dish, assemble your Tiramisu directly into small ramekins, parfait glasses, or even mason jars. This creates charming, pre-portioned desserts that are perfect for dinner parties. Follow the same layering process, just on a smaller scale.
- Demiscips: For a very light dessert, small espresso cups can be used for mini Tiramisu shots.
Garnishing for Extra Flair:
Beyond the classic cocoa dust, get creative with your garnishes:
- Chocolate Shavings: Use a vegetable peeler or grater to create elegant curls of dark chocolate over the cocoa-dusted top.
- Coffee Beans: A few whole roasted coffee beans placed artfully on top can add a gourmet touch and reinforce the coffee theme.
- Fresh Berries: A scattering of fresh raspberries or sliced strawberries provides a beautiful color contrast and a hint of tartness.
- Mint Leaves: A small sprig of fresh mint can add a vibrant green accent.
- Whipped Cream Dollops: For extra indulgence, add a dollop of freshly whipped cream just before serving.
How to Serve:
Tiramisu is typically served chilled, making it a refreshing end to any meal. It pairs wonderfully with a fresh cup of espresso, a robust black coffee, or even a glass of dessert wine like Vin Santo. Whether it’s the grand finale to an Italian feast or a delightful afternoon treat, this Easy Authentic Italian Tiramisu is sure to impress.
Storing Your Italian Masterpiece: How Long Does it Last?
So you’ve whipped up a divine Easy Authentic Italian Tiramisu, and if by some miracle there are leftovers (a rare occurrence!), you’ll want to know how to store it to maintain its freshness and deliciousness. Proper storage is key to enjoying every last bit of this creamy delight.
Refrigeration is Key:
Always store your Tiramisu in the refrigerator. It’s a perishable dessert due to its dairy and egg content. Make sure to cover the dish tightly with plastic wrap or transfer leftovers to an airtight container. This prevents it from absorbing odors from other foods in the fridge and keeps the cream from drying out.
How Long Does It Last?
When stored correctly in the refrigerator, your homemade Tiramisu will typically last for **3 to 4 days**. Because this recipe uses raw egg yolks, it’s best to consume it within this timeframe to ensure optimal freshness and food safety.
Can You Freeze Tiramisu?
While technically possible, freezing Tiramisu is generally **not recommended** for the best texture. The dairy in the mascarpone cream can sometimes separate and become grainy or watery upon thawing, affecting the smooth, luxurious mouthfeel that Tiramisu is known for. The ladyfingers might also become a bit mushier than desired.
If you absolutely must freeze it (perhaps for a future emergency dessert craving!), cover it very tightly with plastic wrap and then aluminum foil to prevent freezer burn. It might keep for up to a month. Thaw it slowly in the refrigerator overnight before serving. However, for that authentic, melt-in-your-mouth experience, fresh is always best!
The good news is that this Easy Authentic Italian Tiramisu is so delicious, it rarely lasts long enough to become a storage dilemma!
FAQs: Your Top Questions About Easy Authentic Italian Tiramisu Answered!
Got questions about mastering your Easy Authentic Italian Tiramisu? We’ve got answers!
- 1. Can I make this Tiramisu without raw eggs?
- Yes, you can! While traditional Tiramisu uses raw egg yolks for richness and texture, you can opt for pasteurized egg yolks or create an egg-free mascarpone cream by whipping heavy cream and folding it into the mascarpone. Another method involves cooking the egg yolks gently over a double boiler with sugar until thick and pasteurized.
- 2. What can I use if I don’t have espresso?
- No espresso machine? No problem! You can use very strong brewed coffee (like French press or a dark roast, double-strength). Instant espresso powder dissolved in hot water also works wonderfully as a convenient alternative.
- 3. Why are my ladyfingers soggy?
- The most common culprit is over-dipping! Ladyfingers are like sponges. A quick 1-2 second dip on each side is all they need. You want them moistened, not soaked, so they can still absorb some of the mascarpone cream and maintain their delicate structure.
- 4. Can I make this recipe ahead of time?
- Absolutely! In fact, Tiramisu benefits greatly from being made ahead. Chilling it for at least 8-12 hours (and ideally overnight) allows the flavors to meld beautifully and the dessert to set properly, resulting in a more harmonious and sliceable treat.
- 5. What’s the best type of mascarpone to use?
- Always opt for cold, full-fat mascarpone cheese. Its high-fat content gives Tiramisu its signature rich, creamy, and luxurious texture. Keep it chilled until just before mixing to prevent it from becoming too soft or curdling.
- 6. Can I add alcohol to my Tiramisu?
- Definitely! Many traditional Tiramisu recipes include a splash of liqueur in the coffee. Popular choices are Marsala wine, rum, brandy, Kahlúa, or amaretto. You can add 1-2 tablespoons of your chosen liqueur to the cooled espresso before dipping the ladyfingers.
- 7. How do I prevent my mascarpone from curdling?
- The key is to use cold mascarpone and avoid overmixing. Add it to the egg yolk mixture and beat on medium speed for just about 1 minute, or until it’s smoothly combined. As soon as it looks uniform and creamy, stop mixing.
- 8. What’s the difference between hard and soft ladyfingers?
- Hard Italian ladyfingers (Savoiardi) are drier and firmer, designed to soak up liquid without falling apart. Soft ladyfingers (sometimes found in grocery stores) are more like sponge cake and will become soggy very quickly, so they are not recommended for Tiramisu.
- 9. Can I freeze Tiramisu?
- While you can, it’s not ideal. Freezing can alter the texture of the mascarpone cream, making it a bit grainy or watery upon thawing. For the best quality and authentic texture, it’s best enjoyed fresh and within 3-4 days of refrigeration.
- 10. How many servings does this recipe make?
- This recipe is designed to yield 12 generous servings, making it perfect for entertaining or a delightful treat for the whole family over a few days!
“`
Easy Authentic Italian Tiramisu 🇮🇹
Equipment
- Electric Mixer
- Mixing Bowl
- Baking Dish
Ingredients
- 3 cold egg yolks large
- 1 cup powdered sugar unpacked, sifted
- 2.25 cups mascarpone cheese cold full-fat
- 27-36 hard Italian ladyfingers (Savoiardi)
- 0.5 cup cooled brewed espresso or strong coffee
- 2 tablespoons unsweetened cocoa powder
Instructions
- Whip the Creamy Base: In a large bowl, use an electric mixer to beat the cold egg yolks and powdered sugar. Mix on medium-high speed for 2-3 minutes until the mixture is light, creamy, and the sugar has fully dissolved. This creates a smooth foundation for your dessert.
- Combine with Mascarpone: Gently add the cold mascarpone cheese to the egg yolk mixture. Mix on medium speed for just about 1 minute until everything is smoothly combined and creamy. Be careful not to overmix, as mascarpone can curdle easily.
- Prepare Ladyfingers: Quickly dip both sides of each ladyfinger into the cooled espresso for only 1-2 seconds. You want them moistened but not soggy. Arrange 9-12 dipped ladyfingers in a single layer at the bottom of a 9x7x3-inch or 8x8x3-inch baking dish.
- First Layer of Cream: Spread about one-third of your creamy mascarpone mixture evenly over the ladyfingers.
- Build Your Layers: Repeat steps 3 and 4 twice more, creating three layers total: ladyfingers + cream, ladyfingers + cream, ladyfingers + cream. Ensure the final layer of cream is smooth and even.
- Chill for Perfection: Cover the dish tightly with plastic wrap. Refrigerate for at least 8-12 hours, or ideally, overnight. This crucial chilling time allows the flavors to meld beautifully and the tiramisu to set.
- Serve with a Dusting: Just before serving, lightly dust the top with unsweetened cocoa powder. Slice and enjoy this delightful, authentic Italian treat!