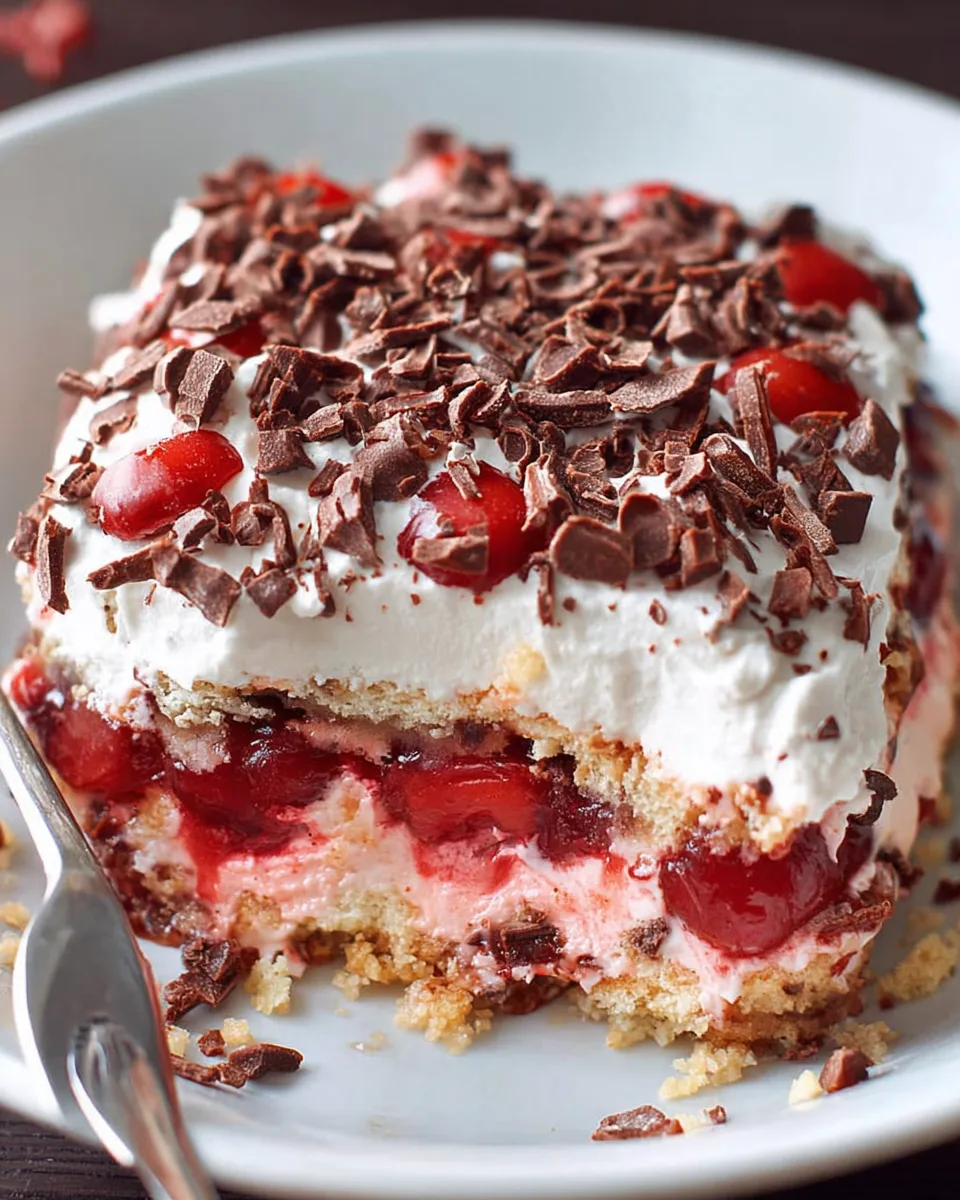
Get ready to embark on a dessert adventure that’s pure bliss! Picture this: layers of rich chocolate, tangy sweet cherries, a luscious creamy filling, and a buttery, nutty crust, all culminating in one spectacular bite. Sounds like a dream, right? Well, it’s not just a dream – it’s the incredible Chocolate Cherry Dream Lush! This isn’t just a dessert; it’s an experience, a masterpiece of flavors and textures that will have everyone at your table asking for seconds. Forget complicated baking; this layered wonder is deceptively easy to assemble, making you look like a pastry chef with minimal effort. Whether you’re planning a special gathering, a family dinner, or just craving something spectacularly sweet, this Chocolate Cherry Dream Lush is about to become your new favorite obsession. Prepare to fall head over heels for every single dreamy layer!
Why You’ll Love This Recipe
There are countless reasons why the Chocolate Cherry Dream Lush will quickly become a cherished recipe in your repertoire. Here are just four compelling ones:
- Effortlessly Elegant: Don’t let its stunning appearance fool you; this dessert is incredibly simple to make. With easy-to-follow steps and mostly no-bake layers, you’ll achieve a show-stopping dessert without the stress, perfect for impressing guests or simply treating yourself.
- A Symphony of Flavors: The combination of rich chocolate, bright, tart cherries, and creamy sweetness is a match made in heaven. Each layer brings a distinct texture and taste, creating a harmonious and utterly addictive experience that delights the palate with every spoonful.
- Perfectly Customizable & Health-Friendly: Whether you’re watching your sugar intake or just prefer lighter options, this recipe is incredibly versatile. With suggestions for sugar substitutes, light cream cheese, and sugar-free pudding, you can easily tailor your Chocolate Cherry Dream Lush to fit various dietary needs without sacrificing an ounce of flavor.
- The Ultimate Make-Ahead Marvel: This lush dessert actually gets better with time! Preparing it a day in advance allows the flavors to meld beautifully and the layers to set perfectly, making it an ideal choice for busy hosts. Simply chill, slice, and serve when you’re ready to enjoy – talk about convenience!
Ingredients with Measurements
Crust Layer:
- 🌰 1 cup all-purpose flour
- 🥜 ½ cup finely crushed nuts (like pecans or almonds, your choice for flavor!)
- 🍚 ¼ cup granulated sugar (or a sugar substitute for a lighter treat)
- 🧈 8 tablespoons (½ cup) unsalted butter, melted
Cherry Layer:
- 🍒 21 ounces (1 standard can) cherry pie filling (opt for a no-sugar-added version if available!)
Creamy Layer:
- 🧀 8 ounces cream cheese, softened (light cream cheese works great here)
- 🥄 1 cup powdered sugar (or a powdered sugar substitute)
- 🍦 1 cup frozen whipped topping, thawed (like Cool Whip, use lite or sugar-free for a healthier twist)
Pudding Layer:
- 🍫 6.8 ounces (2 small packages) chocolate instant pudding mix (sugar-free option is perfect!)
- 🥛 3 cups milk (your preferred type; skim, almond, or oat milk makes it lighter)
Topping Layer:
- ☁️ Remaining frozen whipped topping from the 8 oz container
- 🍫 ½ cup chocolate shavings or sprinkles (optional; dark chocolate adds a nice touch!)
Detailed Step-by-Step Directions How to Make the Recipe
- Craft the Easy Crust: First, preheat your oven to 375°F (190°C). In a mixing bowl, combine the flour, crushed nuts, sugar, and melted butter. Mix until it resembles coarse crumbs. Press this mixture firmly into the bottom of a 9×13 inch baking dish to form an even crust. Bake for just 10 minutes until it’s lightly golden. Let it cool completely on a wire rack.
- Spread the Sweet Cherries: Once your crust is cool, carefully spread the cherry pie filling evenly over the entire surface.
- Whip Up the Creamy Dream: In a separate bowl, beat the softened cream cheese with an electric mixer until it’s wonderfully smooth and fluffy. Gently fold in the 1 cup of thawed whipped topping. Gradually add the powdered sugar, mixing until the layer is light, creamy, and lump-free. Spread this delightful mixture over the cherry layer.
- Prepare the Rich Pudding: In another bowl, prepare the chocolate instant pudding according to the package directions, whisking it vigorously with 3 cups of your chosen milk until it thickens. Once thickened, spread this chocolatey layer evenly over the creamy cream cheese layer.
- Add the Final Flourish: Top the chocolate pudding with the rest of your thawed whipped topping. For an extra special touch, sprinkle with chocolate shavings or sprinkles if you like.
- Chill and Enjoy: Cover the dish and refrigerate for at least 4 hours, or ideally overnight, until it’s perfectly chilled and set. This makes it incredibly easy to slice and serve this beautiful, layered dessert!
Different Ways You Can Present and Serve Your Chocolate Cherry Dream Lush
While serving the Chocolate Cherry Dream Lush straight from the dish in classic square portions is always a delight, you can elevate its presentation with a few creative touches. For an individual, elegant dessert, scoop portions into clear glass dessert cups or martini glasses. This showcases the beautiful layers and instantly transforms it into a sophisticated treat. Garnish each serving with a fresh cherry, a dollop of extra whipped cream, or a few more delicate chocolate shavings for a gourmet touch. For holiday gatherings, you can add a festive sprinkle mix. If you’re feeling extra fancy, use a cookie cutter to create fun shapes (though this works best if the dessert is very firm). A drizzle of chocolate syrup or a light dusting of cocoa powder can also add visual appeal just before serving. Remember, presentation is key to enhancing the “dream” aspect of this lush dessert!
How You Can Store It and How Long Does It Last
Proper storage is crucial for maintaining the freshness and perfect texture of your Chocolate Cherry Dream Lush. Once prepared, cover the baking dish tightly with plastic wrap or aluminum foil, ensuring it’s sealed well to prevent any odors from the refrigerator affecting its flavor and to keep the layers from drying out. Store the dessert in the refrigerator. When stored correctly, this delightful lush will last for 3 to 5 days. The longer it chills, the better the flavors meld and the firmer the layers become, making it even easier to slice. We do not recommend freezing this dessert, as the whipped topping and pudding layers can become watery or separate upon thawing, compromising the desired creamy texture. Stick to refrigeration for the best experience!
FAQs Sections
- Can I use fresh cherries instead of pie filling?
Yes, you can! You’ll need to create a simple cherry topping by simmering fresh pitted cherries with a little sugar and cornstarch to thicken it to a pie-filling consistency. Allow it to cool completely before spreading over the crust. - What if I don’t have Cool Whip or prefer a homemade option?
You can use homemade whipped cream! For the creamy layer, whip 1 cup of heavy cream with 2-3 tablespoons of powdered sugar until stiff peaks form. For the topping, whip another 1.5-2 cups of heavy cream. - Can I make this Chocolate Cherry Dream Lush gluten-free?
Absolutely! Replace the all-purpose flour in the crust with a 1:1 gluten-free baking flour blend. Ensure all other ingredients (pudding mix, pie filling) are certified gluten-free. - How long does this dessert *really* need to chill?
While 4 hours is the minimum, for the best results and easiest slicing, we highly recommend chilling your Chocolate Cherry Dream Lush overnight (8+ hours). This allows all layers to firm up perfectly. - Can I prepare this dessert in individual cups?
Yes, this is a fantastic idea for portion control and elegant serving! Layer the ingredients in individual clear dessert cups or mason jars, starting with a spoonful of crust mixture, then cherry, cream cheese, pudding, and whipped topping. - What kind of nuts work best for the crust?
Pecans and almonds are excellent choices, offering a rich, buttery flavor. Walnuts would also be delicious. Choose your favorite, or a mix, for a personalized touch! - Can I use a different pudding flavor for the Chocolate Cherry Dream Lush?
Certainly! While chocolate is classic, vanilla, white chocolate, or even cheesecake instant pudding would also be delicious and complement the cherry layer beautifully. - Is it possible to make this recipe completely sugar-free?
Yes! Use a sugar substitute for the crust, no-sugar-added cherry pie filling, powdered sugar substitute for the creamy layer, and sugar-free instant chocolate pudding mix. - Can I double the recipe?
This recipe makes a generous 9×13 inch dish. If you need even more, you could prepare two separate 9×13 inch dishes, or scale up ingredients proportionally and bake in a larger catering-sized pan if you have one. - Why is the crust baked, but the other layers are not?
Baking the crust provides a sturdy, slightly crispy base that holds up well against the moist, creamy layers. The subsequent layers are designed to be no-bake, simplifying the process and contributing to the lush, chilled texture of the overall dessert.
Chocolate Cherry Dream Lush 🍒
Equipment
- 9x13 inch Baking Dish
- Mixing Bowl
- Wire Rack
- Electric Mixer
Ingredients
Crust Layer
- 1 cup all-purpose flour
- 0.5 cup finely crushed nuts like pecans or almonds, your choice for flavor!
- 0.25 cup granulated sugar or a sugar substitute for a lighter treat
- 8 tablespoons unsalted butter, melted ½ cup
Cherry Layer
- 21 ounces cherry pie filling 1 standard can, opt for a no-sugar-added version if available!
Creamy Layer
- 8 ounces cream cheese, softened light cream cheese works great here
- 1 cup powdered sugar or a powdered sugar substitute
- 1 cup frozen whipped topping, thawed like Cool Whip, use lite or sugar-free for a healthier twist
Pudding Layer
- 6.8 ounces chocolate instant pudding mix 2 small packages, sugar-free option is perfect!
- 3 cups milk your preferred type; skim, almond, or oat milk makes it lighter
Topping Layer
- remaining frozen whipped topping from the 8 oz container
- 0.5 cup chocolate shavings or sprinkles optional; dark chocolate adds a nice touch!
Instructions
- First, preheat your oven to 375°F (190°C). In a mixing bowl, combine the flour, crushed nuts, sugar, and melted butter. Mix until it resembles coarse crumbs. Press this mixture firmly into the bottom of a 9x13 inch baking dish to form an even crust. Bake for just 10 minutes until it's lightly golden. Let it cool completely on a wire rack.
- Once your crust is cool, carefully spread the cherry pie filling evenly over the entire surface.
- In a separate bowl, beat the softened cream cheese with an electric mixer until it's wonderfully smooth and fluffy. Gently fold in the 1 cup of thawed whipped topping. Gradually add the powdered sugar, mixing until the layer is light, creamy, and lump-free. Spread this delightful mixture over the cherry layer.
- In another bowl, prepare the chocolate instant pudding according to the package directions, whisking it vigorously with 3 cups of your chosen milk until it thickens. Once thickened, spread this chocolatey layer evenly over the creamy cream cheese layer.
- Top the chocolate pudding with the rest of your thawed whipped topping. For an extra special touch, sprinkle with chocolate shavings or sprinkles if you like.
- Cover the dish and refrigerate for at least 4 hours, or ideally overnight, until it's perfectly chilled and set. This makes it incredibly easy to slice and serve this beautiful, layered dessert!
Notes
Nutrition Information (per serving):
- Calories: 155 kcal
- Total Carbs: 20g
- Net Carbs: 19g
- Fats: 8g
- Protein: 2g