Why You’ll Love This Lemon Meringue Tart Recipe
Prepare to fall head over heels for this delightful homemade Lemon Meringue Tart! It’s more than just a dessert; it’s an experience. Here are four irresistible reasons why this recipe will become your new go-to:
- A Burst of Sunshine in Every Bite: There’s nothing quite like the invigorating tang of fresh lemon. Our Lemon Meringue Tart delivers a vibrant, zesty punch that perfectly balances sweetness, making it incredibly refreshing. It’s like bottling a sunny day and serving it on a plate!
- A Symphony of Textures: Get ready for a textural adventure! You’ll love the satisfying crispness of the buttery shortcrust pastry, giving way to the smooth, creamy, and wonderfully tart lemon filling, all crowned with a cloud of impossibly light, airy, and delicately browned meringue. It’s a harmonious blend that keeps you coming back for more.
- The Ultimate Showstopper Dessert: Looking to impress? This Lemon Meringue Tart is a true showstopper. Its golden peaks of meringue, glistening filling, and elegant presentation make it perfect for dinner parties, holidays, or any occasion where you want to wow your guests. It looks complicated, but our step-by-step guide makes it totally achievable!
- The Pure Joy of Homemade Perfection: There’s immense satisfaction in creating something so beautiful and delicious from scratch. From the first whisk to the final garnish, you’ll feel like a pastry chef. Plus, your kitchen will smell absolutely divine! Skip the store-bought and embrace the homemade magic of this classic Lemon Meringue Tart.
Unleash Your Inner Pastry Chef: The Zestiest Lemon Meringue Tart Awaits!
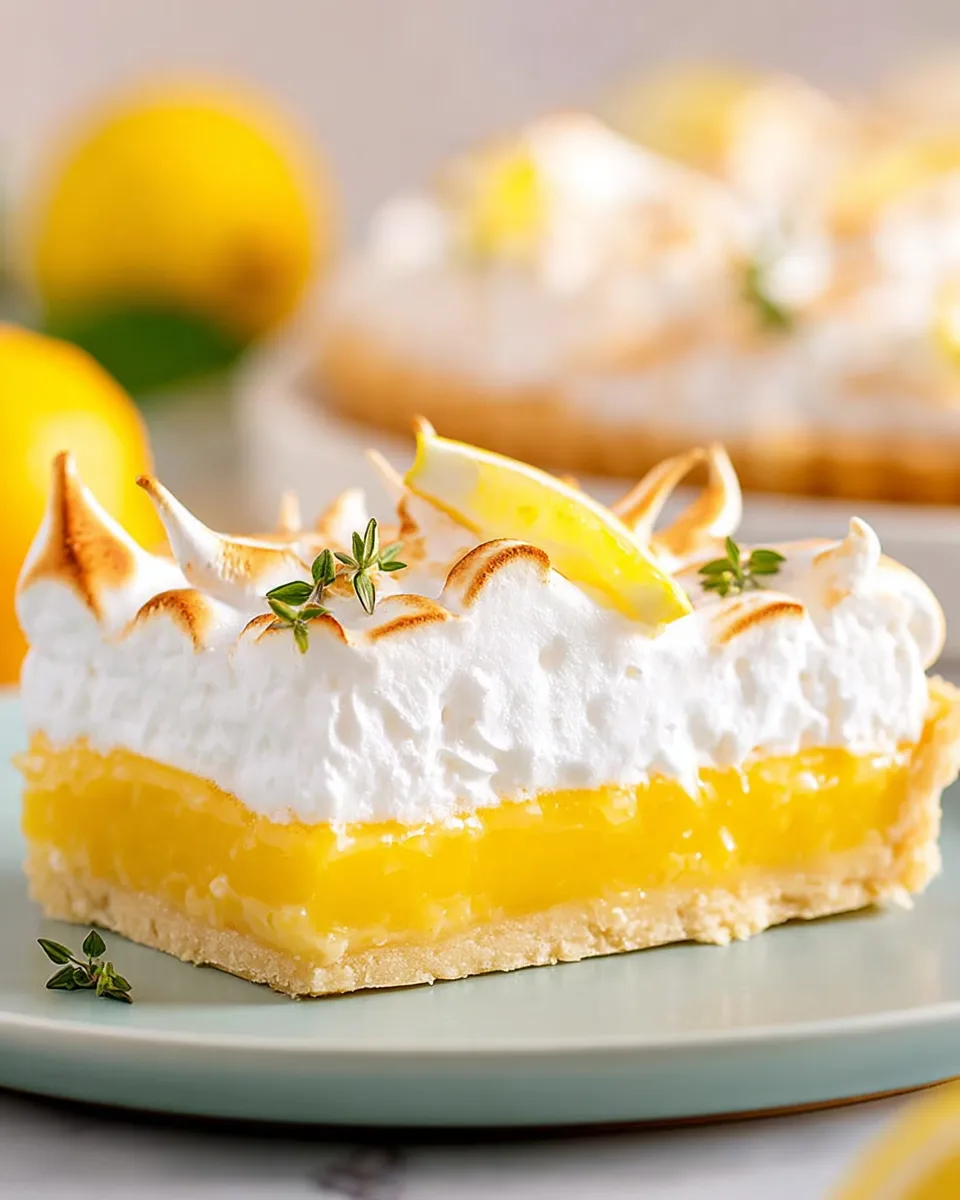
Picture this: a golden-brown, buttery crust cradling a luscious, sunshine-yellow lemon filling, all topped with a sky-high crown of perfectly toasted, pillowy meringue. Sounds like a dream, right? Well, today, that dream becomes your delicious reality! Get ready to whisk, zest, and torch your way to the most exquisite homemade Lemon Meringue Tart you’ve ever tasted.
Forget those wobbly, overly sweet imposters. This recipe is for the real deal – a vibrant, tangy, and utterly irresistible dessert that will have everyone asking for seconds (and maybe even thirds!). We’re breaking down the magic into simple, stress-free steps, so whether you’re a baking novice or a seasoned pro, you’ll master this classic with a smile. So, grab your apron, unleash those lemons, and let’s bake some happiness!
Gather Your Sunshine: Ingredients for the Perfect Lemon Meringue Tart
Before we dive into the fun, let’s make sure you have all the starry ingredients ready for your dazzling Lemon Meringue Tart. Freshness is key, especially for those lemons!
INGREDIENTS:
- ✨ 1 ¾ cups all-purpose flour
- 🍚 ¼ cup powdered sugar
- 🧂 ¼ teaspoon salt
- 🧈 ½ cup (1 stick) cold unsalted butter, cubed
- 🥚 1 large egg
- 💧 1 ½ tablespoons ice-cold water
- 🍋 Zest and juice of 4 fresh lemons
- 🌽 ⅓ cup cornstarch
- 💧 1 ½ cups water
- 🍚 1 cup granulated sugar (for filling)
- 🥚 4 large egg yolks (save the whites for the meringue!)
- 🥚 4 large egg whites (from saved yolks)
- 🍚 1 cup superfine sugar (or regular granulated sugar) (for meringue)
- 🍋 Fresh lemon slices (for garnish, optional)
- 🌿 Lemon thyme sprigs (for garnish, optional)
Your Step-by-Step Journey to Lemon Meringue Tart Perfection
Ready to create some kitchen magic? Follow these detailed instructions to craft each delicious layer of your homemade Lemon Meringue Tart. Take your time, enjoy the process, and soon you’ll have a masterpiece!
To Make the Shortcrust Pastry:
- Start by whisking together the flour, powdered sugar, and salt in a big bowl until they’re nicely combined.
- Now, add the cold butter cubes. Gently rub them into the flour mixture with your fingertips until it resembles coarse breadcrumbs, with a few pea-sized butter pieces remaining. This keeps the crust flaky!
- Pour in the egg and cold water. Mix lightly with a fork until the dough just starts to come together.
- Use your hands to gently bring the dough into a ball. If it’s too crumbly, add a tiny bit more cold water, a few drops at a time, until it forms a cohesive ball. Avoid overworking!
- Lightly flour your workspace. Shape the dough into a flat disc, wrap it in plastic, and chill in the fridge for at least one hour. This makes it easier to roll and helps the crust stay crisp.
- Take the dough out of the fridge and let it sit at room temperature for 15 minutes. Preheat your oven to 350°F (175°C).
- On a lightly floured surface, use a rolling pin to roll the dough into a 12-inch circle, about ⅛ inch thick.
- Carefully fit the dough into a 9-inch tart pan with a removable base. Press it gently into the bottom and sides, then trim any excess with a sharp knife. Prick the bottom all over with a fork to prevent puffing.
- Line the crust with parchment paper and fill it completely with pie weights or dry rice.
- Bake for 15 minutes. Then, remove the parchment and weights and bake for another 15 minutes, or until the crust is a light golden brown and feels dry. Let it cool completely.
To Make the Lemon Filling:
- In a small bowl, whisk together the fresh lemon zest, lemon juice, and cornstarch until smooth and lump-free.
- Bring the water to a boil in a medium saucepan. Stir in the lemon-cornstarch mixture, then reduce heat to medium-low and stir constantly until it thickens. Remove from heat and set aside.
- In a separate bowl, whisk the granulated sugar and egg yolks until smooth. Gradually whisk this into the lemon mixture. Return the pan to low heat and gently bring to a low boil, stirring often, until the filling becomes very thick (about 5 minutes, or longer).
- Remove from heat, let cool for 10 minutes, then pour into the cooled tart shell. Chill in the refrigerator for at least 1 hour, or until firm.
To Make the Meringue:
- In a clean stand mixer bowl with the whisk attachment (or using a hand mixer), beat the egg whites on low speed until frothy, then increase to medium and beat until soft peaks form.
- Gradually add the superfine sugar, one tablespoon at a time, ensuring each addition is fully incorporated before adding more. Once all sugar is in, scrape the bowl, then beat on high for 5 minutes until the meringue is glossy, thick, and holds stiff peaks (no sugar grains should be felt when rubbed between fingers).
- Once the lemon filling is set, spoon or pipe the beautiful meringue over the top, creating decorative swirls. Use a kitchen torch to lightly brown the peaks, or briefly place it under a hot broiler (watch carefully!).
- For a lovely finish, garnish with fresh lemon slices and a few sprigs of lemon thyme, if desired.
- Slice, serve, and enjoy this delightful, bright Lemon Meringue Tart!
Presenting Your Masterpiece: Creative Ways to Serve Your Lemon Meringue Tart
You’ve put in the effort, now it’s time for the grand reveal! Your homemade Lemon Meringue Tart is a sight to behold, and there are several ways to present it to truly dazzle your guests and elevate the serving experience.
- Classic Elegance: The simplest way is often the most striking. Slice your chilled tart into neat wedges using a sharp, warm knife (wipe it clean between slices for perfect edges). Place each slice on a delicate dessert plate. A single sprig of fresh lemon thyme or a thin lemon twist draped artfully beside it adds a gourmet touch.
- Berry Beautiful: Enhance the citrusy brightness with fresh berries! A scattering of vibrant raspberries, blueberries, or sliced strawberries around the plate creates a beautiful contrast in color and adds another layer of fresh flavor that complements the lemon meringue tart wonderfully.
- Creamy Companions: For those who love a little extra richness, a small dollop of lightly sweetened whipped cream or a scoop of vanilla bean ice cream served alongside each slice is pure indulgence. The cool, creamy texture is a delightful contrast to the tartness of the lemon and the airy meringue.
- Mini Tart Magic: If you want to impress with individual portions, consider making smaller tarts! Roll out your pastry, cut it into circles, and press into mini tart pans. Adjust baking times accordingly. These mini Lemon Meringue Tarts are perfect for parties or elegant dessert buffets.
- Aromatic Accents: Beyond lemon slices and thyme, consider a light dusting of powdered sugar (after meringue is browned) or a few edible flowers for a truly stunning presentation.
No matter how you choose to present it, make sure your tart is properly chilled for clean slicing and optimal enjoyment. Each bite of this spectacular dessert is a celebration!
Keeping Your Lemon Meringue Tart Fresh: Storage Tips and Shelf Life
You’ve poured your heart into creating a magnificent Lemon Meringue Tart, and of course, you want it to stay as fresh and delicious as possible! Here’s how to store it properly to enjoy every last bite.
- Refrigeration is Key: Due to the egg-based filling and meringue, this tart absolutely needs to be stored in the refrigerator. Wrap it loosely with plastic wrap or foil, or place it under a cake dome. This helps prevent it from absorbing odors from other foods and protects the meringue.
- How Long Does It Last? For optimal flavor and texture, your homemade Lemon Meringue Tart is best enjoyed within 2-3 days of baking. While it might still be safe to eat a bit longer, the meringue can start to “weep” (release moisture) and the crust might soften, diminishing its appeal.
- Meringue Weeping: Don’t be alarmed if your meringue starts to get a little wet or “weepy” after a day or so in the fridge. This is a common occurrence due to sugar dissolving in the meringue and releasing moisture. It’s perfectly normal and doesn’t affect the taste, but the texture might change slightly. To minimize weeping, ensure your meringue is cooked properly (torched/broiled) and the tart is kept chilled.
- Avoid Freezing (Generally): While you can technically freeze the baked tart (without meringue), it’s generally not recommended for the complete Lemon Meringue Tart. The meringue texture suffers significantly upon thawing, becoming rubbery or watery. The crust can also become soggy. If you must freeze, do so *before* adding the meringue, then add fresh meringue after thawing and before serving.
- Room Temperature? No Way!: Never leave your Lemon Meringue Tart out at room temperature for more than an hour or two, especially in warm weather. The dairy and egg components are perishable and can quickly spoil.
By following these simple storage guidelines, you can ensure your delightful Lemon Meringue Tart remains a refreshing and delicious treat for as long as possible!
FAQs About Your Delicious Lemon Meringue Tart
Got questions about making the perfect Lemon Meringue Tart? We’ve got answers! Check out these common queries to help you master this classic dessert.
- Can I use bottled lemon juice instead of fresh?
While fresh lemon juice is highly recommended for the best flavor and zest, you can use bottled lemon juice in a pinch. However, the tartness and vibrancy won’t be quite the same, and you’ll miss out on the fresh lemon zest which adds significant flavor.
- Why did my tart crust shrink during baking?
Crust shrinkage is often caused by not chilling the dough sufficiently or overworking it. Chilling allows the butter to firm up and the gluten to relax. Overworking develops gluten, making the dough elastic and prone to shrinking. Ensure you chill for at least an hour and handle the dough minimally.
- How can I prevent a soggy tart crust?
Blind baking the crust is essential! Make sure you bake it completely until it’s light golden brown and dry, even after removing the pie weights. A good bake creates a barrier against the moisture from the filling. You can also brush the warm, blind-baked crust with a thin layer of egg white to create an extra seal before filling.
- My meringue is “weeping” – what happened and can I fix it?
Meringue weeping (when liquid pools between the meringue and filling) is common. It can be caused by undercooked meringue, humidity, or over-beating the egg whites. While you can’t truly “fix” it once it starts, you can prevent it by ensuring sugar is fully dissolved in the meringue, beating to stiff peaks, and lightly browning the meringue immediately before serving or chilling.
- Can I make this Lemon Meringue Tart ahead of time?
You can definitely prepare components ahead! The pastry dough can be made 2-3 days in advance and stored in the fridge. The lemon filling can also be made a day ahead and chilled. Assemble and top with meringue no more than 12-24 hours before serving for the freshest result and best meringue texture.
- What if I don’t have superfine sugar for the meringue?
Regular granulated sugar works fine, but superfine sugar (also called caster sugar) dissolves more quickly, resulting in a smoother, more stable meringue. If using regular granulated sugar, just beat for an extra minute or two to ensure it’s fully incorporated and no gritty texture remains.
- Can I freeze a finished Lemon Meringue Tart?
Freezing is not recommended for a fully assembled Lemon Meringue Tart. The meringue’s texture will become unpleasantly rubbery or watery upon thawing, and the crust may become soggy. If you need to freeze, freeze the baked crust and cooled lemon filling separately, then assemble and add fresh meringue just before serving.
- How do I know my egg whites are at “stiff peaks” for the meringue?
Stiff peaks mean that when you lift the whisk, the meringue stands straight up and doesn’t droop. When you invert the bowl, the meringue should not slide. It should also be glossy and smooth. Ensure your bowl and whisk are perfectly clean and free of any fat or grease.
- Why is my lemon filling not thickening?
The most common reasons for a thin lemon filling are not cooking it long enough or not using enough cornstarch. Ensure you bring the mixture to a low boil and stir constantly for at least 5 minutes, or until it reaches a very thick, pudding-like consistency. It will thicken more as it cools.
- Do I have to torch or broil the meringue?
No, you don’t *have* to, but it’s highly recommended! Torching or broiling caramelizes the sugar on the outside, adding a delicious toasted flavor and a beautiful golden-brown color. It also helps to stabilize the meringue and reduce weeping. If you prefer, you can serve it white, but the toasting adds a wonderful dimension to your Lemon Meringue Tart.
Lemon Meringue Tart ☀️
Equipment
- Large Bowl
- Rolling Pin
- 9-inch tart pan with removable base
- Parchment Paper
- Pie Weights or Dry Rice
- Medium Saucepan
- Stand mixer (or hand mixer)
- Whisk Attachment
- Kitchen Torch (optional)
Ingredients
Shortcrust Pastry
- 1.75 cups all-purpose flour
- 0.25 cup powdered sugar
- 0.25 tsp salt
- 0.5 cup cold unsalted butter cubed
- 1 large egg
- 1.5 tbsp ice-cold water
Lemon Filling
- 4 fresh lemons zest and juice
- 0.33 cup cornstarch
- 1.5 cups water
- 1 cup granulated sugar for filling
- 4 large egg yolks save the whites for the meringue!
Meringue
- 4 large egg whites from saved yolks
- 1 cup superfine sugar (or regular granulated sugar)
Garnish (optional)
- fresh lemon slices for garnish, optional
- lemon thyme sprigs for garnish, optional
Instructions
- To Make the Shortcrust Pastry:
- 1. Start by whisking together the flour, powdered sugar, and salt in a big bowl until they're nicely combined.
- 2. Now, add the cold butter cubes. Gently rub them into the flour mixture with your fingertips until it resembles coarse breadcrumbs, with a few pea-sized butter pieces remaining. This keeps the crust flaky!
- 3. Pour in the egg and cold water. Mix lightly with a fork until the dough just starts to come together.
- 4. Use your hands to gently bring the dough into a ball. If it’s too crumbly, add a tiny bit more cold water, a few drops at a time, until it forms a cohesive ball. Avoid overworking!
- 5. Lightly flour your workspace. Shape the dough into a flat disc, wrap it in plastic, and chill in the fridge for at least one hour. This makes it easier to roll and helps the crust stay crisp.
- 6. Take the dough out of the fridge and let it sit at room temperature for 15 minutes. Preheat your oven to 350°F (175°C).
- 7. On a lightly floured surface, use a rolling pin to roll the dough into a 12-inch circle, about ⅛ inch thick.
- 8. Carefully fit the dough into a 9-inch tart pan with a removable base. Press it gently into the bottom and sides, then trim any excess with a sharp knife. Prick the bottom all over with a fork to prevent puffing.
- 9. Line the crust with parchment paper and fill it completely with pie weights or dry rice.
- 10. Bake for 15 minutes. Then, remove the parchment and weights and bake for another 15 minutes, or until the crust is a light golden brown and feels dry. Let it cool completely.
- To Make the Lemon Filling:
- 1. In a small bowl, whisk together the fresh lemon zest, lemon juice, and cornstarch until smooth and lump-free.
- 2. Bring the water to a boil in a medium saucepan. Stir in the lemon-cornstarch mixture, then reduce heat to medium-low and stir constantly until it thickens. Remove from heat and set aside.
- 3. In a separate bowl, whisk the granulated sugar and egg yolks until smooth. Gradually whisk this into the lemon mixture. Return the pan to low heat and gently bring to a low boil, stirring often, until the filling becomes very thick (about 5 minutes, or longer).
- 4. Remove from heat, let cool for 10 minutes, then pour into the cooled tart shell. Chill in the refrigerator for at least 1 hour, or until firm.
- To Make the Meringue:
- 1. In a clean stand mixer bowl with the whisk attachment (or using a hand mixer), beat the egg whites on low speed until frothy, then increase to medium and beat until soft peaks form.
- 2. Gradually add the superfine sugar, one tablespoon at a time, ensuring each addition is fully incorporated before adding more. Once all sugar is in, scrape the bowl, then beat on high for 5 minutes until the meringue is glossy, thick, and holds stiff peaks (no sugar grains should be felt when rubbed between fingers).
- 3. Once the lemon filling is set, spoon or pipe the beautiful meringue over the top, creating decorative swirls. Use a kitchen torch to lightly brown the peaks, or briefly place it under a hot broiler (watch carefully!).
- 4. For a lovely finish, garnish with fresh lemon slices and a few sprigs of lemon thyme, if desired.
- 5. Slice, serve, and enjoy this delightful, bright tart!
Notes
Prep Time: 1 hour
Cook Time: 30 minutes
Total Time: 3 hours 45 minutes
Servings: 6
Calories: 652 kcal
Total Carbs: 113 g
Net Carbs: 110 g
Fats: 20 g
Protein: 10 g