Ever dreamed of a dessert that’s as refreshing as a cool breeze on a summer day, looks absolutely adorable, and requires zero oven time? Well, pinch yourself because your dessert dreams are about to come true with our sensational Grasshopper Mini Cheesecakes (No Bake!)! Forget heating up your kitchen or fumbling with water baths. These minty green beauties are the ultimate fuss-free indulgence, perfect for parties, picnics, or simply treating yourself after a long day. Get ready to impress everyone with these vibrant, creamy, and oh-so-easy treats that are sure to become your new go-to dessert!
Why You’ll Love This Recipe
- Absolutely No Baking Required: That’s right, folks! Keep your oven off and your kitchen cool. These delightful Grasshopper Mini Cheesecakes (No Bake!) come together without a single moment of baking, making them perfect for hot days or when you just don’t feel like turning on the oven.
- Perfectly Portioned & Adorably Mini: No need to cut slices or worry about uneven servings! Each cheesecake is a cute, individual portion, making them super easy to serve and perfect for parties, potlucks, or even a personal treat. They’re as charming as they are delicious.
- Refreshing Minty Flavor: The star of the show is that cool, invigorating mint flavor, perfectly balanced with rich cream cheese and a hint of chocolate from the Oreo crust. It’s like a breath of fresh air in dessert form, offering a unique and delightful taste experience that’s a welcome change from traditional cheesecakes.
- Effortlessly Easy to Make: Whether you’re a seasoned dessert pro or a kitchen newbie, this recipe is incredibly simple to follow. With clear, step-by-step instructions and minimal equipment, you’ll be whipping up these stunning Grasshopper Mini Cheesecakes (No Bake!) with confidence and ease.
Ingredients
- 🍪 2 cups OREO cookie crumbs (about 20-24 cookies, finely crushed)
- 🥄 1/4 cup granulated sugar
- 🧈 8 tablespoons (1 stick) salted butter, melted
- 🥛 1 1/2 cups heavy whipping cream, very cold
- 🧀 16 ounces full-fat cream cheese, softened at room temperature
- 🌿 1/4 cup granulated sugar
- 🌱 3 ounces creme de menthe liqueur OR for a kid-friendly option, 1 1/2 teaspoons mint extract plus a few drops of green gel food coloring
- 💧 1 teaspoon vanilla extract
Detailed Step-by-Step Directions on How to Make Grasshopper Mini Cheesecakes (No Bake!)
Get ready to create some magic with these Grasshopper Mini Cheesecakes (No Bake!)! Follow these steps closely for dessert perfection:
- Get Your Muffin Pan Ready: Start by lining a standard 12-cup muffin pan with paper liners. This simple step is your secret weapon for effortlessly removing your mini cheesecakes once they’re chilled and set.
- Whip Up the Oreo Crust: In a medium-sized bowl, combine your finely crushed OREO cookie crumbs, 1/4 cup granulated sugar, and the melted salted butter. Give it a good stir until every crumb is completely moistened and looks like wet sand.
- Press the Crust Firmly: Now, divide this delicious crumb mixture evenly among the 12 muffin liners. Grab the bottom of a small glass or a measuring cup and firmly press the mixture into the bottom of each liner. You want a compact, sturdy crust. Once pressed, pop the entire muffin pan into the freezer to chill while you get the creamy filling ready.
- Make the Whipped Cream: If you have a stand mixer, attach the whisk attachment. Otherwise, grab a large bowl and a hand mixer. Pour in your very cold heavy whipping cream. Beat on medium-high speed until you achieve stiff peaks – this means the cream will hold its shape beautifully when you lift the whisk. Gently set this cloud-like cream aside.
- Prepare the Cheesecake Base: In a separate large bowl, using the paddle attachment on your stand mixer (or a hand mixer), beat the softened full-fat cream cheese with the remaining 1/4 cup granulated sugar, the creme de menthe (or mint extract and green food coloring for a kid-friendly version!), and vanilla extract. Beat on low speed until the mixture is completely smooth and wonderfully creamy, making sure to scrape down the sides of the bowl often to eliminate any lumps.
- Gently Combine for Fluffy Filling: This is a delicate step! Carefully and gently fold the prepared whipped cream into your smooth cream cheese mixture. Use a spatula and fold until everything is just combined. Be super gentle to preserve that lovely airy, light texture you worked so hard for!
- Fill and Chill: Spoon your dreamy cheesecake filling evenly into the prepared muffin liners, right on top of your now-frozen Oreo crusts. Fill them up!
- Patience is Key: Transfer the entire muffin pan to the refrigerator. Let them chill for at least 4 hours, or even better, overnight. You want these Grasshopper Mini Cheesecakes (No Bake!) to be completely firm and perfectly set before serving.
- Serve and Enjoy: Once thoroughly chilled, remove your beautiful mini cheesecakes from the pan. Now for the fun part – garnishing!
Detailed Different Ways You Can Present and Serve Grasshopper Mini Cheesecakes (No Bake!)
Once your Grasshopper Mini Cheesecakes (No Bake!) are perfectly set, it’s time to make them look as good as they taste! Presentation can elevate any dessert, and these mini marvels offer plenty of creative opportunities:
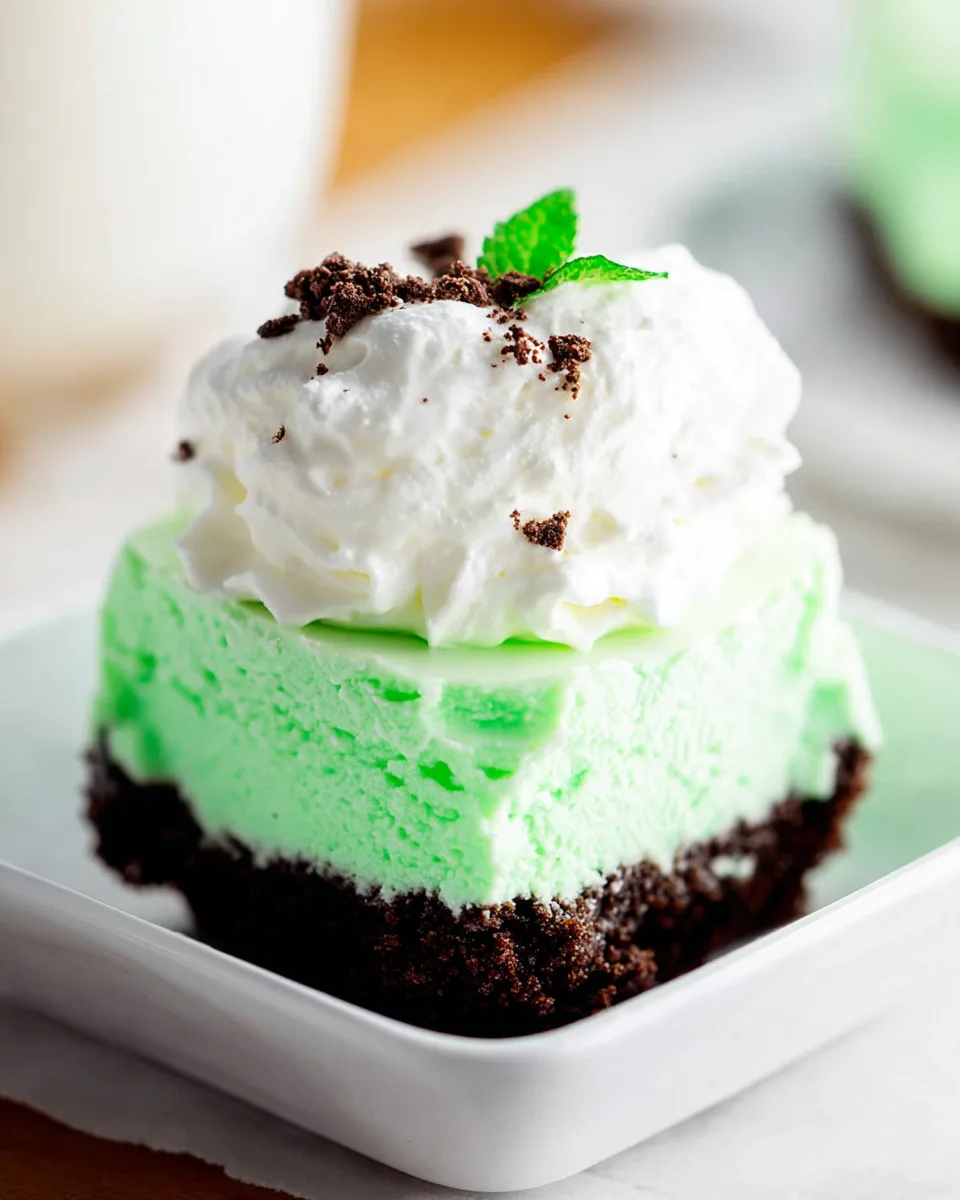
- Classic Minty Elegance: For a simple yet sophisticated touch, place a tiny sprig of fresh mint leaves on top of each cheesecake. The vibrant green adds a beautiful pop of color and reinforces the mint theme.
- Double the Creaminess: A small dollop of extra whipped cream on top, perhaps piped elegantly with a star tip, makes these cheesecakes extra luxurious. You can even dust it lightly with cocoa powder for a subtle contrast.
- Oreo Overload: If you’re an Oreo lover, crush a few extra cookies and sprinkle the crumbs generously over the top. This adds more chocolatey crunch and ties back to the crust.
- Andes Mint Magic: For an unmistakable grasshopper treat, chop up a few Andes mint candies and sprinkle them over the top. They melt slightly when eaten, adding an extra layer of mint-chocolate bliss.
- Chocolate Drizzle Dream: A fine drizzle of melted chocolate or chocolate syrup over the top creates an attractive pattern and enhances the chocolate notes. White chocolate drizzle would also look stunning!
- Festive Flair: For holidays or special occasions, add some themed sprinkles! Green and white for Christmas, or any color to match your party’s theme. A single maraschino cherry can also add a festive touch.
Serve them individually on small plates, or arrange them on a beautiful platter for a stunning dessert display. They’re perfect for any gathering!
How You Can Store Grasshopper Mini Cheesecakes (No Bake!) and How Long They Last
Great news! These Grasshopper Mini Cheesecakes (No Bake!) are not only delicious but also fantastic for making ahead and storing. Here’s how to keep them fresh and tasty:
- In the Refrigerator: Once your mini cheesecakes are fully set, you can store them in an airtight container in the refrigerator for up to 3-4 days. Placing a piece of parchment paper between layers (if stacking) can help prevent sticking. Make sure they are covered to prevent them from absorbing any unwanted odors from the fridge.
- Freezing for Longer Storage: If you want to enjoy these delightful treats for longer, they freeze beautifully! Once fully set and chilled, transfer the cheesecakes (without paper liners, if preferred, or remove them just before freezing) to a freezer-safe airtight container. You can also wrap each individual cheesecake tightly in plastic wrap before placing them in the container to prevent freezer burn. They will keep well in the freezer for up to 1 month.
- Thawing Frozen Cheesecakes: When you’re ready to enjoy a frozen Grasshopper Mini Cheesecake, simply transfer it from the freezer to the refrigerator and let it thaw for a few hours (1-2 hours) until it’s soft enough to eat but still nicely chilled. Do not thaw at room temperature for too long, as this can affect their texture.
Having a batch of these stored away means you’re always ready for an unexpected guest or a sudden dessert craving!
FAQs About Grasshopper Mini Cheesecakes (No Bake!)
Here are some common questions about making these delightful Grasshopper Mini Cheesecakes (No Bake!):
-
Can I make these Grasshopper Mini Cheesecakes ahead of time?
Absolutely! In fact, they are perfect for making ahead. The longer they chill, the firmer and more delicious they become. You can easily prepare them a day or two in advance. -
What if I don’t have creme de menthe liqueur or want a kid-friendly option?
No problem at all! The recipe includes a great alternative: use 1 1/2 teaspoons of mint extract instead of the liqueur, plus a few drops of green gel food coloring to achieve that iconic grasshopper hue. -
Can I use a different type of cookie for the crust?
While OREO crumbs are classic for this recipe, you can definitely experiment! Chocolate wafer cookies or even plain graham crackers with a bit of cocoa powder would also work well. -
Why didn’t my whipped cream get stiff peaks?
The key to stiff peaks is very cold heavy whipping cream and a cold bowl/whisk. Ensure your cream is straight from the fridge and has at least 35% fat content. Overbeating can also turn it grainy, so stop once stiff peaks form. -
How do I know when my cream cheese is soft enough?
Cream cheese is perfectly softened when it yields easily to gentle pressure, but is still cool to the touch. This usually takes about 30-60 minutes at room temperature. Using cold cream cheese will result in a lumpy filling. -
Can I make this into a full-sized no-bake cheesecake?
Yes, you can! You’ll likely need a 9-inch springform pan. Increase the crust ingredients by about 50% and the filling ingredients by 25-50% depending on how tall you want it. The chilling time will also need to be extended significantly, often 6-8 hours or overnight. -
Are there any other flavor variations I could try?
Certainly! While these are Grasshopper Mini Cheesecakes (No Bake!), you could adapt the base recipe. Swap out creme de menthe for lemon juice and zest for a lemon cheesecake, or add cocoa powder for a chocolate version. -
Why is the chilling time so important? Can I skip it?
The chilling time is crucial! It allows the cheesecake filling to firm up and set properly. Skipping or shortening it will result in a soft, runny cheesecake that won’t hold its shape. Patience is a virtue here! -
Why are they called “Grasshopper” cheesecakes?
The name “Grasshopper” comes from the classic Grasshopper cocktail, which also features a delightful blend of creme de menthe (green) and creme de cacao (chocolate), giving it a green color and minty-chocolate flavor profile, just like these cheesecakes! -
Can I use low-fat cream cheese for this recipe?
It’s highly recommended to use full-fat cream cheese. Low-fat cream cheese contains more water, which can make the cheesecake filling too loose and prevent it from setting properly, affecting the creamy texture.
Grasshopper Mini Cheesecakes (No Bake!)
Equipment
- 12-cup standard muffin pan
- Paper Liners
- Stand Mixer
- Whisk Attachment
- Paddle attachment
Ingredients
Oreo Crust
- 2 cups OREO cookie crumbs (about 20-24 cookies, finely crushed)
- 1/4 cup granulated sugar
- 8 tablespoons salted butter (1 stick), melted
Cheesecake Filling
- 1 1/2 cups heavy whipping cream very cold
- 16 ounces full-fat cream cheese softened at room temperature
- 1/4 cup granulated sugar
- 3 ounces creme de menthe liqueur OR for a kid-friendly option, 1 1/2 teaspoons mint extract plus a few drops of green gel food coloring
- 1 teaspoon vanilla extract
Instructions
- 1. Get Your Muffin Pan Ready: Line a 12-cup standard muffin pan with paper liners. This makes these mini cheesecakes super easy to remove once they're set!
- 2. Whip Up the Oreo Crust: In a medium bowl, combine the OREO cookie crumbs, 1/4 cup granulated sugar, and the melted butter. Stir everything together really well until the crumbs are completely moistened.
- 3. Press the Crust Firmly: Divide this crumb mixture evenly among the 12 muffin liners. Use the bottom of a small glass or a measuring cup to firmly press the mixture into the bottom of each liner, creating a compact crust. Pop the muffin pan into the freezer while you prepare the creamy filling.
- 4. Make the Whipped Cream: Attach a whisk attachment to your stand mixer (or use a large bowl with a hand mixer). Pour in the cold heavy whipping cream. Beat on medium-high speed until stiff peaks form – this means the cream will hold its shape when the whisk is lifted. Set this aside.
- 5. Prepare the Cheesecake Base: In a separate large bowl, using the paddle attachment on your stand mixer (or a hand mixer), beat the softened cream cheese, the remaining 1/4 cup granulated sugar, the creme de menthe (or mint extract and food coloring), and vanilla extract on low speed. Mix until the mixture is completely smooth and wonderfully creamy, scraping down the sides of the bowl as needed to ensure there are no lumps.
- 6. Gently Combine for Fluffy Filling: Carefully and gently fold the prepared whipped cream into the smooth cream cheese mixture until everything is just combined. Be gentle to maintain that lovely airy texture!
- 7. Fill and Chill: Spoon the cheesecake filling evenly into the prepared muffin liners, right on top of your frozen Oreo crusts.
- 8. Patience is Key: Transfer the entire muffin pan to the refrigerator. Let them chill for at least 4 hours, or until the mini cheesecakes are completely firm and perfectly set.
- 9. Serve and Enjoy: Once chilled, remove the mini cheesecakes from the pan. Garnish with a sprig of fresh mint, a dollop of extra whipped cream, more OREO crumbs, or a piece of Andes mint for an extra touch of minty goodness!
Notes
Calories: 362kcal
Total Carbs: 22g
Net Carbs: 21g
Fats: 28g
Protein: 3g