Ever found yourself staring longingly at a dessert menu, only to sigh at the sugar content? Do you crave that melt-in-your-mouth sweetness without the guilt or the inevitable sugar crash? Well, dear dessert lover, prepare for a revelation! We’re about to whisk you away on a culinary adventure that proves you can indeed have your pudding and eat it too. Say hello to your new favorite obsession: a truly luxurious, incredibly easy, and utterly irresistible Creamy Sugar-Free Vanilla Pudding. It’s so good, you’ll wonder why you ever bothered with the sugary stuff!
Why You’ll Love This Creamy Sugar-Free Vanilla Pudding (4 Reasons!)
1. Guilt-Free Indulgence
This isn’t just any pudding; it’s a dream come true for anyone watching their sugar intake or following a low-carb lifestyle. Packed with rich flavors and a satisfyingly creamy texture, our Creamy Sugar-Free Vanilla Pudding delivers all the indulgence without the hidden sugars or carbs. Enjoy a decadent treat that fits perfectly into your healthy eating plan!
2. Velvety Smooth Texture
Forget gritty or watery puddings. Thanks to the magic of heavy cream and precisely bloomed gelatin, every spoonful of this vanilla pudding is a symphony of silkiness. It literally melts in your mouth, leaving a delightful vanilla essence that lingers just long enough to make you reach for another bite. Get ready for a dessert experience that’s truly luxurious.
3. Super Versatile & Delicious
While phenomenal on its own, this Creamy Sugar-Free Vanilla Pudding is a chameleon in the dessert world. It’s the perfect canvas for your culinary creativity! Top it with fresh berries, a sprinkle of sugar-free chocolate shavings, or even use it as a base for more elaborate low-carb desserts. The simple, elegant vanilla flavor pairs beautifully with almost anything.
4. Surprisingly Easy to Make
Don’t let the gourmet taste fool you – making this pudding is a breeze! With clear, step-by-step instructions, even beginner cooks can whip up this impressive dessert. A little whisking, a bit of chilling, and voilà! You’ll have a show-stopping dessert ready to impress yourself and your guests without hours of kitchen labor.
Ingredients for Your Creamy Sugar-Free Vanilla Pudding
Gather your simple yet mighty ingredients to create this luscious sugar-free treat:
- 🥛 1 2/3 cups heavy whipping cream (or full-fat canned coconut milk for dairy-free), divided (1/3 cup + 1 1/3 cups)
- 🍯 1/3 cup sugar-free vanilla syrup
- 🥚 2 large egg yolks
- ✨ 2 1/2 teaspoons unflavored gelatin powder
- 🧂 1/4 teaspoon sea salt
Step-by-Step Directions to Perfect Creamy Sugar-Free Vanilla Pudding
Follow these easy instructions to create your own irresistible Creamy Sugar-Free Vanilla Pudding:
- Bloom Gelatin: In a small bowl, pour 1/3 cup of heavy whipping cream. Gently sprinkle the gelatin powder over it and whisk immediately until combined. Set this aside to thicken for a few minutes.
- Heat Cream Mixture: In a medium saucepan, combine the remaining 1 1/3 cups of heavy whipping cream, sugar-free vanilla syrup, and sea salt. Heat over medium-low heat, whisking constantly for about 5 minutes, until the mixture is smooth and just begins to bubble gently around the edges. Be careful not to let it come to a rolling boil.
- Temper Egg Yolks: In a separate bowl, lightly whisk the egg yolks. Slowly and gradually pour a small amount of the hot cream mixture into the egg yolks while continuously whisking. This “tempers” the eggs, preventing them from scrambling. Continue adding the hot cream mixture a little at a time until everything is thoroughly combined.
- Dissolve Gelatin: Stir the bloomed gelatin mixture into the warm pudding mixture. Whisk well until the gelatin is completely dissolved and the mixture is smooth.
- Cool & Chill: Let the pudding cool for about 10 minutes, allowing it to become lukewarm so it won’t melt plastic wrap. Whisk it again to remove any film that might have formed on top. Then, press plastic wrap directly onto the surface of the pudding to prevent a skin from forming. Refrigerate for at least 4 hours, or until fully firm and set.
- Whip Before Serving: Once the pudding is chilled and firm, give it a good stir or whip it with a hand mixer for a minute or two. This makes it wonderfully light and silky smooth before serving.
Creative Ways to Present and Serve Your Creamy Sugar-Free Vanilla Pudding
Once your delectable Creamy Sugar-Free Vanilla Pudding is perfectly chilled and whipped, it’s time to show it off! Here are a few delightful serving suggestions to elevate your dessert experience:
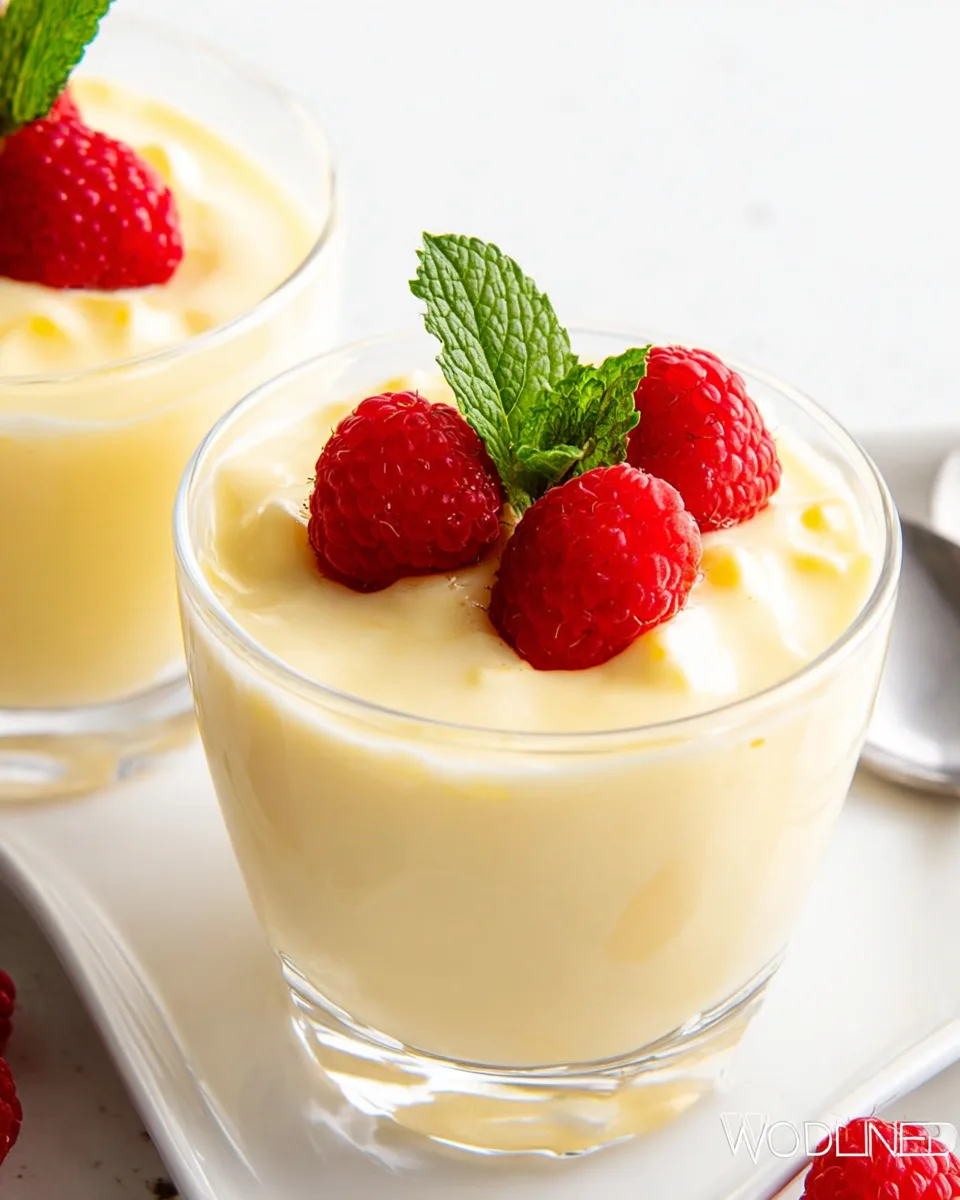
- Classic Individual Servings: Simply spoon the whipped pudding into elegant ramekins, small glass bowls, or pretty dessert cups. A simple garnish of a fresh berry or a mint leaf is all it needs.
- Berry Parfait Perfection: Layer your vanilla pudding with fresh, sugar-free berries (like raspberries, blueberries, or sliced strawberries) and perhaps a sprinkle of crushed sugar-free nuts or toasted coconut flakes for a beautiful and delicious parfait.
- Chocolate Swirl Dream: Gently melt a square of sugar-free dark chocolate and drizzle it into the pudding just before serving, creating beautiful swirls with a toothpick for an extra touch of decadence.
- Lemon Zest Brightness: For a zesty twist, grate a little fresh lemon zest over the top of your pudding. The bright citrus notes beautifully complement the creamy vanilla.
- Coffee Lover’s Treat: Dust with a tiny bit of unsweetened cocoa powder or instant espresso powder for a sophisticated mocha hint.
- As a Pie or Tart Filling: This firm pudding makes an excellent sugar-free base for a no-bake pie or tart. Simply pour it into a pre-made sugar-free crust and chill until set!
Storing Your Creamy Sugar-Free Vanilla Pudding: Longevity & Freshness
One of the best things about this Creamy Sugar-Free Vanilla Pudding is that you can make it ahead of time, making entertaining a breeze! Here’s how to keep it fresh and delicious:
- Storage Container: Transfer any leftover pudding into an airtight container.
- Preventing a Skin: The key to fresh pudding is to prevent a “skin” from forming. Press a piece of plastic wrap directly onto the surface of the pudding before sealing the container.
- Refrigeration: Store the pudding in the refrigerator.
- Shelf Life: Your homemade Creamy Sugar-Free Vanilla Pudding will stay wonderfully fresh and delicious for 3 to 4 days when properly stored in the fridge.
- Before Serving: If you’ve stored it for a day or two, give it a quick whisk or use a hand mixer for about a minute before serving to restore its silky-smooth, airy texture.
FAQs About Your Creamy Sugar-Free Vanilla Pudding
Got questions? We’ve got answers to help you perfect this delightful sugar-free treat!
- Q1: Can I make this Creamy Sugar-Free Vanilla Pudding dairy-free?
- Absolutely! The recipe specifically notes that you can use full-fat canned coconut milk instead of heavy whipping cream for a delicious dairy-free version. Ensure it’s full-fat for the best creamy texture.
- Q2: What kind of sugar-free vanilla syrup should I use?
- Any sugar-free vanilla syrup you enjoy will work! Brands like Torani, DaVinci, or Jordan’s Skinny Syrups are popular choices. Just ensure it’s specifically labeled “sugar-free” and you like its taste.
- Q3: Why do I need to temper the egg yolks?
- Tempering is crucial! It slowly brings the temperature of the egg yolks up by gradually adding hot cream, preventing them from scrambling when mixed into the main hot pudding base. This ensures a smooth, custard-like texture.
- Q4: What if my pudding doesn’t set properly?
- This can happen if the gelatin wasn’t properly bloomed, thoroughly dissolved, or if the pudding wasn’t chilled long enough. Ensure you whisk the bloomed gelatin into a sufficiently warm (but not boiling) mixture until completely dissolved, and always allow at least 4 hours of chilling time.
- Q5: Can I use a different sugar-free sweetener instead of syrup?
- You could experiment with powdered erythritol or monk fruit sweetener, but you might need to adjust the liquid content slightly as syrup adds volume. Stick to the syrup for best results as per the recipe.
- Q6: Can I add other flavors to this vanilla pudding?
- Definitely! This is a fantastic base. Consider adding a teaspoon of unsweetened cocoa powder for chocolate pudding, or different sugar-free extracts like almond or peppermint for a flavor variation.
- Q7: Is this recipe keto-friendly?
- Yes, it is! With its low net carb count (2.9g per serving) and high fat content from the heavy cream, this Creamy Sugar-Free Vanilla Pudding is an excellent choice for a keto diet.
- Q8: Can I freeze this pudding?
- Freezing is generally not recommended for this type of pudding. The gelatin and cream can separate upon thawing, leading to a grainy or watery texture. It’s best enjoyed fresh from the fridge.
- Q9: Why whip the pudding before serving?
- While optional, whipping the chilled and set pudding with a hand mixer (or vigorous hand whisking) incorporates a bit of air, transforming it into an even lighter, silkier, and incredibly smooth dessert. It takes it from good to absolutely divine!
- Q10: What’s the difference between heavy cream and heavy whipping cream?
- For this recipe, “heavy whipping cream” and “heavy cream” are generally interchangeable as they both contain at least 36% milk fat, which is essential for the rich, creamy texture and proper setting of the pudding. Regular whipping cream (light whipping cream) has a lower fat content and might result in a less firm or less rich pudding.
Creamy Sugar-Free Vanilla Pudding 🍮
Ingredients
- 1 2/3 cups heavy whipping cream (or full-fat canned coconut milk for dairy-free), divided (1/3 cup + 1 1/3 cups)
- 1/3 cup sugar-free vanilla syrup
- 2 large egg yolks
- 2 1/2 teaspoons unflavored gelatin powder
- 1/4 teaspoon sea salt
Instructions
- Combine 1/3 cup of heavy whipping cream and gelatin powder in a small bowl, whisking immediately until combined. Set aside to thicken for a few minutes.
- In a medium saucepan, combine the remaining 1 1/3 cups of heavy whipping cream, sugar-free vanilla syrup, and sea salt. Heat over medium-low heat, whisking constantly for about 5 minutes, until smooth and just beginning to bubble gently around the edges. Avoid a rolling boil.
- In a separate bowl, lightly whisk the egg yolks. Slowly and gradually pour a small amount of the hot cream mixture into the egg yolks while continuously whisking to temper them and prevent scrambling. Continue adding the hot cream mixture until thoroughly combined.
- Stir the bloomed gelatin mixture into the warm pudding mixture. Whisk well until the gelatin is completely dissolved and the mixture is smooth.
- Let the pudding cool for about 10 minutes until lukewarm. Whisk again to remove any film. Press plastic wrap directly onto the surface of the pudding to prevent a skin from forming, then refrigerate for at least 4 hours, or until fully firm and set.
- Once chilled and firm, give the pudding a good stir or whip it with a hand mixer for a minute or two to make it wonderfully light and silky smooth before serving.
Notes
- Calories: 376
- Total Carbs: 3g
- Net Carbs: 2.9g
- Fats: 38.3g
- Protein: 6.2g