Why You’ll Love These Salted Peanut Butter Christmas Trees
Get ready to fall head over heels for the ultimate no-bake holiday treat! Our Salted Peanut Butter Christmas Trees aren’t just delicious; they’re a festive dream come true. Here are four irresistible reasons why they’ll become your new holiday tradition:
- Effortlessly Festive & Fun: Forget the oven! These no-bake beauties come together with minimal fuss, making them perfect for busy holiday schedules and a fantastic activity to do with kids. Their tree shape and vibrant green icing instantly scream “Happy Holidays!”
- The Perfect Sweet & Salty Harmony: This recipe masterfully combines the creamy richness of peanut butter and chocolate with the delightful crunch and salty bite of pretzels. It’s a flavor explosion that hits all the right notes, leaving everyone reaching for more.
- Crowd-Pleasing Perfection: Whether you’re bringing them to a holiday potluck, gifting them to neighbors, or simply enjoying them with your family, these Salted Peanut Butter Christmas Trees are guaranteed to be a hit. They appeal to all ages and dietary preferences (with easy GF and vegan adaptations!).
- Quick to Prepare, Quicker to Disappear: With just 20 minutes of active prep time, you can have these delightful treats chilling in the fridge in no time. The hardest part will be waiting for them to set before they vanish from your platter!
Alright, cookie crew, listen up! The holiday season is here, and with it comes the delightful dilemma of what magical treats to whip up. But fear not, because we’ve got a recipe so enchanting, so ridiculously easy, and so utterly delicious, it’ll make your sleigh bells jingle with joy! Forget slaving over a hot oven; we’re talking about crafting festive, no-bake masterpieces that are as fun to make as they are to devour. Get ready to transform humble ingredients into irresistible Salted Peanut Butter Christmas Trees, complete with a delightful crunch, a dreamy chocolate peanut butter layer, and a whimsical green icing. These aren’t just treats; they’re tiny, edible celebrations waiting to happen. So, grab your apron (or don’t, it’s no-bake!), put on some carols, and let’s make some holiday magic that tastes incredible!
Ingredients You’ll Need for Your Salted Peanut Butter Christmas Trees
Gather your festive arsenal! Here’s everything you’ll need to create these delightful Salted Peanut Butter Christmas Trees:
- 🎄 1/2 cup (100g) packed light brown sugar
- 🌽 1/2 cup (170g) Karo Light Corn Syrup
- 🥜 3/4 cup (190g) creamy peanut butter
- 🥨 1/2 cup (60g) crushed pretzels (use gluten-free for a GF option!)
- 🌾 1 cup (100g) quick oats
- 🥣 2 cups (55g) crispy rice cereal
- 🍫 3/4 cup (130g) semisweet chocolate chips (vegan option available)
- 🌿 1/2 cup (125g) creamy peanut butter (for topping)
- 🍬 1 cup (120g) powdered sugar
- 🥛 1 1/2 tablespoons milk (dairy or plant-based)
- 🟢 1-2 drops green gel food coloring
- ✨ Sprinkles of choice
Detailed Steps: How to Make Your Salted Peanut Butter Christmas Trees
Get ready for a super easy and fun holiday treat! These no-bake Salted Peanut Butter Christmas Trees are simple to make and always a crowd-pleaser.
- Start the Base: In a large bowl, simply combine your crushed pretzels, quick oats, and crispy rice cereal. Give it a quick stir and set it aside.
- Melt the Sweetness: Grab a saucepan and, over medium heat, gently mix the corn syrup and brown sugar. Keep stirring until the mixture begins to bubble, then let it bubble for just about 30 seconds. Take it off the heat and stir in the creamy peanut butter until it’s perfectly smooth.
- Combine & Press: Pour this warm, peanut buttery goodness over your dry ingredients (cereal, oats, pretzels). Stir really well until everything is evenly coated. Now, firmly press this delicious mixture into an 8×8 square baking dish that’s been lightly greased and lined with parchment paper, making sure to leave some paper hanging over the edges for easy lifting later. Really pack it down into all the corners for a nice, solid base.
- Craft the Chocolate Topping: In a heat-safe bowl, combine your chocolate chips and the second portion of creamy peanut butter. Microwave this for 30 seconds, give it a good stir, then microwave for another 15-30 seconds until it’s completely smooth and glossy. Stir out any tiny lumps.
- Layer and Chill: Pour the melted chocolate topping evenly over the peanut butter base. Gently shake and tap the pan a few times to ensure a perfectly smooth surface. Pop the pan into the refrigerator for 30 minutes to 1 hour to let everything set firmly. If you’re in a hurry, freezing for 20-30 minutes works wonders, but just know it’ll be quite firm when you go to slice it.
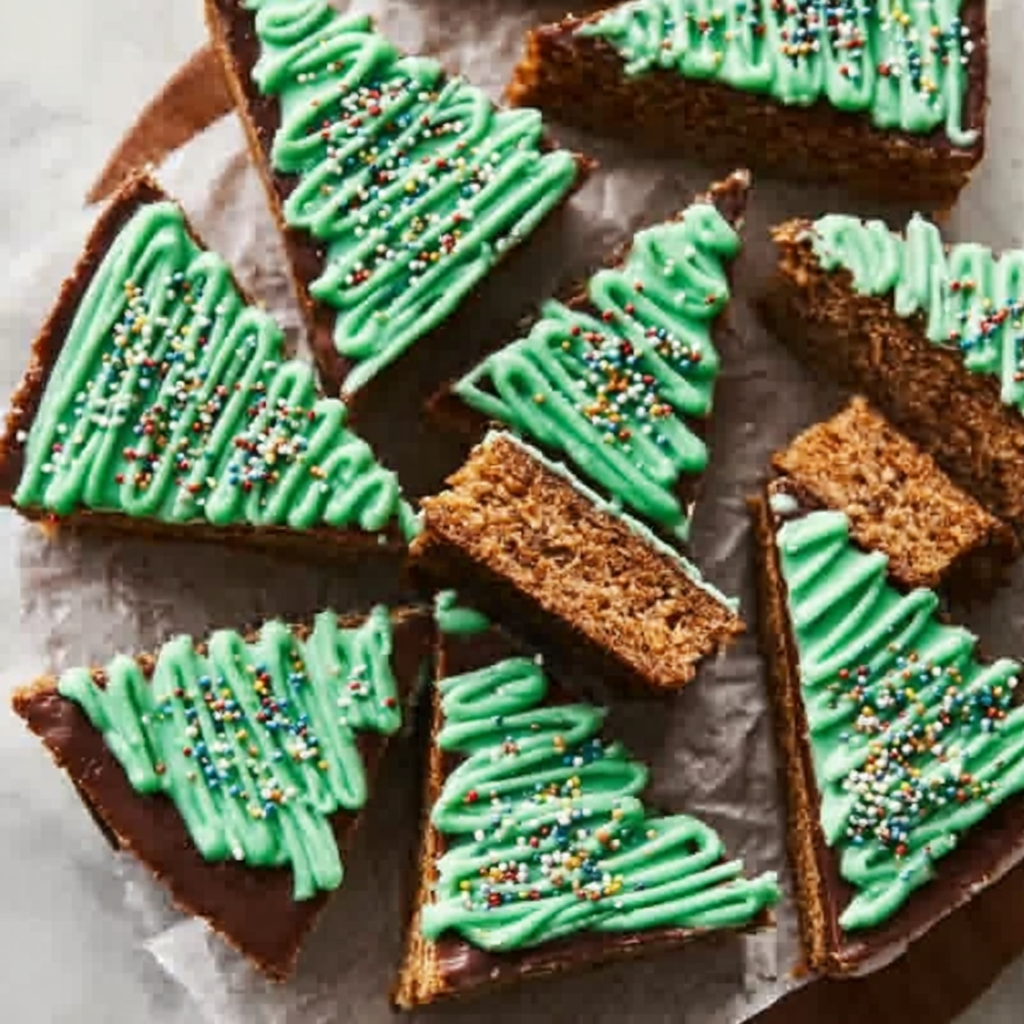
- Slice into Trees: Once firm, use the parchment paper overhangs to lift the entire slab out of the pan and place it onto a cutting board. Carefully make one long cut right down the middle, then slice each half into 5 triangles to create your festive Christmas tree shapes. Don’t worry about the corner pieces – those are your chef’s samples!
- Decorate with Ease: For the simple icing, whisk together the powdered sugar and milk until it’s the consistency of thick glue. Add 1-2 drops of green gel food coloring for that vibrant tree color. If it’s too thick, add milk a teaspoon at a time until you get the perfect consistency.
- Piping Fun: Transfer the green icing to a piping bag (or a ziplock bag with a tiny corner snipped off). Pipe zigzag lines onto each Salted Peanut Butter Christmas Tree, then sprinkle generously with your favorite festive sprinkles for a truly personalized touch. Enjoy your easy, homemade holiday masterpiece!
Presenting & Serving Your Salted Peanut Butter Christmas Trees
Once you’ve crafted these delightful Salted Peanut Butter Christmas Trees, it’s time to show them off! Their festive shape and vibrant colors make them natural showstoppers, but here are a few ways to elevate their presentation and serving:
- Platter Perfection: Arrange your finished trees on a large holiday platter, perhaps interspersed with other festive treats like gingerbread cookies or candy canes. A dusting of powdered sugar over the platter can mimic snow!
- Individual Masterpieces: For a more elegant touch, serve each tree on a small dessert plate. You could add a tiny drizzle of extra melted chocolate or a dollop of whipped cream on the side.
- Gift-Giving Gold: These treats make fantastic homemade gifts! Stack a few Salted Peanut Butter Christmas Trees in clear cellophane bags, tie with a festive ribbon, and gift them to neighbors, teachers, or friends.
- Creative Decorating:
- Trunk Time: Before the chocolate layer sets completely, press a small pretzel stick into the base of each tree shape for an instant “trunk.”
- Sprinkle Spectacle: Experiment with different types of sprinkles – silver edible glitter for a snowy effect, red and green nonpareils, or even tiny star sprinkles for a tree topper!
- Icing Art: Instead of just zigzags, you could pipe tiny “ornament” dots with different colored icing (red, white, yellow) before adding sprinkles.
- Serving Suggestions:
- Holiday Dessert Table: They are a must-have alongside other sweets.
- Cozy Comfort: Pair them with a warm mug of hot cocoa, spiced cider, or a rich coffee for an afternoon treat.
- Party Favors: Send guests home with a beautifully packaged tree as a sweet memento of your gathering.
Storing Your Salted Peanut Butter Christmas Trees
You’ve put in the effort to create these gorgeous Salted Peanut Butter Christmas Trees, so let’s make sure they stay fresh and delicious for as long as possible!
- Countertop (Short-Term): If you plan to eat them within 1-2 days, and your kitchen is cool (below 70°F/21°C), you can store them in an airtight container at room temperature. However, the chocolate layer might soften a bit.
- Refrigerator (Recommended): For optimal freshness and to keep the chocolate and peanut butter layers firm, store your Salted Peanut Butter Christmas Trees in an airtight container in the refrigerator. This is especially crucial in warmer climates or if your home is on the warmer side.
- How Long Do They Last?
- In the Refrigerator: When stored properly in an airtight container, these treats will stay fresh and delightful for up to 1 week.
- In the Freezer (Long-Term): Yes, these are freezer-friendly! To freeze, place the individual trees on a baking sheet lined with parchment paper and freeze until solid (about 1-2 hours). Once firm, transfer them to a freezer-safe airtight container or a heavy-duty freezer bag, layering them with parchment paper to prevent sticking. They will keep well for up to 1-2 months.
- Thawing Frozen Trees: When you’re ready to enjoy a frozen Salted Peanut Butter Christmas Tree, simply remove it from the freezer and let it thaw in the refrigerator for a few hours, or at room temperature for about 30-60 minutes, until softened to your liking.
Frequently Asked Questions About Salted Peanut Butter Christmas Trees
- Can I make these Salted Peanut Butter Christmas Trees gluten-free?
Absolutely! The recipe already calls for gluten-free crushed pretzels as an option. Just ensure your oats are certified gluten-free and all other ingredients (like crispy rice cereal) are free from gluten.
- Can I use crunchy peanut butter instead of creamy?
While creamy peanut butter is recommended for a smoother base and topping, you can certainly use crunchy peanut butter for an extra textural element. Just be aware it might make the layers slightly less uniform.
- Is Karo Light Corn Syrup essential, or can I substitute it?
Karo Light Corn Syrup is key for achieving the correct texture and chewiness in the base, as it prevents crystallization and acts as a binder. While some substitutes exist, they might alter the final consistency. It’s best to stick to corn syrup for this recipe.
- What if I don’t have quick oats or crispy rice cereal? Can I use other cereals?
Quick oats and crispy rice cereal contribute significantly to the unique texture. You could try other similar cereals, but be aware it might change the density and crunch. Rolled oats might make the base too chewy, and other cereals might not provide the same light crispness.
- How do I get perfectly neat tree shapes when slicing?
The trick is to ensure the base is thoroughly chilled and firm. Use a very sharp knife, and wipe it clean between each cut to prevent sticking and ensure crisp edges. Make one long cut down the middle, then slice each half into triangles.
- Can I make these Salted Peanut Butter Christmas Trees ahead of time for a party?
Yes, absolutely! These are an excellent make-ahead holiday treat. You can prepare them completely, including decorating, up to a few days in advance and store them in the refrigerator until ready to serve.
- What if I want to omit the pretzels?
You can omit the pretzels if you prefer, but you’ll lose the delightful salty crunch that balances the sweetness so well. If you skip them, you might want to add a pinch of sea salt to the base mixture or sprinkle flaky sea salt over the finished chocolate layer.
- My green icing is too thick/thin. How can I fix it?
If your icing is too thick, add milk a tiny bit at a time (1/4 teaspoon) until it reaches the desired piping consistency. If it’s too thin, add more powdered sugar, a tablespoon at a time, until it thickens up.
- Are these Salted Peanut Butter Christmas Trees freezer-friendly?
Yes, they are! You can freeze them for up to 1-2 months. Just ensure they are stored in an airtight freezer-safe container, separated by parchment paper, to prevent them from sticking together.
- Can I use a different type of chocolate for the topping?
Yes! Semisweet chocolate chips provide a classic flavor, but you could experiment with milk chocolate chips for a sweeter topping or even white chocolate chips for a different look and taste. Just ensure to adjust microwave times as needed, as different chocolates melt at varying rates.
Salted Peanut Butter Christmas Trees 🎄
Equipment
- Large Bowl
- Saucepan
- 8×8 square baking dish
- Parchment Paper
- Heat-safe bowl
- Cutting Board
- Piping Bag (or Ziplock Bag)
Ingredients
Base Ingredients
- 1/2 cup packed light brown sugar (100g)
- 1/2 cup Karo Light Corn Syrup (170g)
- 3/4 cup creamy peanut butter (190g)
- 1/2 cup crushed pretzels (60g) (use gluten-free for a GF option!)
- 1 cup quick oats (100g)
- 2 cups crispy rice cereal (55g)
Chocolate Topping
- 3/4 cup semisweet chocolate chips (130g) (vegan option available)
- 1/2 cup creamy peanut butter (125g) (for topping)
Icing & Decoration
- 1 cup powdered sugar (120g)
- 1 1/2 tablespoons milk (dairy or plant-based)
- 1-2 drops green gel food coloring
- sprinkles of choice
Instructions
- Combine your crushed pretzels, quick oats, and crispy rice cereal in a large bowl. Give it a quick stir and set it aside.
- Grab a saucepan and, over medium heat, gently mix the corn syrup and brown sugar. Keep stirring until the mixture begins to bubble, then let it bubble for just about 30 seconds. Take it off the heat and stir in the creamy peanut butter until it’s perfectly smooth.
- Pour this warm, peanut buttery goodness over your dry ingredients (cereal, oats, pretzels). Stir really well until everything is evenly coated. Now, firmly press this delicious mixture into an 8×8 square baking dish that’s been lightly greased and lined with parchment paper, making sure to leave some paper hanging over the edges for easy lifting later. Really pack it down into all the corners for a nice, solid base.
- In a heat-safe bowl, combine your chocolate chips and the second portion of creamy peanut butter. Microwave this for 30 seconds, give it a good stir, then microwave for another 15-30 seconds until it’s completely smooth and glossy. Stir out any tiny lumps.
- Pour the melted chocolate topping evenly over the peanut butter base. Gently shake and tap the pan a few times to ensure a perfectly smooth surface. Pop the pan into the refrigerator for 30 minutes to 1 hour to let everything set firmly. If you’re in a hurry, freezing for 20-30 minutes works wonders, but just know it’ll be quite firm when you go to slice it.
- Once firm, use the parchment paper overhangs to lift the entire slab out of the pan and place it onto a cutting board. Carefully make one long cut right down the middle, then slice each half into 5 triangles to create your festive Christmas tree shapes. Don’t worry about the corner pieces – those are your chef’s samples!
- For the simple icing, whisk together the powdered sugar and milk until it’s the consistency of thick glue. Add 1-2 drops of green gel food coloring for that vibrant tree color. If it’s too thick, add milk a teaspoon at a time until you get the perfect consistency.
- Transfer the green icing to a piping bag (or a ziplock bag with a tiny corner snipped off). Pipe zigzag lines onto each peanut butter Christmas tree, then sprinkle generously with your favorite festive sprinkles for a truly personalized touch. Enjoy your easy, homemade holiday masterpiece!
Notes
- Calories: N/A
- Total Carbs: N/A
- Net Carbs: N/A
- Fats: N/A
- Protein: N/A