Salted Peanut Butter Christmas Trees 🎄
Get ready for a super easy and fun holiday treat! These no-bake Christmas trees are simple to make and always a crowd-pleaser.
Equipment
- Large Bowl
- Saucepan
- 8x8 square baking dish
- Parchment Paper
- Heat-safe bowl
- Cutting Board
- Piping Bag (or Ziplock Bag)
Ingredients
Base Ingredients
- 1/2 cup packed light brown sugar (100g)
- 1/2 cup Karo Light Corn Syrup (170g)
- 3/4 cup creamy peanut butter (190g)
- 1/2 cup crushed pretzels (60g) (use gluten-free for a GF option!)
- 1 cup quick oats (100g)
- 2 cups crispy rice cereal (55g)
Chocolate Topping
- 3/4 cup semisweet chocolate chips (130g) (vegan option available)
- 1/2 cup creamy peanut butter (125g) (for topping)
Icing & Decoration
- 1 cup powdered sugar (120g)
- 1 1/2 tablespoons milk (dairy or plant-based)
- 1-2 drops green gel food coloring
- sprinkles of choice
Instructions
- Combine your crushed pretzels, quick oats, and crispy rice cereal in a large bowl. Give it a quick stir and set it aside.
- Grab a saucepan and, over medium heat, gently mix the corn syrup and brown sugar. Keep stirring until the mixture begins to bubble, then let it bubble for just about 30 seconds. Take it off the heat and stir in the creamy peanut butter until it's perfectly smooth.
- Pour this warm, peanut buttery goodness over your dry ingredients (cereal, oats, pretzels). Stir really well until everything is evenly coated. Now, firmly press this delicious mixture into an 8x8 square baking dish that's been lightly greased and lined with parchment paper, making sure to leave some paper hanging over the edges for easy lifting later. Really pack it down into all the corners for a nice, solid base.
- In a heat-safe bowl, combine your chocolate chips and the second portion of creamy peanut butter. Microwave this for 30 seconds, give it a good stir, then microwave for another 15-30 seconds until it's completely smooth and glossy. Stir out any tiny lumps.
- Pour the melted chocolate topping evenly over the peanut butter base. Gently shake and tap the pan a few times to ensure a perfectly smooth surface. Pop the pan into the refrigerator for 30 minutes to 1 hour to let everything set firmly. If you're in a hurry, freezing for 20-30 minutes works wonders, but just know it'll be quite firm when you go to slice it.
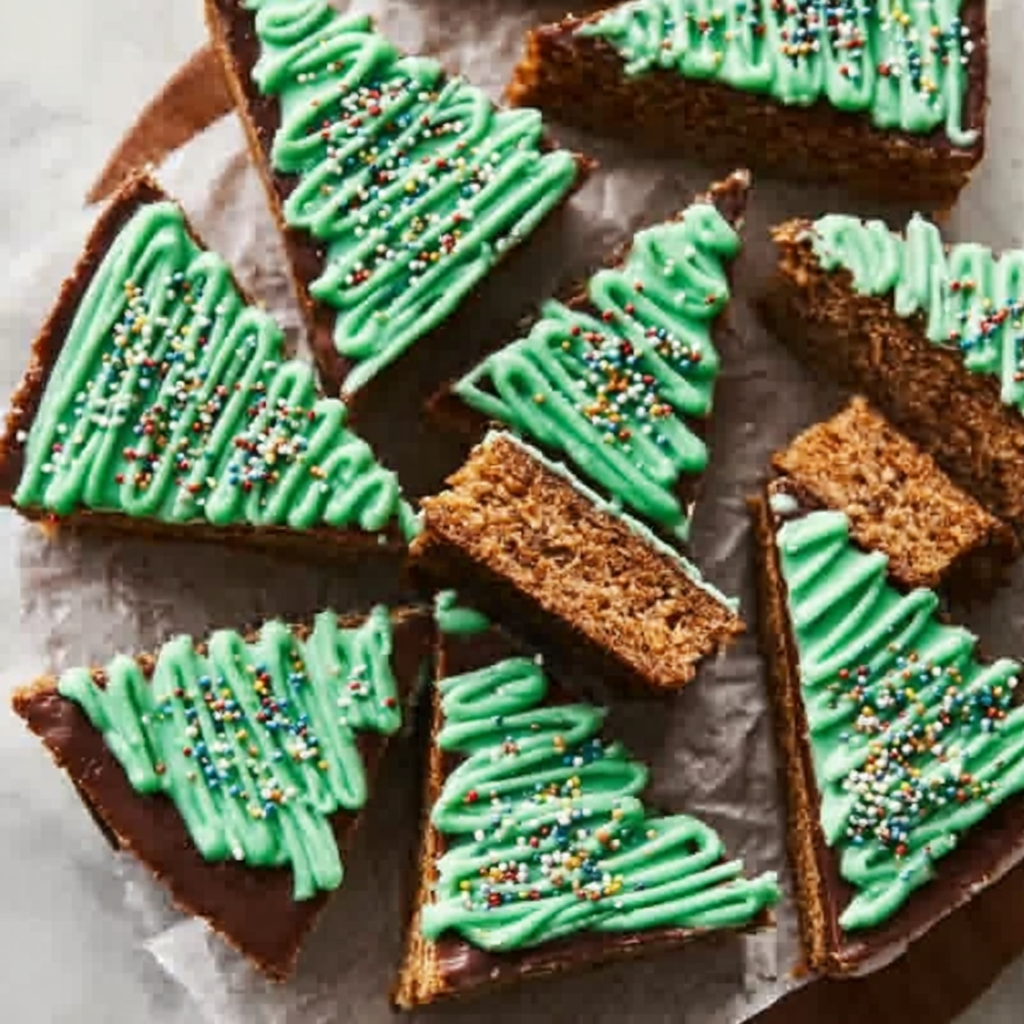
- Once firm, use the parchment paper overhangs to lift the entire slab out of the pan and place it onto a cutting board. Carefully make one long cut right down the middle, then slice each half into 5 triangles to create your festive Christmas tree shapes. Don't worry about the corner pieces – those are your chef's samples!
- For the simple icing, whisk together the powdered sugar and milk until it's the consistency of thick glue. Add 1-2 drops of green gel food coloring for that vibrant tree color. If it's too thick, add milk a teaspoon at a time until you get the perfect consistency.
- Transfer the green icing to a piping bag (or a ziplock bag with a tiny corner snipped off). Pipe zigzag lines onto each peanut butter Christmas tree, then sprinkle generously with your favorite festive sprinkles for a truly personalized touch. Enjoy your easy, homemade holiday masterpiece!
Notes
Enjoy your easy, homemade holiday masterpiece!
Nutrition Information (Estimates):
- Calories: N/A
- Total Carbs: N/A
- Net Carbs: N/A
- Fats: N/A
- Protein: N/A
