Ever found yourself staring longingly at a pie, only to sigh because gluten-free options often mean sacrificing flavor or texture? Or perhaps you’ve tried making your own gluten-free pie crust, only to end up with a crumbly mess or a hockey puck? Well, get ready to toss those frustrations out the window! We’re about to introduce you to the holy grail of pie-making: an unbelievably **Easy Gluten-Free Pie Crust** recipe that delivers on taste, texture, and pure baking joy. Say goodbye to soggy bottoms and hello to perfectly golden, flaky edges that will make you wonder why you ever bothered with traditional crusts. Let’s bake some magic!
Why You’ll Love This Easy Gluten-Free Pie Crust Recipe
This isn’t just another recipe; it’s a game-changer for anyone navigating the delicious world of gluten-free baking. Here are four irresistible reasons why this pie crust will become your new go-to:
- Effortlessly Gluten-Free: Made with wholesome almond and tapioca flours, this crust is naturally gluten-free without needing any funky binders or complicated mixes. It’s perfect for those with celiac disease or gluten sensitivities, allowing everyone to enjoy a slice of pie.
- Quick & Simple Prep: Forget chilling dough for hours or wrestling with rolling pins. This recipe comes together in about 10 minutes of active prep time, making it incredibly convenient for last-minute dessert cravings or busy schedules.
- Perfectly Pliable & Flaky: The unique blend of flours, butter, and egg creates a dough that’s easy to press into your pie pan and bakes up with a delightful texture—tender yet sturdy enough to hold your favorite fillings, with just the right amount of flakiness.
- Versatile for Any Pie: Whether you’re dreaming of a sweet apple pie, a creamy pumpkin tart, or a savory quiche, this **Easy Gluten-Free Pie Crust** can do it all. With simple adjustments, you can tailor it perfectly to complement any filling you desire.
Ingredients for Your Easy Gluten-Free Pie Crust
Gather these simple ingredients, and you’ll be on your way to a perfect pie crust in no time. Precision matters here, so grab your measuring cups and spoons!
- 1 ¾ cups Wholesome Yum Blanched Almond Flour (superfine for best texture)
- ⅓ cup Tapioca flour (also called tapioca starch, helps make the crust pliable)
- 1 tablespoon Wholesome Yum Organic Coconut Flour (balances texture and prevents stickiness)
- ¼ teaspoon Sea salt (use ½ teaspoon for a savory crust)
- 3 tablespoons Unsalted butter (measured solid, then melted; substitute ghee or coconut oil for dairy-free)
- 1 large Egg (whisked; or use about 2 tablespoons additional butter, ghee, or coconut oil if making only a bottom crust)
- 1 tablespoon Wholesome Yum Zero Sugar Honey (optional, for sweet pies; omit for savory)
- ½ teaspoon Vanilla extract (optional, for sweet pies; omit for savory)
Step-by-Step Directions: Crafting Your Easy Gluten-Free Pie Crust
Get ready for a stress-free pie crust experience! Follow these simple steps, and you’ll be a gluten-free pie pro in no time.
- Oven & Pan Prep Party: First things first, get your oven ready! Preheat it to a cozy 350°F (177°C). Grab your trusty 9-inch (23 cm) round pie pan and either line the bottom with a circle of parchment paper or give it a good grease. This ensures your beautiful crust won’t stick around after baking.
- Whisk Those Dry Goodies: In a spacious bowl, combine your almond flour, tapioca flour, coconut flour, and sea salt. Give them a good whisk until they’re perfectly combined. This helps distribute everything evenly for a consistent crust.
- Pour in the Wet Wonders: Now, for the liquid magic! Pour in your melted butter, the whisked egg, and if you’re making a sweet treat, the honey. If vanilla is joining the party, stir it into the melted butter first—it helps it blend in super smoothly.
- Dough Formation Fun: Don’t panic if it looks a bit crumbly at first; that’s totally normal! Keep pressing and stirring with a spoon or get your hands in there. You’ll see it transform into a uniform, cohesive dough with no dry spots. It’s wonderfully forgiving!
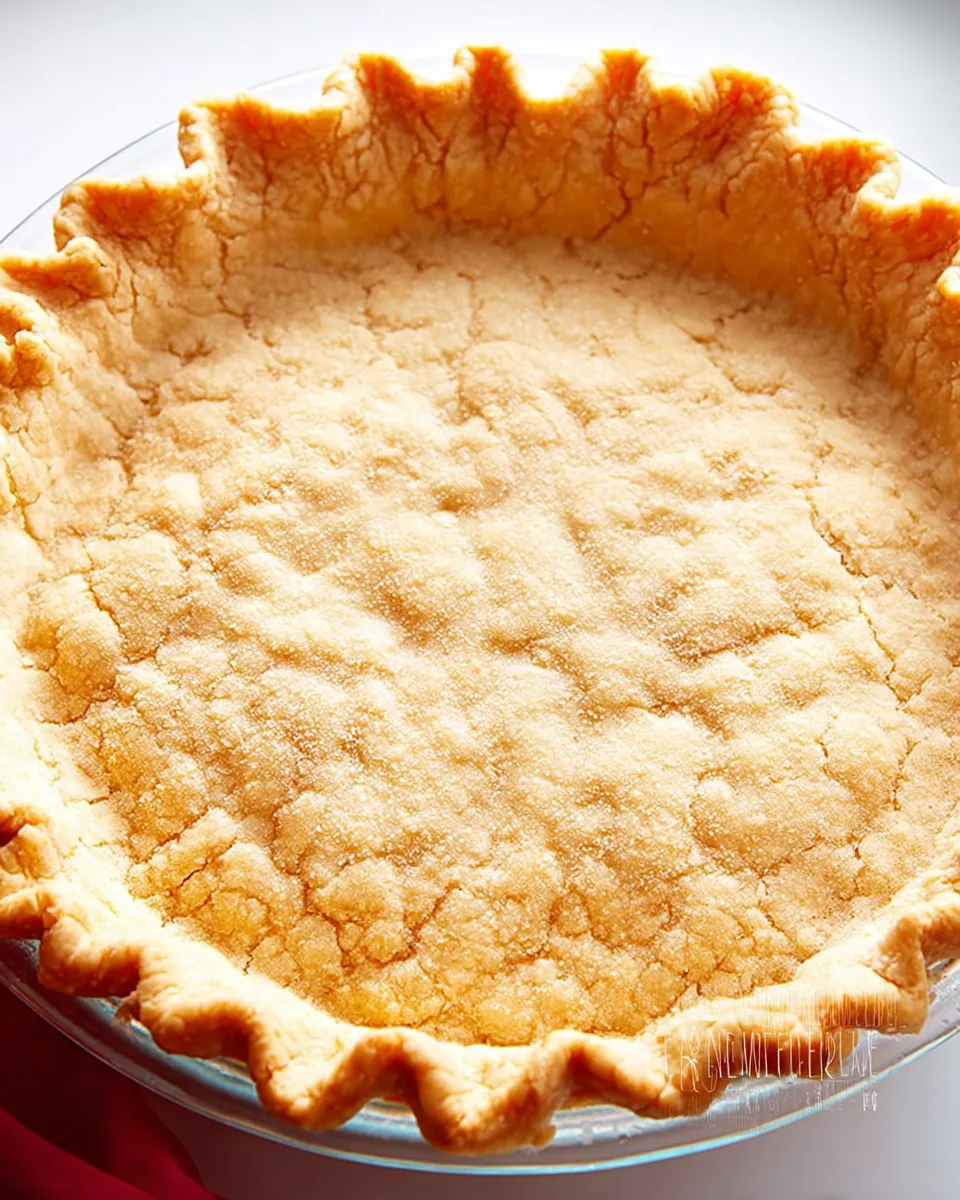
- Shape Your Masterpiece: Time to give your dough its pie pan home. Press it evenly into the bottom and up the sides of your prepared pan. A little trick: flatten it into a disc first, then gently spread it. For an extra touch of elegance, flute the edges with your fingers or a fork—it makes for a truly beautiful finish!
- Ready for Its Close-Up: If your recipe calls for blind baking (partially baking the crust before adding the filling), grab a fork and gently poke a few holes in the bottom. This prevents any unwelcome puffing up during baking.
- To Parbake (Blind Bake): Pop your crust into the preheated oven for 6-10 minutes, or until those edges start looking deliciously golden. Baking times can vary, so keep an eye on it. If your pie will have a second bake with a filling, consider shielding the edges with foil or a pie shield to prevent them from getting too dark and crispy.
- To Bake with Filling: If your crust is going straight into the oven with its filling, start baking at a slightly higher temperature, 400-425°F (204-218°C), for 8-10 minutes. This initial burst of heat helps set the bottom. Then, cover the edges with foil, reduce the oven to 350°F (176°C), and let it finish baking alongside your glorious filling. This clever trick is your secret weapon against a soggy bottom!
Presenting and Serving Your Gluten-Free Pie Masterpiece
This **Easy Gluten-Free Pie Crust** is so versatile, it’s like a blank canvas for your culinary creativity! Here are some delightful ways to present and serve your pie:
- Classic Sweet Pies: Fill it with traditional favorites like apple, cherry, blueberry, or peach. A slice of warm fruit pie with a scoop of vanilla bean ice cream or a dollop of fresh whipped cream is pure bliss.
- Holiday Staples: It’s perfect for pumpkin pie, pecan pie, or sweet potato pie during festive seasons. The sturdy crust holds rich fillings beautifully.
- Cream Pies & Tarts: Chilled fillings like chocolate silk, banana cream, or lemon meringue also shine with this crust. Just be sure to blind bake the crust fully for these no-bake-filling options.
- Savory Sensations: Don’t forget savory! Omit the honey and vanilla, and maybe add an extra pinch of salt to create a fantastic base for quiches, chicken pot pies, or savory vegetable tarts. A quiche fresh from the oven, served with a simple green salad, makes a wonderful brunch or light dinner.
- Mini Pies & Tartlets: For individual portions or party favors, press the dough into muffin tins or mini tart pans. Adjust baking times accordingly. These are adorable and easy to serve!
- Decorative Flair: Even though it’s a press-in crust, you can still get creative! Use small cookie cutters to create decorative shapes from leftover dough to place on top of your filling, or simply perfect that fluted edge.
Storing Your Easy Gluten-Free Pie Crust
Planning ahead or have leftovers? This **Easy Gluten-Free Pie Crust** is happy to wait for you!
- Unbaked Dough:
- Refrigerator: Wrap the dough ball tightly in plastic wrap and store it in the fridge for up to 3-4 days. When ready to use, let it come to room temperature for about 15-20 minutes to make it easier to press into the pan.
- Freezer: Form the dough into a disc, wrap it tightly in plastic wrap, then place it in a freezer-safe bag. It can be frozen for up to 1-2 months. Thaw in the refrigerator overnight before using.
- Unbaked Crust in Pan:
- Freezer: Press the dough into your pie pan, cover it tightly with plastic wrap and then foil, and freeze for up to 1 month. When ready to bake, you can bake it directly from frozen (adding a few extra minutes to the baking time), or thaw it in the fridge first.
- Baked Crust (Empty/Blind Baked):
- Countertop: Once fully cooled, a blind-baked crust can be left on the countertop, loosely covered, for 1-2 days.
- Refrigerator: Store in an airtight container or wrapped in plastic for up to 3-4 days.
- Freezer: Wrap the cooled, baked crust tightly in plastic wrap and then foil, and freeze for up to 1 month. Thaw at room temperature before filling.
- Baked Pie with Filling:
- Storage depends entirely on the filling! Most fruit pies can be stored at room temperature for a day, then refrigerated. Cream pies, quiches, and pies with dairy or eggs should always be refrigerated and typically last 3-5 days.
FAQs About This Easy Gluten-Free Pie Crust
- Can I make this pie crust dairy-free?
Yes! Simply substitute the unsalted butter with an equal amount of ghee or a solid dairy-free butter alternative like coconut oil or a plant-based butter stick. - Is it possible to make this crust egg-free?
For a bottom crust, yes. The recipe suggests using about 2 tablespoons of additional butter, ghee, or coconut oil in place of the egg. The egg helps bind for a flakier texture, so adjusting the fat content helps maintain pliability. - Do I have to blind bake this gluten-free crust?
It depends on your filling! For wet fillings (like pumpkin, quiche, or custard pies) or no-bake fillings (like cream pies), blind baking is highly recommended to prevent a soggy bottom and ensure a crisp crust. For fruit pies with a shorter bake time, you might get away with skipping it, but parbaking still gives the best results. - Why do you use tapioca flour in the recipe?
Tapioca flour (or starch) is crucial here! It helps give the crust pliability, making it much easier to press into the pan without cracking. It also contributes to a slightly chewy, tender texture, which is lovely for a gluten-free crust. - What’s the role of coconut flour?
Coconut flour is a highly absorbent flour that helps balance the texture of the almond flour and prevents the dough from becoming too sticky or greasy. A small amount goes a long way in achieving the perfect consistency. - Can I use a different nut flour instead of blanched almond flour?
Blanched superfine almond flour is highly recommended for the best texture and flavor, as it’s finely ground and low in carbs. Other nut flours (like almond meal) might result in a denser, coarser crust. Substituting with other flours like oat flour would require significant adjustments to the liquid content and binder. - How do I prevent a soggy bottom with this crust?
There are two key tricks! First, parbaking (blind baking) for 6-10 minutes is essential for wet fillings. Second, if baking with a filling, starting at a higher oven temperature (400-425°F) for the first 8-10 minutes helps quickly set the bottom crust before reducing the heat to finish baking the filling. - Is this recipe suitable for a double-crust pie?
While this recipe is designed for a single bottom crust, you could double the ingredients to attempt a top crust. However, almond flour crusts tend to be more delicate than traditional wheat flour crusts, so rolling out a top crust or lattice might be challenging. A crumble topping or decorative cut-outs might be an easier option for the top. - What if my dough is too crumbly and won’t come together?
Keep pressing and kneading it in the bowl! The warmth of your hands helps to melt the butter slightly and bring the dough together. If it’s still extremely dry after a few minutes of pressing, you can add a tiny bit (½ to 1 teaspoon) of very cold water or melted butter/ghee until it just barely holds together. - Can I use this crust for savory pies?
Absolutely! Simply omit the Wholesome Yum Zero Sugar Honey and vanilla extract. You might also want to increase the sea salt from ¼ teaspoon to ½ teaspoon to enhance the savory flavors of your filling. It makes a fantastic quiche base!
Easy Gluten-Free Pie Crust
Equipment
- 9-inch (23 cm) round pie pan
Ingredients
- 1 ¾ cups Wholesome Yum Blanched Almond Flour (superfine for best texture)
- ⅓ cup Tapioca flour (also called tapioca starch, helps make the crust pliable)
- 1 tablespoon Wholesome Yum Organic Coconut Flour (balances texture and prevents stickiness)
- ¼ teaspoon Sea salt (use ½ teaspoon for a savory crust)
- 3 tablespoons Unsalted butter (measured solid, then melted; substitute ghee or coconut oil for dairy-free)
- 1 large Egg (whisked; or use about 2 tablespoons additional butter, ghee, or coconut oil if making only a bottom crust)
- 1 tablespoon Wholesome Yum Zero Sugar Honey (optional, for sweet pies; omit for savory)
- ½ teaspoon Vanilla extract (optional, for sweet pies; omit for savory)
Instructions
- Prep Your Oven & Pan: Preheat your oven to 350°F (177°C). Get a 9-inch (23 cm) round pie pan ready by lining the bottom with parchment paper or greasing it well.
- Mix Dry Goodies: In a large bowl, whisk together the almond flour, tapioca flour, coconut flour, and sea salt until they're well combined.
- Add Wet Wonders: Stir in the melted butter, whisked egg, and honey (if you're making a sweet crust). If you're adding vanilla, mix it into the melted butter first for a smoother blend.
- Form the Dough: The mixture will look a bit crumbly at first, but don't worry! Just keep pressing and stirring with a spoon or your hands until it comes together to form a uniform dough without any dry spots.
- Shape Your Crust: Press the dough evenly into the bottom and up the sides of your prepared pie pan. You can flatten it into a disc first, then gently spread it. Feel free to flute the edges for a beautiful finish!
- Ready for Baking: If you plan to "blind bake" (partially bake the crust before adding a filling), gently poke a few holes in the bottom with a fork to prevent it from puffing up during baking.
- To Parbake (Blind Bake): Bake the crust for 6-10 minutes, or until the edges look lightly golden. Baking time can vary slightly depending on your pan. If your pie will be baked again with a filling, shield the edges with foil or a pie shield to prevent them from getting too dark.
- To Bake with Filling: If you're baking the crust directly with a filling, start by baking at 400-425°F (204-218°C) for 8-10 minutes. Then, cover the edges with foil and reduce the oven temperature to 350°F (176°C) to finish baking the filling. This trick helps prevent a soggy bottom!
Notes
- Calories: 140
- Total Carbs: 7.3g
- Net Carbs: 5.4g
- Fats: 11.5g
- Protein: 4.1g