Get ready to embark on a sweet adventure that culminates in the most show-stopping, yet incredibly simple, dessert you’ll ever bake! Imagine a golden, fluffy cake embraced by a waterfall of rich, buttery caramel. Sounds like a dream, right? Well, with our recipe for Easy Homemade Caramel Cake, that dream is about to become your delicious reality. Forget complicated techniques and endless hours; this recipe delivers maximum flavor with surprising ease, proving that homemade perfection is truly within reach.
Why You’ll Love This Recipe
This isn’t just any cake; it’s *the* cake that will make you fall in love with baking all over again. Here are four irresistible reasons why our Easy Homemade Caramel Cake will become your new go-to:
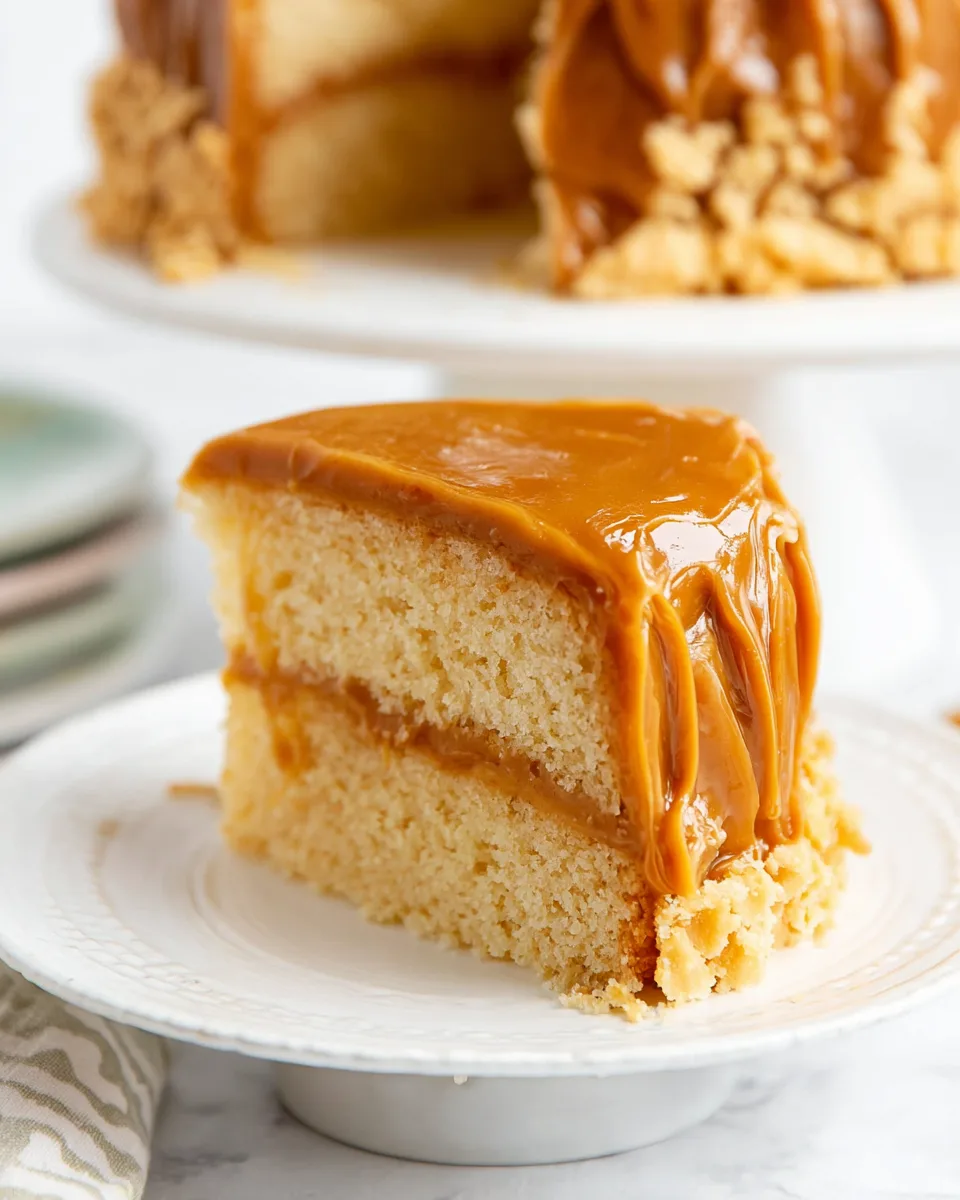
- Unforgettable Flavor & Texture: Experience the perfect harmony of a melt-in-your-mouth moist yellow cake contrasting beautifully with a luscious, deep-caramel frosting that’s sweet, buttery, and utterly divine. Each bite is a symphony of textures and tastes.
- Surprisingly Simple to Master: Don’t let the decadent appearance fool you! We’ve broken down every step to ensure that even novice bakers can achieve a stunning result. The “easy” in Easy Homemade Caramel Cake isn’t just a suggestion, it’s a promise.
- A Showstopper for Any Occasion: Whether it’s a birthday, a holiday gathering, or just a treat-yourself Tuesday, this caramel cake is guaranteed to impress. It looks elegant, tastes incredible, and always elicits oohs and aahs from delighted guests.
- The Joy of Homemade: There’s unparalleled satisfaction in baking something from scratch. This recipe allows you to create a truly special dessert with wholesome ingredients, filling your home with the comforting aroma of baking and fresh caramel.
Ingredients for Your Easy Homemade Caramel Cake
Gather your baking essentials! Here’s what you’ll need to create this magnificent Easy Homemade Caramel Cake:
For the Moist Yellow Cake:
- 🧈 1 cup salted butter, softened
- 🍚 2 ½ cups granulated sugar
- 🥚 4 large eggs, at room temperature
- ✨ 2 teaspoons vanilla extract
- 🌾 3 cups all-purpose flour (or 3 ¼ cups cake flour for a lighter texture)
- 🥄 1 Tablespoon baking powder
- 🧂 ½ teaspoon salt
- 🍦 1 cup sour cream, at room temperature
- 🥛 ¼ cup whole milk, at room temperature
For the Luscious Caramel Frosting:
- 🧈 1 cup salted butter, cubed
- 🍚 3 ¾ cups granulated sugar
- 🥛 2 (12-ounce) cans evaporated milk
- ✨ 2 teaspoons vanilla extract
Detailed Directions to Bake Your Easy Homemade Caramel Cake
Let’s get baking! Follow these simple steps to bring your Easy Homemade Caramel Cake to life:
- Get Ready to Bake: Preheat your oven to 350°F (175°C). Lightly grease two 9-inch round cake pans and line their bottoms with parchment paper circles. This simple trick ensures your cakes release perfectly!
- Cream the Goodness: In a large mixing bowl, beat the softened butter and granulated sugar together for 2-3 minutes until the mixture looks wonderfully light and fluffy. Now, beat in the eggs one at a time, followed by the vanilla extract, until everything is smoothly combined.
- Mix Wet & Dry Smartly: In a separate bowl, quickly whisk together the flour, baking powder, and salt. Gently add about half of this dry mixture to your wet butter-sugar mixture, mixing on low speed just until it starts to come together. Then, add half of the sour cream and milk, mixing briefly until incorporated. Repeat with the remaining dry ingredients, then the rest of the sour cream and milk. Remember to scrape down the sides of the bowl to ensure an even batter, but be careful not to overmix!
- Bake to Golden Perfection: Divide your perfectly mixed cake batter evenly between the two prepared pans. Bake for 30 to 35 minutes. You’ll know they’re ready when a toothpick inserted into the center of a cake layer comes out clean. Don’t overbake, as this helps keep your cake deliciously moist.
- Cool Your Layers: Let the baked cake layers cool in their pans for about 10 minutes. After that, carefully invert them onto a wire rack to cool completely. If your cake tops aren’t perfectly flat, you can gently level them with a serrated knife once fully cooled.
- Start the Caramel Magic: In a large saucepan or Dutch oven, combine the cubed butter, granulated sugar, and evaporated milk. Cook this mixture over medium heat, stirring until the butter has fully melted and everything is well combined.
- Slow Caramelization: Reduce the heat to medium-low. This is where the magic happens! Continue to cook the mixture for about 1.5 to 2 hours, stirring occasionally to prevent burning. Use a candy thermometer clipped to the side of the pan to reach 240°F (the soft-ball stage). This patient cooking process builds that incredible, deep caramel flavor and beautiful color.
- Perfect the Frosting: Once the thermometer hits 240°F, remove the pan from the heat and stir in the vanilla extract. Allow the caramel frosting to cool for about 20 to 25 minutes – it will naturally thicken. For an extra smooth and spreadable consistency, you can beat the cooled icing vigorously with a sturdy wooden spoon or in a stand mixer (with a paddle attachment) for another 20-25 minutes until it’s glossy and thick. If it gets too thick, a tiny splash of milk will help loosen it up.
- Assemble Your Masterpiece: Place one cooled cake layer on your serving plate or cake stand. Spoon a generous amount of your homemade caramel frosting over the top and spread it out evenly. Gently place the second cake layer on top. Pour the remaining luscious frosting over the entire cake, letting it beautifully cascade down the sides. Use a knife to spread it around the sides with rustic, elegant swooshes.
- Chill and Enjoy: For the best presentation and to help the frosting set, refrigerate your finished cake for 30 to 60 minutes. Then, slice into this delightful homemade treat and savor every moment!
Presenting and Serving Your Easy Homemade Caramel Cake
Once you’ve mastered the art of making this Easy Homemade Caramel Cake, it’s time to show it off! Here are some delightful ways to present and serve your creation:
- Classic Elegance: The simple cascade of frosting down the sides of your two-layer cake is already stunning. For a touch of rustic charm, use the back of a spoon to create gentle swirls in the frosting on top and sides.
- A Sprinkle of Salt: Just before serving, a delicate sprinkle of flaky sea salt over the top of the cake will truly elevate the caramel flavor, creating that irresistible sweet and salty contrast.
- Nutty Crunch: Lightly toast some chopped pecans or walnuts and sprinkle them around the base or on top of the cake for added texture and a complementary flavor.
- Dessert Platter Star: Serve individual slices alongside a scoop of premium vanilla bean ice cream or a dollop of fresh whipped cream. The coolness of the ice cream beautifully balances the rich caramel.
- Coffee Companion: This rich cake pairs wonderfully with a freshly brewed cup of coffee, an espresso, or a glass of cold milk. Perfect for an afternoon treat or after-dinner indulgence.
- Clean Slices: For picture-perfect slices, use a sharp, thin knife dipped in hot water and wiped clean between each cut. This prevents sticking and keeps your slices neat.
Storing Your Easy Homemade Caramel Cake
Want to savor your Easy Homemade Caramel Cake for a little longer? Here’s how to keep it fresh and delicious:
- Countertop Storage: If consumed within 1-2 days, you can store the cake at room temperature in an airtight cake dome or container. This helps keep the cake moist and the frosting soft.
- Refrigeration for Longevity: For longer storage, refrigerate the cake in an airtight container. The frosting will firm up in the fridge, making it easy to slice. Simply let it come to room temperature for about 30 minutes before serving for the best texture. It will last up to 5-7 days in the refrigerator.
- Freezing for Future Cravings: You can freeze individual slices or whole layers. Wrap slices tightly in plastic wrap, then aluminum foil, and store in a freezer-safe bag for up to 2-3 months. Thaw in the refrigerator overnight before bringing to room temperature.
FAQs About Your Easy Homemade Caramel Cake
- Can I use unsalted butter for this recipe?
Yes, absolutely! If using unsalted butter for the cake, simply add an extra ¼ teaspoon of salt to the dry ingredients. For the frosting, stick to salted butter for that classic caramel flavor balance, or add a pinch of salt if using unsalted. - What if my caramel frosting is too thick or too thin?
If it’s too thick after cooling and beating, add a tiny splash (¼ to ½ teaspoon at a time) of whole milk and beat until it reaches your desired consistency. If it’s too thin, you might not have cooked it long enough to reach 240°F. You can gently reheat it over low heat, stirring constantly, until it reaches the correct temperature, then cool and beat again. - Can I make the cake layers ahead of time?
Yes! You can bake the cake layers up to 1-2 days in advance. Once completely cooled, wrap them tightly in plastic wrap and store at room temperature. You can even freeze them for up to a month (wrap well in plastic wrap and then foil). Thaw overnight in the fridge before frosting. - Why is my cake dry?
Overmixing the batter or overbaking are the most common culprits. Mix just until combined and keep a close eye on your baking time, checking for doneness with a toothpick. - Can I halve this recipe?
While possible, caramel frosting recipes are sometimes tricky to halve precisely due to the volume needed to reach the correct temperature. It’s often best to make the full frosting recipe, but you could halve the cake batter if you only want a single layer or smaller cake. - What’s the difference between evaporated milk and condensed milk?
Evaporated milk has about 60% of its water removed and is unsweetened. Sweetened condensed milk is also concentrated but has a large amount of sugar added, making it very sweet and thick. This recipe specifically calls for unsweetened evaporated milk, which is crucial for the caramel frosting. - Do I need a candy thermometer for the frosting?
For best results and consistency, yes, a candy thermometer is highly recommended. It ensures you reach the precise “soft-ball stage” (240°F), which is key to the frosting setting up correctly. While experienced candy makers might eyeball it, a thermometer makes this part of the Easy Homemade Caramel Cake truly easy. - Can I use a different size cake pan?
This recipe is for two 9-inch round pans. If using 8-inch pans, you might need to increase the baking time slightly (by 5-10 minutes) as the layers will be thicker. Using a different number of pans (e.g., three 8-inch pans) will also alter baking times significantly. - How do I prevent the caramel from burning?
The key is consistent, occasional stirring, especially as it thickens, and maintaining a medium-low heat. A heavy-bottomed saucepan or Dutch oven helps distribute heat more evenly and reduces hot spots. - Is this recipe really “easy”?
Yes! While the caramel frosting requires patience for cooking time, the steps themselves are straightforward. The cake batter is simple, and the frosting, once cooked, just needs beating. We’ve designed this Easy Homemade Caramel Cake to be approachable for home bakers of all levels, yielding truly impressive results.
Easy Homemade Caramel Cake 🎂
Equipment
- Large mixing bowl
- Whisk
- 9-inch Round Cake Pans (x2)
- Parchment Paper
- Wire Rack
- Large Saucepan or Dutch Oven
- candy thermometer
- Serrated Knife (optional)
- Stand Mixer (optional)
Ingredients
For the Moist Yellow Cake
- 1 cup salted butter softened
- 2 ½ cups granulated sugar
- 4 large eggs at room temperature
- 2 teaspoons vanilla extract
- 3 cups all-purpose flour (or 3 ¼ cups cake flour for a lighter texture)
- 1 Tablespoon baking powder
- ½ teaspoon salt
- 1 cup sour cream at room temperature
- ¼ cup whole milk at room temperature
For the Luscious Caramel Frosting
- 1 cup salted butter cubed
- 3 ¾ cups granulated sugar
- 2 (12-ounce) cans evaporated milk
- 2 teaspoons vanilla extract
Instructions
- 1. Get Ready to Bake: Preheat your oven to 350°F (175°C). Lightly grease two 9-inch round cake pans and line their bottoms with parchment paper circles. This simple trick ensures your cakes release perfectly!
- 2. Cream the Goodness: In a large mixing bowl, beat the softened butter and granulated sugar together for 2-3 minutes until the mixture looks wonderfully light and fluffy. Now, beat in the eggs one at a time, followed by the vanilla extract, until everything is smoothly combined.
- 3. Mix Wet & Dry Smartly: In a separate bowl, quickly whisk together the flour, baking powder, and salt. Gently add about half of this dry mixture to your wet butter-sugar mixture, mixing on low speed just until it starts to come together. Then, add half of the sour cream and milk, mixing briefly until incorporated. Repeat with the remaining dry ingredients, then the rest of the sour cream and milk. Remember to scrape down the sides of the bowl to ensure an even batter, but be careful not to overmix!
- 4. Bake to Golden Perfection: Divide your perfectly mixed cake batter evenly between the two prepared pans. Bake for 30 to 35 minutes. You'll know they're ready when a toothpick inserted into the center of a cake layer comes out clean. Don't overbake, as this helps keep your cake deliciously moist.
- 5. Cool Your Layers: Let the baked cake layers cool in their pans for about 10 minutes. After that, carefully invert them onto a wire rack to cool completely. If your cake tops aren't perfectly flat, you can gently level them with a serrated knife once fully cooled.
- 6. Start the Caramel Magic: In a large saucepan or Dutch oven, combine the cubed butter, granulated sugar, and evaporated milk. Cook this mixture over medium heat, stirring until the butter has fully melted and everything is well combined.
- 7. Slow Caramelization: Reduce the heat to medium-low. This is where the magic happens! Continue to cook the mixture for about 1.5 to 2 hours, stirring occasionally to prevent burning. Use a candy thermometer clipped to the side of the pan to reach 240°F (the soft-ball stage). This patient cooking process builds that incredible, deep caramel flavor and beautiful color.
- 8. Perfect the Frosting: Once the thermometer hits 240°F, remove the pan from the heat and stir in the vanilla extract. Allow the caramel frosting to cool for about 20 to 25 minutes – it will naturally thicken. For an extra smooth and spreadable consistency, you can beat the cooled icing vigorously with a sturdy wooden spoon or in a stand mixer (with a paddle attachment) for another 20-25 minutes until it's glossy and thick. If it gets too thick, a tiny splash of milk will help loosen it up.
- 9. Assemble Your Masterpiece: Place one cooled cake layer on your serving plate or cake stand. Spoon a generous amount of your homemade caramel frosting over the top and spread it out evenly. Gently place the second cake layer on top. Pour the remaining luscious frosting over the entire cake, letting it beautifully cascade down the sides. Use a knife to spread it around the sides with rustic, elegant swooshes.
- 10. Chill and Enjoy: For the best presentation and to help the frosting set, refrigerate your finished cake for 30 to 60 minutes. Then, slice into this delightful homemade treat and savor every moment!