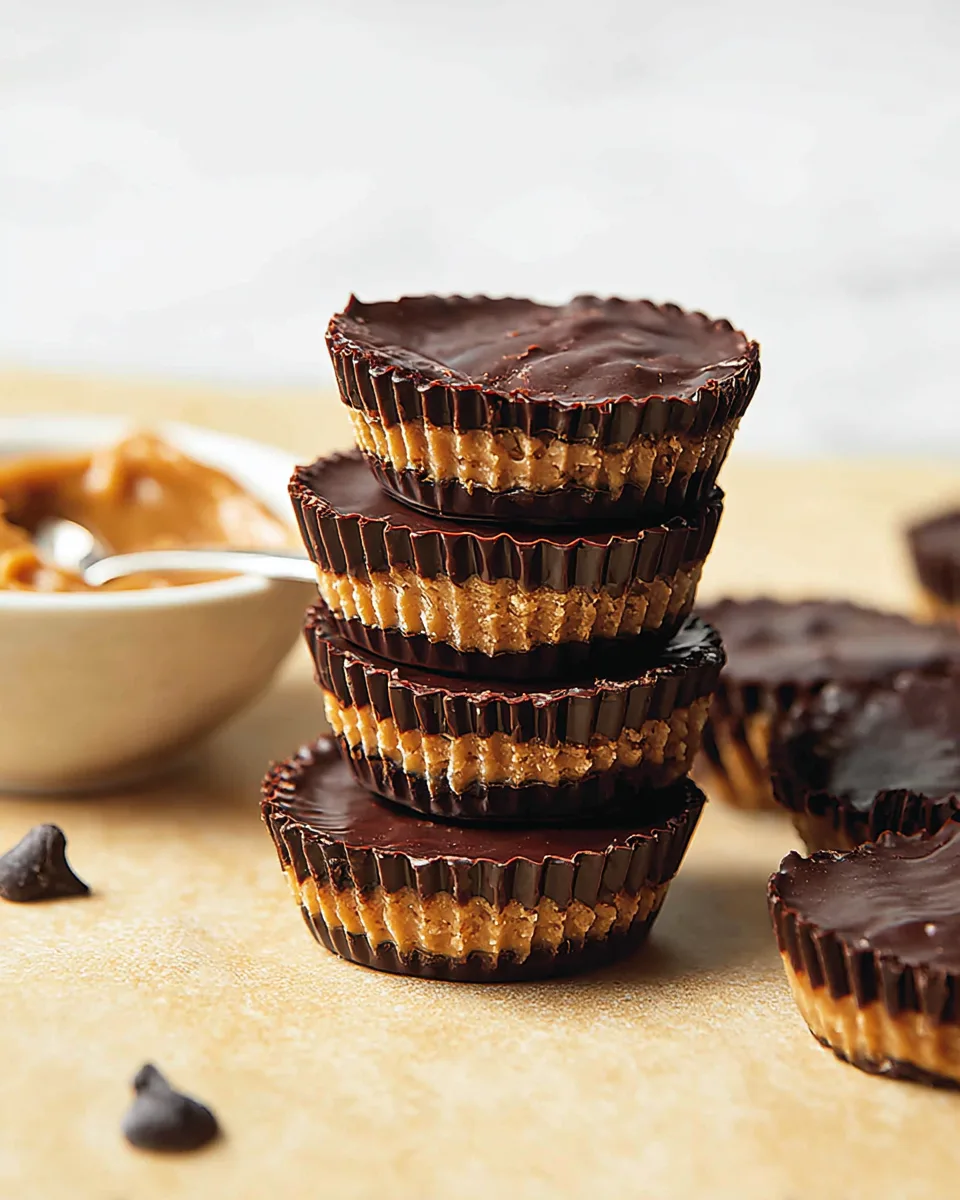
Ever found yourself staring longingly at those classic chocolate and peanut butter treats, wishing you could indulge without breaking your keto goals? Well, get ready to wave goodbye to carb-loaded cravings and say hello to your new best friend! We’re diving into the deliciously easy world of Homemade Keto Peanut Butter Cups. Imagine a rich, creamy peanut butter filling nestled between two layers of smooth, sugar-free chocolate – all crafted in your kitchen with just a handful of ingredients. This isn’t just a recipe; it’s a game-changer for anyone on a low-carb journey who refuses to compromise on taste. Prepare to impress your taste buds and satisfy that sweet tooth, guilt-free!
Why You’ll Love These Homemade Keto Peanut Butter Cups
These aren’t just any treat; they’re a revelation for anyone following a keto lifestyle or simply looking for a healthier alternative to a beloved classic. Here are four fantastic reasons why you’ll be obsessed with these Homemade Keto Peanut Butter Cups:
- Seriously Delicious & Guilt-Free: Indulge in the iconic combination of chocolate and peanut butter without the sugar crash or carb overload. They taste so good, you won’t believe they’re keto-friendly!
- Incredibly Easy to Make: With just three main ingredients and simple melting and mixing steps, even a novice in the kitchen can whip up a batch of these delightful cups in no time.
- Perfect for Meal Prep & Snacking: Make a batch on the weekend, and you’ll have a healthy, satisfying snack ready to grab from the fridge or freezer whenever a craving strikes.
- Customizable to Your Taste: While perfect as is, these cups are a fantastic base for adding your own keto-friendly twists, from a sprinkle of sea salt to a dash of vanilla extract.
Ingredients You’ll Need
Creating these magical Homemade Keto Peanut Butter Cups requires only a few simple, keto-friendly ingredients. Gather these essentials, and you’ll be well on your way to a decadent treat:
- 🥜 ½ cup natural peanut butter (ensure it’s sugar-free, just peanuts and salt)
- ✨ ¼ cup powdered sugar-free sweetener (erythritol, monk fruit, or allulose blends work best)
- 🍫 9 ounces sugar-free chocolate chips (check labels for low net carbs)
Detailed Step-by-Step Directions
Get ready to create your own batch of irresistible Homemade Keto Peanut Butter Cups. Follow these straightforward steps, and you’ll be enjoying your delicious treats in no time!
- Prepare Your Molds: Line a standard 9×13 inch cupcake tin with 12 paper liners. For super easy removal later, give the inside of each liner a light spray with cooking spray.
- Melt the First Chocolate Layer: Place half of your sugar-free chocolate chips (about 4.5 ounces) into a microwave-safe bowl. Microwave for 1 minute, then stir well. If there are still a few solid pieces, microwave for another 30 seconds and stir until mostly smooth. Alternatively, for a silky smooth finish, use a double boiler method.
- Create the Bottom Chocolate Layer: Carefully spoon the melted chocolate evenly among the 12 prepared cupcake liners, creating the foundation for your cups. Place the tin in the refrigerator for about 10 minutes to allow this layer to harden.
- Mix the Peanut Butter Filling: While the chocolate is chilling, combine the natural peanut butter and powdered sugar-free sweetener in a small mixing bowl. If your peanut butter is quite stiff, a quick 30-second warm-up in the microwave can make the mixture easier to stir into a smooth, thick, spreadable paste.
- Add the Peanut Butter Layer: Once the bottom chocolate layer is firm, remove the tin from the fridge. Spoon the delicious peanut butter mixture evenly over the chocolate layer in each cup. Return to the refrigerator for another 10 minutes to allow the peanut butter layer to set slightly.
- Melt the Final Chocolate Layer: Melt the remaining half of your chocolate chips (the other 4.5 ounces) using the same method as before (microwave in short bursts or a double boiler) until smooth.
- Cap Them Off: Take the cups out of the refrigerator and spoon the freshly melted chocolate evenly over the peanut butter layer, creating the perfect chocolate top.
- Final Chill & Enjoy: Chill for a final 10 minutes, or until fully firm. Serve these amazing Homemade Keto Peanut Butter Cups and enjoy your hard work!
Presentation and Serving Suggestions
While the taste of your Homemade Keto Peanut Butter Cups is undeniably the star, a little effort in presentation can elevate them from a simple snack to a truly show-stopping dessert. Here are some fun ways to present and serve your delectable creations:
- A Dash of Drama: Before the final chocolate layer sets, sprinkle a tiny pinch of flaky sea salt on top for a gourmet touch that enhances both flavor and visual appeal.
- Miniature Delights: For bite-sized treats, use mini muffin liners. Adjust chilling times slightly, but the process is the same. Perfect for portion control or a sophisticated dessert platter!
- Creative Toppings: Drizzle with a contrasting sugar-free chocolate sauce (white chocolate works beautifully!), sprinkle with finely chopped keto-friendly nuts, or even a few sugar-free sprinkles for a festive look.
- Gift-Ready Goodness: Arrange a few Homemade Keto Peanut Butter Cups in a decorative box or clear bag tied with a ribbon. They make fantastic homemade gifts for friends and family who appreciate a healthy treat.
- Serve with a Warm Beverage: Pair them with a hot cup of black coffee, unsweetened tea, or a keto hot chocolate for the ultimate cozy indulgence.
- Dessert Platter Star: On a dessert platter, arrange them alongside fresh berries (in moderation for keto) or other small keto-friendly sweets for an impressive spread.
Storage and Shelf Life
Once you’ve made your incredible Homemade Keto Peanut Butter Cups, you’ll want to ensure they stay fresh and delicious for as long as possible. Proper storage is key!
- Refrigerator: Store any leftovers in an airtight container in the refrigerator for up to a week. The cool temperature keeps the chocolate firm and prevents the peanut butter from becoming too soft.
- Freezer: For longer storage, you can freeze your peanut butter cups! Place them in an airtight, freezer-safe container or bag, separating layers with parchment paper if stacking. They will last wonderfully in the freezer for up to 3 months. When you’re ready to enjoy, simply take one out and let it thaw for a few minutes at room temperature, or enjoy it frozen for a different texture experience!
Always ensure they are fully set before transferring them to storage containers to maintain their shape and prevent sticking.
FAQs About Homemade Keto Peanut Butter Cups
- Can I use any peanut butter for these Keto Peanut Butter Cups?
It’s crucial to use natural peanut butter with no added sugar, and ideally, only peanuts and salt as ingredients. Many commercial peanut butters contain added sugars and oils that are not keto-friendly. - What kind of sugar-free sweetener works best?
Powdered erythritol, monk fruit, or allulose blends are recommended. Granulated sweeteners can leave a gritty texture, so powdered is best for a smooth filling. - My chocolate isn’t melting smoothly. What should I do?
If using a microwave, melt in short bursts (30 seconds) and stir well between each. Overheating chocolate can cause it to seize. A double boiler method offers more gentle and consistent heat, resulting in a smoother melt. Adding a tiny bit of coconut oil can sometimes help if it’s very thick. - Why is my peanut butter filling too soft/runny?
This usually happens if your natural peanut butter is very oily or if the mixture was warmed too much. Make sure to drain off any excess oil from your natural peanut butter if it has separated. If it’s too soft after mixing, you can try chilling the mixture for a few minutes before spooning it into the cups. - Can I make these dairy-free?
Yes! Simply ensure your sugar-free chocolate chips are dairy-free. Many brands offer dark chocolate or specific dairy-free sugar-free options. - What if I don’t have a 9×13 inch cupcake tin? Can I use a different size?
Absolutely! You can use a mini muffin tin for smaller bites (yields more servings) or even silicone molds for fun shapes. Just adjust the amount of chocolate and peanut butter per mold accordingly. - Can I add other flavorings to the peanut butter layer?
Definitely! A tiny dash of vanilla extract or a pinch of cinnamon can add a lovely dimension to the peanut butter filling. Just a small amount is needed. - How long do these take to set completely?
The recipe suggests 10 minutes per layer, but total setting time can vary based on your refrigerator’s temperature and the thickness of your layers. Generally, 30-45 minutes total chilling time should be sufficient for them to be firm. - Are these good for meal prepping?
Yes, they are excellent for meal prepping! Make a larger batch and store them in the fridge or freezer for quick, guilt-free access to a sweet treat whenever you need one. - How do I get them out of the paper liners easily?
Lightly spraying the paper liners with cooking spray before adding the chocolate is key! Once firm, the cups should peel away from the liners with ease. If they’re a bit stubborn, let them sit at room temperature for a minute or two.
Homemade Keto Peanut Butter Cups
Equipment
- Standard 9x13 inch cupcake tin
- Paper Liners
- Microwave-safe Bowl
- Small Mixing Bowl
Ingredients
- 0.5 cup natural peanut butter
- 0.25 cup powdered sugar-free sweetener
- 9 ounces sugar-free chocolate chips
Instructions
- Line a standard 9x13 inch cupcake tin with 12 paper liners. For easy removal, lightly spray the inside of each liner with cooking spray.
- Place half of your sugar-free chocolate chips (about 4.5 ounces) into a microwave-safe bowl. Melt them by microwaving for 1 minute, then stir well. If there are still a few solid pieces, microwave for another 30 seconds and stir until mostly smooth. Alternatively, use a double boiler method for melting.
- Carefully spoon the melted chocolate evenly among the 12 prepared cupcake liners, creating the bottom layer. Place the tin in the refrigerator for about 10 minutes to allow the chocolate to harden.
- While the chocolate chills, combine the natural peanut butter and powdered sugar-free sweetener in a small mixing bowl. If your peanut butter is very stiff, you can warm the mixture in the microwave for about 30 seconds to make it easier to stir into a smooth, thick paste.
- Once the chocolate layer is firm, remove the tin from the fridge. Spoon the peanut butter mixture evenly over the chocolate layer in each cup. Return to the refrigerator for another 10 minutes to set.
- Melt the remaining half of your chocolate chips using the same method as before (microwave or double boiler).
- Take the cups out of the refrigerator and spoon the freshly melted chocolate evenly over the peanut butter layer, creating the top.
- Chill for a final 10 minutes, or until fully firm. Serve and enjoy! Store any leftovers in the refrigerator for up to a week, or in the freezer for up to 3 months.
Notes
- Calories: 152 kcal
- Total Carbs: 4g
- Net Carbs: 3g
- Fats: 12g
- Protein: 4g