Summer days are calling, and with them, the craving for something sweet, simple, and utterly spectacular! Forget turning on that oven and sweating it out in the kitchen. We’re here to introduce you to your new warm-weather best friend: the Easy No-Bake Berry Flag Cheesecake! Imagine soft, pillowy sweet rolls forming the perfect base for a luscious, creamy cheesecake filling, generously studded with fresh strawberries, and topped with a cloud of whipped cream, all adorned with a vibrant flag of berries. It’s a dessert that screams celebration, sunshine, and pure joy – and the best part? It comes together in a flash, leaving you more time to enjoy the good times. Get ready to impress with minimal effort!
Why You’ll Love This Easy No-Bake Berry Flag Cheesecake!
This isn’t just a dessert; it’s a statement! Here are four fabulous reasons why this Easy No-Bake Berry Flag Cheesecake! will become your go-to treat:
- Effortlessly Easy & No Oven Required: Seriously, “no-bake” is the magic word here! Skip the heat and the hassle of traditional cheesecakes. With only 15 minutes of prep, you’ll have a showstopper dessert ready for chilling. It’s perfect for hot summer days or when you just don’t feel like complicated baking.
- Bursting with Fresh Flavors: Every bite is a delightful symphony! The tang of cream cheese, the sweet hint of vanilla, the juicy pop of fresh strawberries and blueberries, all balanced by the unique sweetness of King’s Hawaiian rolls. It’s a refreshing, light, and incredibly satisfying taste experience.
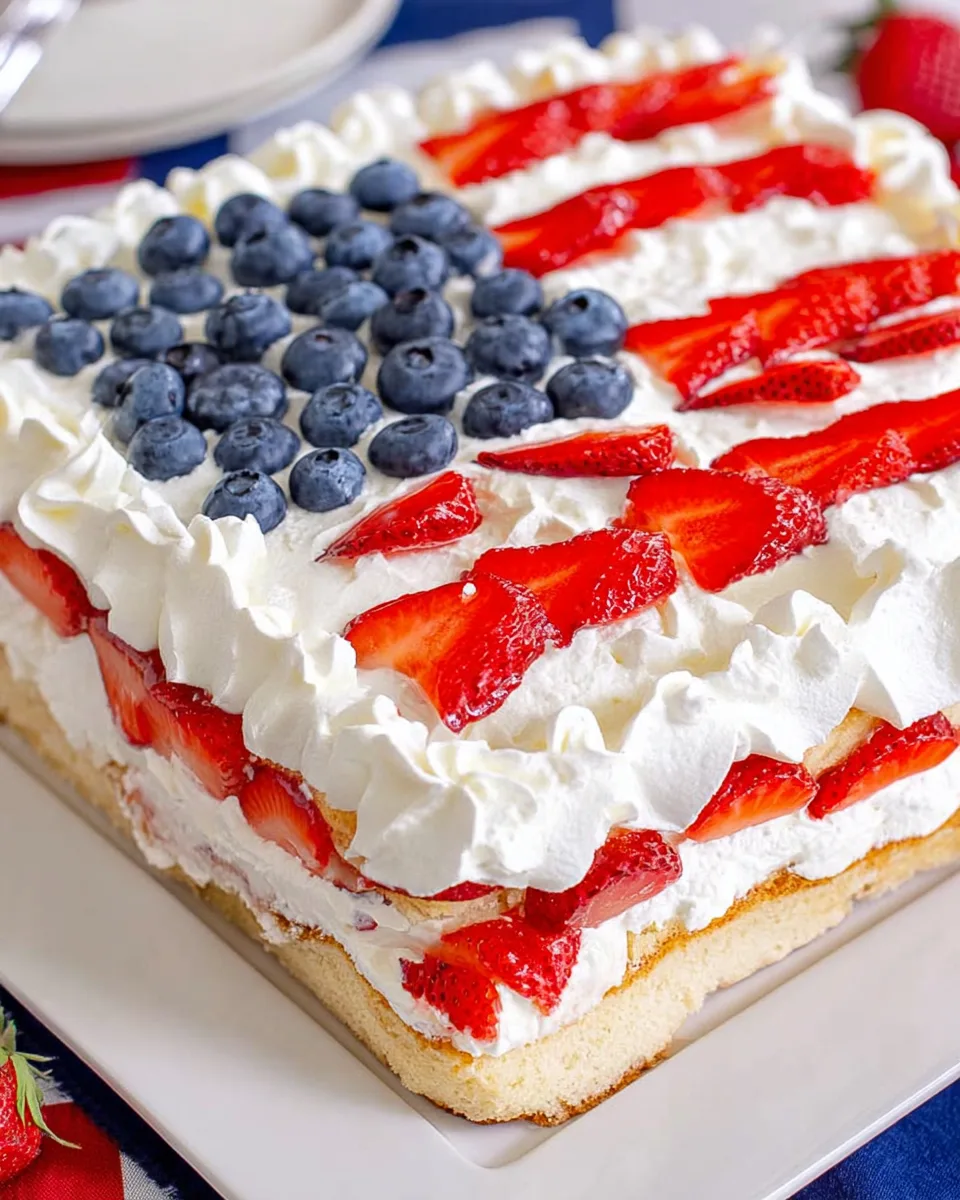
- Picture-Perfect Presentation: Whether you’re aiming for a patriotic masterpiece or just a beautiful scatter of berries, this dessert is visually stunning. The vibrant reds and blues against the creamy white make for an Instagram-worthy treat that looks far more complicated than it actually is. It’s a true feast for the eyes!
- A Guaranteed Crowd-Pleaser: From kids to adults, everyone adores this cheesecake. The combination of familiar flavors and textures makes it universally appealing. It’s ideal for potlucks, barbecues, picnics, or just a sweet family evening. Prepare for compliments and requests for the recipe!
Ingredients for Your Easy No-Bake Berry Flag Cheesecake!
Gather these simple ingredients to create your delightful Easy No-Bake Berry Flag Cheesecake!
- 1 package (12 count) King’s Hawaiian Original Sweet Rolls
- 16 ounces cream cheese, softened
- 1 ½ teaspoons vanilla extract, divided (1 teaspoon for filling, ½ teaspoon for topping)
- ½ cup granulated sugar
- 2 pints fresh strawberries, stemmed and hulled (1 pint quartered for filling, 1 pint sliced for topping)
- 1 pint fresh blueberries
- 2 cups heavy whipping cream, divided (or 16 ounces store-bought whipped topping, divided)
- ¼ cup powdered sugar
Detailed Step-by-Step Directions to Make Your Easy No-Bake Berry Flag Cheesecake!
Ready to create this incredible Easy No-Bake Berry Flag Cheesecake!? Follow these simple steps for a dessert that’s as fun to make as it is to eat!
- Prep the Rolls: Carefully slice the entire block of King’s Hawaiian rolls in half horizontally, aiming to keep them together as one unit. Gently set the top halves aside for later.
- Make Cheesecake Filling: In a large mixing bowl, beat the softened cream cheese with an electric mixer until it’s wonderfully smooth and fluffy. Incorporate 1 teaspoon of vanilla extract and the ½ cup of granulated sugar, continuing to beat until everything is perfectly blended and creamy.
- Fold in Cream: If you’re using heavy whipping cream for your filling, whip 1 cup of it in a separate bowl until it forms stiff peaks. Gently fold this freshly whipped cream (or half of your store-bought whipped topping) into the cream cheese mixture until just combined and light.
- First Filling Layer: Take about two-thirds of this dreamy cheesecake mixture and spread it evenly over the bottom halves of your King’s Hawaiian rolls, forming a smooth, generous layer.
- Add Berries: Lightly press the 1 pint of quartered strawberries directly into the first cheesecake layer. This will ensure they stay in place and provide juicy bursts of flavor.
- Second Filling Layer: Carefully spread the remaining cheesecake filling over the strawberries, making sure to cover them completely.
- Assemble: Gently place the top halves of the rolls back over the cheesecake filling, forming the upper crust of your dessert.
- Prepare Whipped Topping: For the ultimate topping, if using heavy whipping cream, whip the remaining 1 cup with ½ teaspoon vanilla extract and ¼ cup powdered sugar until glorious stiff peaks form.
- Top It Off: Spread your prepared whipped cream (or the other half of your store-bought whipped topping) evenly over the entire top of the rolls. Don’t be shy – you can spread some down the sides for a truly decadent look!
- Decorate: Now for the fun part! Arrange the 1 pint of sliced strawberries and 1 pint of fresh blueberries on top. For a patriotic flair, create a flag design: use blueberries for the “union” in one corner and sliced strawberries for the “stripes.” Or, simply scatter them beautifully for a rustic, inviting look!
- Chill & Serve: Refrigerate your magnificent dessert until you’re ready to enjoy it. For the best taste and texture, chill for at least 30 minutes. If you’ve used homemade whipped cream, it’s best served within 2 hours of assembly for peak freshness.
Creative Ways to Present and Serve Your Easy No-Bake Berry Flag Cheesecake!
The beauty of this Easy No-Bake Berry Flag Cheesecake! isn’t just in its taste, but also in its presentation versatility. While the flag design is a showstopper, don’t feel limited! For a patriotic celebration like the Fourth of July or Memorial Day, arrange the blueberries in a square in the upper left corner, mimicking the stars of the flag, and then create horizontal stripes with the sliced strawberries. You can even use a few small pieces of cream cheese or white chocolate chips among the blueberries for “stars.”
Beyond the flag, consider a more free-form design for other occasions:
- Berry Medley: Simply scatter all the sliced strawberries and blueberries artfully across the top, perhaps creating a gentle swirl or a central mound.
- Checkerboard Chic: If you’re feeling precise, arrange alternating squares of blueberries and strawberries for a fun checkerboard effect.
- Monogram Magic: Use the berries to form an initial or a simple shape, perfect for birthdays or anniversaries.
When serving, simply slice the entire cheesecake into individual portions, following the natural divisions of the rolls for easy cutting. This dessert is perfect on its own, but also pairs wonderfully with a cup of coffee, a glass of iced tea, or even a light sparkling wine for an elegant touch. It’s incredibly portable, making it ideal for picnics, potlucks, and backyard BBQs. Serve chilled for the most refreshing experience.
Storing Your Easy No-Bake Berry Flag Cheesecake! and How Long It Lasts
Proper storage ensures your delicious Easy No-Bake Berry Flag Cheesecake! remains fresh and delightful. Once assembled, it’s crucial to keep this no-bake wonder refrigerated. The best way to store it is in an airtight container or tightly covered with plastic wrap. This prevents it from absorbing odors from other foods in the fridge and keeps the whipped cream and berries fresh.
If you used store-bought whipped topping, your cheesecake can typically last for 2-3 days in the refrigerator. However, if you opted for homemade whipped cream (which is amazing!), it’s best enjoyed within 24-48 hours. Homemade whipped cream tends to soften and weep a bit more over time. The King’s Hawaiian rolls might soften slightly over the first day, but they will still be delicious. For optimal flavor and texture, especially with the fresh berries, aim to serve it within 1-2 days of making it. While you technically could freeze portions, the texture of the berries and whipped cream might change upon thawing, making it less ideal for freezing.
FAQs About Your Easy No-Bake Berry Flag Cheesecake!
- Can I use other types of fruit besides strawberries and blueberries?
- Absolutely! Feel free to experiment with raspberries, blackberries, sliced kiwi, or even peaches. Just ensure they are fresh and relatively firm.
- Can I make this cheesecake ahead of time?
- Yes! This is an excellent make-ahead dessert. You can assemble it up to 24 hours in advance. For the freshest look, add the berries just a few hours before serving.
- What if I don’t have King’s Hawaiian rolls?
- While the sweet rolls are a signature touch, you could adapt this recipe by using a graham cracker crust (store-bought or homemade) as the base, pressed into a 9×13 inch pan.
- Can I make individual servings?
- Yes! Instead of slicing the rolls horizontally as one unit, you can separate them and make mini cheesecakes on individual roll halves. This is perfect for portion control and easy serving.
- Is this recipe gluten-free?
- No, King’s Hawaiian rolls contain wheat. To make it gluten-free, you would need to use gluten-free sweet rolls or a gluten-free graham cracker crust.
- Can I reduce the amount of sugar?
- You can slightly reduce the granulated sugar in the filling to ¼ cup if you prefer a less sweet dessert. Be mindful that the rolls and berries add natural sweetness.
- How do I ensure my heavy whipping cream forms stiff peaks?
- Make sure your heavy whipping cream, bowl, and beaters are very cold. Chill them for at least 15 minutes before whipping. Start on low speed and gradually increase to high.
- Can I use frozen berries?
- While fresh berries are highly recommended for best texture and appearance, you *can* use frozen berries if thawed and drained very well to prevent excess moisture from making the cheesecake soggy.
- What’s the best way to hull strawberries?
- You can use a small paring knife to cut a cone shape around the green top, or use a straw to push through the bottom of the strawberry, popping out the stem.
- Is this dessert suitable for a large crowd?
- Absolutely! This recipe serves 12, making it perfect for gatherings. For even larger crowds, simply double the recipe and make two separate cheesecakes.
“`
Easy No-Bake Berry Flag Cheesecake!
Ingredients
Base
- 1 package King's Hawaiian Original Sweet Rolls (12 count)
Cheesecake Filling
- 16 ounces cream cheese softened
- 1 teaspoon vanilla extract for filling
- 0.5 cup granulated sugar
- 1 cup heavy whipping cream or half of 16 oz store-bought whipped topping
- 1 pint fresh strawberries quartered, for filling
Whipped Topping & Decoration
- 1 cup heavy whipping cream or other half of 16 oz store-bought whipped topping
- 0.5 teaspoon vanilla extract for topping
- 0.25 cup powdered sugar
- 1 pint fresh strawberries sliced, for topping
- 1 pint fresh blueberries
Instructions
- Gently slice the King's Hawaiian rolls in half horizontally, being careful to keep them intact. Set the top halves aside for later.
- In a large bowl, beat the softened cream cheese until it's smooth and fluffy. Add 1 teaspoon of vanilla extract and the ½ cup granulated sugar, continuing to beat until everything is well blended.
- If using heavy whipping cream for the filling, whip 1 cup until stiff peaks form. Gently fold this whipped cream (or half of your store-bought whipped topping) into the cream cheese mixture until just combined.
- Spread about two-thirds of this creamy cheesecake mixture evenly over the bottom halves of the rolls.
- Lightly press the 1 pint of quartered strawberries into the cheesecake layer.
- Carefully spread the remaining cheesecake filling over the strawberries.
- Place the top halves of the rolls back over the cheesecake filling.
- If using heavy whipping cream for the topping, whip the remaining 1 cup with ½ teaspoon vanilla extract and ¼ cup powdered sugar until stiff peaks form.
- Spread the prepared whipped cream (or the other half of your store-bought whipped topping) evenly over the top of the rolls. You can spread some on the sides if you like!
- Arrange the 1 pint of sliced strawberries and 1 pint of fresh blueberries on top. Get creative with a flag design for a patriotic touch, or simply scatter them beautifully!
- Refrigerate the dessert until you're ready to enjoy.
- For the best taste and texture, chill for at least 30 minutes. If using homemade whipped cream, serve within 2 hours of assembly.
Notes
- Calories: 322kcal
- Total Carbs: 17g
- Net Carbs: 16g
- Fats: 28g
- Protein: 3g