Why You’ll Love This Simple Decadent Chocolate Poke Cake
Prepare to fall head over heels for this incredible dessert! The Simple Decadent Chocolate Poke Cake isn’t just a recipe; it’s an experience waiting to happen. Here are four irresistible reasons why it will become your new go-to:
- Effortlessly Easy: Don’t let the “decadent” part fool you – this cake starts with a simple box mix! Minimal fuss, maximum impact. It’s perfect for beginner bakers or anyone craving a show-stopping dessert without the culinary gymnastics.
- Unbelievably Moist: The magic of a poke cake lies in its ability to soak up a rich, sweet filling. Our warm chocolatey condensed milk mixture seeps into every crevice, transforming a delicious cake into an unbelievably moist, melt-in-your-mouth masterpiece that stays fresh longer.
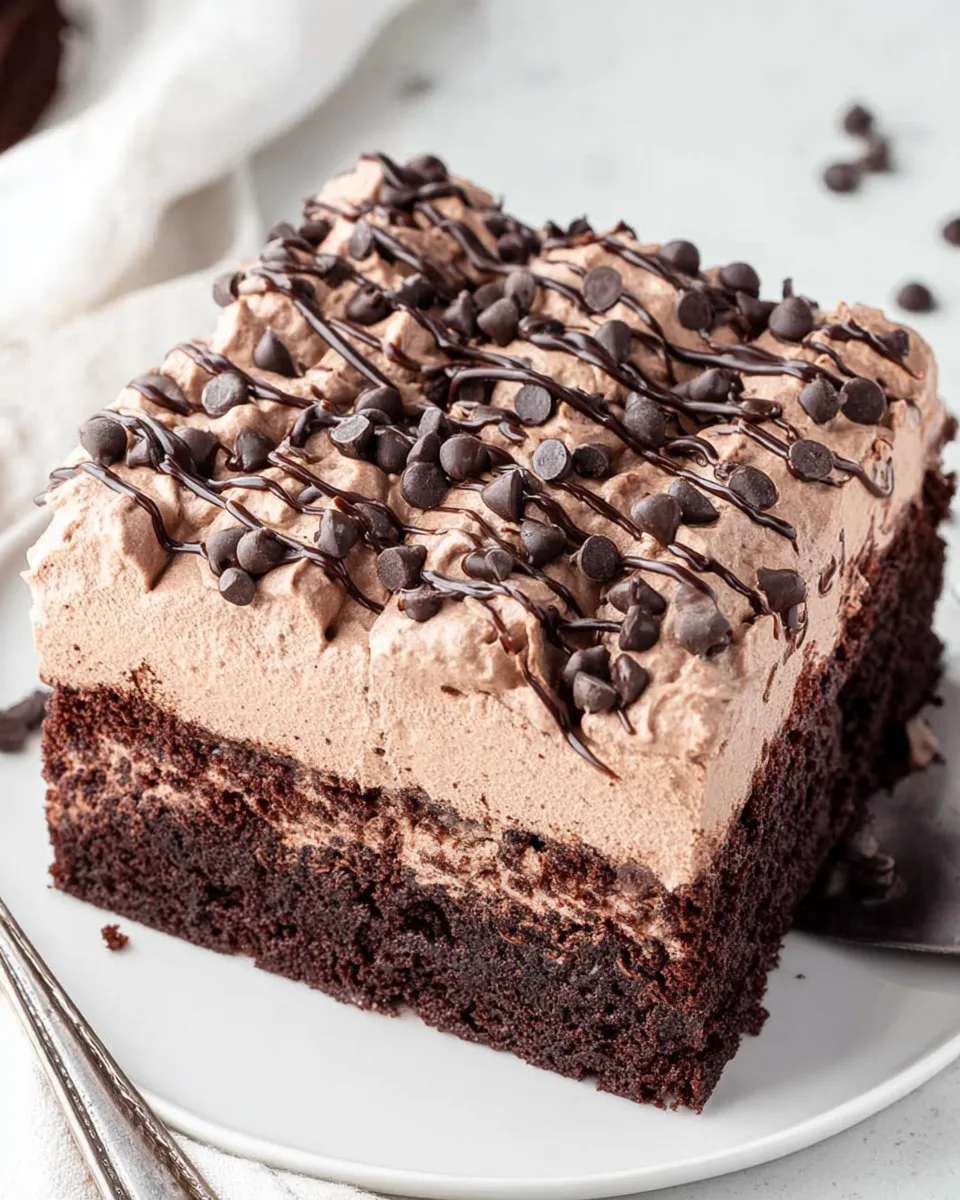
- Pure Chocolate Bliss: From the deep Devil’s Food cake to the creamy milk chocolate filling, and finally, the luscious cocoa whipped topping, this cake delivers a triple threat of chocolatey goodness. It’s a chocolate lover’s dream, intensified with mini chips and a drizzle of syrup.
- A Crowd-Pleasing Showstopper: Whether it’s a birthday party, a casual potluck, or just a sweet treat for your family, this cake is guaranteed to impress. It looks stunning, tastes divine, and always elicits gasps of delight. Get ready for requests for the recipe!
Ever had one of those days where only chocolate can truly understand you? We’ve all been there! But what if your chocolate craving could be met with something so profoundly moist, so utterly rich, and so ridiculously easy to make that it feels like pure magic? Enter the Simple Decadent Chocolate Poke Cake! This isn’t just a dessert; it’s a warm hug for your taste buds, a symphony of chocolate layers that will have you closing your eyes in bliss with every forkful. Forget complicated techniques and endless clean-up; we’re here to show you how to whip up a show-stopping cake that looks like it took hours but practically makes itself. Get ready to poke, pour, and prepare for pure chocolate nirvana!
Ingredients for Your Simple Decadent Chocolate Poke Cake
Gather your components for this delightful chocolate adventure:
For the Cake:
- 1 (15.25 ounce) box Devil’s Food Chocolate Cake Mix
- 3 large eggs
- ½ cup vegetable oil
- ½ cup water
For the Chocolate Filling:
- 1 (14-ounce) can sweetened condensed milk
- 2 (1.55-ounce) milk chocolate Hershey bars, broken into small pieces
For the Chocolate Whipped Topping:
- 2 cups heavy whipping cream, well chilled
- ½ cup powdered sugar
- ⅓ cup unsweetened cocoa powder
- 1 teaspoon vanilla extract
For Garnish:
- Mini chocolate chips, for sprinkling
- Hershey’s chocolate syrup, for drizzling
Detailed Step-by-Step Directions to Make Your Chocolate Poke Cake
Let’s get baking! Follow these simple steps to create your own Simple Decadent Chocolate Poke Cake:
- Bake Your Cake: Preheat your oven according to the cake mix box directions. In a large mixing bowl, combine the chocolate cake mix, eggs, vegetable oil, and water. Stir gently with a spoon or spatula until all ingredients are just incorporated and no dry streaks remain. Be careful not to overmix! Pour the smooth batter into a greased 9×13 inch cake pan. Bake as directed on the cake mix box, typically 30-35 minutes, or until a wooden skewer inserted into the center comes out clean.
- Poke It Up: As soon as your cake is out of the oven, while it’s still warm in the pan, grab the back of a wooden spoon (or a similar blunt, round object like a dowel or even the handle of a fork) and gently poke holes all over the top surface of the cake. Aim for holes that are about ¾ inch deep and spaced approximately 1 inch apart. Don’t go all the way to the bottom!
- Whip Up the Filling: In a separate medium-sized microwave-safe bowl, combine the entire can of sweetened condensed milk with the broken pieces of Hershey chocolate bars. Microwave this mixture for about 30 seconds. Remove and stir well. Return to the microwave for another 15 seconds if needed, stirring until the chocolate is completely melted and the mixture is smooth, glossy, and fully combined.
- Pour the Indulgence: Carefully and slowly pour the warm chocolatey condensed milk mixture evenly over the top of your still-warm, poked cake. Use a rubber spatula to gently encourage the mixture to sink into all the holes and spread it smoothly across the entire surface.
- Chill Out: Allow the cake to cool down on your kitchen counter for about an hour. Once it’s cooled to room temperature, cover the cake pan tightly with plastic wrap and transfer it to the refrigerator. Let it chill for at least 2 hours. This crucial step allows the luscious filling to deeply penetrate the cake, making it incredibly moist and setting the flavors.
- Make Whipped Topping: While your cake is chilling, place a large metal mixing bowl (or the bowl for your stand mixer) and your beater attachments into the freezer for about 15-20 minutes. This helps the cream whip up faster and more stable. Once chilled, pour the 2 cups of cold heavy whipping cream into the bowl. Using a hand mixer (or stand mixer with a whisk attachment) on high speed, beat the cream until it starts to thicken and form soft peaks.
- Flavor the Topping: To the thickening cream, add the powdered sugar, unsweetened cocoa powder, and vanilla extract. Continue to mix on high speed until stiff peaks form. This means when you lift the beaters, the cream holds its shape firmly. Be vigilant and stop mixing as soon as stiff peaks are achieved to avoid overmixing, which can turn it grainy.
- Decorate & Serve: Once your cake is thoroughly chilled and firm, remove it from the refrigerator. Spread the luscious chocolate whipped topping evenly over the top of the cake using an offset spatula. For a final, tempting flourish, drizzle generously with Hershey’s chocolate syrup and sprinkle a delightful amount of mini chocolate chips over the entire surface.
- Keep it Cool: Keep your finished Simple Decadent Chocolate Poke Cake refrigerated until you are ready to slice and serve. Enjoy your heavenly, homemade creation!
Serving and Presenting Your Simple Decadent Chocolate Poke Cake
Part of the joy of baking is in the presentation! This Simple Decadent Chocolate Poke Cake already looks impressive, but here are some ideas to make it truly unforgettable:
Elegant Presentation Ideas:
- Classic Slice: Serve individual slices straight from the 9×13 pan. A sharp, warm knife will help achieve clean cuts. For extra flair, clean the knife between each slice.
- Dusting Magic: Before adding the final chocolate chips and syrup, you can gently place a doily or a stencil on top of the chocolate whipped cream and dust lightly with extra cocoa powder or powdered sugar for a decorative pattern. Remove the stencil carefully.
- Berry Bright: A vibrant pop of color can elevate the rich chocolate. Arrange fresh raspberries, strawberries, or even a mix of berries around the base of the cake or on top of individual slices. The tartness beautifully complements the sweetness.
- Chocolate Shavings: Instead of or in addition to mini chocolate chips, use a vegetable peeler to create delicate chocolate shavings from a bar of dark chocolate for an extra sophisticated look.
How to Serve It:
- A La Mode: A scoop of good quality vanilla bean ice cream or even coffee ice cream alongside a slice of this cake is pure heaven. The cold creaminess provides a delightful contrast to the rich cake.
- With a Beverage: Pair it with a steaming mug of coffee, a glass of cold milk, or even a shot of espresso for a truly grown-up treat.
- Party Perfection: This cake is ideal for birthdays, holidays, potlucks, or any gathering where you want to impress without stress. Its generous servings make it perfect for sharing.
- Anytime Indulgence: Don’t wait for a special occasion! Treat yourself and your loved ones to a slice after dinner or as a decadent afternoon pick-me-up.
However you choose to present and serve it, prepare for smiles and satisfied sighs!
Storage and Shelf Life for Your Simple Decadent Chocolate Poke Cake
Ensuring your delicious Simple Decadent Chocolate Poke Cake stays fresh for as long as possible is key. Here’s how to store it and what to expect regarding its shelf life:
How to Store It:
Due to the dairy components in the sweetened condensed milk filling and especially the fresh whipped cream topping, refrigeration is essential for this cake. Make sure to:
- Cover Tightly: After enjoying a slice (or several!), ensure the cake pan is covered tightly with plastic wrap or foil. If you’ve transferred slices to a plate, place them in an airtight container. This prevents the cake from drying out and absorbing odors from the refrigerator.
- Refrigerate Promptly: Always return any uneaten portions to the refrigerator as soon as possible.
How Long Does It Last?
- In the Refrigerator: When properly stored in an airtight container or tightly covered pan in the refrigerator, your Simple Decadent Chocolate Poke Cake will stay fresh and delicious for 3 to 5 days. The poke cake method and the condensed milk filling actually help keep the cake incredibly moist for longer than a typical frosted cake!
- Freezing (with caution): While the cake base and filling can freeze well (up to 1-2 months when tightly wrapped without the whipped cream), fresh whipped cream doesn’t typically freeze and thaw beautifully. It can lose its fluffy texture and become watery. If you want to freeze portions, it’s best to freeze the cake *before* adding the whipped topping and then add freshly made whipped cream after thawing. Otherwise, enjoy the fully assembled cake within its refrigerated lifespan for the best quality.
FAQs About the Simple Decadent Chocolate Poke Cake
- Can I use a different cake mix?
Absolutely! While Devil’s Food is recommended for ultimate richness, a standard chocolate fudge cake mix or even a dark chocolate cake mix would work wonderfully. - What if I don’t have a wooden spoon to poke holes?
No problem! You can use the handle of a sturdy fork, a chopstick, a skewer, or any similar blunt, round object. Just ensure the holes are about ¾ inch deep and spaced evenly. - Can I make the chocolate filling less sweet?
The sweetened condensed milk is inherently sweet. To slightly temper the sweetness, you could use dark chocolate instead of milk chocolate Hershey bars in the filling, which will add a pleasant bitterness. - Why chill the mixing bowl for the whipped cream?
Chilling the bowl and beaters helps the heavy cream whip up faster and achieve stiffer, more stable peaks. Cold cream holds its structure better, resulting in a fluffier whipped topping. - Can I make the whipped topping ahead of time?
It’s best to make the whipped topping just before assembling the cake. While it can be made a few hours in advance and kept refrigerated, it’s at its peak freshness and fluffiness right after being made. - How do I know when the cake is baked through?
The cake is done when a wooden skewer or toothpick inserted into the center comes out clean or with only a few moist crumbs attached. - Can I use dark chocolate instead of milk chocolate Hershey bars in the filling?
Yes, you can! Using dark chocolate will result in a richer, slightly less sweet, and more intense chocolate flavor in the filling, which many chocolate lovers prefer. - Is this cake suitable for freezing?
The cake base with the condensed milk filling freezes quite well for up to 1-2 months if wrapped tightly. However, fresh whipped cream does not freeze well; it can become watery and lose its texture upon thawing. It’s best to add the whipped topping fresh after thawing the cake. - What’s the best way to cut clean slices?
For neat slices, chill the cake thoroughly. Use a long, sharp knife, warming it under hot water and wiping it clean between each cut. - Can I make this cake in a different size pan?
Adjustments would be needed. A smaller pan might require reducing baking time and ingredients, while a larger pan would mean a thinner cake or needing more batter. The 9×13 inch pan is ideal for this recipe to ensure the correct cake thickness for optimal filling absorption.
Simple Decadent Chocolate Poke Cake
Equipment
- 9x13 inch cake pan
- Hand Mixer
- Large mixing bowl
Ingredients
- 1 box Devil's Food Chocolate Cake Mix 15.25 ounce
- 3 large eggs
- 0.5 cup vegetable oil
- 0.5 cup water
- 1 can sweetened condensed milk 14-ounce
- 2 milk chocolate Hershey bars 1.55-ounce, broken into small pieces
- 2 cups heavy whipping cream well chilled
- 0.5 cup powdered sugar
- 0.33 cup unsweetened cocoa powder
- 1 tsp vanilla extract
- Mini chocolate chips for sprinkling
- Hershey’s chocolate syrup for drizzling
Instructions
- In a large bowl, combine the chocolate cake mix, eggs, oil, and water. Stir until everything is just mixed. Pour this batter into a greased 9x13 inch cake pan and bake according to the directions on your cake mix box.
- Once the cake is baked, take it out of the oven. While it's still warm, use the back of a wooden spoon or a similar blunt object to poke holes all over the top of the cake.
- In a separate medium-sized bowl, mix the sweetened condensed milk with the broken Hershey chocolate bars. Microwave this mixture for about 30 seconds, stir, then microwave for another 15 seconds. Keep stirring until the chocolate is completely melted and the mixture is smooth and combined.
- Carefully pour the warm chocolatey condensed milk mixture over the top of your poked cake. Use a spatula to gently push the mixture into all the holes and spread it evenly across the cake.
- Let the cake cool on your counter for an hour, then cover it with plastic wrap and move it to the refrigerator for at least 2 hours. This lets all that delicious filling soak deeply into the cake, making it incredibly moist.
- While the cake is chilling, place a large mixing bowl in your freezer to chill for about 15-20 minutes. Once chilled, add the 2 cups of cold heavy whipping cream to the bowl. Using a hand mixer on high speed, beat the cream until it starts to thicken.
- Add the powdered sugar, cocoa powder, and vanilla extract to the thickening cream. Continue to mix with your hand mixer until stiff peaks form (meaning the cream holds its shape when you lift the beaters). Be careful not to overmix!
- Spread this luscious chocolate whipped topping evenly over the thoroughly chilled cake. For a final flourish, drizzle with chocolate syrup and sprinkle a generous amount of mini chocolate chips on top.
- Keep the cake refrigerated until you're ready to slice and serve. Enjoy your simple, decadent creation!