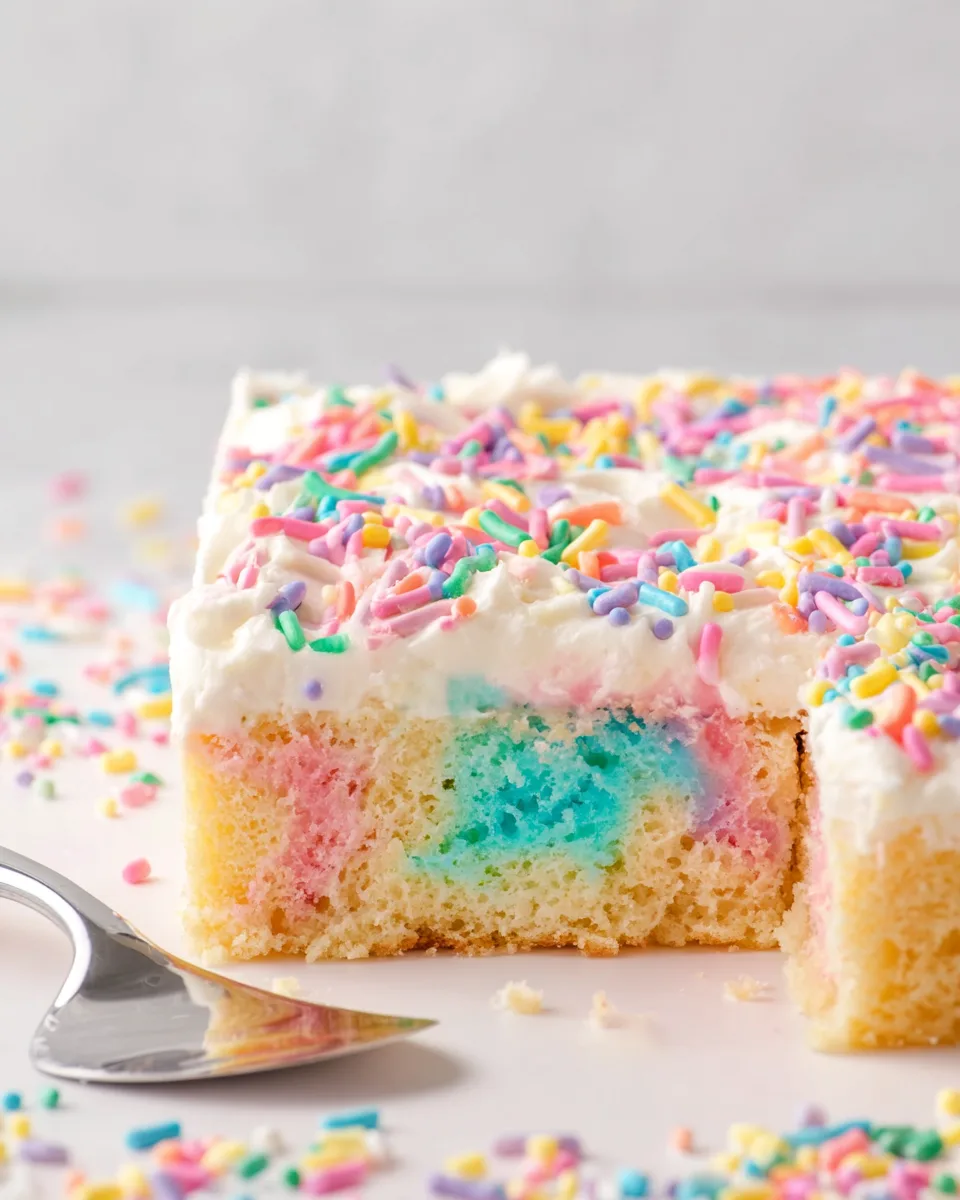
Ever dreamt of baking a cake that looks like a party exploded in a bakery? Well, get ready to turn that dream into a delicious reality with our show-stopping Easy Swirled Tie Dye Cake! Forget complicated techniques and endless hours in the kitchen. This recipe is your ticket to a vibrant, eye-catching dessert that’s as simple to make as it is stunning to behold. Imagine cutting into a slice and revealing a kaleidoscope of blue, pink, and yellow swirls – it’s pure magic! Whether you’re celebrating a birthday, an ordinary Tuesday, or just want to brighten someone’s day, this Easy Swirled Tie Dye Cake brings joy and color to any table without breaking a sweat. Let’s get swirling!
Why You’ll Love This Recipe
Get ready to fall head over heels for this incredible dessert! Here are four fabulous reasons why our Easy Swirled Tie Dye Cake will become your new go-to:
- Visually Spectacular: This isn’t just a cake; it’s a piece of edible art! The vibrant, playful swirls make every slice a photo opportunity and a delightful surprise. You’ll impress everyone with minimal effort, making your Easy Swirled Tie Dye Cake the star of any gathering.
- Deceptively Simple: Don’t let the elaborate look fool you! We’re tapping into the power of a boxed cake mix and a few clever additions to create bakery-quality results. It’s truly an Easy Swirled Tie Dye Cake that even beginner bakers can master with confidence.
- Unbelievably Moist & Delicious: Thanks to a secret ingredient (shhh, it’s sour cream!), this cake boasts an incredibly moist, tender crumb that melts in your mouth. Paired with our fluffy homemade buttercream, every bite of this Easy Swirled Tie Dye Cake is pure heaven.
- Perfectly Customizable Fun: While we love blue, pink, and yellow, feel free to unleash your inner artist! You can swap out the colors to match any holiday, party theme, or simply your favorite hues. This versatility makes your Easy Swirled Tie Dye Cake a unique treat every time.
Ingredients with Measurements
For the Cake:
- 1 box white cake mix (any brand)
- 1/4 cup (59 ml) water
- 4 large egg whites
- 1/2 cup (118 ml) vegetable oil
- 1 cup (245g) sour cream
- 1 teaspoon pure vanilla extract
- Blue, pink, and yellow food coloring (gel or liquid)
For the Buttercream Frosting:
- 1/2 cup (113g) unsalted butter, softened
- 2 cups (226g) powdered sugar
- 1/4 teaspoon salt
- 1 teaspoon pure vanilla extract
- 2-4 tablespoons heavy cream or milk
- Optional: extra food coloring for frosting, sprinkles
Detailed Step-by-Step Directions How to Make the Recipe
For the Cake:
- Get Ready to Bake: Preheat your oven to a cozy 350°F (175°C). Take a 9×13 inch baking dish and give it a light grease – a little spray or butter will do!
- Mix it Up: In a large mixing bowl, combine the white cake mix, water, egg whites, vegetable oil, sour cream, and vanilla extract. Grab your electric mixer and start on low speed until everything is just combined. Don’t forget to scrape down the sides of the bowl to catch any stray bits!
- Smooth Sailing: Increase the mixer speed to medium and beat for another 2 minutes. Keep scraping that bowl occasionally to make sure your batter is wonderfully smooth and lump-free.
- White Base Layer: Pour about 2 cups of this plain white batter into your prepared baking pan. Spread it out evenly – this is going to be the beautiful canvas for your tie-dye magic!
- Color Your World: Now for the fun part! Divide the remaining batter equally among three separate medium bowls. You’ll end up with about 1/2 cup in each.
- Add the Hues: Drop a few drops of blue food coloring into one bowl, pink into another, and sunny yellow into the last. Gently stir each bowl until you achieve your desired pastel shades. Remember, a little goes a long way with gel coloring!
- Drop and Dot: Randomly drop spoonfuls of each colored batter over the white batter already in the pan. Don’t stress about perfection here – the more random, the better for that authentic tie-dye vibe!
- Swirl Away! Grab a butter knife and gently run it back and forth, and then in circular motions, through the colored batter. This creates those gorgeous tie-dye swirls. Be gentle and don’t over-mix; you want those distinct color streaks!
- Bake to Perfection: Pop your masterpiece into the preheated oven and bake for 30-35 minutes, or until a toothpick inserted into the center comes out clean.
- Cool Down: Patience is a virtue! Let the cake cool completely on a wire rack before you even think about frosting it. A warm cake and frosting are a melty mess waiting to happen.
For the Buttercream Frosting:
- Fluff the Butter: In a mixing bowl with an electric mixer, whip your softened unsalted butter for 1-2 minutes until it’s noticeably lighter in color and wonderfully fluffy.
- Sweeten Up: Gradually add the powdered sugar and salt to the whipped butter. Beat on low to medium speed for about 1 minute until well combined, scraping down the sides of the bowl as needed.
- Smooth Operator: Stir in the vanilla extract and 2 tablespoons of heavy cream. Beat for another minute until your frosting is smooth and dreamy.
- Perfect Consistency: If your frosting feels a little too thick, slowly add more cream, one tablespoon at a time, until it reaches your desired light and spreadable consistency. If you want to color your frosting (optional!), add a few drops of food coloring now and mix it in well.
- Frost & Finish: Once your Easy Swirled Tie Dye Cake is completely cool, spread your fluffy homemade buttercream frosting generously over the top.
- Sprinkle the Joy: Finish by decorating with your favorite sprinkles for that extra festive and fun touch!
Detailed Different Ways You Can Present the Recipe and How to Serve It
The beauty of this Easy Swirled Tie Dye Cake isn’t just in its delicious taste, but also in its incredible versatility for presentation! Here are some fun ideas to make your cake shine:
- Birthday Bash Bliss: This cake is practically made for birthdays! Top it with colorful candles and a fun “Happy Birthday” topper. The internal swirls will be a delightful surprise when you cut the first slice, making it an unforgettable centerpiece.
- Holiday Hues: Adapt the colors to suit any holiday! Think reds and greens for Christmas, pastels for Easter (perfect for an Easy Swirled Tie Dye Cake!), red, white, and blue for patriotic celebrations, or even spooky oranges and purples for Halloween.
- Party Platter Perfection: For a dessert buffet, cut the cake into smaller squares or even triangles. Arrange them artfully on a large platter, perhaps with some fresh berries or mint leaves for garnish. Each piece is a mini work of art!
- Simple & Sweet: Sometimes less is more. For a casual get-together, simply slice and serve this magnificent cake on pretty dessert plates. The cake itself is so vibrant, it needs little else to impress.
- Ala Mode Magic: Elevate a simple slice of your Easy Swirled Tie Dye Cake by serving it alongside a scoop of vanilla bean ice cream or a dollop of whipped cream. A drizzle of raspberry sauce can add an extra layer of flavor and visual appeal.
- Individual Delights: While this recipe is for a 9×13 pan, you could adapt it for cupcakes! Drop the plain batter into liners, then add colored dollops and swirl. Perfect for portion control and grab-and-go treats.
How You Can Store It and How Long Does It Last
You’ve put all that love into making your stunning Easy Swirled Tie Dye Cake, so let’s make sure it stays fresh and delicious! Proper storage is key:
- Room Temperature: If your cake is frosted with buttercream, it can safely be stored at room temperature for up to 2-3 days, provided it’s in an airtight container. The buttercream acts as a protective barrier. Keep it away from direct sunlight or heat sources.
- Refrigeration for Longer Freshness: For extended freshness, especially in warmer climates or if your frosting contains cream cheese (which this one doesn’t, but good to know for variations!), store your frosted Easy Swirled Tie Dye Cake in an airtight container in the refrigerator for up to 5-7 days. Just be sure to bring it back to room temperature for about 30 minutes before serving for the best flavor and texture.
- Unfrosted Cake: If you’ve baked the cake layers but haven’t frosted them yet, you can wrap them tightly in plastic wrap and store them at room temperature for up to 2 days, or in the refrigerator for up to 5 days.
- Freezing for Future Feasting: Yes, you can freeze your Easy Swirled Tie Dye Cake!
- Frosted Cake: Place the frosted cake (uncovered) in the freezer for about an hour to allow the frosting to firm up. Then, wrap it tightly in several layers of plastic wrap, followed by a layer of aluminum foil. It will last for up to 2-3 months. Thaw overnight in the refrigerator before bringing to room temperature to serve.
- Unfrosted Cake Layers: Once completely cool, wrap individual cake layers tightly in plastic wrap, then in foil. Freeze for up to 3 months. Thaw in the refrigerator before frosting and serving.
FAQs Sections
- Can I use a different flavor of cake mix for this Easy Swirled Tie Dye Cake?
Yes! While white cake mix provides the best “blank canvas” for the colors, you can absolutely experiment with vanilla, lemon, or even funfetti mixes for a different flavor profile. - What if I only have whole eggs, not just egg whites?
Using only egg whites helps keep the cake batter very white, allowing the food coloring to pop. If you use whole eggs, the cake might have a slightly yellower tint, which could alter the final color appearance slightly, especially with lighter pastels. It will still taste delicious! - Is gel or liquid food coloring better for this recipe?
Gel food coloring is highly recommended! It’s more concentrated, so you need less to achieve vibrant colors, and it won’t thin out your batter as much as liquid food coloring. - Can I make this Easy Swirled Tie Dye Cake into cupcakes?
Absolutely! Fill cupcake liners about 2/3 full with the plain white batter, then drop spoonfuls of colored batter on top and swirl gently with a toothpick. Baking time will be shorter, typically 18-22 minutes. - How do I ensure my colors stay distinct and don’t get muddy?
The key is gentle swirling and not over-mixing! Just a few passes with your butter knife are enough to create beautiful swirls without blending the colors completely. - Can I prepare the cake batter ahead of time?
It’s best to bake the cake batter shortly after mixing. The leavening agents in the mix start working once wet, so waiting too long could result in a less fluffy cake. - My cake colors look dull after baking. What happened?
This could be due to using too little food coloring, or potentially using liquid food coloring which can be less vibrant. Try adding a few more drops of gel coloring next time to achieve brighter shades. - How long does the cake really need to cool before frosting?
Completely cool! This is crucial. A warm cake will melt your beautiful buttercream, turning it into a runny mess. Depending on your kitchen temperature, this can take 2-3 hours. - Can I use store-bought frosting instead of making my own?
Yes, you can! While homemade buttercream is fantastic, store-bought frosting is a great time-saver. Just ensure you buy enough for a 9×13 inch cake (usually 1-2 standard tubs). You can also color store-bought frosting. - Is this Easy Swirled Tie Dye Cake recipe suitable for beginner bakers?
Definitely! By starting with a box cake mix, we simplify the baking process significantly. The swirling technique is forgiving and fun, making it perfect for anyone new to baking or looking for an easy yet impressive dessert.
Easy Swirled Tie Dye Cake 🌈
Equipment
- 9x13 inch Baking Dish
- Electric Mixer
- Wire Rack
- Butter knife
Ingredients
For the Cake
- 1 box white cake mix (any brand)
- 1/4 cup water 59 ml
- 4 large egg whites
- 1/2 cup vegetable oil 118 ml
- 1 cup sour cream 245g
- 1 teaspoon pure vanilla extract
- Blue, pink, and yellow food coloring (gel or liquid)
For the Buttercream Frosting
- 1/2 cup unsalted butter softened, 113g
- 2 cups powdered sugar 226g
- 1/4 teaspoon salt
- 1 teaspoon pure vanilla extract
- 2-4 tablespoons heavy cream or milk
- extra food coloring for frosting Optional
- sprinkles Optional
Instructions
For the Cake:
Preheat your oven to 350°F (175°C). Lightly grease a 9x13 inch baking dish.- In a large mixing bowl, combine the cake mix, water, egg whites, vegetable oil, sour cream, and vanilla extract. Use an electric mixer on low speed until everything is just combined. Scrape down the sides of the bowl.
- Increase the mixer speed to medium and beat for 2 more minutes, scraping the bowl occasionally to ensure a smooth batter.
- Pour about 2 cups of this plain white batter into your prepared baking pan, spreading it evenly.
- Divide the remaining batter equally among three separate medium bowls (you'll have about 1/2 cup in each).
- Add a few drops of blue food coloring to one bowl, pink to another, and yellow to the last. Gently stir each bowl until you reach your desired pastel shades.
- Now, randomly drop spoonfuls of each colored batter over the white batter in the pan. Don't worry about perfection!
- Using a butter knife, gently run it back and forth and in circular motions through the colored batter to create beautiful tie-dye swirls. Be careful not to over-mix, as you want distinct colors.
- Bake for 30-35 minutes, or until a toothpick inserted into the center of the cake comes out clean.
- Let the cake cool completely on a wire rack before you even think about frosting it!
For the Buttercream Frosting:
In a mixing bowl with an electric mixer, whip the softened unsalted butter for 1-2 minutes until it's noticeably lighter in color and fluffy.- Gradually add the powdered sugar and salt to the whipped butter. Beat on low to medium speed for about 1 minute until well combined, scraping down the sides of the bowl as needed.
- Stir in the vanilla extract and 2 tablespoons of heavy cream. Beat for another minute until smooth.
- If your frosting is too thick, slowly add more cream, one tablespoon at a time, until it reaches your desired light and spreadable consistency. If you want to color your frosting, add a few drops of food coloring now and mix well.
- Once the cake is completely cool, spread your fluffy homemade buttercream frosting generously over the top.
- Finish by decorating with your favorite sprinkles for that extra festive touch!
Notes
Calories: 440kcal
Total Carbs: 56g
Net Carbs: 55g
Fats: 23g
Protein: 3g