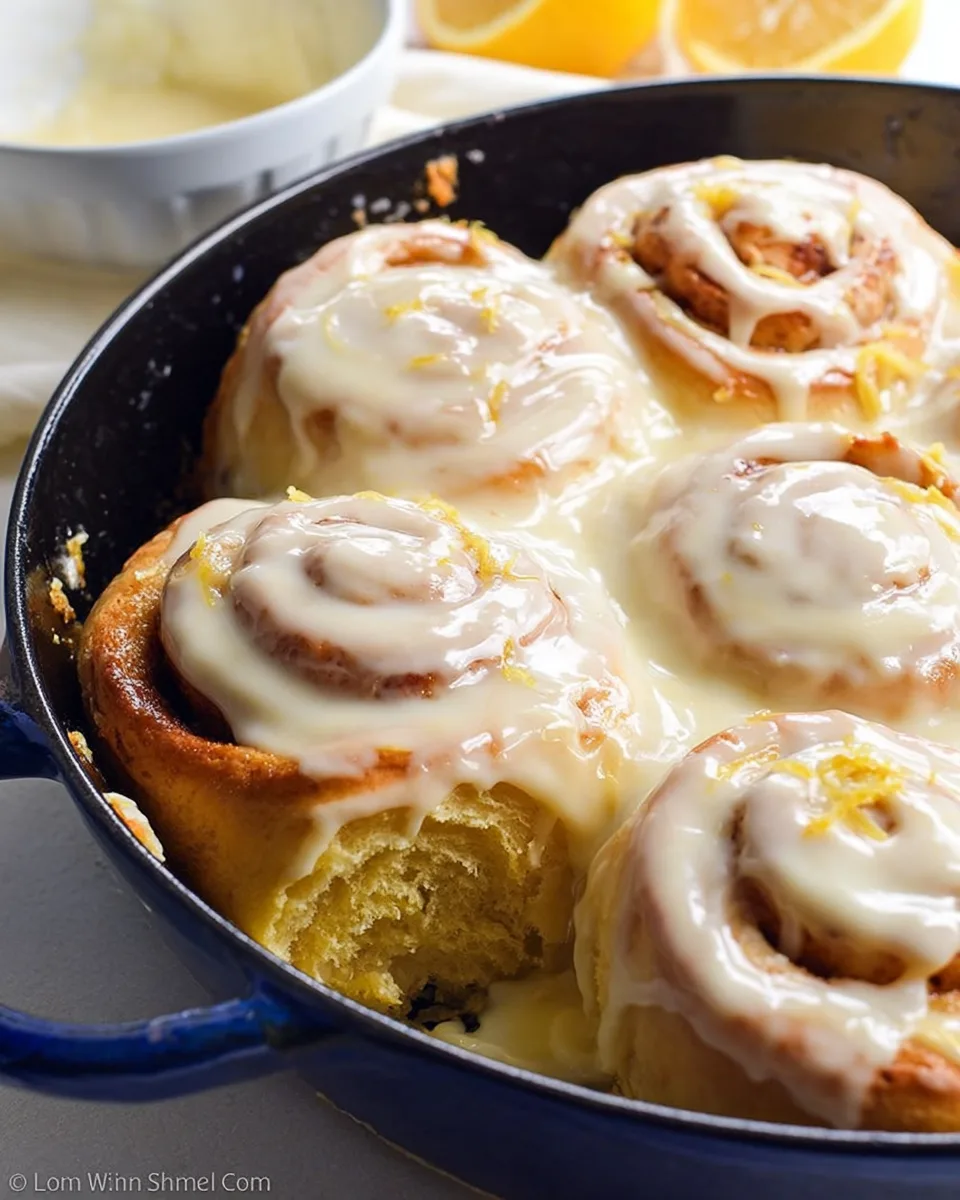
Tired of gluten-free treats that taste like cardboard? Dreaming of a roll that’s as soft as a cloud and bursting with sunshine? Get ready to ditch those dreary gluten-free stereotypes because we’re about to dive headfirst into a recipe that will revolutionize your dessert game: **Gluten-Free Zesty Lemon Rolls**! Imagine waking up to the irresistible aroma of freshly baked rolls, each one a delightful swirl of tender dough, tangy lemon curd, and a velvety cream cheese icing that melts in your mouth. This isn’t just a recipe; it’s an experience, a bright burst of citrusy joy that proves gluten-free can be utterly gourmet. So grab your mixer, put on your apron, and prepare to be amazed by the most delicious lemon rolls you’ve ever had – no gluten required!
Why You’ll Love These Gluten-Free Zesty Lemon Rolls
These **Gluten-Free Zesty Lemon Rolls** are more than just a sweet treat; they’re a revelation for anyone navigating a gluten-free diet or simply looking for something spectacular. Here are four reasons why you’ll fall head over heels for this recipe:
- Unbelievably Soft & Fluffy: Forget dense, crumbly gluten-free baked goods! Thanks to a carefully balanced blend of flours and the magic of psyllium husk, these rolls achieve an incredible, tender texture that rivals any traditional yeast roll.
- Bursting with Bright Lemon Flavor: From the vibrant lemon curd filling to the zesty dough and the tangy cream cheese icing, every component of these rolls is infused with the fresh, invigorating taste of lemon. It’s like a sunny day in every bite!
- A Truly Gourmet Gluten-Free Treat: This isn’t just a substitute; it’s a stand-alone masterpiece. These rolls feel special enough for brunch, dessert, or a celebratory breakfast, impressing even those who aren’t gluten-free.
- Perfectly Balanced Sweet & Tart: The richness of the dough and the sweet cream cheese icing are beautifully complemented by the bright, zesty tang of the lemon curd, creating a harmonious flavor profile that keeps you coming back for more.
Ingredients for Your Gluten-Free Zesty Lemon Rolls
🍋 For the Bright Lemon Curd:
- ½ cup granulated sugar
- Zest of 1 fresh lemon (organic, unwaxed recommended)
- 3 large egg yolks, at room temperature
- ¼ teaspoon salt
- ¼ cup fresh lemon juice
- ½ stick (¼ cup) unsalted butter, cut into cubes
🍋 For the Soft Gluten-Free Dough:
- 3 tablespoons whole psyllium husk (or 2.5 tablespoons psyllium husk powder)
- ¾ cup warm water
- ¼ cup granulated sugar
- Zest of 1 fresh lemon (organic, unwaxed recommended)
- 1⅓ cups + 1 tablespoon tapioca starch (or arrowroot starch, cornstarch, or potato starch)
- 1 cup millet flour (or finely milled brown rice flour)
- 3 tablespoons sorghum flour (or light buckwheat, white teff, or oat flour if no oat sensitivity)
- 2 teaspoons instant yeast (or 2.5 teaspoons active dry yeast)
- 1½ teaspoons baking powder
- 2 teaspoons xanthan gum
- 1 teaspoon salt
- ⅓ cup + 1½ tablespoons warm whole milk
- 1 large egg, at room temperature
- 2½ tablespoons unsalted butter, melted
🍋 For the Tangy Filling:
- ⅔ cup of the prepared lemon curd (about 170g)
- 1 tablespoon cornstarch
🍋 For the Velvety Lemon Cream Cheese Icing:
- ⅓ cup full-fat cream cheese, softened
- 2½ tablespoons unsalted butter, softened
- ½ cup powdered sugar
- ½-1 teaspoon vanilla bean paste (or 1-2 teaspoons vanilla extract)
- Pinch of salt
- ¼ cup of the prepared lemon curd (about 55g)
Detailed Directions: Crafting Your Gluten-Free Zesty Lemon Rolls
Step 1: Create the Luscious Lemon Curd (Best Made Ahead!)
- Prep Your Tools: To avoid a metallic taste, use a glass or ceramic bowl, a rubber spatula, and a non-metal saucepan.
- Infuse the Sugar: In a bowl, rub the lemon zest into the granulated sugar with your fingertips. This step really brings out the lemon flavor!
- Whip It Good: Add the egg yolks and salt to the lemon-sugar mixture. Whisk by hand until they’re slightly fluffy and lighter in color.
- Heat the Juice: Gently heat the lemon juice in your saucepan until it just starts to boil.
- Temper the Eggs: Slowly drizzle the hot lemon juice into the egg yolk mixture, whisking constantly. This keeps your eggs from scrambling!
- Thicken It Up: Pour the mixture back into the saucepan. Cook over low heat, stirring continuously, for about 4-5 minutes until it thickens enough to coat the back of your spoon. Don’t let it boil!
- Butter Up: Remove from heat and stir in the cubed butter until it’s completely melted and smooth.
- Cool Down: Pour the curd into a heat-proof container. Cover it with plastic wrap, pressing it directly onto the surface to prevent a “skin” from forming. Let it cool to room temperature, then chill in the fridge until you’re ready to use it (can be made a day or two in advance).
Step 2: Mix the Light & Fluffy Gluten-Free Dough
- Psyllium Gel Magic: In a small bowl, mix the psyllium husk with warm water. Watch it transform into a gel in about 30-45 seconds.
- Zesty Sugar: In the bowl of a stand mixer (recommended, with dough hook), rub the lemon zest into ¼ cup granulated sugar.
- Combine Dry Goodies: Add tapioca starch, millet flour, sorghum flour, instant yeast, baking powder, xanthan gum, and salt to the mixer bowl. Whisk everything together.
- Quick Tip for Active Dry Yeast: If using active dry yeast, first mix it with 1-2 tablespoons of the sugar and the warm milk. Let it sit for 10-15 minutes until it gets foamy, then add it with the other wet ingredients.
- Wet Meets Dry: Make a little well in the center of your dry ingredients. Add the psyllium gel, warm milk, egg, and melted butter.
- Knead to Perfection: Knead with the dough hook for 4-5 minutes (or 6-8 minutes by hand) until the dough is smooth and all ingredients are well combined. Scrape the sides and bottom of the bowl occasionally. This extra kneading is key for soft rolls!
- Sticky is Okay! The dough will be a bit sticky, but that’s perfectly normal for gluten-free dough. Resist adding more flour, which can make your rolls dry. If it’s too sticky to handle, chill it in the fridge for about an hour to firm it up.
Step 3: Assemble Your Swirly Lemon Rolls
- Prep Your Pan: Lightly butter a 10-inch round skillet or baking pan.
- Filling Time: In a small bowl, mix ⅔ cup of your prepared lemon curd with the cornstarch. This helps it set nicely inside the rolls.
- Roll it Out: Lightly flour your work surface and your hands. Gently knead the dough, then roll it into a rectangle, roughly 11×15 inches.
- Spread the Zest: Dollop the lemon curd filling evenly over the entire dough rectangle, spreading it all the way to the edges.
- Cut & Roll: Using a pizza cutter or a sharp knife, cut the dough lengthwise into seven 1½-inch wide strips (about 15 inches long). Carefully roll up each strip into a pretty swirl. Don’t worry if it gets a little messy – lemon curd is softer than typical cinnamon roll filling!
- Arrange: Place the rolled lemon rolls into your buttered pan, so they are just touching each other.
Step 4: Let Them Rise (Proofing)
- Warm Spot: Lightly cover the rolls with plastic wrap to prevent drying. Let them rise in a warm spot for about 1 hour 15 minutes to 1 hour 30 minutes, or until they’ve nearly doubled in size.
- Cozy Oven Tip: If your kitchen is cool, you can proof them in a lukewarm oven (around 79ºF/26ºC) with a cup of hot water inside for humidity.
Step 5: Bake to Golden Perfection
- Preheat: While the rolls are proofing, preheat your oven to 350ºF (180ºC) and adjust the oven rack to the middle position.
- Cover & Bake (Initial): Once the rolls have doubled, cover the pan loosely with aluminum foil. Bake for 15 minutes. This traps steam and helps the rolls get extra soft!
- Uncover & Bake (Final): Remove the foil and continue baking for another 18-22 minutes, until the tops are beautifully golden brown.
- Cool Down: Let the baked rolls cool slightly while you whip up the icing.
Step 6: Whip Up the Creamy Lemon Icing & Enjoy!
- Creamy Base: In a bowl, whisk together the softened cream cheese and butter until smooth. (A hand mixer works well here).
- Sweet & Smooth: Add the powdered sugar, vanilla, and a pinch of salt. Whisk until creamy and lump-free.
- Lemon Boost: Stir in the remaining ¼ cup of lemon curd until fully combined.
- Ice Away! Spread the delicious lemon cream cheese icing over the warm or lukewarm rolls. For extra gooeyness, ice them while they’re still quite warm.
Serving & Presentation Ideas for Your Gluten-Free Zesty Lemon Rolls
These **Gluten-Free Zesty Lemon Rolls** are already a showstopper, but a little extra flair can make them even more irresistible! Here are some fun ways to present and serve your delightful creations:
- Brunch Star: Arrange them beautifully on a platter for your next brunch gathering. They pair wonderfully with a fresh fruit salad, mimosas, or a light frittata.
- Afternoon Treat: Serve them warm with a cup of Earl Grey tea or a refreshing iced lemon drink for a sophisticated afternoon snack.
- Dessert Delight: While usually a breakfast item, the rich lemon flavor and creamy icing make these rolls a fantastic light dessert. You could even add a dollop of whipped cream or a few fresh raspberries on the side.
- Garnish with Zest & Berries: A sprinkle of extra fresh lemon zest on top of the icing adds a pop of color and an extra aromatic burst. A few fresh blueberries or raspberries scattered around the plate also provide a beautiful contrast and hint of fruitiness.
- Dusting of Powdered Sugar: For a more elegant look, skip some of the icing and instead dust the tops generously with powdered sugar right before serving.
- Individual Servings: If you’re hosting, serve each roll on a small dessert plate, perhaps with a sprig of mint for a touch of green.
- DIY Icing Station: For a fun, interactive experience, serve the warm rolls and the icing separately, allowing guests to ice their own rolls to their desired gooeyness!
Storing Your Gluten-Free Zesty Lemon Rolls
While these **Gluten-Free Zesty Lemon Rolls** are absolutely best enjoyed warm and fresh from the oven on baking day, you can certainly store them to savor their deliciousness a little longer.
- Room Temperature (Short-Term): If consuming within a few hours, you can keep them lightly covered on the counter. However, due to the cream cheese icing and lemon curd, refrigeration is generally recommended for longer storage.
- Refrigeration (2-3 Days): For optimal freshness and safety, store leftover rolls in an airtight container in the refrigerator for up to 2-3 days. This prevents them from drying out and keeps the dairy components fresh.
- Reheating: To bring back that fresh-baked softness, simply pop a roll into the microwave for 15-30 seconds, or until warmed through. You can also warm them gently in a preheated oven (around 250°F/120°C) for 5-10 minutes.
- Freezing (Long-Term): You can freeze un-iced baked rolls! Once completely cooled, wrap each roll individually in plastic wrap, then place them in a freezer-safe bag or container for up to 1-2 months. When ready to enjoy, thaw at room temperature, then warm in the microwave or oven and apply fresh icing. You can also freeze the baked and iced rolls, though the icing texture might change slightly upon thawing.
FAQs About Gluten-Free Zesty Lemon Rolls
Here are answers to some common questions you might have about making these delightful **Gluten-Free Zesty Lemon Rolls**:
1. Can I prepare parts of the Gluten-Free Zesty Lemon Rolls recipe ahead of time?
Absolutely! The lemon curd is best made a day or two in advance and chilled. You can also mix the dough the night before, let it rise in the fridge overnight, then proceed with rolling, filling, and baking the next morning.
2. What if I don’t have a stand mixer for the dough?
No problem! You can knead the dough by hand. It will take a bit longer, about 6-8 minutes, and your arms will get a good workout, but the results will still be soft and delicious. Just ensure all ingredients are well combined.
3. Can I substitute the psyllium husk?
Psyllium husk is crucial for the texture and structure in this gluten-free yeast dough, acting as a gluten substitute. While you *might* be able to try ground chia seeds or flax seeds as a binder, the texture will be different, and results are not guaranteed to be the same as intended by the recipe.
4. Is making lemon curd difficult?
Not at all! It’s quite straightforward. The key is to temper the eggs slowly and stir continuously over low heat to prevent scrambling. Don’t let it boil, and you’ll have luscious lemon curd in no time!
5. Can I use a different gluten-free flour blend?
This recipe uses a specific blend (tapioca, millet, sorghum) designed for optimal texture. While some all-purpose gluten-free blends might work, results can vary significantly in terms of texture, moisture, and rise. Sticking to the recommended flours will give you the best outcome for these **Gluten-Free Zesty Lemon Rolls**.
6. Why is my gluten-free dough so sticky?
Gluten-free dough, especially yeast dough, is typically stickier than traditional wheat dough because it lacks the elasticity of gluten. This is normal! Resist the urge to add too much extra flour, as this can make your rolls dry. Lightly flouring your hands and work surface, or chilling the dough briefly, will help with handling.
7. How do I know when the rolls have proofed enough?
The rolls should look noticeably puffier and have nearly doubled in size. A good test is to gently poke one with a floured finger; if the indentation slowly springs back halfway, it’s ready. If it springs back completely, it needs more time; if it collapses, it’s over-proofed.
8. Can I make these dairy-free?
To make these **Gluten-Free Zesty Lemon Rolls** dairy-free, you would need to substitute the butter with a dairy-free stick butter alternative, the milk with a warm dairy-free milk (like unsweetened almond or oat milk), and the cream cheese with a dairy-free cream cheese alternative. Ensure your lemon curd is also made with dairy-free butter.
9. What makes these rolls “zesty”?
The “zesty” factor comes from using fresh lemon zest rubbed into the sugar in both the curd and the dough, and plenty of fresh lemon juice in the curd. This maximizes the vibrant, aromatic lemon flavor throughout every part of the roll.
10. Can I add more filling or icing?
You certainly can! If you love a really gooey roll, feel free to increase the amount of lemon curd in the filling by an extra ¼ cup. For the icing, you can whip up an extra half batch if you prefer a very generous coating on your **Gluten-Free Zesty Lemon Rolls**.
Gluten-Free Zesty Lemon Rolls 🍋
Equipment
- Stand Mixer
- Saucepan
- Baking Pan
- Whisk
Ingredients
For the Bright Lemon Curd
- 0.5 cup granulated sugar
- 1 fresh lemon zest (organic, unwaxed recommended)
- 3 large egg yolks at room temperature
- 0.25 tsp salt
- 0.25 cup fresh lemon juice
- 0.25 cup unsalted butter cut into cubes
For the Soft Gluten-Free Dough
- 3 tbsp whole psyllium husk (or 2.5 tablespoons psyllium husk powder)
- 0.75 cup warm water
- 0.25 cup granulated sugar
- 1 fresh lemon zest (organic, unwaxed recommended)
- 1.4 cups tapioca starch (or arrowroot starch, cornstarch, or potato starch)
- 1 cup millet flour (or finely milled brown rice flour)
- 3 tbsp sorghum flour (or light buckwheat, white teff, or oat flour if no oat sensitivity)
- 2 tsp instant yeast (or 2.5 teaspoons active dry yeast)
- 1.5 tsp baking powder
- 2 tsp xanthan gum
- 1 tsp salt
- 0.42 cups warm whole milk
- 1 large egg at room temperature
- 2.5 tbsp unsalted butter melted
For the Tangy Filling
- 0.67 cup prepared lemon curd (about 170g)
- 1 tbsp cornstarch
For the Velvety Lemon Cream Cheese Icing
- 0.33 cup full-fat cream cheese softened
- 2.5 tbsp unsalted butter softened
- 0.5 cup powdered sugar
- 0.5 tsp vanilla bean paste (or 1-2 teaspoons vanilla extract)
- pinch of salt
- 0.25 cup prepared lemon curd (about 55g)
Instructions
- Step 1: Create the Luscious Lemon Curd (Best Made Ahead!)
- Prep Your Tools: To avoid a metallic taste, use a glass or ceramic bowl, a rubber spatula, and a non-metal saucepan.
- Infuse the Sugar: In a bowl, rub the lemon zest into the granulated sugar with your fingertips. This step really brings out the lemon flavor!
- Whip It Good: Add the egg yolks and salt to the lemon-sugar mixture. Whisk by hand until they're slightly fluffy and lighter in color.
- Heat the Juice: Gently heat the lemon juice in your saucepan until it just starts to boil.
- Temper the Eggs: Slowly drizzle the hot lemon juice into the egg yolk mixture, whisking constantly. This keeps your eggs from scrambling!
- Thicken It Up: Pour the mixture back into the saucepan. Cook over low heat, stirring continuously, for about 4-5 minutes until it thickens enough to coat the back of your spoon. Don't let it boil!
- Butter Up: Remove from heat and stir in the cubed butter until it's completely melted and smooth.
- Cool Down: Pour the curd into a heat-proof container. Cover it with plastic wrap, pressing it directly onto the surface to prevent a "skin" from forming. Let it cool to room temperature, then chill in the fridge until you're ready to use it (can be made a day or two in advance).
- Step 2: Mix the Light & Fluffy Gluten-Free Dough
- Psyllium Gel Magic: In a small bowl, mix the psyllium husk with warm water. Watch it transform into a gel in about 30-45 seconds.
- Zesty Sugar: In the bowl of a stand mixer (recommended, with dough hook), rub the lemon zest into ¼ cup granulated sugar.
- Combine Dry Goodies: Add tapioca starch, millet flour, sorghum flour, instant yeast, baking powder, xanthan gum, and salt to the mixer bowl. Whisk everything together. Quick Tip for Active Dry Yeast: If using active dry yeast, first mix it with 1-2 tablespoons of the sugar and the warm milk. Let it sit for 10-15 minutes until it gets foamy, then add it with the other wet ingredients.
- Wet Meets Dry: Make a little well in the center of your dry ingredients. Add the psyllium gel, warm milk, egg, and melted butter.
- Knead to Perfection: Knead with the dough hook for 4-5 minutes (or 6-8 minutes by hand) until the dough is smooth and all ingredients are well combined. Scrape the sides and bottom of the bowl occasionally. This extra kneading is key for soft rolls!
- Sticky is Okay! The dough will be a bit sticky, but that's perfectly normal for gluten-free dough. Resist adding more flour, which can make your rolls dry. If it's too sticky to handle, chill it in the fridge for about an hour to firm it up.
- Step 3: Assemble Your Swirly Lemon Rolls
- Prep Your Pan: Lightly butter a 10-inch round skillet or baking pan.
- Filling Time: In a small bowl, mix ⅔ cup of your prepared lemon curd with the cornstarch. This helps it set nicely inside the rolls.
- Roll it Out: Lightly flour your work surface and your hands. Gently knead the dough, then roll it into a rectangle, roughly 11x15 inches.
- Spread the Zest: Dollop the lemon curd filling evenly over the entire dough rectangle, spreading it all the way to the edges.
- Cut & Roll: Using a pizza cutter or a sharp knife, cut the dough lengthwise into seven 1½-inch wide strips (about 15 inches long). Carefully roll up each strip into a pretty swirl. Don't worry if it gets a little messy – lemon curd is softer than typical cinnamon roll filling!
- Arrange: Place the rolled lemon rolls into your buttered pan, so they are just touching each other.
- Step 4: Let Them Rise (Proofing)
- Warm Spot: Lightly cover the rolls with plastic wrap to prevent drying. Let them rise in a warm spot for about 1 hour 15 minutes to 1 hour 30 minutes, or until they've nearly doubled in size.
- Cozy Oven Tip: If your kitchen is cool, you can proof them in a lukewarm oven (around 79ºF/26ºC) with a cup of hot water inside for humidity.
- Step 5: Bake to Golden Perfection
- Preheat: While the rolls are proofing, preheat your oven to 350ºF (180ºC) and adjust the oven rack to the middle position.
- Cover & Bake (Initial): Once the rolls have doubled, cover the pan loosely with aluminum foil. Bake for 15 minutes. This traps steam and helps the rolls get extra soft!
- Uncover & Bake (Final): Remove the foil and continue baking for another 18-22 minutes, until the tops are beautifully golden brown.
- Cool Down: Let the baked rolls cool slightly while you whip up the icing.
- Step 6: Whip Up the Creamy Lemon Icing & Enjoy!
- Creamy Base: In a bowl, whisk together the softened cream cheese and butter until smooth. (A hand mixer works well here).
- Sweet & Smooth: Add the powdered sugar, vanilla, and a pinch of salt. Whisk until creamy and lump-free.
- Lemon Boost: Stir in the remaining ¼ cup of lemon curd until fully combined.
- Ice Away! Spread the delicious lemon cream cheese icing over the warm or lukewarm rolls. For extra gooeyness, ice them while they're still quite warm.
- Serve & Store: Enjoy these zesty rolls while they're warm! They're best on baking day but can be stored in an airtight container for 2-3 days. Reheat briefly in the microwave for that fresh-baked softness.