Why You’ll Love This Healthy & Easy Ninja Creami Blizzard Dream!
Prepare to fall head over heels for this incredible dessert! Our Healthy & Easy Ninja Creami Blizzard Dream! recipe isn’t just another sweet treat; it’s a game-changer for anyone craving indulgence without the guilt. Here’s why it’s about to become your new freezer staple:
- Guilt-Free Indulgence: Forget those calorie bombs from the drive-thru! This recipe is designed to be a significantly healthier alternative, allowing you to enjoy a satisfying blizzard without derailing your wellness goals.
- Effortless Creation: With the magic of your Ninja Creami and a few simple steps, you’ll be whisking up this dream dessert in minutes. The “easy” isn’t just in the name – it’s baked into every step!
- Customization King (or Queen!): This isn’t a one-size-fits-all treat. From fresh berries to decadent dark chocolate, you have total control over your mix-ins, making every blizzard uniquely yours and perfectly suited to your health preferences.
- Creamy Perfection, Every Time: Thanks to the Ninja Creami, you’re guaranteed an irresistibly smooth, velvety texture that rivals your favorite ice cream parlor. Say goodbye to icy, sad homemade desserts and hello to pure bliss!
Your Healthy & Easy Ninja Creami Blizzard Dream! Awaits!
Ever found yourself staring longingly at a menu, wishing for a creamy, dreamy blizzard, but then pulling back, thinking about the sugar, the calories, the… well, the everything that isn’t exactly “healthy”? What if we told you that your blizzard dreams don’t have to be just dreams? What if you could whip up a luscious, satisfying, and genuinely *healthier* version right in your own kitchen, with minimal effort and maximum deliciousness?
Enter the Healthy & Easy Ninja Creami Blizzard Dream! This isn’t just a recipe; it’s a passport to guilt-free indulgence, a testament to what happens when smart choices meet incredible taste. Your Ninja Creami is about to become your best friend in dessert-making, transforming simple ingredients into a frosty masterpiece that’s both light on your conscience and bursting with flavor. Get ready to scoop into bliss!
Ingredients for Your Ninja Creami Blizzard
Gather your simple ingredients to create this fantastic treat. Remember, choice is key here – opt for lighter versions where noted to keep it a true Healthy & Easy Ninja Creami Blizzard Dream!
- 🥛 1 cup milk (skim or almond milk for a lighter option)
- ☁️ 3/4 cup light whipped topping (like Cool Whip Lite)
- 🍨 1 Tablespoon Junket vanilla ice cream mix
- 🍦 1/2 cup heavy cream (or use half-and-half for fewer calories)
- 🌿 1/4 teaspoon vanilla extract
- 🍫 1/4 cup mini Reese’s cups (or choose fresh fruit, nuts, or dark chocolate for a healthier mix-in!), plus more for garnish if desired
Step-by-Step Directions to Blizzard Bliss
Making your Healthy & Easy Ninja Creami Blizzard Dream! is a breeze! Follow these simple steps for a perfect, creamy result every time:
- Whisk It Up: Grab a small mixing bowl or a large liquid measuring cup. Pour in your chosen milk, the fluffy light whipped topping, and the Junket vanilla ice cream mix. Now, for the magic touch: use an immersion blender to blend everything until it’s perfectly smooth. This ensures a uniform base that’s super easy to prepare!
- Add Flavor & Freeze: Gently stir in the heavy cream (or your lighter half-and-half alternative!) and the fragrant vanilla extract. Mix until everything is beautifully combined. Pour this delightful mixture into a Ninja Creami pint container, snap on the lid, and place it on a level shelf in your freezer. This step is crucial: let it chill and solidify for at least 24 hours. Patience truly makes for the best, creamiest results!
- Creamify!: Once your pint is frozen solid (no shortcuts here!), take it out of the freezer and remove the lid. Pop the container into the Ninja Creami’s outer bowl, secure the outer bowl lid, and lock it firmly into place on your Ninja Creami machine. Hit that “Ice Cream” button and let the machine do its incredible work!
- Perfect Consistency: After the Creami finishes its cycle, take out the pint and check the texture. If it looks a little crumbly or powdery – don’t fret! This is totally normal. Just place it back into the machine, hit the “Re-spin” button, and let it work its magic again for an even smoother, dreamier finish.
- Mix-In Magic: Now for the fun part that makes this a true Healthy & Easy Ninja Creami Blizzard Dream!! Using a spoon, create a small well in the center of your creamy treat, about an inch wide and going all the way to the bottom of the pint. Add your favorite healthy mix-ins – whether it’s vibrant fresh berries, crunchy chopped nuts, a sprinkle of dark chocolate, or those irresistible mini Reese’s cups – pressing them in gently. Return the outer bowl to the machine and press the “Mix-in” button to perfectly incorporate your chosen goodies throughout your ice cream.
- Enjoy Guilt-Free: Scoop out your homemade, healthier Blizzard immediately! Feel free to add a few extra mix-ins or a dollop of light whipped topping on top for an extra touch of indulgence. Savor every spoonful of your creation!
Serving & Presentation Ideas for Your Dream Blizzard
Part of the joy of making your own Healthy & Easy Ninja Creami Blizzard Dream! is getting creative with how you present and serve it! Here are a few ways to make your homemade treat even more special:
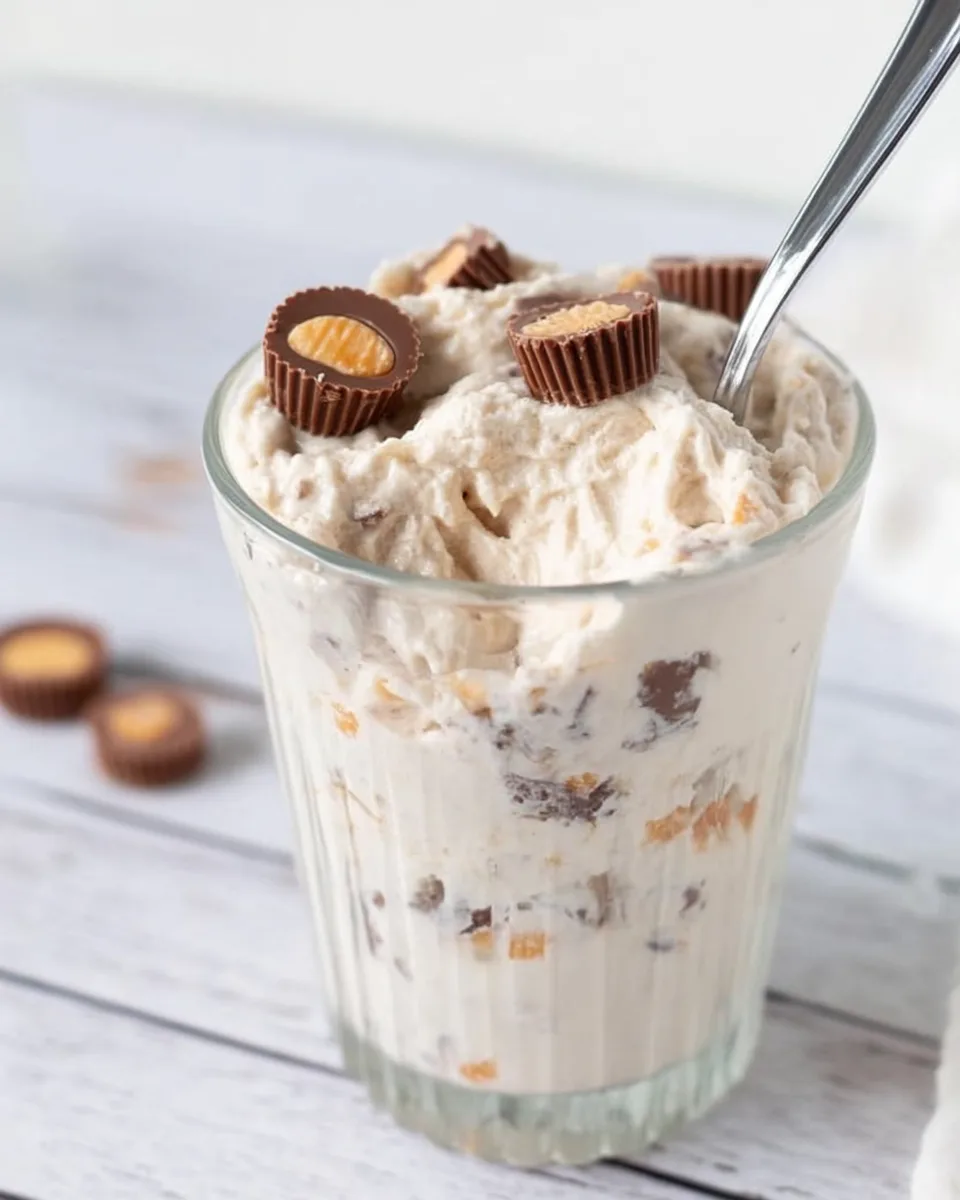
- Classic Pint Perfection: The simplest way to enjoy is straight from the Ninja Creami pint with a long spoon! It’s casual, satisfying, and truly lets the creamy texture shine.
- Elegant Glass Delight: For a more sophisticated presentation, scoop your blizzard into a chilled clear glass or parfait dish. This allows you to show off the beautiful swirls of mix-ins.
- Garnish Galore: Elevate your blizzard with a thoughtful garnish! A few fresh berries (strawberries, raspberries, blueberries), a sprinkle of toasted coconut flakes, a light drizzle of melted dark chocolate, or a delicate sprig of mint can add visual appeal and extra flavor.
- Blizzard Parfait: Layer your creamy blizzard with other healthy components. Think alternating layers of fresh fruit, a sprinkle of low-sugar granola, or even some Greek yogurt for an extra protein boost.
- Mini Blizzard Bites: For a party, scoop small portions into mini shot glasses or small dessert cups, each with a tiny spoon. It’s a fun and easy way for guests to sample your delightful creation.
No matter how you serve it, this customizable dessert is sure to impress!
Storage & Longevity of Your Ninja Creami Blizzard Dream!
You’ve crafted a perfect Healthy & Easy Ninja Creami Blizzard Dream!, and while it’s tempting to eat it all in one go, sometimes you might have leftovers or want to prep ahead. Here’s how to store your delicious creation:
- Storing the Base: Before processing, the liquid mixture can be stored in the Ninja Creami pint, sealed with its lid, in the freezer indefinitely (though for best freshness, use within a month or two).
- Storing After Processing: If you process the pint and have leftovers, simply smooth the top of the ice cream in the pint, put the lid back on, and return it to the freezer.
- Re-spinning Leftovers: When you’re ready for another scoop, your blizzard might have refrozen solid. Don’t worry if it’s too hard to scoop! Just place the pint back into the Ninja Creami’s outer bowl, secure it, and run the “Re-spin” cycle. This will bring it back to that perfectly creamy texture, ready for you to enjoy.
- How Long Does It Last? For optimal taste and texture, your processed Ninja Creami blizzard is best enjoyed within 1-2 weeks. While it will technically be safe to eat for longer (provided it’s kept consistently frozen), the texture and flavor might degrade slightly over time.
FAQs: Your Ninja Creami Blizzard Dream! Questions Answered
- Q: Can I use different types of milk for this recipe?
A: Absolutely! Skim or almond milk are recommended for a lighter option, but you can use whole milk for a richer, creamier base. Plant-based milks like oat or soy also work great, just ensure they are unsweetened if you’re watching sugar intake. - Q: What if I don’t have Junket vanilla ice cream mix? Are there alternatives?
A: Junket mix helps with the texture and vanilla flavor. If you don’t have it, you can try substituting with 1 tablespoon of vanilla pudding mix powder (sugar-free for a healthier option) or a mixture of 1/2 tablespoon cornstarch whisked into the milk, plus an extra splash of vanilla extract and a touch of sweetener if desired. - Q: Can I skip the light whipped topping?
A: The light whipped topping contributes significantly to the creamy texture and lower calorie count. Skipping it might result in a less creamy, potentially icier consistency. If you omit it, you might need to adjust the heavy cream amount or add a different fat source to compensate. - Q: What are some other healthy mix-in ideas besides Reese’s cups?
A: The possibilities are endless! Consider fresh berries (strawberries, blueberries, raspberries), chopped nuts (almonds, walnuts, pecans), dark chocolate chips or shavings (70% cocoa or higher), unsweetened shredded coconut, chia seeds, or a drizzle of natural peanut butter. - Q: How long does the pint *really* need to freeze before processing?
A: A minimum of 24 hours is crucial. The mixture needs to be frozen completely solid, all the way through, for the Ninja Creami to work its magic and produce that signature smooth, creamy texture. Rushing this step can lead to a crumbly or soupy result. - Q: My Creami blizzard is crumbly after the first spin. What should I do?
A: Don’t panic, this is very common! Simply put the pint back into the machine and press the “Re-spin” button. This usually resolves any crumbly texture, making your blizzard wonderfully smooth and creamy. - Q: Can I make this recipe dairy-free?
A: Yes! Use a dairy-free milk (like almond, oat, or soy milk), a dairy-free whipped topping (like coconut whip), and ensure your Junket mix or substitute is dairy-free. This makes for a fantastic dairy-free Healthy & Easy Ninja Creami Blizzard Dream! - Q: Is this recipe truly “healthy” or just “healthier”?
A: It’s designed to be a “healthier alternative” to traditional, high-calorie blizzards. By using lighter ingredients and allowing for customizable, wholesome mix-ins, it offers a more nutritious option. Portion control and your choice of mix-ins will further influence its overall health profile. - Q: Can I make multiple pints ahead of time for a party?
A: Absolutely! This recipe is perfect for meal prep or party planning. Prepare several pints, freeze them for 24+ hours, and then process them one by one just before serving your guests. - Q: Do I need a Ninja Creami machine to make this recipe?
A: Yes, this recipe is specifically formulated for the Ninja Creami. The unique processing method of the Creami is essential to achieve the incredibly smooth, ice cream-like texture from the frozen base. Traditional blenders or ice cream makers will not yield the same results.
Healthy & Easy Ninja Creami Blizzard Dream! ✨
Equipment
- Ninja Creami
- Mixing Bowl
- Immersion Blender
Ingredients
- 1 cup milk skim or almond milk for a lighter option
- 3/4 cup light whipped topping like Cool Whip Lite
- 1 Tablespoon Junket vanilla ice cream mix
- 1/2 cup heavy cream or use half-and-half for fewer calories
- 1/4 teaspoon vanilla extract
- 1/4 cup mini Reese's cups or choose fresh fruit, nuts, or dark chocolate for a healthier mix-in!, plus more for garnish if desired
Instructions
- Whisk It Up: In a small mixing bowl or large liquid measuring cup, combine your chosen milk, light whipped topping, and Junket vanilla ice cream mix. Use an immersion blender to blend until the mixture is perfectly smooth – it makes it super easy!
- Add Flavor & Freeze: Gently stir in the heavy cream (or your lighter cream alternative!) and vanilla extract until everything is well combined. Pour this delicious mixture into a Ninja Creami pint container, seal it with the lid, and place it on a level surface in your freezer. Let it chill and solidify for at least 24 hours – patience is key for the best creamy results!
- Creamify!: Once your pint is frozen solid, remove it from the freezer and take off the lid. Place the container into the Ninja Creami's outer bowl, secure the outer bowl lid, and then lock it into place on your Ninja Creami machine. Press the "Ice Cream" button and let the magic happen!
- Perfect Consistency: After the cycle completes, remove the pint and check its texture. If it appears a little crumbly, don't worry! Just place it back into the machine and press the "Re-spin" button for an even smoother finish.
- Mix-In Magic: Now for the fun part! Create a small well in the center of your creamy treat, about an inch wide and extending to the bottom of the pint. Add your favorite healthy mix-ins, like fresh berries, chopped nuts, or a small handful of mini Reese's cups, pressing them in gently. Put the outer bowl back into the machine and press the "Mix-in" button to perfectly incorporate your chosen goodies throughout the ice cream.
- Enjoy Guilt-Free: Serve immediately and savor your homemade, healthier Blizzard! Feel free to add a few extra mix-ins on top for garnish if you like.
Notes
Calories : 254
Total Carbs: 15g
Net Carbs: 14g
Fats: 20g
Protein: 5g Enjoy customizing your Ninja Creami Blizzard with various healthy mix-ins!