
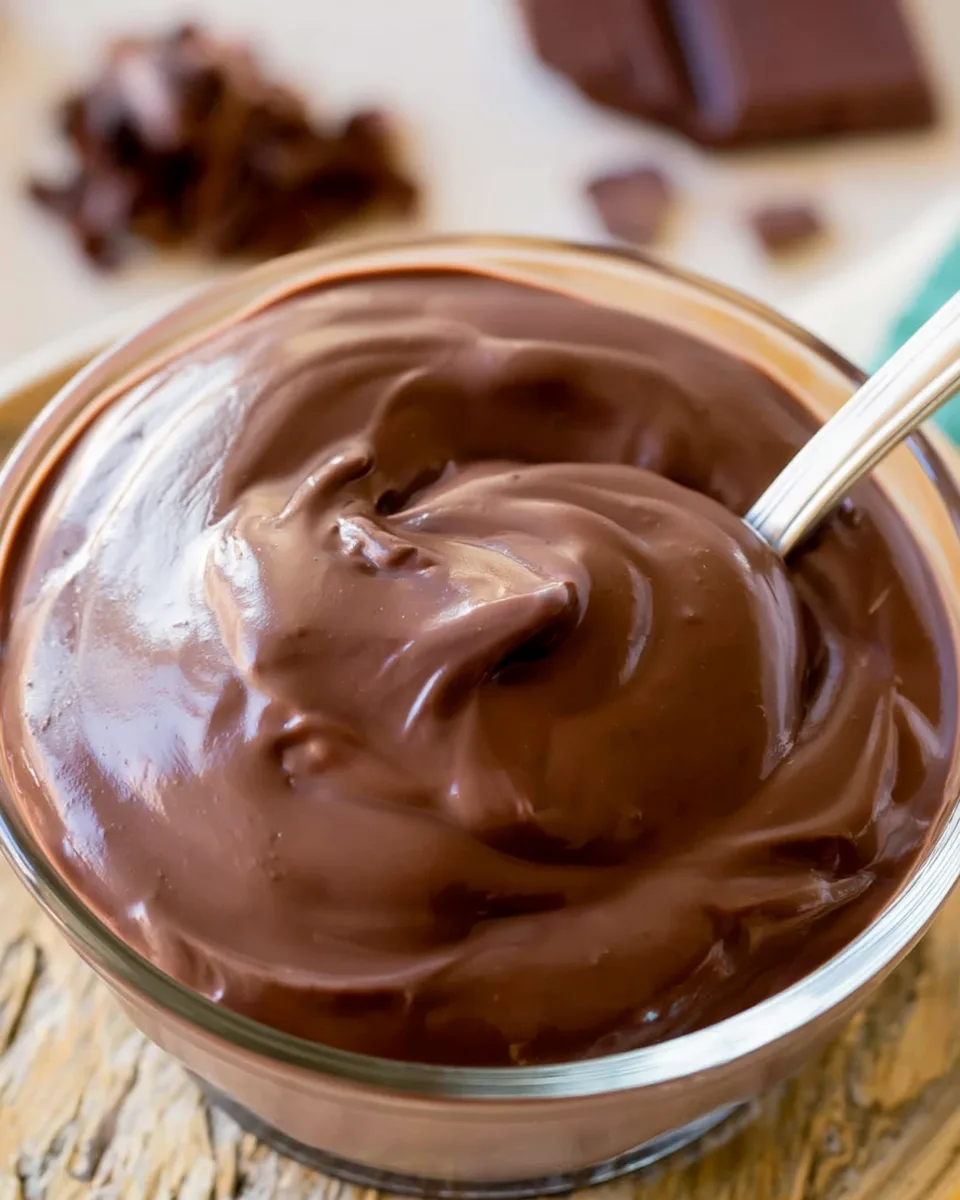
🍫✨ The Lunchbox Secret That Makes Kids (and Grown‑Ups) Actually Do a Happy Dance
Picture this: you open your kid’s lunchbox at school, and instead of the usual sad sandwich, there’s a perfectly creamy, deeply chocolatey pudding that tastes like a hug in a cup. No artificial junk, no weird aftertaste. Just pure, melt‑in‑your‑mouth bliss. This Homemade Lunchbox Chocolate Pudding is the superhero of packed lunches – it’s quick, budget‑friendly, and so ridiculously smooth that even the pickiest eaters will beg for more. Plus, you get to feel like a kitchen wizard when you pull it off in under 20 minutes of active work. Ready to become the lunchbox legend? Let’s dive in!
❤️ Why You’ll Love This Homemade Lunchbox Chocolate Pudding
1. It’s a No‑Fail, Speedy Miracle
Most puddings require babysitting over a hot stove. Not this one! With just 5 minutes of real cooking (plus a 15‑minute cool‑down), you’ll have a velvety dessert that sets perfectly in the fridge. No egg‑tempering, no double‑boiler drama – just whisk, boil, strain, and chill.
2. Clean Ingredients You Can Pronounce
Forget the preservatives, high‑fructose corn syrup, and mystery stabilizers lurking in store‑bought cups. This recipe uses real whole milk, dark chocolate (60% cacao for that rich hit), butter, and vanilla. You control the sugar and cocoa – and your body will thank you.
3. Lunchbox‑Ready & Leak‑Proof
Once chilled, this pudding is thick enough to stay put in small containers. No drips, no mess, no sad pudding puddles at the bottom of a backpack. Just pop a lid on, toss it in the lunchbox, and you’re golden. Bonus: it tastes even better the next day!
4. Customisable for Every Sweet Tooth
Want a dairy‑free version? Swap whole milk for oat milk and use vegan butter. Need a lower‑sugar option? Reduce the sugar to ½ cup and go for 85% dark chocolate. The base recipe is a blank canvas for your family’s cravings – add a pinch of cinnamon, a drop of peppermint extract, or a swirl of peanut butter.
📋 Ingredients – Grab These From Your Pantry
- 🍬 ¾ cup (150 g) granulated sugar
- 🌽 3 tablespoons cornstarch
- 🍫 2 tablespoons natural cocoa powder (unsweetened)
- 🧂 ¼ teaspoon salt
- 🥛 3 cups (710 ml) whole milk
- 🍫 4 oz (113 g) dark chocolate bar (60% cacao), finely chopped
- 🧈 2 tablespoons butter, cut into small pieces
- 🌿 1 teaspoon vanilla extract
Tip: Use a high‑quality dark chocolate – it makes all the difference. Avoid chocolate chips that contain stabilisers; a chopped bar melts silkier.
👩🍳 Step‑by‑Step – How to Make Homemade Lunchbox Chocolate Pudding
- Whisk dry ingredients: In a medium saucepan (non‑stick is easiest), whisk together the sugar, cornstarch, cocoa powder, and salt. Make sure there are no lumps – a fine‑mesh strainer can help sift the cocoa.
- Add milk: Slowly pour in the whole milk while whisking. Whisk until the mixture is completely smooth and the dry ingredients are fully dissolved.
- Cook over medium‑low heat: Place the saucepan over medium‑low heat. Whisk frequently (don’t walk away!). After about 10 minutes, the mixture will start to thicken. Test by coating the back of a metal spoon – you should see no metal showing through.
- Boil for 60 seconds: Once thick, switch to constant whisking. Bring the pudding to a gentle boil (you’ll see small bubbles break the surface). Continue whisking for exactly 60 seconds – this activates the cornstarch for a stable set.
- Remove from heat & add chocolate: Take the pan off the stove. Immediately stir in the finely chopped dark chocolate, butter pieces, and vanilla extract. Stir until everything is melted and the pudding is glossy and smooth.
- Strain for perfection: Pour the hot pudding through a fine‑mesh strainer into a heatproof bowl. Use a rubber spatula to push it through – this catches any tiny lumps or cooked bits.
- Cool with love: Let the pudding sit at room temperature for 15 minutes, stirring occasionally with a clean spoon. This prevents a skin from forming while it cools down.
- Cover & chill: Press a piece of plastic wrap directly onto the surface of the pudding (again, to stop a skin). Refrigerate for at least 4 hours, or overnight. The pudding will set into a spoonable, dreamy texture.
- Spoon & go: After chilling, give it a quick stir if needed. Spoon into lunchbox containers (4–6 small cups, depending on size). Pack in your kid’s lunchbox with a cold pack – or enjoy straight from the bowl!
🎉 5 Fun Ways to Serve & Present This Pudding
- Classic lunchbox cups: Use ½‑cup reusable silicone cups with lids. Top with a sprinkle of sea salt or mini chocolate chips for crunch.
- Layered parfait: In a clear jar, alternate pudding with crumbled graham crackers or crushed Oreos and a dollop of whipped cream. Instant dessert bar!
- Pudding popsicles: Pour the slightly cooled pudding into popsicle molds, insert sticks, and freeze for 4–6 hours. Creamy fudge pops without the additives.
- Fruit & pudding cups: Add a layer of sliced bananas or strawberries at the bottom of the container, then spoon pudding on top. The fruit stays fresh and adds natural sweetness.
- DIY topping station: Pack a separate small bag with toasted coconut flakes, crushed peanuts, or a drizzle of caramel sauce. Kids can customise their own pudding at lunch!
🧊 Storage & Shelf Life
Refrigerator: Keep the Homemade Lunchbox Chocolate Pudding in an airtight container (with plastic wrap pressed on the surface) for up to 5 days. The texture stays creamy; if it thickens too much, stir in a splash of milk.
Freezer: You can freeze this pudding in portions! Spoon into freezer‑safe containers, cover tightly, and freeze for up to 3 months. Thaw overnight in the fridge before packing. The texture may be slightly less silky after freezing, but still delicious – perfect for popsicles!
Pro tip: Always keep the pudding cold for lunchboxes. Use an insulated lunch bag with an ice pack, especially in warm weather.
❓ Frequently Asked Questions
Yes! Skim milk will work, but the pudding will be less rich. For plant‑based, choose oat milk or full‑fat coconut milk for the best creaminess. Avoid watery milks like rice milk.
Lumps usually happen if you stop whisking while heating, or if you added the milk too quickly. Next time, whisk constantly once the mixture starts to thicken, and don’t let it boil too vigorously.
Absolutely. Cut the granulated sugar to ½ cup (100 g) and use a darker chocolate (70–85% cacao). Taste the pudding before chilling – it should be slightly sweeter than you’d like, because chilling mutes sweetness.
Press plastic wrap directly onto the warm pudding surface (this is called “contact covering”). Alternatively, stir occasionally during the first 30 minutes of chilling.
Yes! Use a full‑fat oat or coconut milk, and replace the butter with a vegan butter stick (like Miyoko’s or Earth Balance). The chocolate must be dairy‑free (check the label).
Cornstarch gives the silkiest texture. You can substitute 3 tablespoons of all‑purpose flour, but you’ll need to cook for an extra 2–3 minutes to eliminate the raw flour taste. The pudding will be slightly less glossy.
Simply whisk in 1–2 tablespoons of milk until it loosens. This happens if the pudding was boiled too long – next time, stop as soon as you see the first boil.
Sure! Double all ingredients and use a larger saucepan. The cooking time may increase by 2–3 minutes. Still whisk frequently, and strain in batches if needed.
Use an insulated lunch bag with a frozen ice pack. The pudding stays cold for at least 4–5 hours. If your child doesn’t have refrigeration, add a small reusable ice pack.
You can whisk in a scoop of chocolate protein powder after removing from heat (or mix it with a little milk first). For chia, stir in 2 tablespoons after straining – the pudding will set softer and have a slight tapioca texture.
✨ Now go ahead – whip up a batch of this Homemade Lunchbox Chocolate Pudding and watch the lunchbox smiles multiply! 🎒🍫
Homemade Lunchbox Chocolate Pudding
Equipment
- Medium Saucepan
- Whisk
- Fine-mesh strainer
Ingredients
Dry Ingredients
- 3/4 cup granulated sugar 150g
- 3 Tbsp cornstarch
- 2 Tbsp natural cocoa powder
- 1/4 tsp salt
Wet Ingredients
- 3 cups whole milk 710ml
- 4 oz dark chocolate bar (60% cacao) finely chopped
- 2 Tbsp butter cut into pieces
- 1 tsp vanilla extract
Instructions
- In a medium saucepan, whisk together sugar, cornstarch, cocoa powder, and salt.
- Pour in the milk and whisk well. Place over medium-low heat.
- Whisk frequently until the mixture thickens (about 10 minutes). It should coat the back of a spoon with no metal showing through.
- Once thick, whisk constantly until it comes to a gentle boil. Continue whisking for 60 seconds, then remove from heat.
- Immediately stir in the chopped dark chocolate, butter, and vanilla until smooth and fully melted.
- Pour the pudding through a fine-mesh strainer into a heatproof bowl to remove any lumps.
- Let cool for 15 minutes, stirring occasionally to prevent a skin from forming.
- Press plastic wrap directly onto the surface of the pudding to keep it skin-free.
- Refrigerate for at least 4 hours (or overnight) until fully chilled and set.
- Spoon into lunchbox containers and enjoy! Top with whipped cream if you like.