Homemade Summer Vanilla Bliss Ice Cream: Your Ultimate Warm-Weather Treat!
Summer is calling, and it’s whispering sweet nothings about cool, creamy, utterly divine ice cream! Forget those bland, store-bought tubs that promise flavor but deliver disappointment. This year, you’re going to create something truly magical right in your own kitchen: Homemade Summer Vanilla Bliss Ice Cream. Imagine scooping into a cloud of velvety, vanilla-infused perfection, each spoonful a mini-vacation for your taste buds. It’s not just dessert; it’s an experience, a memory in the making, and frankly, the best decision you’ll make all season. Get ready to impress your friends, delight your family, and treat yourself to the purest form of summer joy!
Why You’ll Love This Homemade Summer Vanilla Bliss Ice Cream Recipe
Prepare to fall head over heels for this recipe! Here are four irresistible reasons why our Homemade Summer Vanilla Bliss Ice Cream will become your new favorite:
- Unparalleled Vanilla Flavor: We’re talking real vanilla bean power here! By infusing the cream base with both the bean and an extra splash of extract, you get a complex, aromatic vanilla profile that store-bought versions can only dream of. It’s truly a vanilla lover’s dream come true.
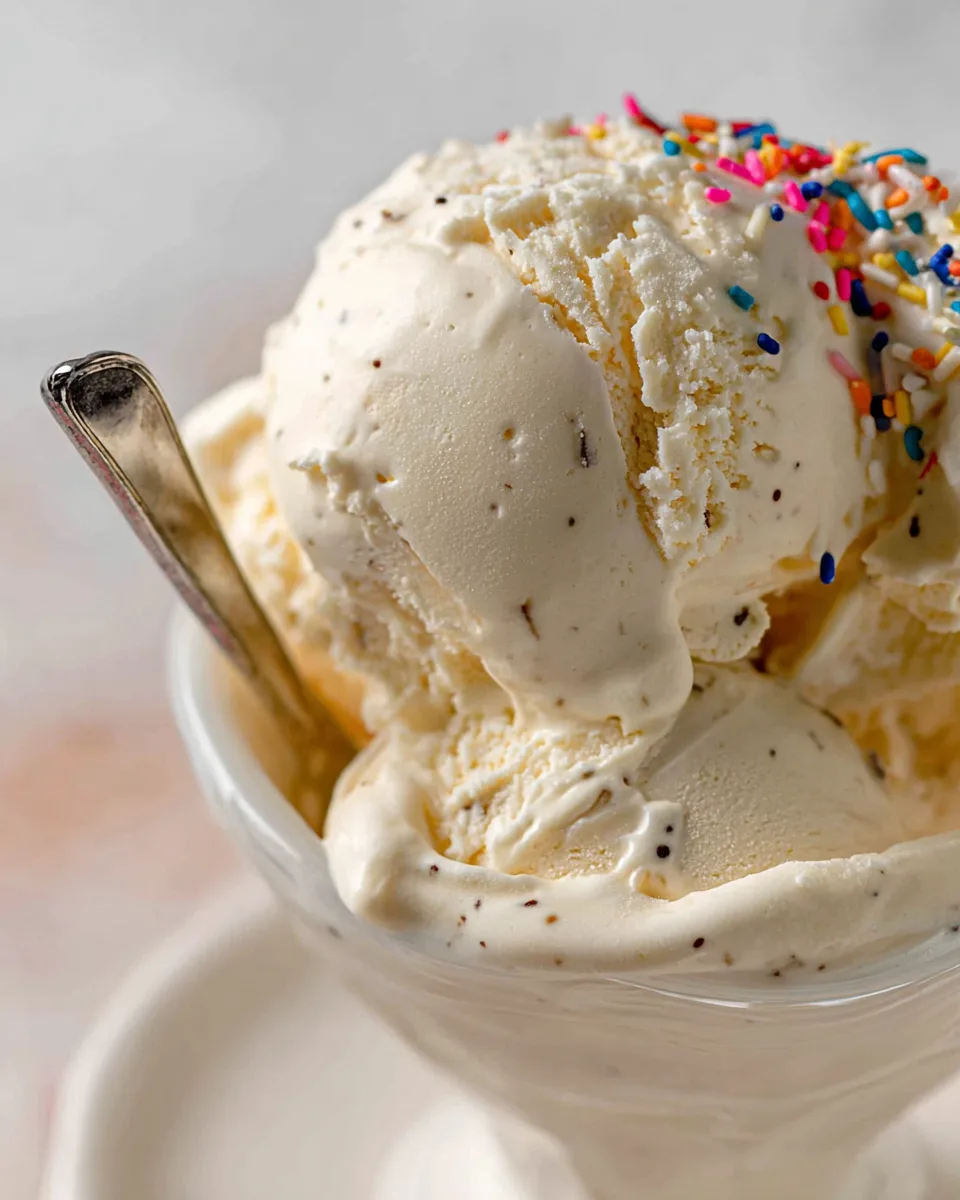
- Silky Smooth, Dreamy Texture: Thanks to the rich custard base (hello, egg yolks!) and the careful straining, this ice cream boasts an incredibly luxurious, velvety texture. Say goodbye to icy, grainy ice cream and hello to pure bliss that melts perfectly in your mouth.
- The Ultimate Summer Cooler: What’s better than a scoop of perfectly chilled, intensely flavorful ice cream on a hot summer day? This recipe is designed to be the refreshing antidote to rising temperatures, providing a cool and comforting escape from the heat.
- Pure DIY Satisfaction: There’s immense joy in creating something so delicious from scratch. From watching the custard thicken to seeing your ice cream maker transform liquid into a creamy delight, every step brings a sense of accomplishment. Plus, you control every ingredient, ensuring a wholesome and delightful treat.
Ingredients for Your Homemade Summer Vanilla Bliss Ice Cream
Gather your simple yet sublime ingredients to craft this incredible dessert. Quality matters here, especially for that vanilla bean!
- 🍦 1 cup whole milk
- 🍦 ¾ cup granulated sugar
- 🍦 2 cups heavy cream, divided
- 🍦 Pinch of salt
- 🍦 1 vanilla bean, split lengthwise (or 2 tsp vanilla bean paste for ease)
- 🍦 6 large egg yolks
- 🍦 ¾ teaspoon vanilla extract
Detailed Directions: Crafting Your Vanilla Dream
Follow these steps closely, and you’ll be on your way to the most delicious Homemade Summer Vanilla Bliss Ice Cream you’ve ever tasted!
- Infuse the Cream Base: In a medium saucepan, gently warm the milk, sugar, 1 cup of heavy cream, and the pinch of salt over low heat. Stir until the sugar is fully dissolved. Scrape the fragrant seeds from your vanilla bean into the mixture, then drop in the bean pod. Take the pan off the heat, cover it, and let it sit for 30 minutes to steep, allowing all that wonderful vanilla flavor to soak in.
- Craft the Custard: While the vanilla steeps, whisk your egg yolks in a separate medium bowl until light. Remove the vanilla bean pod from the warm milk mixture. Slowly, in a steady stream, pour about half of the warm milk mixture into the whisked egg yolks, whisking constantly to temper the yolks and prevent scrambling. Pour this tempered egg mixture back into the saucepan with the remaining warm milk.
- Thicken to Perfection: Place the saucepan back over medium heat. Stir continuously with a rubber spatula, making sure to scrape the bottom of the pan, until the mixture thickens enough to coat the back of your spatula (this usually takes just a few minutes and should reach about 170-175°F). Avoid boiling to keep it smooth!
- Chill and Combine: Pour the thickened custard through a fine-mesh sieve into a large clean bowl containing the remaining 1 cup of cold heavy cream. This step ensures a super smooth, silky ice cream base. Stir in the vanilla extract. Place this bowl over an ice bath (a larger bowl filled with ice and a little water) and stir occasionally until the mixture is cool.
- Overnight Chill: Cover the custard tightly and transfer it to the refrigerator. Let it chill completely for at least 8 hours, or ideally overnight. This deep chilling is essential for the best texture and flavor in your homemade ice cream!
- Churn for Creaminess: Once thoroughly chilled, remove the vanilla bean pod from the custard. Pour the custard into your ice cream maker and churn according to the manufacturer’s instructions until it reaches a soft-serve consistency.
- Freeze for Firmness: Transfer the freshly churned ice cream to an airtight freezer-safe container. Freeze for at least 2-4 hours to firm up before serving. It will keep beautifully in the freezer for up to 2 months.
Presenting and Serving Your Homemade Summer Vanilla Bliss Ice Cream
Once you’ve made your perfect batch of Homemade Summer Vanilla Bliss Ice Cream, the fun doesn’t stop there! Here are some delightful ways to serve and present this summery treat:
- The Classic Scoop: Simply serve a generous scoop (or two!) in a chilled bowl or a crisp waffle cone. Sometimes, simplicity is perfection, allowing the pure vanilla flavor to shine.
- Build-Your-Own Sundae Bar: Lay out an array of toppings! Think hot fudge, caramel sauce, fresh berries (strawberries, blueberries, raspberries), chopped nuts, sprinkles, whipped cream, and of course, a maraschino cherry on top.
- Affogato Dream: Pour a shot of hot, strong espresso over a scoop of vanilla ice cream. The contrast of hot and cold, bitter and sweet, is absolutely divine.
- Ice Cream Sandwiches: Sandwich a scoop between your favorite homemade cookies (chocolate chip, oatmeal, or even shortbread work wonderfully). Freeze for a little longer until firm.
- Milkshake Magic: Blend with a splash of milk and a little extra vanilla extract for a thick, creamy milkshake. Add some malt powder for a retro twist!
- Fruit & Compote Companion: Serve alongside a vibrant homemade berry compote, grilled peaches, or a simple bowl of fresh sliced mangoes or nectarines.
- Dessert A La Mode: It’s the perfect accompaniment to almost any warm dessert – apple pie, cherry crumble, or a warm chocolate brownie.
No matter how you choose to serve it, this Homemade Summer Vanilla Bliss Ice Cream is guaranteed to be a hit!
Storing Your Homemade Summer Vanilla Bliss Ice Cream: Keep It Fresh!
You’ve put in the effort to create this magnificent Homemade Summer Vanilla Bliss Ice Cream, so let’s make sure it stays perfectly delicious for as long as possible!
After churning, transfer your soft-serve consistency ice cream into an airtight, freezer-safe container. To prevent ice crystals from forming on the surface (which can lead to an icy texture), press a piece of plastic wrap directly onto the surface of the ice cream before sealing the container with its lid. For optimal firmness and texture, freeze for at least 2-4 hours before scooping.
This Homemade Summer Vanilla Bliss Ice Cream will maintain its peak quality and creamy texture in the freezer for up to 2 months. Beyond that, it’s still safe to eat, but you might notice a slight degradation in texture or flavor. For the best scooping experience, take your ice cream out of the freezer about 5-10 minutes before serving to allow it to soften slightly.
FAQs About Homemade Summer Vanilla Bliss Ice Cream
“`
Homemade Summer Vanilla Bliss Ice Cream
Equipment
- Medium Saucepan
- Whisk
- Rubber Spatula
- Fine Mesh Sieve
- Large clean bowl
- Ice Bath
- Ice Cream Maker
- Airtight freezer-safe container
Ingredients
- 1 cup whole milk
- 3/4 cup granulated sugar
- 2 cups heavy cream divided
- Pinch salt
- 1 vanilla bean split lengthwise (or 2 tsp vanilla bean paste for ease)
- 6 large egg yolks
- 3/4 tsp vanilla extract
Instructions
- Infuse the Cream Base: In a medium saucepan, gently warm the milk, sugar, 1 cup of heavy cream, and the pinch of salt over low heat. Stir until the sugar is fully dissolved. Scrape the fragrant seeds from your vanilla bean into the mixture, then drop in the bean pod. Take the pan off the heat, cover it, and let it sit for 30 minutes to steep, allowing all that wonderful vanilla flavor to soak in.
- Craft the Custard: While the vanilla steeps, whisk your egg yolks in a separate medium bowl until light. Remove the vanilla bean pod from the warm milk mixture. Slowly, in a steady stream, pour about half of the warm milk mixture into the whisked egg yolks, whisking constantly to temper the yolks and prevent scrambling. Pour this tempered egg mixture back into the saucepan with the remaining warm milk.
- Thicken to Perfection: Place the saucepan back over medium heat. Stir continuously with a rubber spatula, making sure to scrape the bottom of the pan, until the mixture thickens enough to coat the back of your spatula (this usually takes just a few minutes and should reach about 170-175°F). Avoid boiling to keep it smooth!
- Chill and Combine: Pour the thickened custard through a fine-mesh sieve into a large clean bowl containing the remaining 1 cup of cold heavy cream. This step ensures a super smooth, silky ice cream base. Stir in the vanilla extract. Place this bowl over an ice bath (a larger bowl filled with ice and a little water) and stir occasionally until the mixture is cool.
- Overnight Chill: Cover the custard tightly and transfer it to the refrigerator. Let it chill completely for at least 8 hours, or ideally overnight. This deep chilling is essential for the best texture and flavor in your homemade ice cream!
- Churn for Creaminess: Once thoroughly chilled, remove the vanilla bean pod from the custard. Pour the custard into your ice cream maker and churn according to the manufacturer's instructions until it reaches a soft-serve consistency.
- Freeze for Firmness: Transfer the freshly churned ice cream to an airtight freezer-safe container. Freeze for at least 2-4 hours to firm up before serving. It will keep beautifully in the freezer for up to 2 months.