Why You’ll Love This Espresso Lover’s Dream Cheesecake
Prepare to fall head over heels for this magnificent creation! Here are four irresistible reasons why the Espresso Lover’s Dream Cheesecake will become your new favorite:
- Unbeatable Flavor Fusion: Imagine the bold, aromatic punch of your morning espresso swirling harmoniously with the creamy, tangy sweetness of classic cheesecake. This recipe perfectly balances those beloved flavors for a truly sophisticated treat that coffee aficionados will adore.
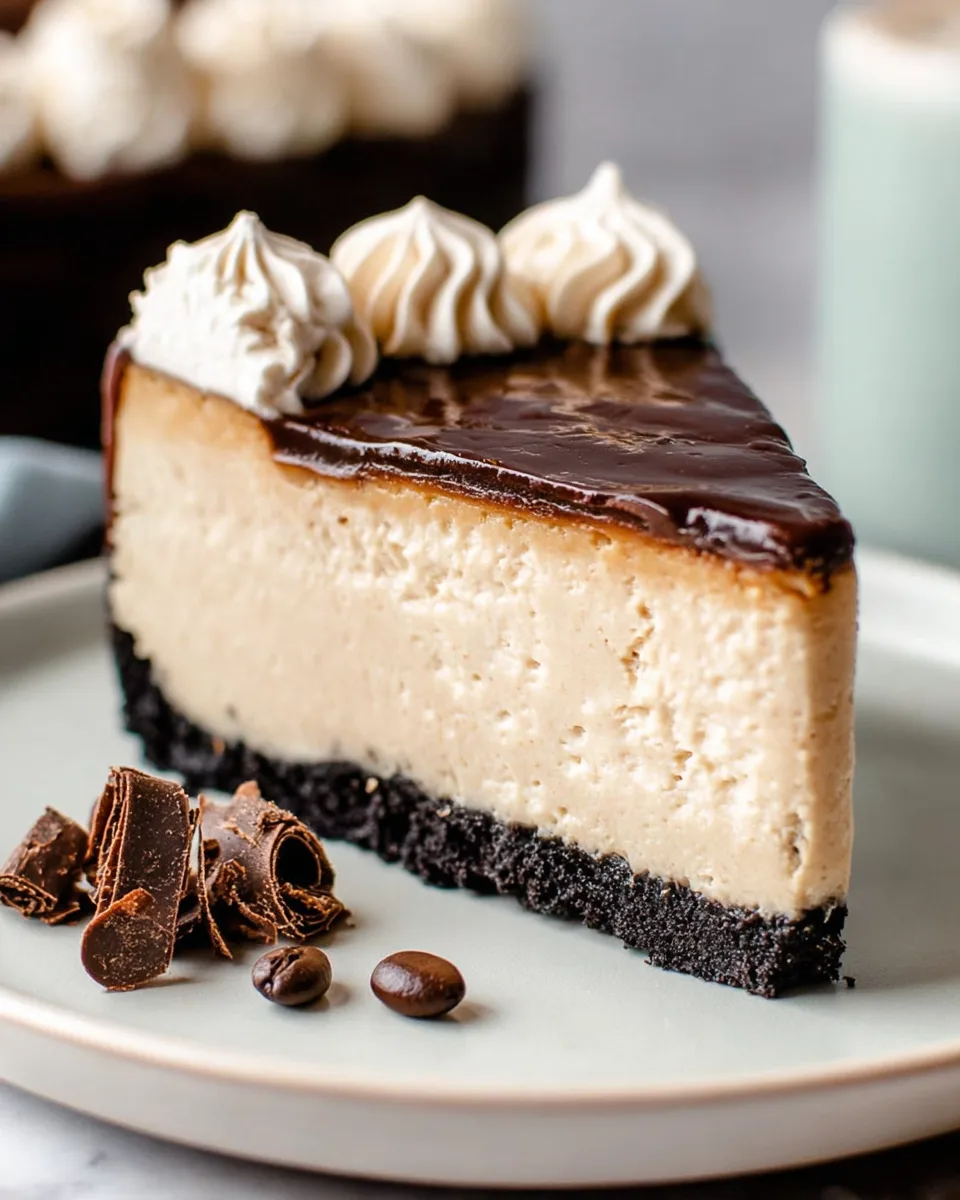
- Texture Heaven: From the satisfying crunch of the rich OREO crust to the unbelievably smooth, melt-in-your-mouth espresso-infused filling, topped with a decadent, glossy chocolate ganache, every bite is a delightful journey through contrasting textures.
- A True Showstopper: This isn’t just a dessert; it’s a statement piece! Despite its impressive appearance, our detailed instructions make it surprisingly approachable to create. Get ready for gasps of delight and requests for the recipe at your next gathering.
- Your Coffee Craving, Satisfied: Forget having to choose between coffee and dessert. This cheesecake is the ultimate two-in-one indulgence, delivering that comforting coffee kick in the most luxurious, dreamy form imaginable. It’s truly an Espresso Lover’s Dream Cheesecake come true!
Alright, coffee fiends and dessert devotees, gather ’round! Have you ever found yourself caught in that delightful dilemma? You’ve just finished a fantastic meal, and your brain is screaming for two things: a rich, robust espresso to cap it all off, AND a slice of something utterly decadent and creamy. What if we told you that you don’t have to choose? What if we offered you the ultimate solution, a dessert so perfectly crafted it tastes like a cozy coffee shop dream? Get ready to unleash your inner barista-baker because we’re diving headfirst into crafting the most magnificent, soul-satisfying Espresso Lover’s Dream Cheesecake you’ve ever encountered. This isn’t just a cheesecake; it’s a love letter to coffee, wrapped in an OREO hug, and drizzled with chocolate bliss. Let’s make some magic!
Ingredients for Your Espresso Lover’s Dream Cheesecake
Here’s what you’ll need to assemble your creamy, dreamy coffee masterpiece. Gather these goodies and let the baking adventure begin!
For the OREO Crust:
- 🍪 2 cups OREO cookie crumbs (about 20 cookies)
- 🧈 6 tablespoons butter, melted
- 🧂 ¼ teaspoon salt
For the Espresso Cheesecake Filling:
- 🧀 24 ounces cream cheese, softened (3 packages)
- 🍚 ¾ cup granulated sugar
- 🌾 3 tablespoons all-purpose flour
- ☕ ¼ cup espresso or strong coffee, cooled to room temperature
- 🥛 ½ cup heavy whipping cream
- 🍦 1 teaspoon vanilla extract
- 🥚 3 large eggs, at room temperature
For the Rich Chocolate Ganache Topping:
- 🥛 ¼ cup heavy whipping cream
- 🍫 4 ounces bittersweet or dark chocolate, roughly chopped
For the Optional Cream Cheese Frosting:
- 🧀 4 ounces cream cheese, softened
- 🧈 4 tablespoons butter, softened
- 🍦 ½ teaspoon vanilla extract
- 🥣 ¾ to 1 cup powdered sugar
For Garnish (Optional):
- ☕ Espresso beans and chocolate shavings
Detailed Directions: Crafting Your Espresso Lover’s Dream Cheesecake
Follow these steps carefully, and you’ll be on your way to cheesecake nirvana!
- Get Ready to Bake: First things first, preheat your oven to a welcoming 350°F (175°C). Grab an 8-inch springform pan, give it a quick spray with non-stick magic, and set it aside.
- Crust Creation Time: In a food processor, pulse about 20 OREO cookies until they transform into beautiful fine crumbs (you’ll need about 2 cups). Pour in the melted butter and that little pinch of salt, then pulse again until everything is perfectly combined. Press this glorious mixture firmly into the bottom of your prepared springform pan, letting it climb about 1 inch up the sides. A measuring cup bottom works wonders for packing it down!
- Bake the Base: Pop that crust into your preheated oven and bake for 10 minutes. Once done, let it cool completely – this is crucial for a perfect foundation.
- Cheesecake Filling Frenzy: In a large mixing bowl, beat your softened cream cheese for at least 5 glorious minutes until it’s unbelievably smooth and fluffy. Don’t forget to scrape down the sides – we want every bit of that creamy goodness!
- Infuse the Flavor: Gently mix in the granulated sugar and flour until just combined. Now, for the star of the show: pour in that cooled espresso and mix again until everything is wonderfully smooth. Another quick scrape of the bowl never hurt anyone!
- Add the Richness: Beat in the heavy whipping cream and vanilla extract for another 1 to 2 minutes. You’re building layers of flavor!
- Egg-cellent Addition: Add the eggs one at a time, mixing only until each egg is just combined. Seriously, resist the urge to overmix here – it’s key to that smooth texture.
- Ready for the Oven: Pour your silky-smooth cheesecake filling over the cooled OREO crust. Give the pan a gentle tap on the counter 10 to 15 times to banish any sneaky air bubbles.
- The Grand Bake: Bake at 350°F (175°C) for 15 minutes. Then, without peeking or opening the door, reduce the temperature to a gentle 200°F (95°C) and continue baking for another 55 to 60 minutes. It’s done when the sides are set but the very center still has a slight, delicate jiggle.
- The Art of Cooling: Turn off the oven and let your cheesecake chill inside with the door closed for 30 minutes. After that, slightly crack the oven door and let it cool for another 15 minutes. This slow, gradual cooling is your secret weapon against cracks!
- The Chill Factor: Remove from the oven and let it cool completely on a wire rack. Once fully cooled (patience, young padawan!), transfer it to the refrigerator to chill for at least 8 hours, or ideally, overnight. This step is absolutely non-negotiable for the perfect, firm texture of an Espresso Lover’s Dream Cheesecake!
- Ganache Glamour: Once your cheesecake is perfectly chilled, it’s ganache time! Heat ¼ cup heavy cream until it just boils. Pour the hot cream over your chopped chocolate and let it sit for 1-2 minutes. Whisk until it’s incredibly smooth and glossy. Carefully pour this luscious ganache over your chilled cheesecake and spread it evenly to the edges.
- Optional Frosting Flourish: If you’re going for extra flair, beat the softened cream cheese and butter until light and fluffy. Mix in vanilla, then gradually add powdered sugar until smooth. Pipe decorative swirls or a border – go wild!
- Garnish and Serve: Crown your masterpiece with chocolate shavings and/or a few elegant espresso beans. Slice, serve, and bask in the glory of your homemade Espresso Lover’s Dream Cheesecake!
Presenting and Serving Your Espresso Lover’s Dream Cheesecake
Your magnificent Espresso Lover’s Dream Cheesecake deserves a presentation as stellar as its taste! Here are some fun and elegant ways to present and serve your creation:
- Classic Elegance: For a clean, sophisticated look, simply let the chocolate ganache be the star. Use a sharp, warm knife (run under hot water and wipe dry) to get clean slices. Place each slice on a simple white plate to let its beauty shine.
- Coffee Shop Chic: Embrace the coffee theme! Garnish each slice with a sprinkle of cocoa powder or a dusting of finely grated dark chocolate. A few whole espresso beans artfully placed on the plate or on top of the slice add a professional touch.
- Whipped Cream Wonderland: A dollop of freshly whipped cream (unsweetened or lightly sweetened) alongside each slice adds a cloud-like texture contrast and a touch of classic dessert luxury. You can even swirl a little espresso into your whipped cream for extra coffee goodness!
- Berry Brightness: While the flavor profile is rich, a few fresh raspberries or strawberries can provide a delightful tart contrast and a vibrant pop of color.
- Individual Indulgence: For parties, consider cutting the cheesecake into smaller, bite-sized squares or triangles. These can be served on mini dessert plates or even in small parchment-lined cupcake wrappers for easy grab-and-go treats.
- Themed Pairing: Serve your cheesecake with, you guessed it, a fresh cup of espresso or a strong brew. The complementary flavors will enhance the entire experience for your guests. A small glass of Baileys or Kahlúa also makes a wonderful accompaniment for an adult dessert pairing.
- Frosting Fanfare: If you made the optional cream cheese frosting, pipe beautiful swirls or rosettes around the edge of the cheesecake or directly onto individual slices. This adds another layer of creaminess and visual appeal, truly making it an Espresso Lover’s Dream Cheesecake!
Storing Your Espresso Lover’s Dream Cheesecake
Proper storage is key to keeping your Espresso Lover’s Dream Cheesecake tasting its absolute best, ensuring every slice is as delightful as the first!
- Refrigeration is Required: Due to its dairy-rich ingredients (cream cheese, heavy cream), this cheesecake must always be stored in the refrigerator.
- Airtight is Best: To prevent it from absorbing any unwanted fridge odors and to keep it fresh and moist, store the cheesecake in an airtight container. If you still have it in the springform pan, cover it tightly with plastic wrap after detaching the sides. If sliced, place individual slices in an airtight container.
- How Long Does It Last? When stored correctly in the refrigerator, your Espresso Lover’s Dream Cheesecake will remain wonderfully fresh and delicious for 5 to 7 days.
- Freezing for Future Feasts: Yes, you can freeze cheesecake! This is a fantastic option if you want to make it ahead or save some for later.
- To Freeze a Whole Cheesecake: First, ensure the cheesecake is completely cooled and chilled. Freeze it uncovered until firm (about 2-3 hours). Once firm, wrap it tightly in several layers of plastic wrap, then an additional layer of aluminum foil.
- To Freeze Slices: Freeze individual slices on a parchment-lined baking sheet until firm. Then, wrap each slice individually in plastic wrap and place them in a freezer-safe bag or container.
- Freezer Lifespan: Frozen cheesecake will maintain its quality for up to 1 to 2 months.
- Thawing: To thaw, simply transfer the wrapped cheesecake (whole or slices) from the freezer to the refrigerator and let it thaw overnight. Do not thaw at room temperature, as this can affect the texture.
FAQs About Your Espresso Lover’s Dream Cheesecake
- Can I use instant coffee instead of brewed espresso?
Yes, you can! For ¼ cup of strong coffee, dissolve 1-2 tablespoons of high-quality instant espresso powder or instant coffee in ¼ cup of hot water, then let it cool completely. Adjust to your taste preference for strength. - How can I prevent my cheesecake from cracking?
The key is slow and gentle cooling! Using room temperature ingredients, avoiding overmixing the batter (especially after adding eggs), not opening the oven door during the main bake, and following the gentle cooling steps (oven off, door cracked) are all crucial to preventing cracks. A water bath can also help but isn’t strictly necessary with this recipe’s method. - Can I make this cheesecake ahead of time?
Absolutely! In fact, cheesecake is best made a day in advance to allow it ample time to chill and for the flavors to fully develop and meld. The chilling step is vital for the perfect texture. - What kind of chocolate should I use for the ganache?
Bittersweet or dark chocolate (around 60-70% cacao) works best as it provides a deep, rich chocolate flavor that complements the espresso without being overly sweet. High-quality chocolate chips or a chopped chocolate bar will yield the best results. - Why do my ingredients need to be at room temperature?
Room temperature cream cheese, eggs, and butter (if using for frosting) combine much more smoothly, creating a uniform, lump-free batter. Cold ingredients can lead to a lumpy cheesecake and overmixing as you try to incorporate them. - Is a water bath necessary for this cheesecake?
This particular recipe is designed to bake without a water bath, relying on the two-stage baking temperature and gentle cooling method to achieve a smooth, crack-free finish. If you prefer using a water bath, you certainly can, ensuring your springform pan is well-sealed. - Can I use a different type of crust?
Of course! While the OREO crust is fantastic, you could substitute it with a graham cracker crust (1½ cups graham cracker crumbs, ⅓ cup melted butter, 2 tbsp sugar) or even a chocolate cookie crust using a different brand. - How do I know when the cheesecake is perfectly baked?
The cheesecake is done when the outer 2-3 inches appear set, but the very center (about 2-3 inches across) still has a slight, delicate wobble when you gently shake the pan. It will continue to set as it cools. - Can I adjust the strength of the espresso flavor?
Yes! For a milder coffee flavor, you could reduce the espresso to 3 tablespoons. For an even bolder kick, you might try adding an extra tablespoon (up to ⅓ cup total), but be mindful not to add too much liquid. - My ganache is too thick/thin. What can I do?
If your ganache is too thick, add a tiny splash (½ teaspoon at a time) of hot cream or milk and whisk until smooth. If it’s too thin, let it sit for a few more minutes to cool and thicken, or place it in the fridge for 5-10 minutes, stirring occasionally.
Espresso Lover's Dream Cheesecake
Equipment
- 8-inch Springform Pan
- Food Processor
- Stand mixer (or hand mixer)
- Wire Rack
- Piping bag (optional)
Ingredients
For the OREO Crust
- 2 cups OREO cookie crumbs about 20 cookies
- 6 tablespoons butter melted
- 1/4 teaspoon salt
For the Espresso Cheesecake Filling
- 24 ounces cream cheese softened, 3 packages
- 3/4 cup granulated sugar
- 3 tablespoons all-purpose flour
- 1/4 cup espresso or strong coffee cooled to room temperature
- 1/2 cup heavy whipping cream
- 1 teaspoon vanilla extract
- 3 large eggs at room temperature
For the Rich Chocolate Ganache Topping
- 1/4 cup heavy whipping cream
- 4 ounces bittersweet or dark chocolate roughly chopped
For the Optional Cream Cheese Frosting
- 4 ounces cream cheese softened
- 4 tablespoons butter softened
- 1/2 teaspoon vanilla extract
- 3/4 cup powdered sugar up to 1 cup
For Garnish (Optional)
- Espresso beans
- Chocolate shavings
Instructions
- 1. Get Ready: Preheat your oven to 350°F (175°C). Lightly grease an 8-inch springform pan with non-stick spray and set it aside.
- 2. Make the Easy Crust: In a food processor, pulse about 20 OREO cookies until you have 2 cups of fine crumbs. Add the melted butter and a pinch of salt, then pulse until everything is well combined. Press this mixture firmly into the bottom of your prepared springform pan, extending about 1 inch up the sides. You can use the bottom of a measuring cup to help pack it down evenly.
- 3. Bake the Crust: Pop the crust into the preheated oven and bake for 10 minutes. Let it cool completely while you prepare the filling.
- 4. Whip Up the Cream Cheese Base: In a large mixing bowl (using a stand mixer or hand mixer), beat the softened cream cheese for at least 5 minutes until it's super smooth and fluffy, scraping down the sides as needed.
- 5. Add the Flavors: Gently mix in the granulated sugar and flour until just combined. Next, pour in the cooled espresso and mix again until smooth. Don't forget to scrape the bowl!
- 6. Fold in the Richness: Beat in the heavy whipping cream and vanilla extract for another 1 to 2 minutes.
- 7. Incorporate the Eggs: Add the eggs one at a time, mixing only until each is just combined. Be careful not to overmix!
- 8. Prepare for Baking: Pour your smooth cheesecake filling over the cooled OREO crust in the springform pan. Gently tap the pan on the counter 10 to 15 times to release any air bubbles.
- 9. Bake to Perfection: Bake the cheesecake at 350°F (175°C) for 15 minutes. Then, without opening the oven door, reduce the temperature to 200°F (95°C) and continue baking for another 55 to 60 minutes, or until the sides are set but the center still jiggles slightly.
- 10. Gentle Cooling: Turn off the oven and leave the cheesecake inside with the door closed for 30 minutes. After that, slightly crack the oven door and let it cool for another 15 minutes. This slow cooling helps prevent cracks!
- 11. Chill Out: Remove the cheesecake from the oven and let it cool completely on a wire rack. Once fully cooled, transfer it to the refrigerator to chill for at least 8 hours, or ideally overnight. This step is key for the perfect texture!
- 12. Make the Ganache: Once your cheesecake is well-chilled, prepare the ganache. Heat the ¼ cup heavy cream until it just boils (either on the stovetop or in the microwave). Pour the hot cream over the chopped chocolate and let it sit for 1-2 minutes. Whisk until it's wonderfully smooth and glossy. Carefully pour this delicious ganache over the chilled cheesecake and spread it evenly.
- 13. Optional Frosting Flourish: If you're adding the cream cheese frosting, beat the softened cream cheese and butter in a medium bowl until light and fluffy. Mix in the vanilla extract, then gradually add the powdered sugar on low speed until fully combined. Transfer to a piping bag and pipe decorative swirls or a border around the cheesecake.
- 14. Garnish and Serve: Finish your masterpiece with chocolate shavings and/or espresso beans for an extra touch of elegance. Slice and enjoy this rich, satisfying dessert!
Notes
- Calories: 628 kcal
- Total Carbohydrates: 47 g
- Net Carbs: 46 g
- Fats: 46 g
- Protein: 8 g