Why You’ll Love These Low Carb Cherry Cheesecake Cups
Prepare to fall head over heels for these delightful Low Carb Cherry Cheesecake Cups! They’re not just a dessert; they’re a revelation for anyone seeking guilt-free indulgence. Here are four irresistible reasons why this recipe will become your new favorite:
- Guilt-Free Indulgence: With only 6g net carbs per serving, you can satisfy your sweet tooth without derailing your low-carb lifestyle. These cups offer all the rich, creamy flavor of traditional cheesecake, minus the sugar and carb overload.
- Effortlessly Easy & No-Bake: Forget turning on the oven! This recipe is a breeze to whip up, requiring zero baking. In just minutes, you’ll have a luscious dessert base ready to chill, making it perfect for busy days or impromptu cravings.
- Creamy, Dreamy Texture: The combination of softened cream cheese, Greek yogurt, and whipped heavy cream creates an incredibly light, airy, and velvety smooth texture that melts in your mouth. It’s pure dessert bliss with every spoonful!
- Perfectly Portioned Treats: Making individual cups means built-in portion control. No more guessing or accidental over-serving. Each cup is a perfectly sized, ready-to-enjoy dessert, ideal for meal prepping your sweet treats for the week.
Your New Go-To Dessert: Low Carb Cherry Cheesecake Cups!
Ever find yourself staring longingly at dessert menus, only to sigh and remember your low-carb goals? Well, get ready to turn that sigh into a satisfied smile! Introducing the magical, mouth-watering world of Low Carb Cherry Cheesecake Cups! Imagine a cloud-like, creamy cheesecake experience, bursting with vibrant cherry flavor, all without the sugar crash or carb guilt. This isn’t just a recipe; it’s your new secret weapon against sweet cravings, a beacon of deliciousness that proves eating healthy can still be incredibly fun and utterly decadent. So, grab your mixing bowls and get ready to create individual portions of pure joy!
Gather Your Goodies: Ingredients for Low Carb Cherry Cheesecake Cups
Creating these heavenly Low Carb Cherry Cheesecake Cups requires just a handful of simple ingredients. Make sure everything is measured out and ready to go for a smooth and quick preparation process. You’ll be surprised how little it takes to make something so wonderfully delicious!
- 🧀 8 ounces Cream Cheese, softened
- 🥛 10 ounces Greek Yogurt (or two 5.3-ounce containers)
- ✨ 1/2 cup Splenda (or your preferred low-carb sweetener)
- 🌿 1 teaspoon Vanilla Extract
- 🍦 1 cup Heavy Whipping Cream
- 🍒 Zero Sugar Cherry Pie Filling, for topping (optional)
Whip Up Wonder: Step-by-Step Directions for Low Carb Cherry Cheesecake Cups
Get ready to transform simple ingredients into spectacular Low Carb Cherry Cheesecake Cups with these easy-to-follow steps. No baking required, just pure mixing magic!
- Creamy Base Creation: Grab a spacious mixing bowl and add your softened cream cheese, Greek yogurt, Splenda (or your chosen sweetener), and a dash of vanilla extract. Using an electric mixer, beat these ingredients together on medium speed until the mixture is unbelievably smooth and beautifully creamy. There should be no lumps – just lusciousness! Set this bowl aside for a moment.
- Whipped Cream Wonderland: In a separate, smaller, and preferably chilled bowl, pour in your heavy whipping cream. With a clean electric mixer, beat the cream on high speed until it transforms into stiff, dreamy peaks. You want it to hold its shape perfectly – this is key for that light, airy cheesecake texture!
- Gentle Folding Fiesta: Now for the magic! Gently, and we mean gently, fold the freshly whipped cream into your cream cheese mixture. Use a spatula to scoop from the bottom and fold over, turning the bowl as you go. Continue this careful folding until the whipped cream is fully incorporated, and the entire mixture is gloriously light, fluffy, and perfectly blended.
- Portioning Perfection: Evenly spoon this delightful cheesecake mixture into your six small serving cups. Don’t press it down too hard; keep it light! You can use anything from small ramekins to cute mason jars.
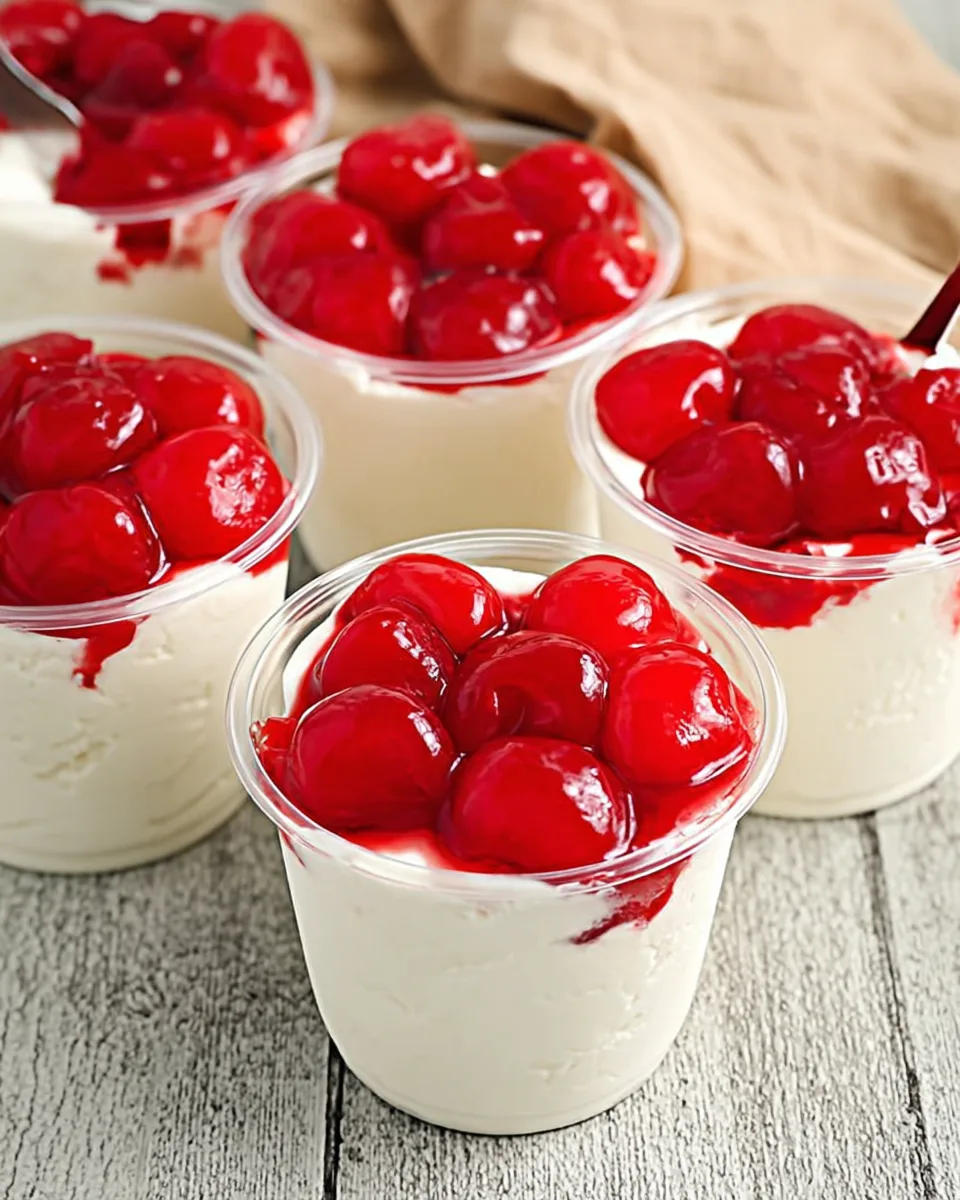
- Cherry on Top: Finish each cup by spooning about 2 tablespoons of the zero-sugar cherry pie filling directly on top of the cheesecake mixture. Feel free to swirl it in a little for a marbled effect or just let it sit pretty on top.
- Chill Out Time: Place your beautiful Low Carb Cherry Cheesecake Cups in the refrigerator. Let them chill and set for a minimum of 2 hours. This crucial step ensures they firm up perfectly, making them irresistible before you dive in!
Presenting Your Perfection: Ways to Serve Low Carb Cherry Cheesecake Cups
Once your delightful Low Carb Cherry Cheesecake Cups are perfectly chilled, it’s time to show them off! The beauty of individual desserts is how versatile they are for presentation and serving. Here are a few creative ideas:
- Elegant Glassware: Serve them in clear glass dessert cups, small mason jars, or even wine glasses to showcase the distinct layers of creamy cheesecake and vibrant cherry topping.
- Garnish Galore: Elevate the look with a simple garnish. A fresh mint leaf, a few fresh cherries (if in season), a sprinkle of sugar-free chocolate shavings, or even a tiny dollop of extra whipped cream can make them look extra special.
- Dessert Bar Star: If you’re hosting, arrange your Low Carb Cherry Cheesecake Cups on a tiered dessert stand. They make a fantastic, grab-and-go option for guests, adding an elegant touch to any gathering.
- Deconstructed Dream: For a more casual, rustic feel, spoon the cheesecake mixture into small bowls and let guests top their own with the cherry filling and other low-carb toppings like chopped nuts or sugar-free granola.
- Anytime Treat: These cups are ideal for personal enjoyment. Simply grab one from the fridge whenever a craving strikes, making healthy indulgence effortlessly convenient.
Keep ‘Em Fresh: Storage Tips for Low Carb Cherry Cheesecake Cups
So you’ve created these amazing Low Carb Cherry Cheesecake Cups, and now you want to make them last! Proper storage is key to maintaining their deliciousness and creamy texture. Here’s how to keep your treats fresh:
After preparing and chilling, make sure your cheesecake cups are covered. The best way to do this is to place them in an airtight container. If you’re using individual serving cups, you can cover each cup tightly with plastic wrap before placing them in a larger container. This prevents them from absorbing any refrigerator odors and keeps them from drying out.
Store your Low Carb Cherry Cheesecake Cups in the refrigerator. They will last beautifully for about 3-5 days. Beyond that, the texture might start to change, and the freshness will diminish. While technically safe to eat for a bit longer, they are definitely at their best within that initial window. Freezing is generally not recommended for this specific recipe, as the delicate, airy texture of the no-bake cheesecake might become watery or grainy upon thawing.
FAQs About Low Carb Cherry Cheesecake Cups
- Can I use a different low-carb sweetener instead of Splenda?
Absolutely! Erythritol, monk fruit, or a blend of both are excellent alternatives. Just ensure you adjust to your preferred sweetness level, as different sweeteners have varying potencies. - Is it okay to use regular full-fat yogurt instead of Greek yogurt?
Greek yogurt is recommended for its thicker consistency, which contributes to the cheesecake’s structure. If you use regular full-fat yogurt, the mixture might be a bit softer, but it will still taste delicious. - What if I don’t like cherries? Can I use a different sugar-free topping?
Of course! Sugar-free strawberry, blueberry, or even a sugar-free chocolate syrup would be fantastic. Fresh berries like raspberries or blackberries are also excellent low-carb options. - How many net carbs are in each serving?
As per the provided nutrition, each serving of these Low Carb Cherry Cheesecake Cups contains 6g net carbs. This makes them a fantastic choice for those following ketogenic or low-carb diets. - Can I prepare these Low Carb Cherry Cheesecake Cups ahead of time for an event?
Yes, these are perfect for making ahead! Prepare them up to 2-3 days in advance and keep them chilled in the refrigerator, covered. They often taste even better after a day or two as the flavors meld. - What if my whipped cream doesn’t form stiff peaks?
Ensure your heavy whipping cream is very cold, and ideally, chill your mixing bowl and beaters for 15 minutes beforehand. Over-beating can also cause it to become lumpy, so stop as soon as stiff peaks form. - Can I make a crust for these cheesecake cups?
This recipe is designed to be a no-bake, crustless delight. However, if you crave a crust, you could press a mixture of almond flour, melted butter, and a touch of sweetener into the bottom of the cups before adding the cheesecake filling. - Are there any dairy-free options for this recipe?
For a dairy-free version, you would need dairy-free cream cheese, dairy-free Greek yogurt alternatives, and a dairy-free heavy whipping cream substitute (like coconut cream, chilled and whipped). Results may vary slightly in texture. - How crucial is the “softened” cream cheese?
Very crucial! Softened cream cheese ensures a smooth, lump-free mixture. If it’s too cold, you’ll end up with lumps, and the texture won’t be as creamy. - Is the Zero Sugar Cherry Pie Filling truly low carb?
Most “zero sugar” or “sugar-free” pie fillings are formulated to be low in carbs. Always double-check the nutrition label on your specific brand to ensure it aligns with your dietary needs, especially regarding net carbs.
Low Carb Cherry Cheesecake Cups
Equipment
- Spacious bowl
- Smaller bowl
- Electric Mixer
- Small serving cups
Ingredients
- 8 ounces Cream Cheese softened
- 10 ounces Greek Yogurt (or two 5.3-ounce containers)
- 1/2 cup Splenda (or your preferred low-carb sweetener)
- 1 teaspoon Vanilla Extract
- 1 cup Heavy Whipping Cream
- Zero Sugar Cherry Pie Filling for topping (optional, about 2 tablespoons per cup)
Instructions
- In a spacious bowl, combine the softened cream cheese, Greek yogurt, Splenda, and vanilla extract. Beat them together until the mixture is beautifully smooth and creamy. Set this bowl aside.
- In a separate, smaller bowl, use an electric mixer to beat the heavy whipping cream until it forms stiff, dreamy peaks.
- Gently fold the whipped cream into the cream cheese mixture. Continue folding until it's thoroughly blended and the texture is light and fluffy.
- Evenly spoon this delightful cheesecake mixture into six small serving cups.
- Finish each cup by adding about 2 tablespoons of sugar-free cherry pie filling on top.
- Place your cheesecake cups in the refrigerator and allow them to chill for a minimum of 2 hours. This ensures they set perfectly before you indulge!